Beta Release — 02-07-2026
📌 What Was Happening
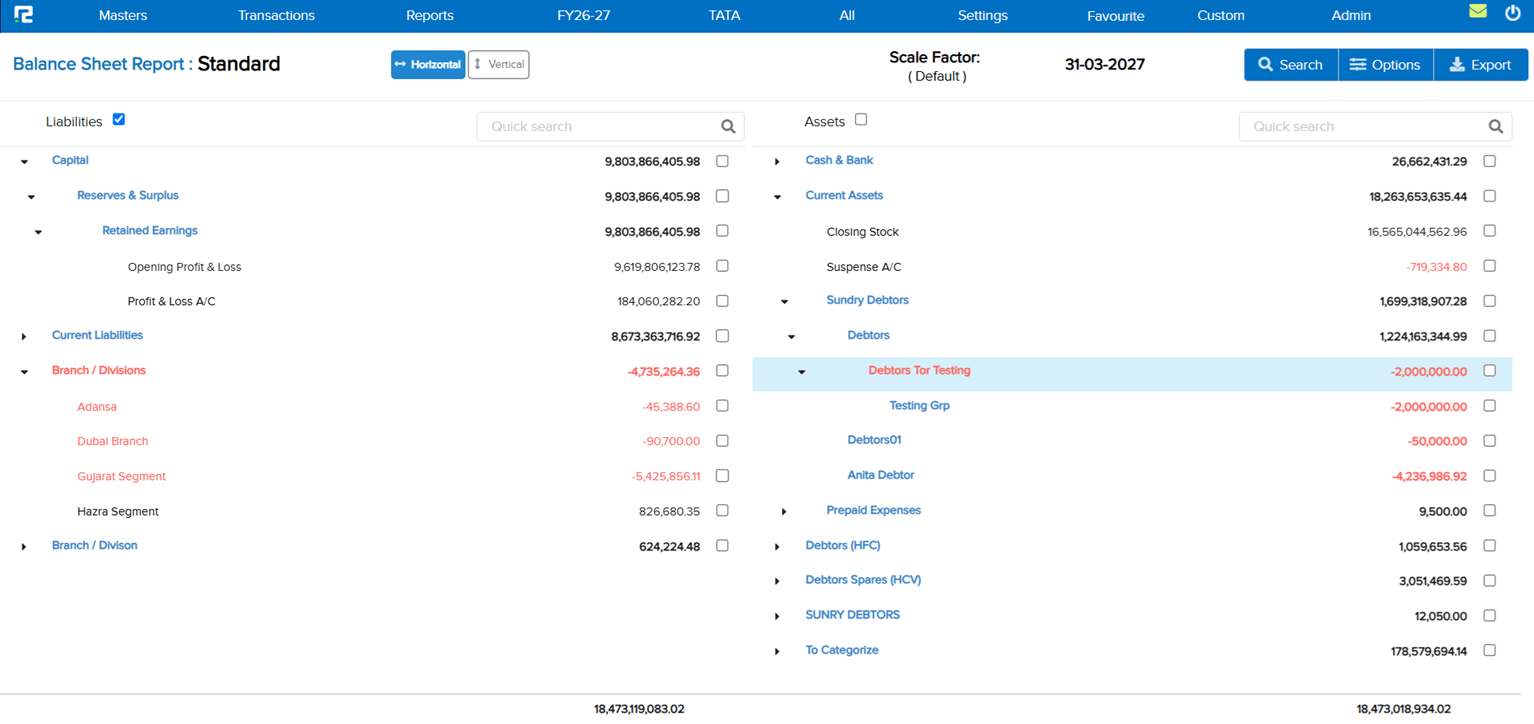
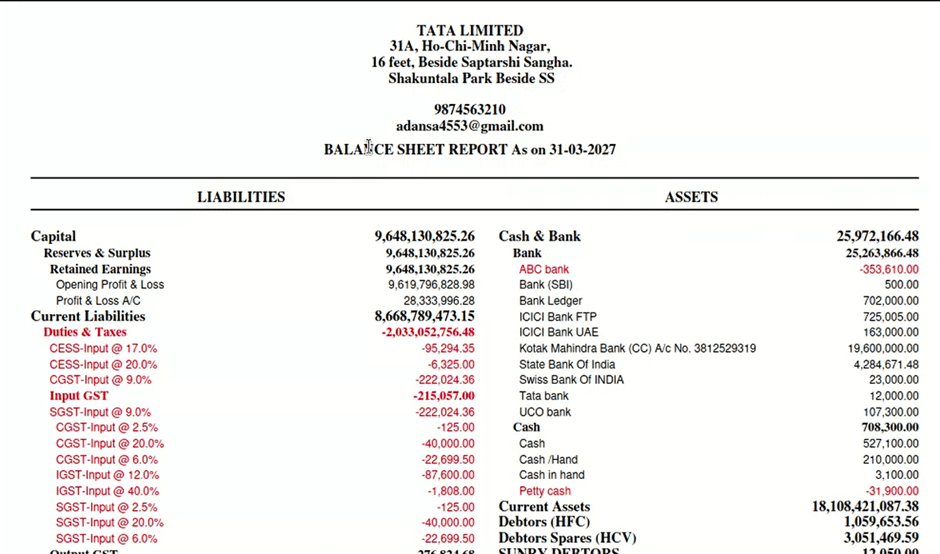
In the Balance Sheet (Standard), there was no visual distinction for negative (opposite-nature) values — a Cr balance in the Assets side or a Dr balance in the Liabilities side appeared in the same colour as all other figures. Users had to manually identify these anomalous balances by reading the values, with no at-a-glance signal that a closing balance was behaving contrary to its expected nature. This problem existed across the UI view, the PDF (Standard) download, and the Excel (Standard) export.
🌟 What This Means for You
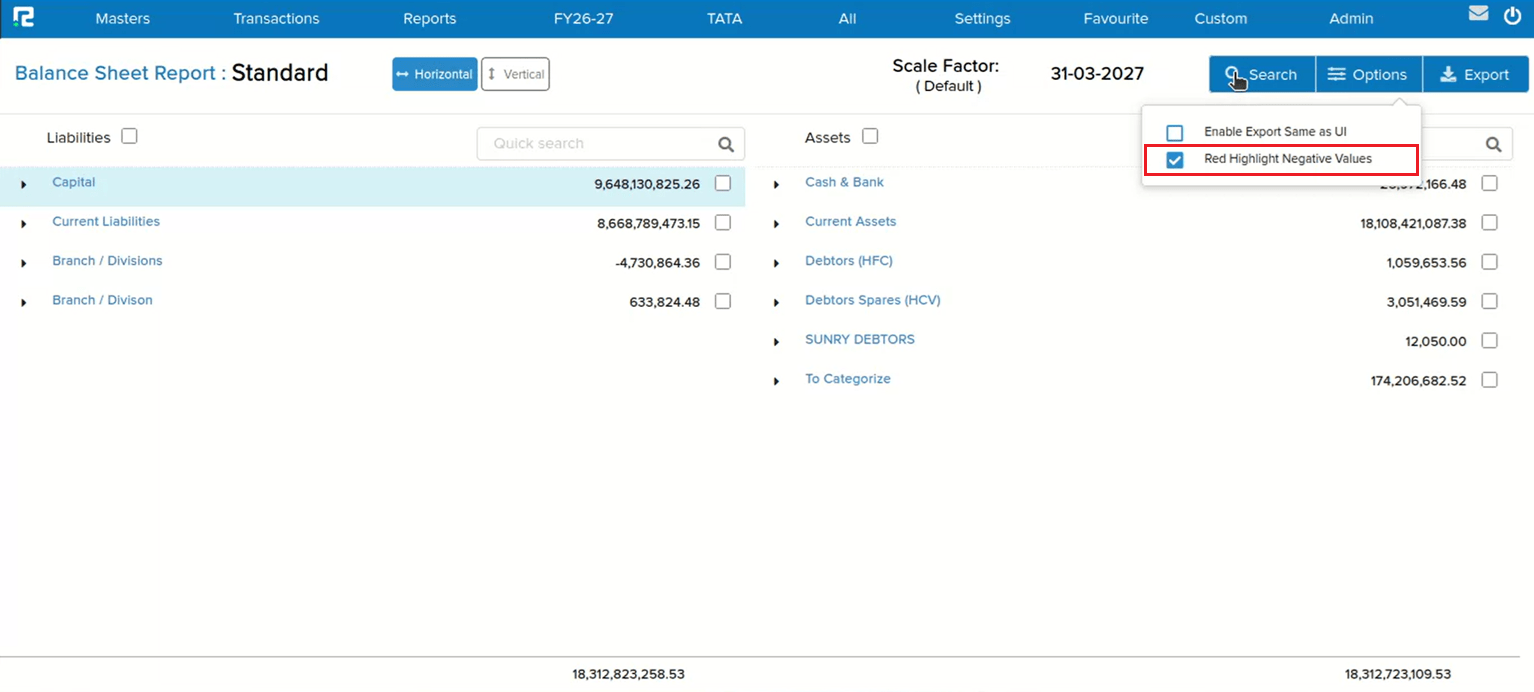
A highlight toggle has been introduced to the Balance Sheet (Standard) that lets you switch RED highlighting on or off for negative / opposite-nature closing balance values:
• A tick box is available beside the Search button on the report screen — tick it to enable RED highlighting, leave it unticked for the regular report view
• The same tick box is available inside the Search popup as well, so you can set the preference before running the report
• When highlighted, both the Ledger Name and the Value are shown in RED for any entry where the closing balance is of opposite nature (Cr balance in Assets or Dr balance in Liabilities)
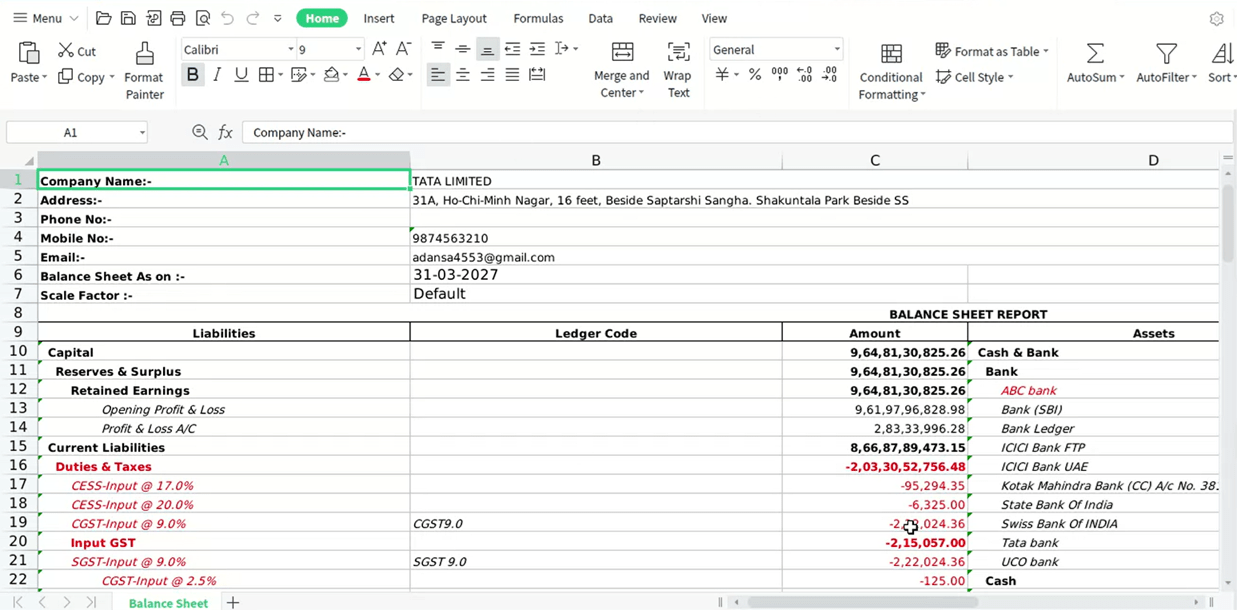
• Separate download options are provided so you can get PDF (Standard) with highlighted values and Excel (Standard) with highlighted values independently when the tick box is enabled
🎬 Where to Find It
📷 See It in Action
📌 What Was Happening
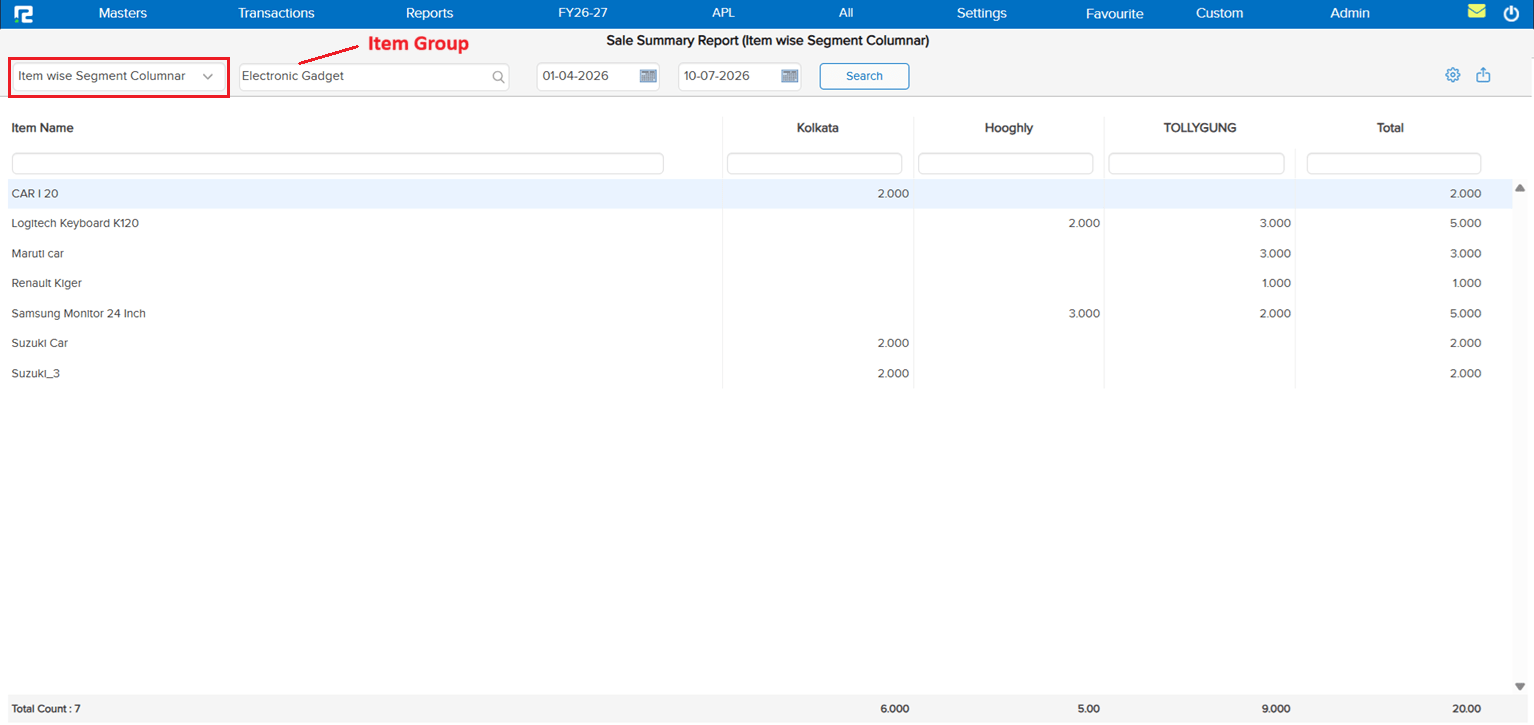
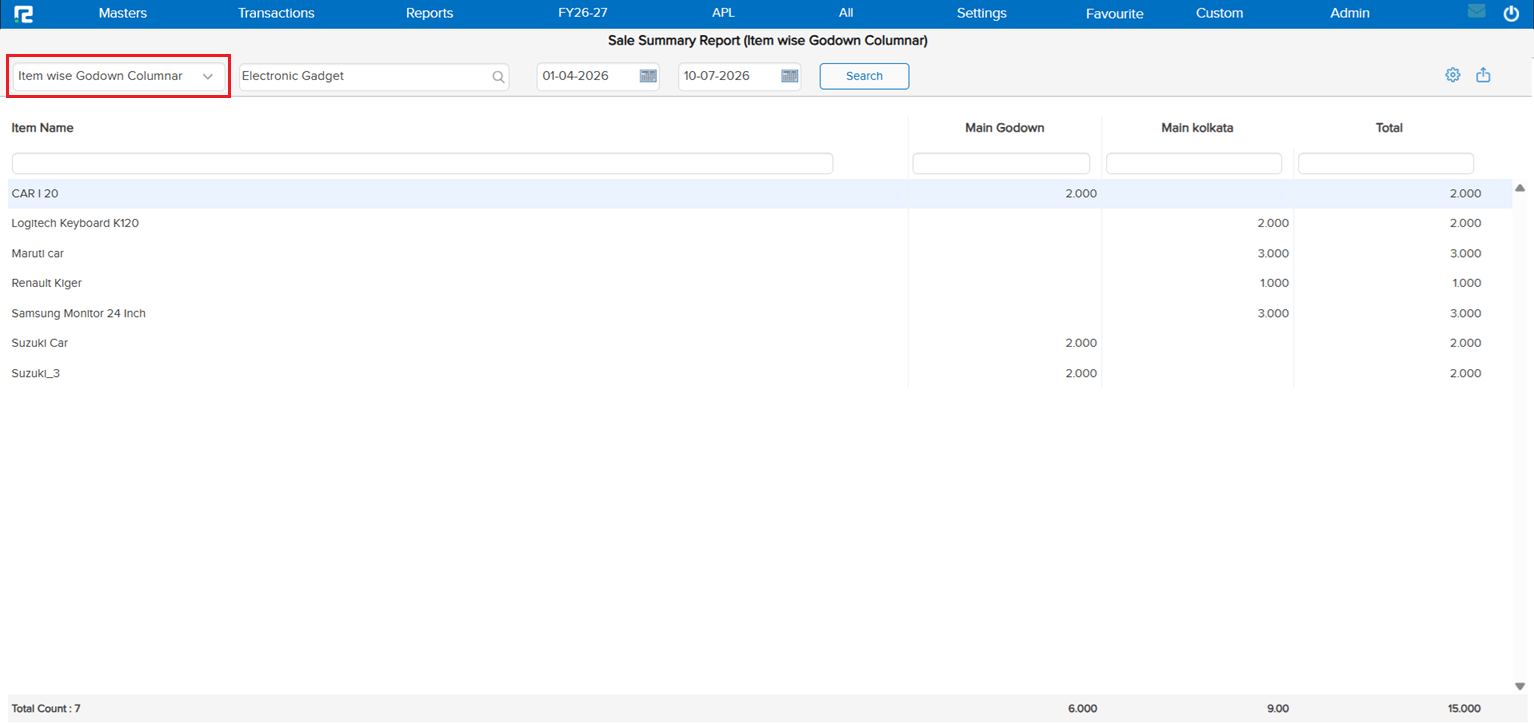
There was no dedicated sales report to view the quantity sold broken down by Godown or Segment across the company. Users had no single-screen view to compare sales volumes across locations or segments — making it difficult to analyse distribution performance without pulling and reconciling data from multiple sources.
🌟 What This Means for You
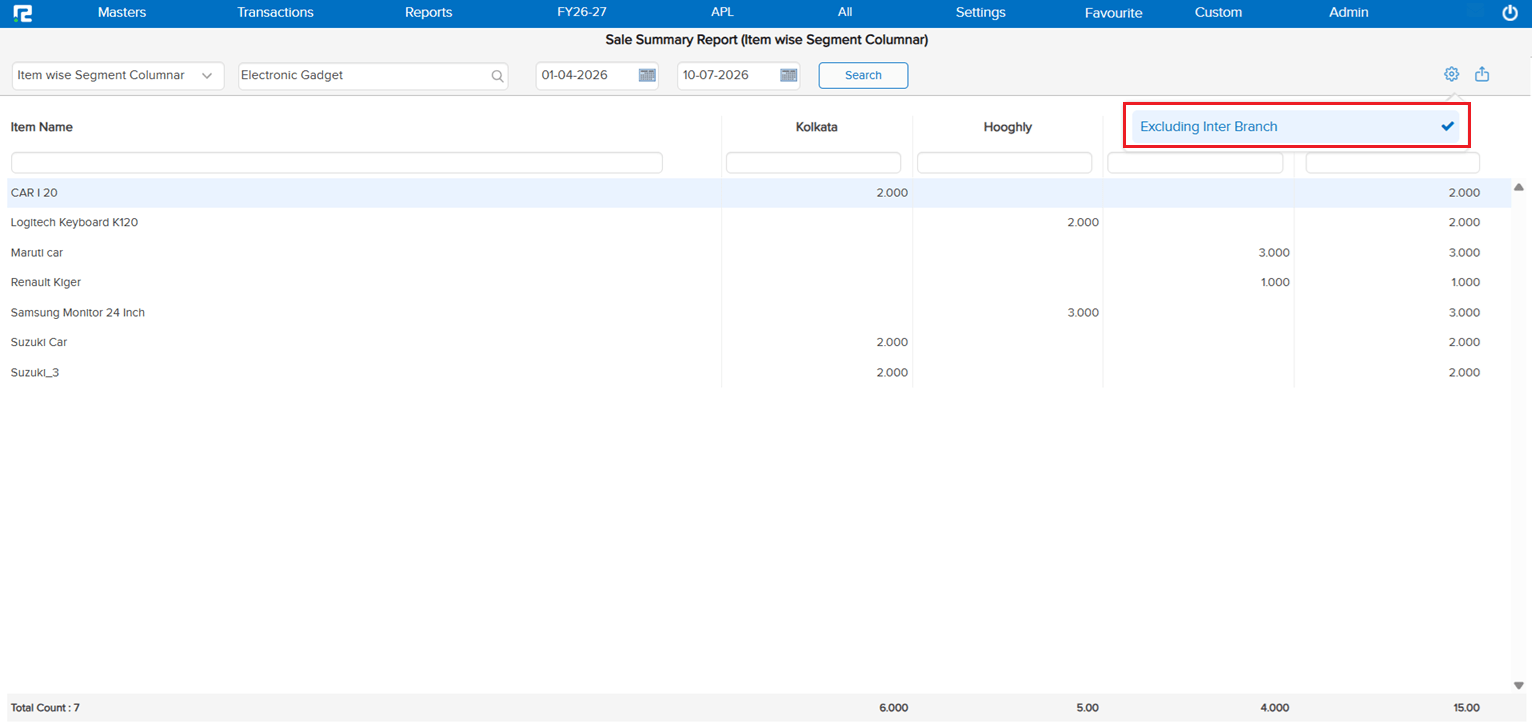
A new Sales Qty Godown / Segment Wise Report has been added. The report shows the quantity sold for each Godown or Segment across the company in the format agreed upon — giving a clear, consolidated view of sales volumes by location or segment in one place.
🎬 Where to Find It
📷 See It in Action
📌 What Was Happening
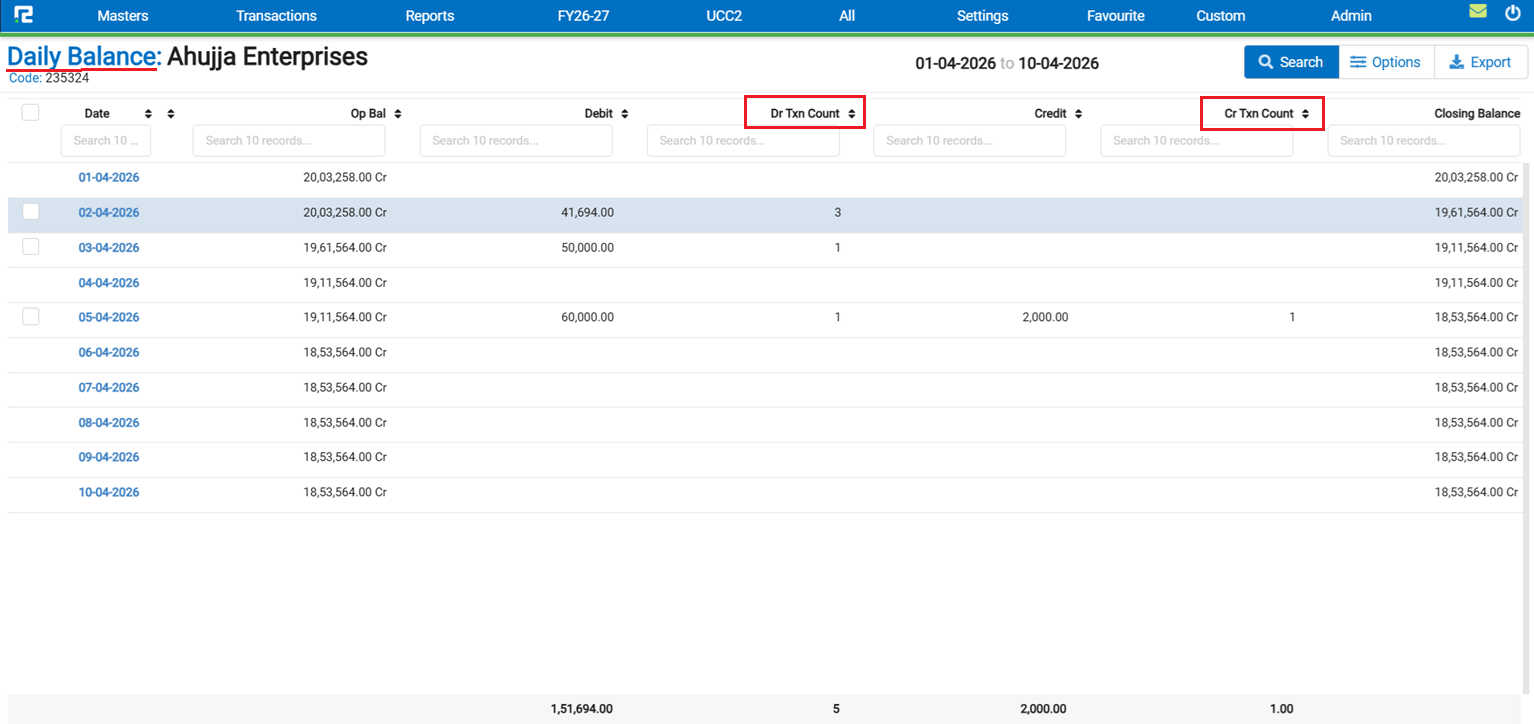
The Ledger Report → Daily Balance showed Debit and Credit amounts for each date but had no way to see how many individual transactions made up those totals. Users who needed to verify the count of entries for a particular date had to drill down or cross-check manually — the report gave amounts but no count of entries.
🌟 What This Means for You
The Ledger Daily Report now automatically shows the Transaction Count alongside amounts — no setting or toggle needed:
• Debit Transaction Count is displayed alongside the Debit amount for each date
• Credit Transaction Count is displayed alongside the Credit amount for each date
• The count reflects the total number of Debit / Credit entries posted for that date
• Transaction counts are included in the Excel and PDF outputs as well
🎬 Where to Find It
📷 See It in Action
📌 What Was Happening
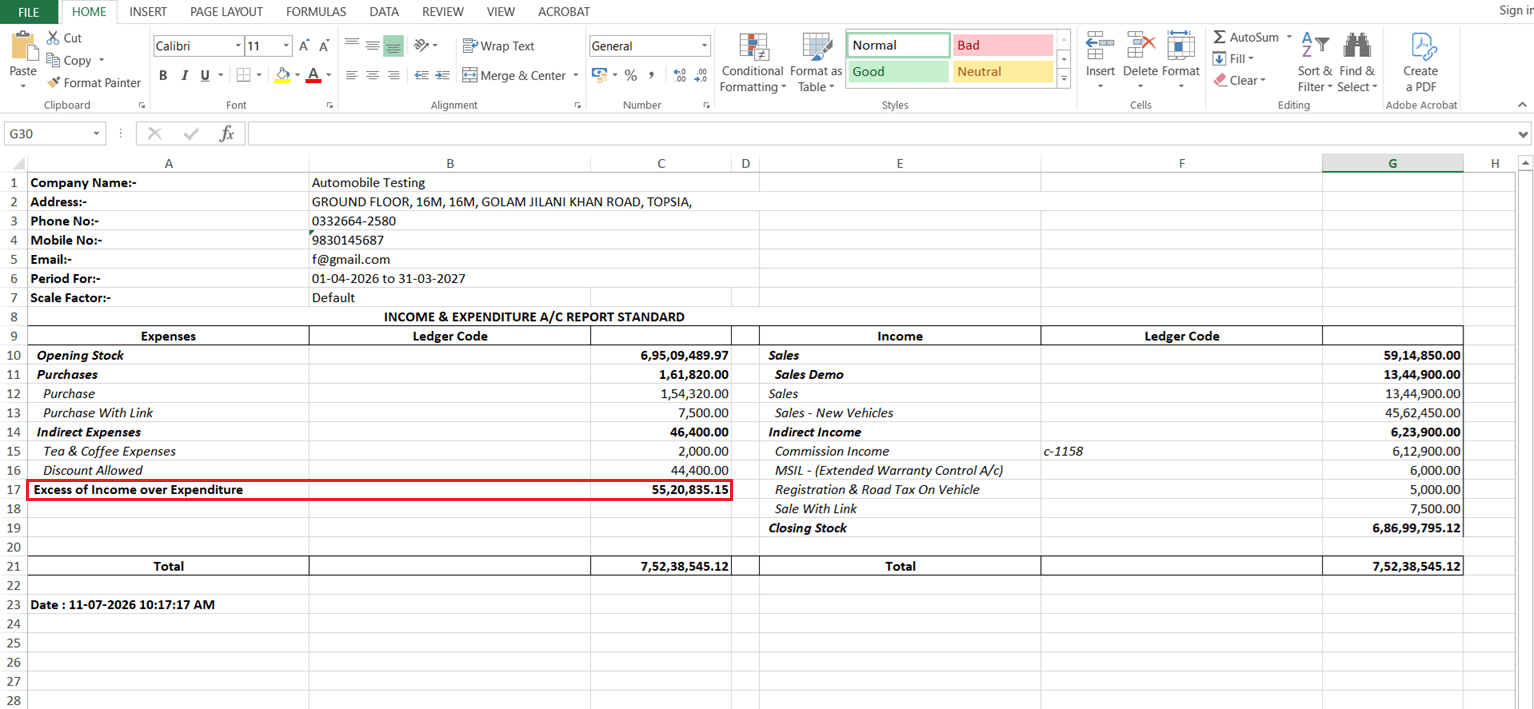
The Profit & Loss (Standard) report used P&L specific terminology throughout — the export was named “Profit & Loss” and the bottom line was labelled “Profit for the Period” or “Loss for the Period”. For organisations that follow the Income & Expenditure account format (trusts, societies, non-profits, and similar entities), this terminology was not appropriate — there was no alternate report format using the correct I&E labels.
🌟 What This Means for You
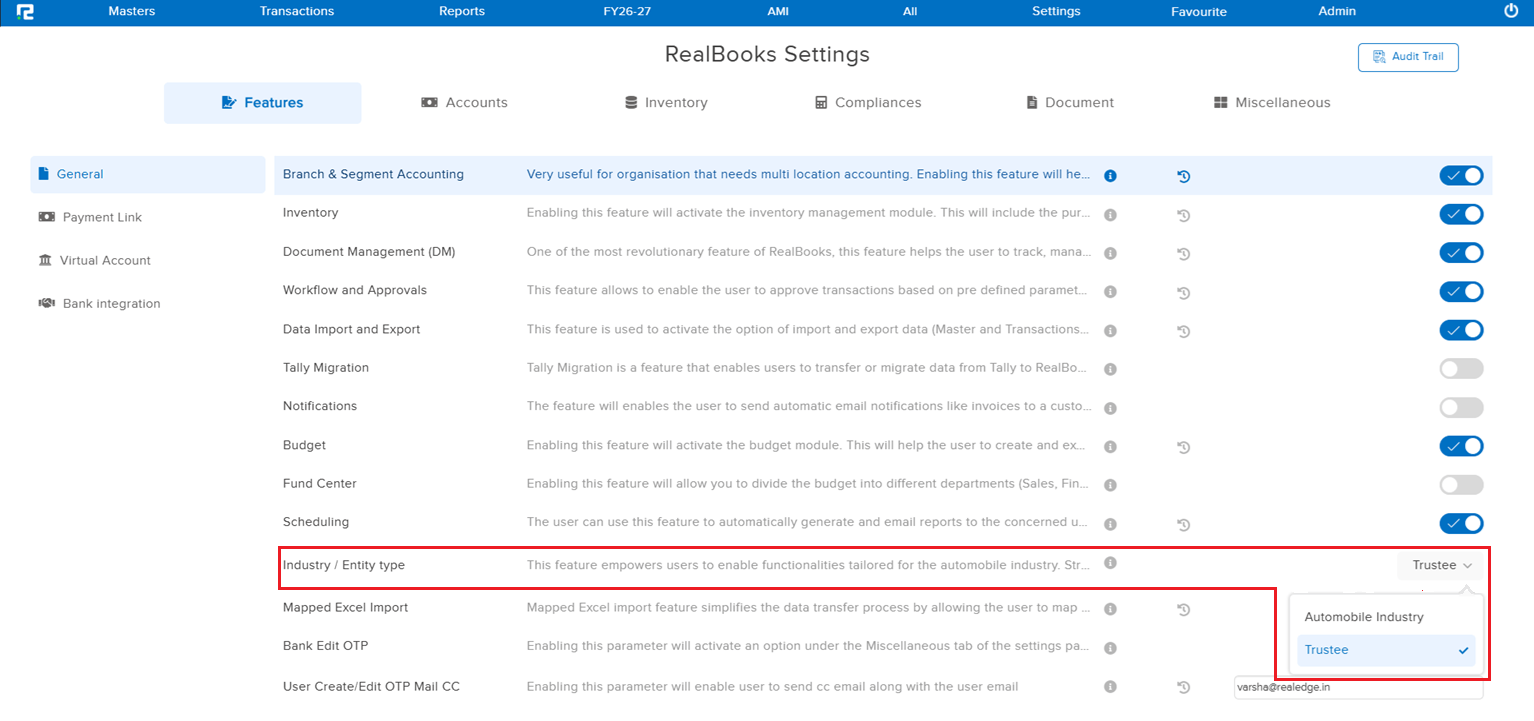
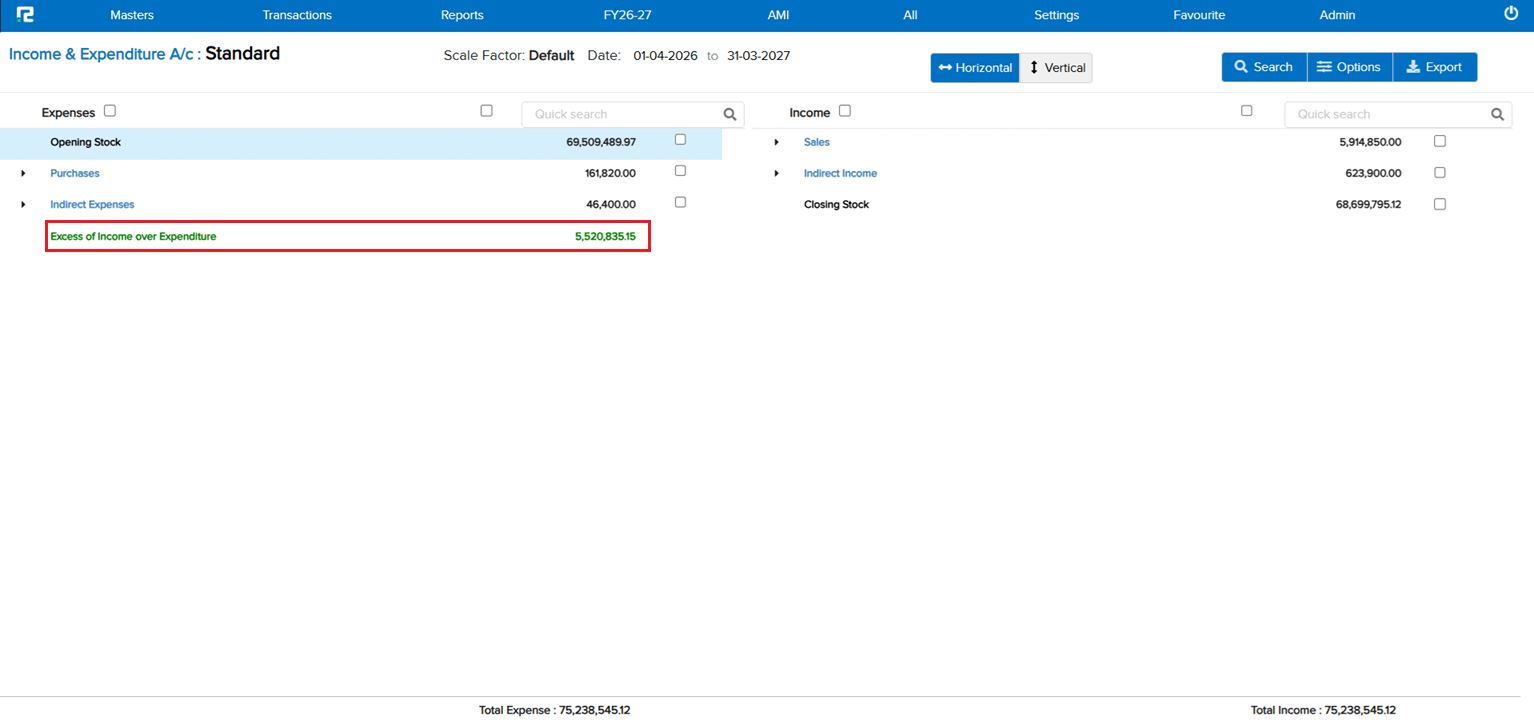
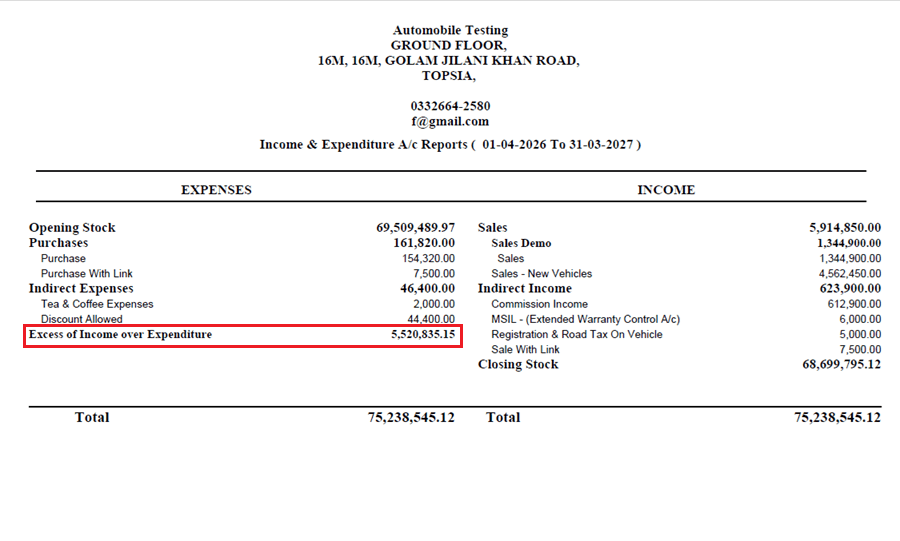
A new Income & Expenditure A/c report variant has been added under the P&L Standard path for eligible companies:
• The report export name is displayed as “Income & Expenditure A/c” instead of “Profit & Loss”
• The bottom-line label reads “Excess of Income over Expenditure” (surplus) or “Excess of Expenditure over Income” (deficit) instead of Profit / Loss for the Period
• This report is only visible when the company has the relevant marking enabled via Acc Param or Company Master — no impact on standard P&L companies
🎬 Where to Find It
📷 See It in Action
📌 What Was Happening
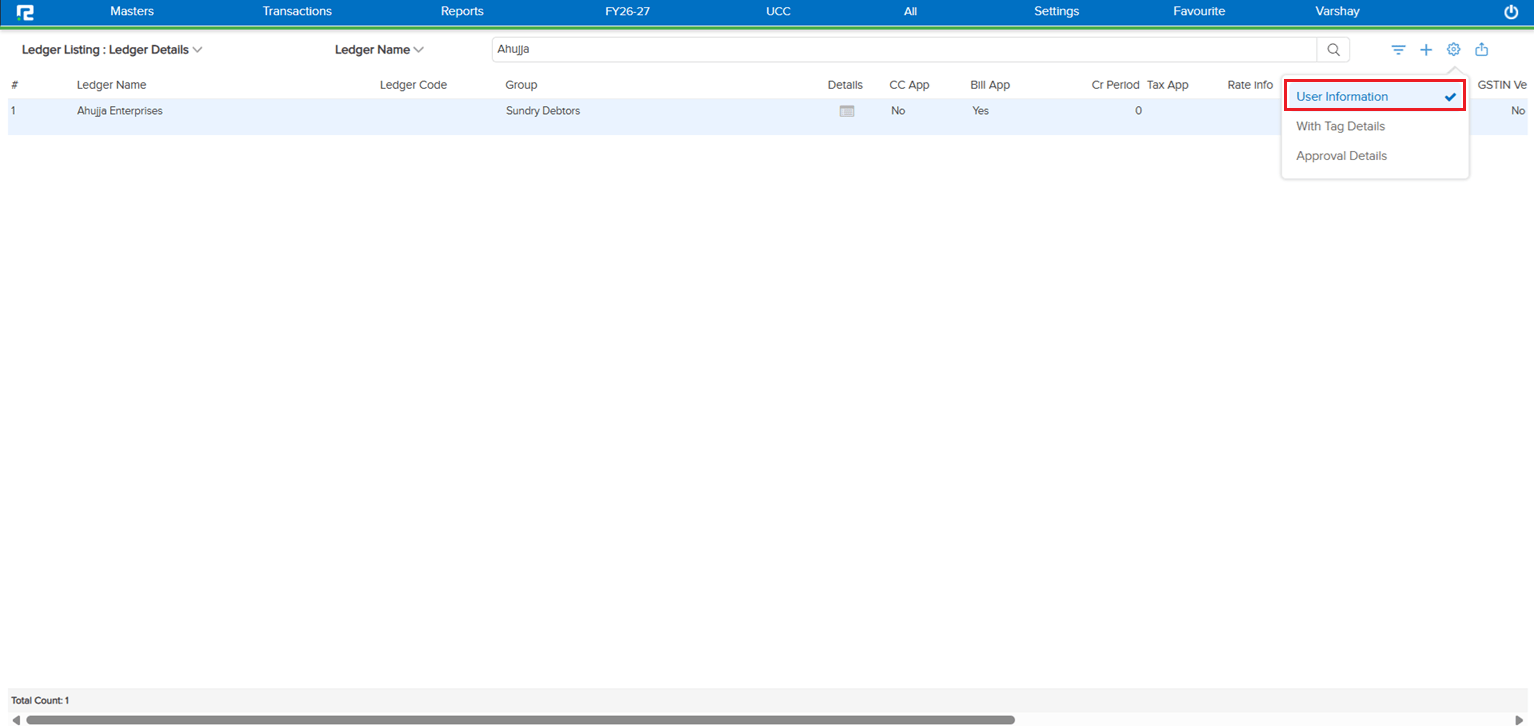
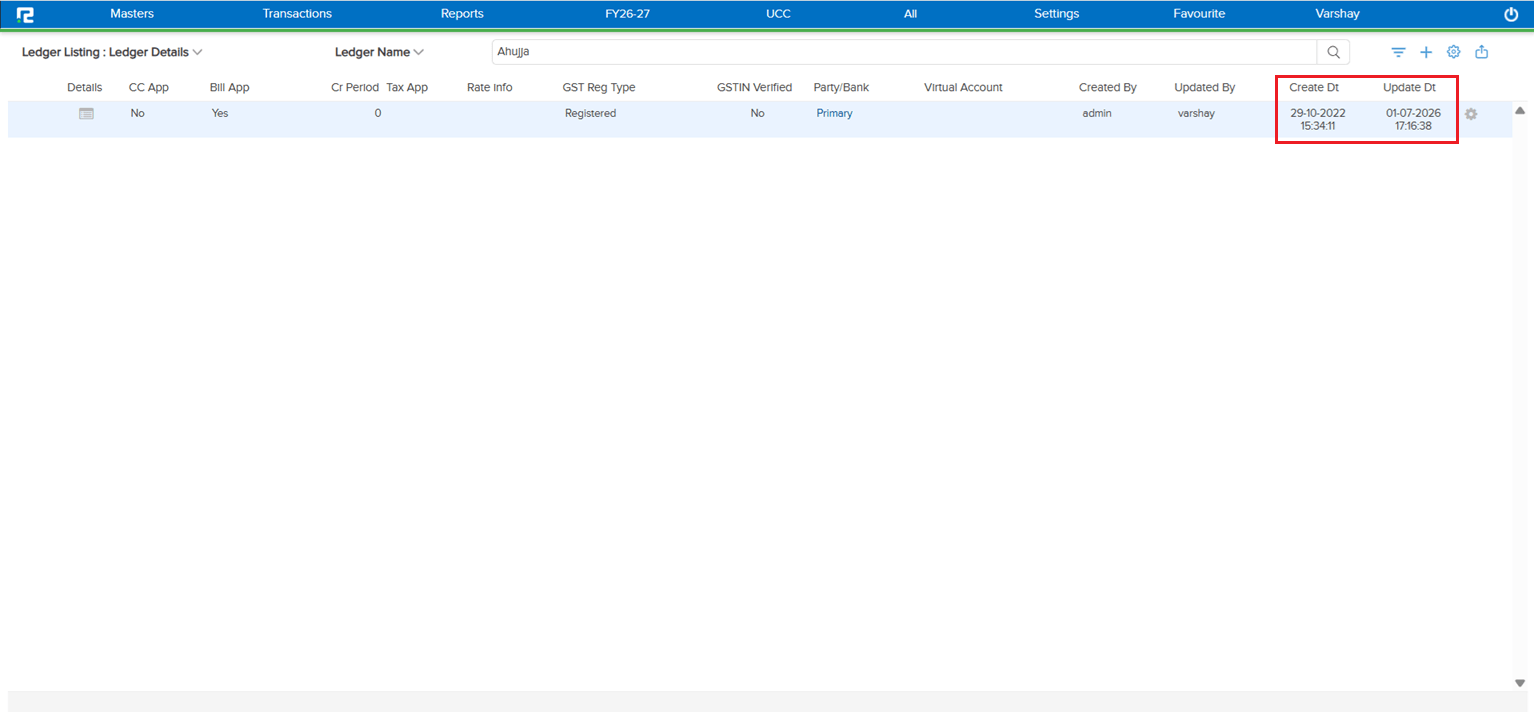
When a ledger was created via the API, the creation timestamp was being stored in 12-hour format without an AM / PM indicator. Since RealBooks displays timestamps in 24-hour format, this caused the time to be interpreted incorrectly — a ledger created at 12:34:19 PM was showing as 00:34:19 in Ledger Master → User Information → Create Dt.
🌟 How This Helps You
The API now stores the creation timestamp in 24-hour format, consistent with how RealBooks handles all creation and edit times. The Create Dt field in Ledger Master → User Information now shows the correct time for ledgers created via the API — no more midnight-looking timestamps for afternoon-created ledgers.
🎬 Where to Find It
📷 See It in Action
📌 What Was Happening
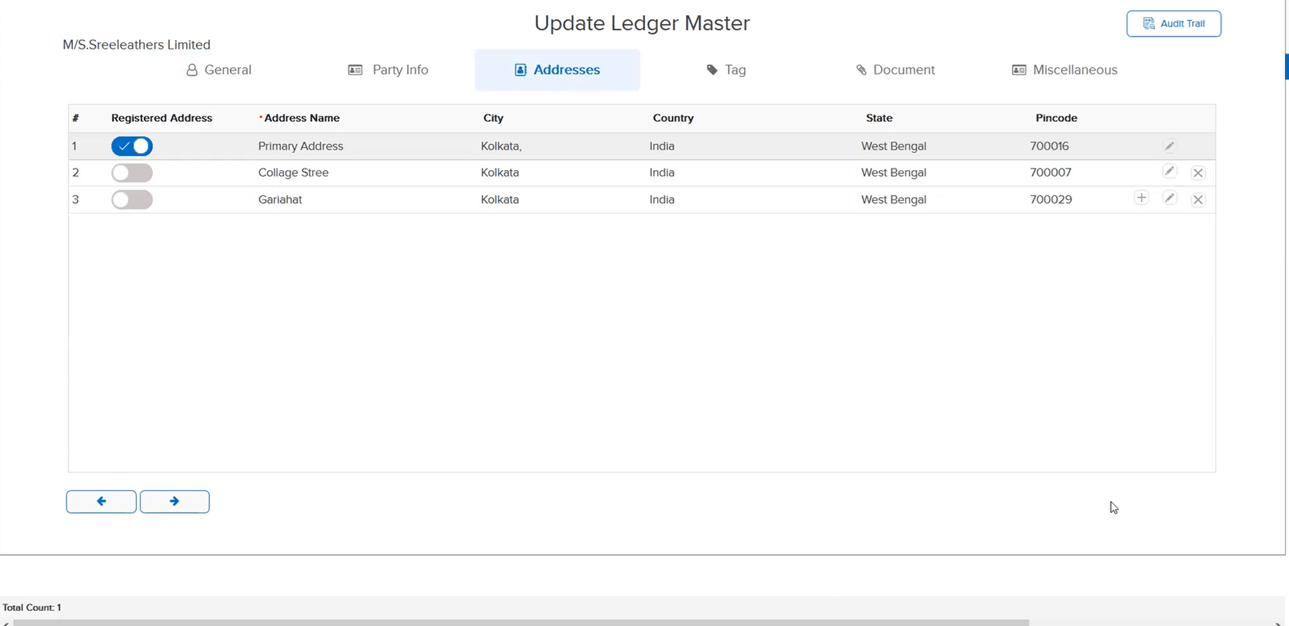
In the Party Ledger Master, address details entered in the Address tab were not getting saved. Users could enter the address, but on saving and reopening the ledger, the address fields were blank — forcing repeated re-entry with no reliable way to persist the data.
🌟 How This Helps You
The bug in the address saving tab of the Party Ledger Master has been fixed. Address details entered against a party ledger are now saved and retained correctly on subsequent opens.
🎬 Where to Find It
📷 See It in Action
📌 What Was Happening
The issue arose from a specific sequence of actions:
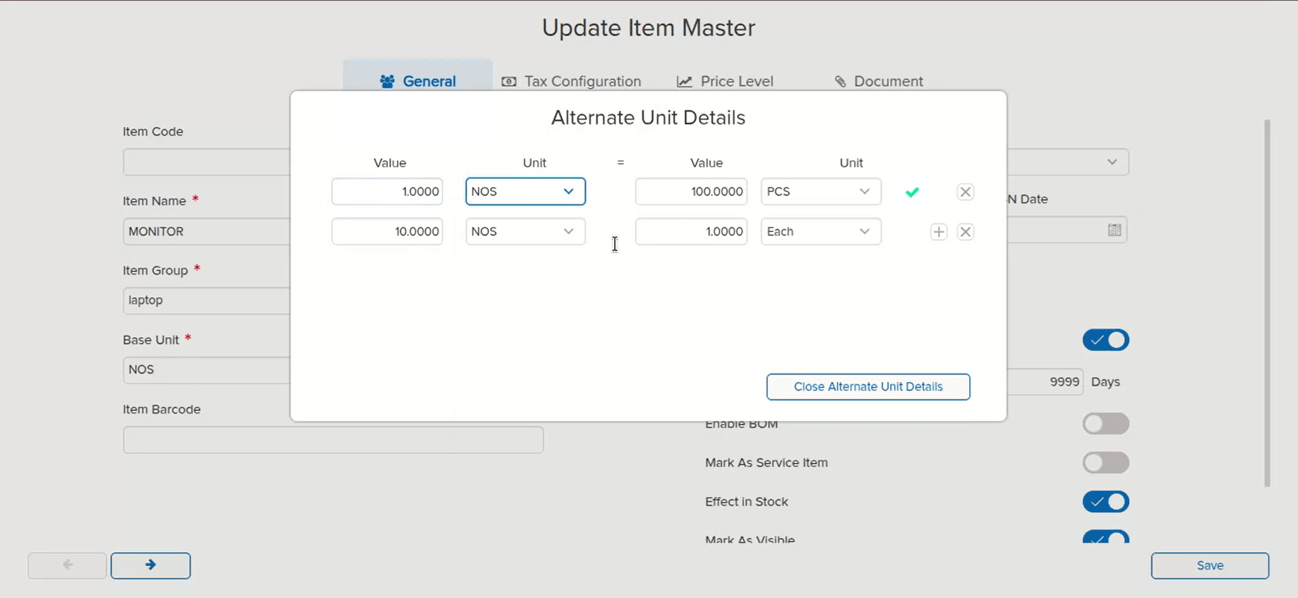
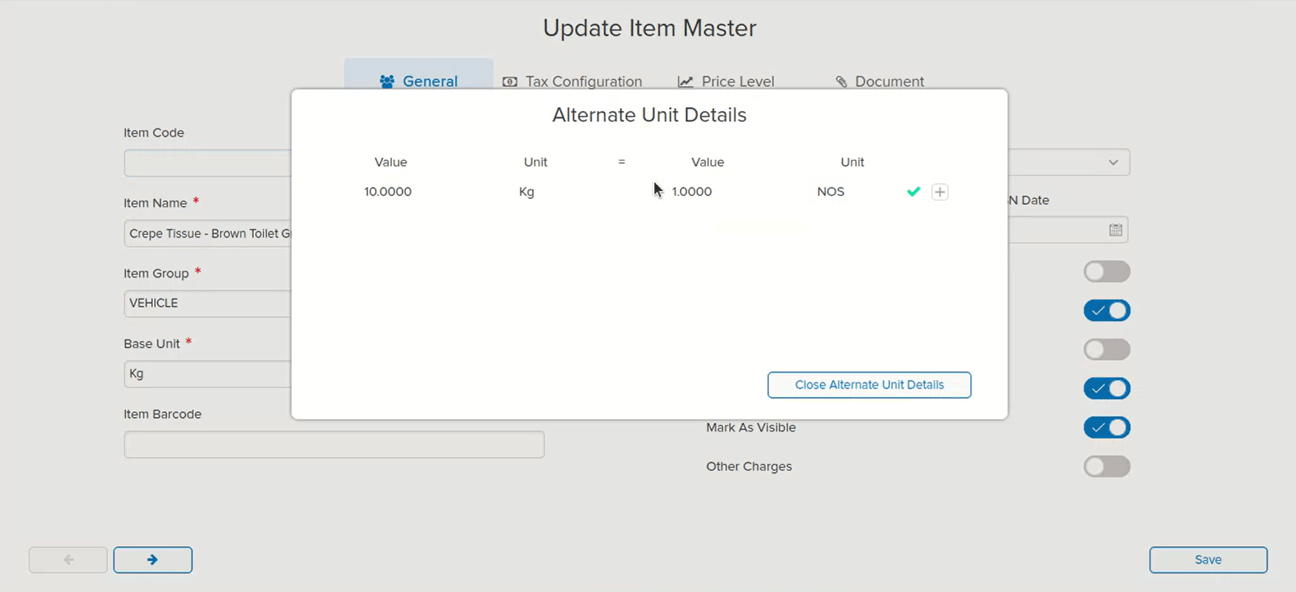
1. Assign Alt Unit details in the Item Master and create a Sales Order (SO) using that Alt Unit combination
2. Go back to the Item Master and update (change) the Alt Unit details
3. When creating the Sale transaction against that SO, the Alt Unit field appeared blank — because the system no longer recognised the original combination as valid
As a result, the Alt Qty was wrongly carried / considered in the affected SO and Sale transactions, leading to incorrect quantity data.
🌟 How This Helps You
To prevent this at the source, editing Alt Unit details in the Item Master is now blocked once any transaction exists in the system against that item — whether it is a Sales Order, Purchase Order, Sale, or Purchase. This ensures that the Alt Unit combination used in transactions always remains consistent with the Item Master, so Alt Qty is never incorrectly applied or left blank in downstream transactions.
🎬 Where to Find It
📷 See It in Action
📌 What Was Happening
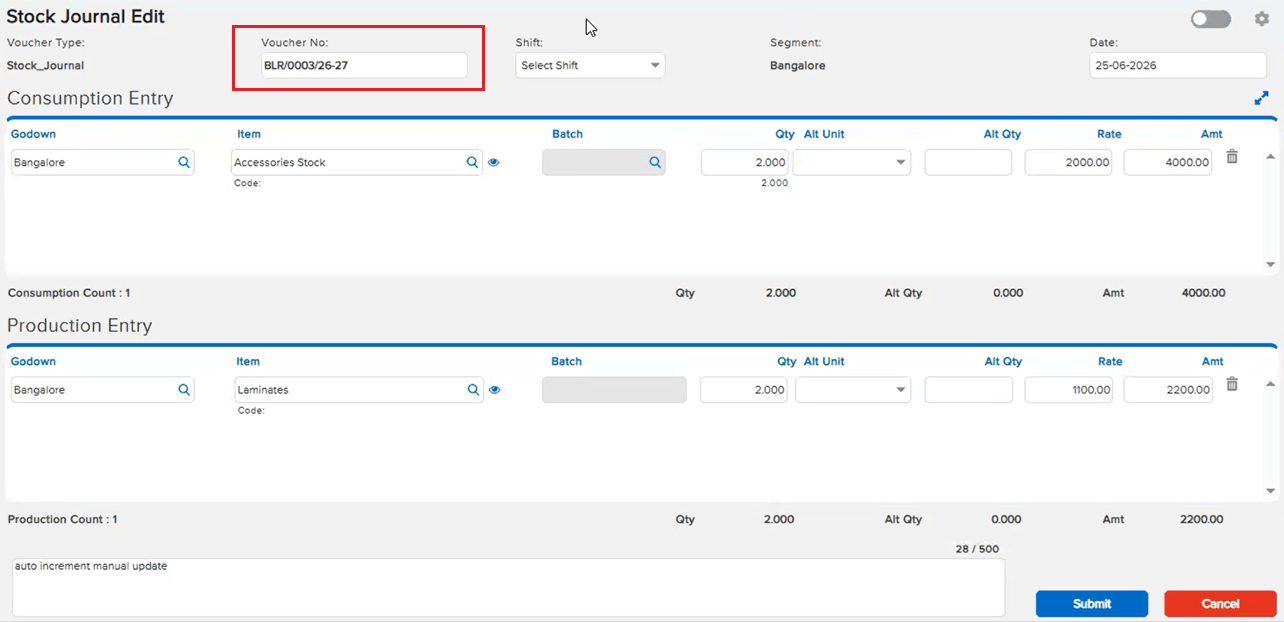
The Stock Journal edit screen was recently optimised for better performance (see E4 / JOB-156882 in Beta Release 18-06-2026). During that optimisation, a specific edge case was not handled:
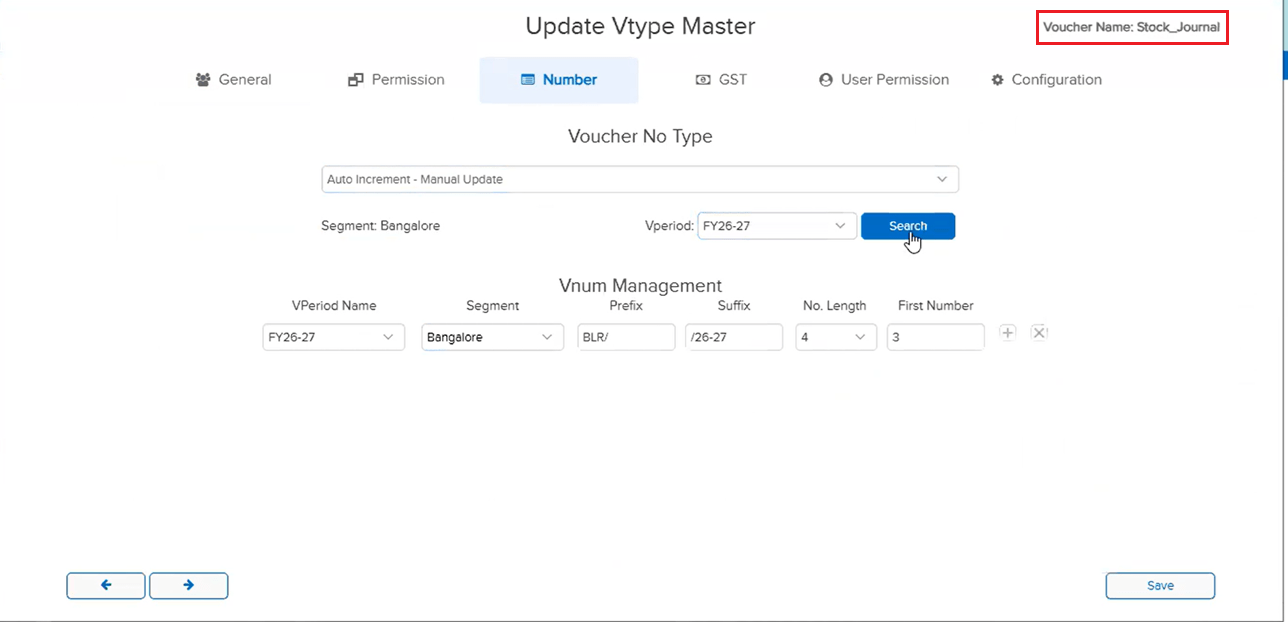
The Voucher Type Master for Stock Journal does not expose an Auto-Increment Manual Update option in the UI. However, one client had configured this numbering setting via an Excel import, and the system had accepted it. Because this configuration path was not accounted for in the optimised version, Stock Journal entries with this numbering setup could not be opened in Beta.
🌟 How This Helps You
The optimised Stock Journal edit screen now handles the Excel-imported Auto-Increment Manual Update numbering configuration correctly. Entries that previously failed to open due to this edge case now open as expected — the performance optimisation is preserved and the missing case is covered.
🎬 Where to Find It
📷 See It in Action
📌 What Was Happening
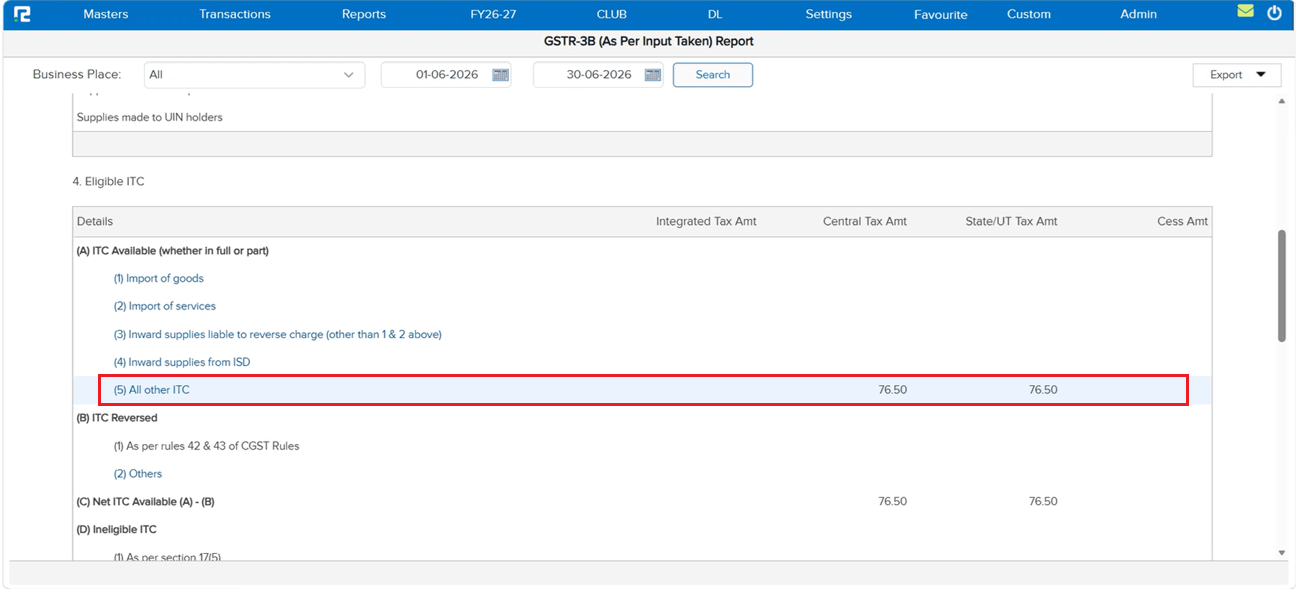
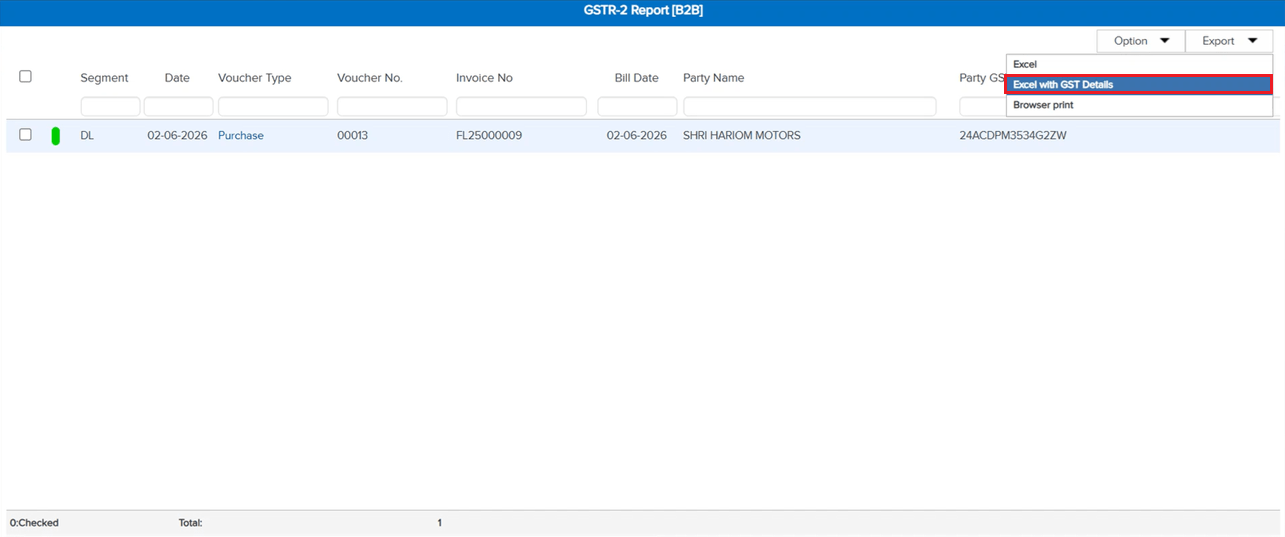
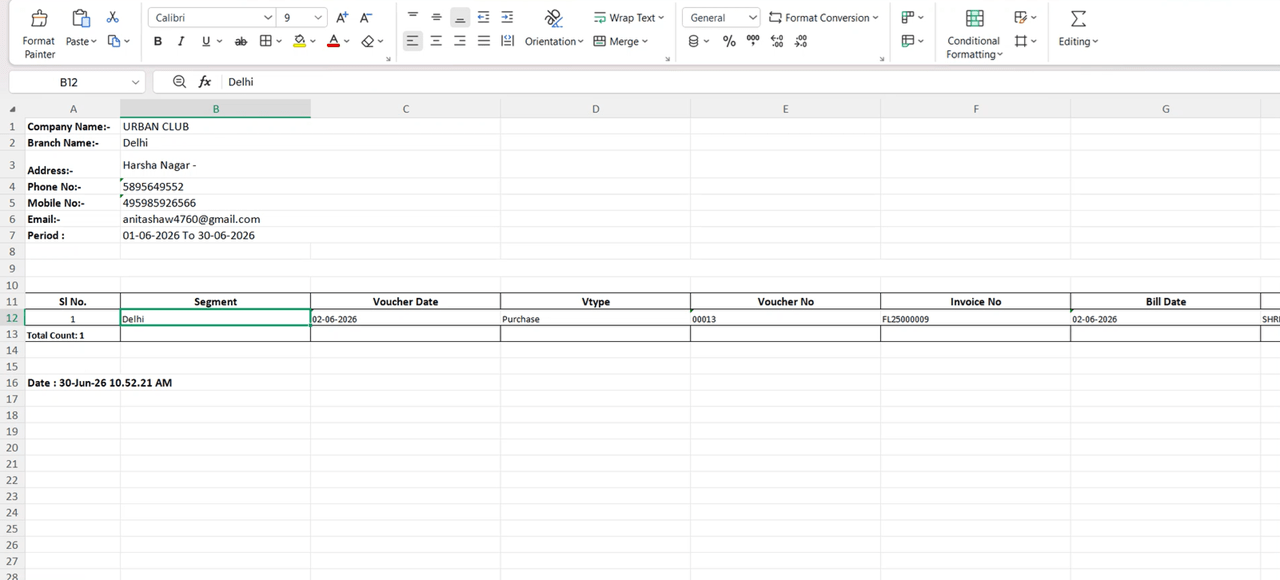
In the GSTR-3B (As Per Input Taken) report, entries were correctly visible in the GSTR B2B screen when drilling down from the report UI. However, when exporting the GSTR 2 B2B Report via “Excel with GST Details”, those same entries were missing from the export — creating a discrepancy between what was shown on screen and what was downloaded.
🌟 How This Helps You
The export logic has been fixed. Entries that appear in the GSTR B2B drill-down from the GSTR-3B (As Per Input Taken) report are now correctly included in the “Excel with GST Details” export — the on-screen view and the downloaded file are now consistent.
🎬 Where to Find It
📷 See It in Action
📌 What Was Happening
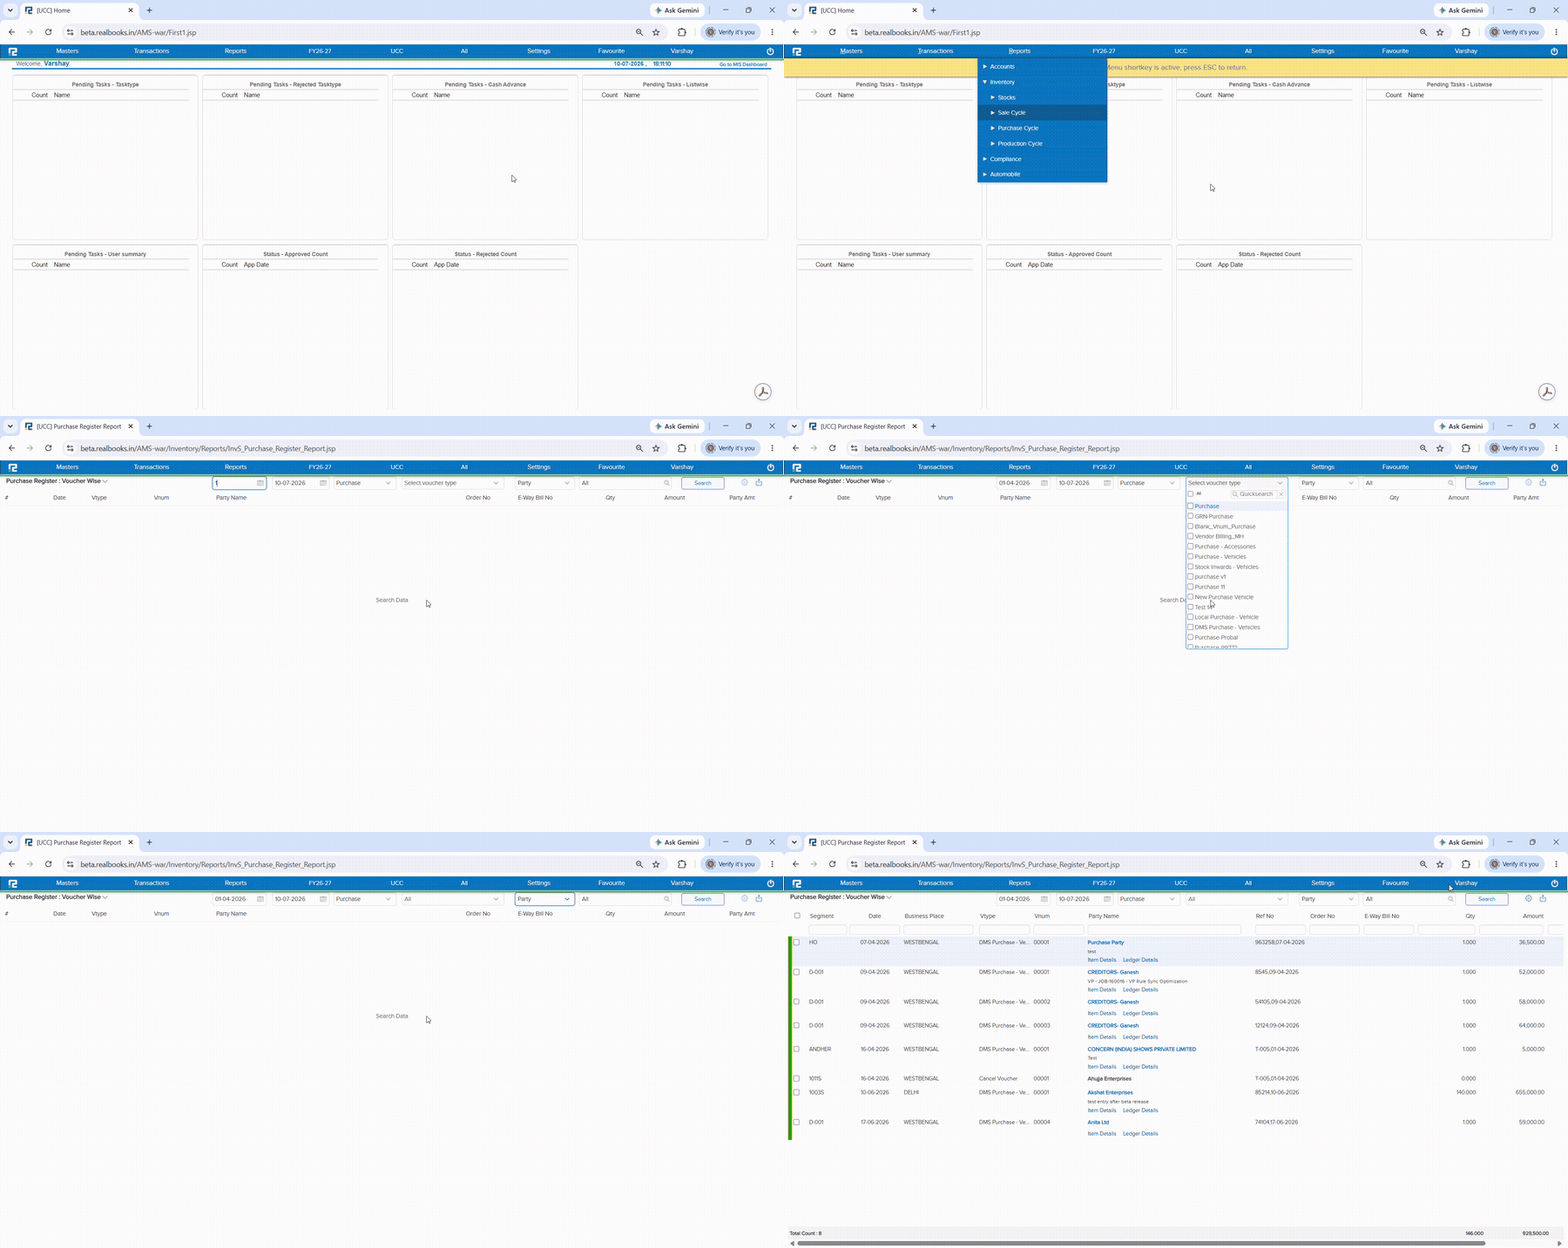
In the Purchase Register, after selecting the Voucher Type from the filter, the cursor was not automatically moving to the Party field. Users who navigate primarily using the keyboard had to manually click or tab to the Party field before they could continue, breaking the natural keyboard-driven flow through the report filters.
🌟 How This Helps You
The cursor now automatically moves to the Party field after a Voucher Type is selected in the Purchase Register. Keyboard-first users can move through the report filters without interruption — no extra click or tab needed to land on the next field.
🎬 Where to Find It
📷 See It in Action