Multi-branch transaction (MBT) facilitates the organization to post banking transactions to multiple branches together. MBT works on the assumption that a Bank ledger used in this transaction belongs to the company as a whole, and is not restricted to any single Branch/segment. So the auto-posted child entries hit multiple branches together using the same bank ledger but only for the amount that belongs to the specific branch.
Note: Transaction posting via MBT works only at the company level/group segment level.
How to Create a Multi-Branch Transfer Payment
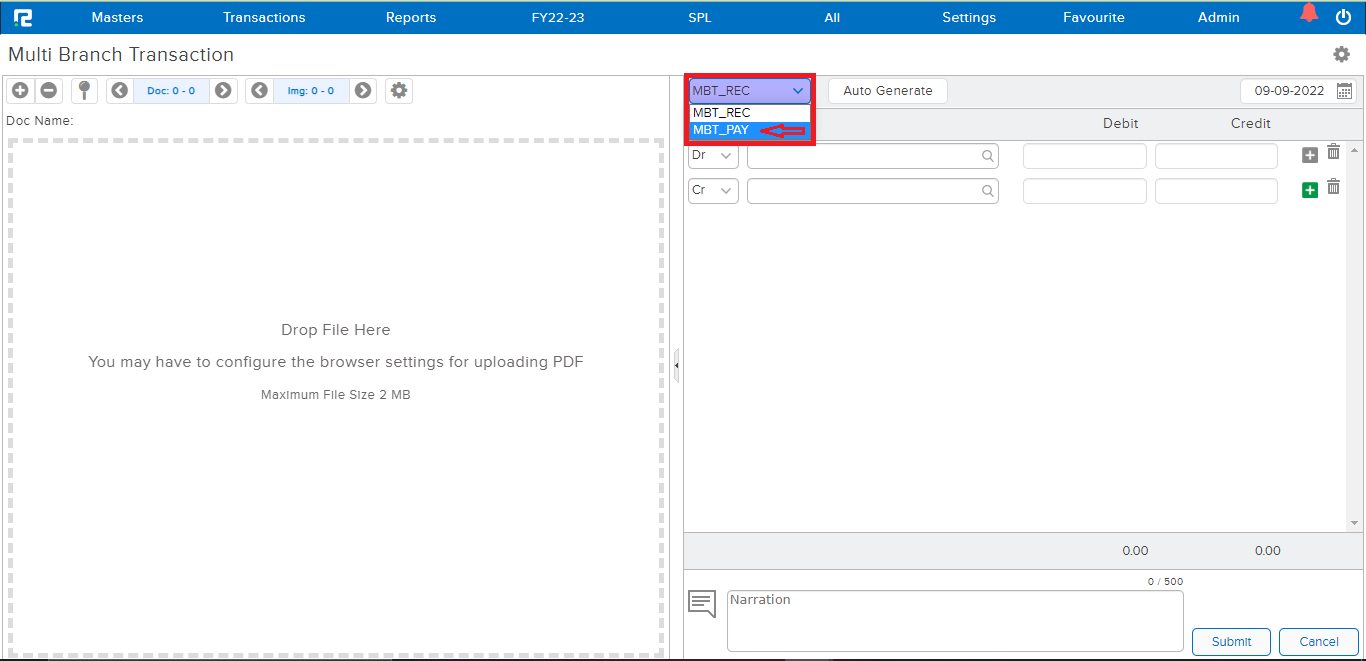
STEP 1: Transactions⇒ Accounts⇒ Multi Branch Transfer

A Transaction Entry page will open. Select the Voucher type from the Dropdown list.
STEP 2: On the Debit Side, search the Vendor/Party ledger (type minimum 3 letters, then select the ledger) and put the party amount.
Note: The billing feature must be enabled in the vendor ledger master for posting MBT entries.
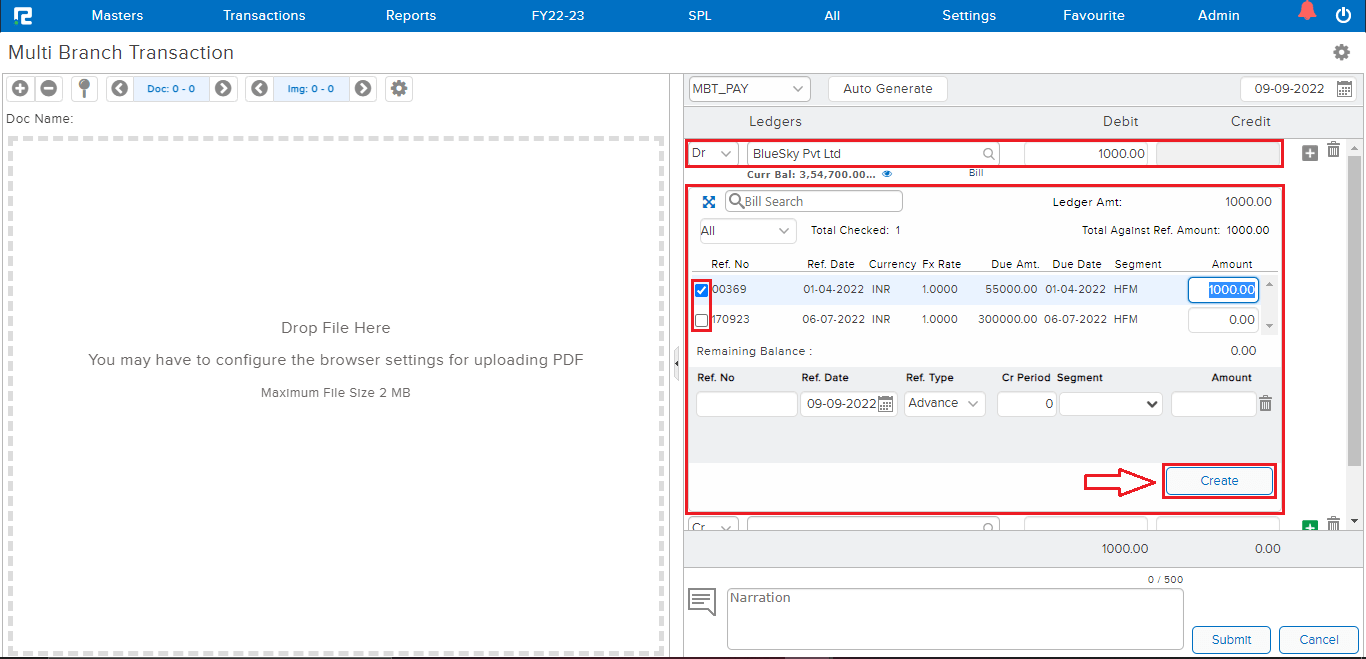
STEP 3: Tag the Bill reference, and click on Create.
STEP 4: On the Credit side, search the Bank/Cash ledger and enter the payment amount.
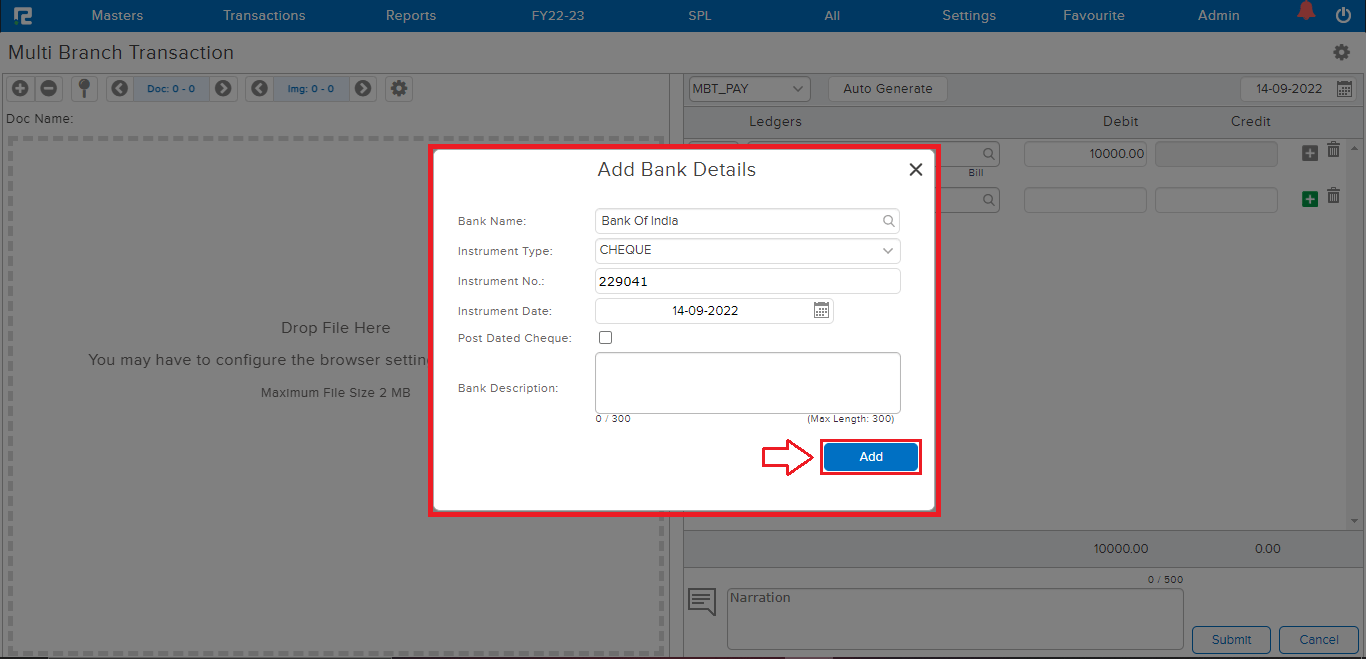
Note: In the case of a Bank Ledger, if capture Bank Details are enabled in configurations, then whenever a bank ledger is selected, the bank details pop-up will open.
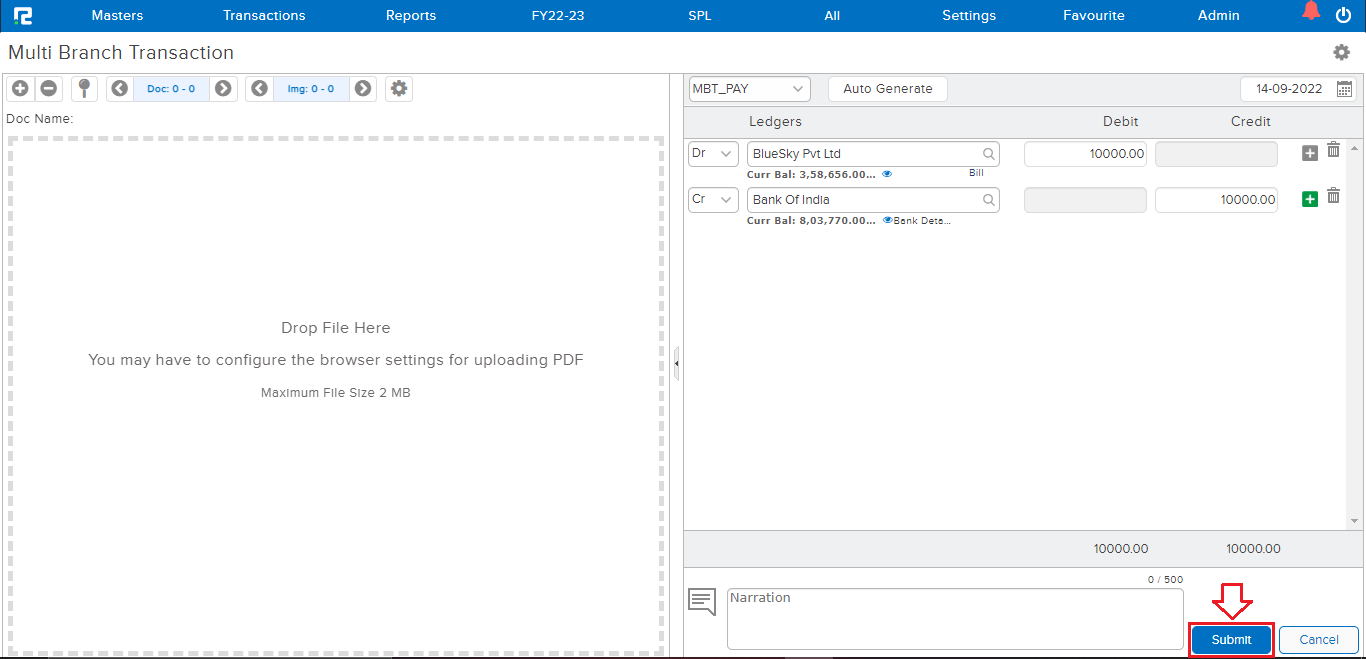 STEP 5: CLICK on the “SUBMIT” button to save the voucher.
Note: Supporting Documents can be attached by simply dragging & dropping them in the left half of the screen.
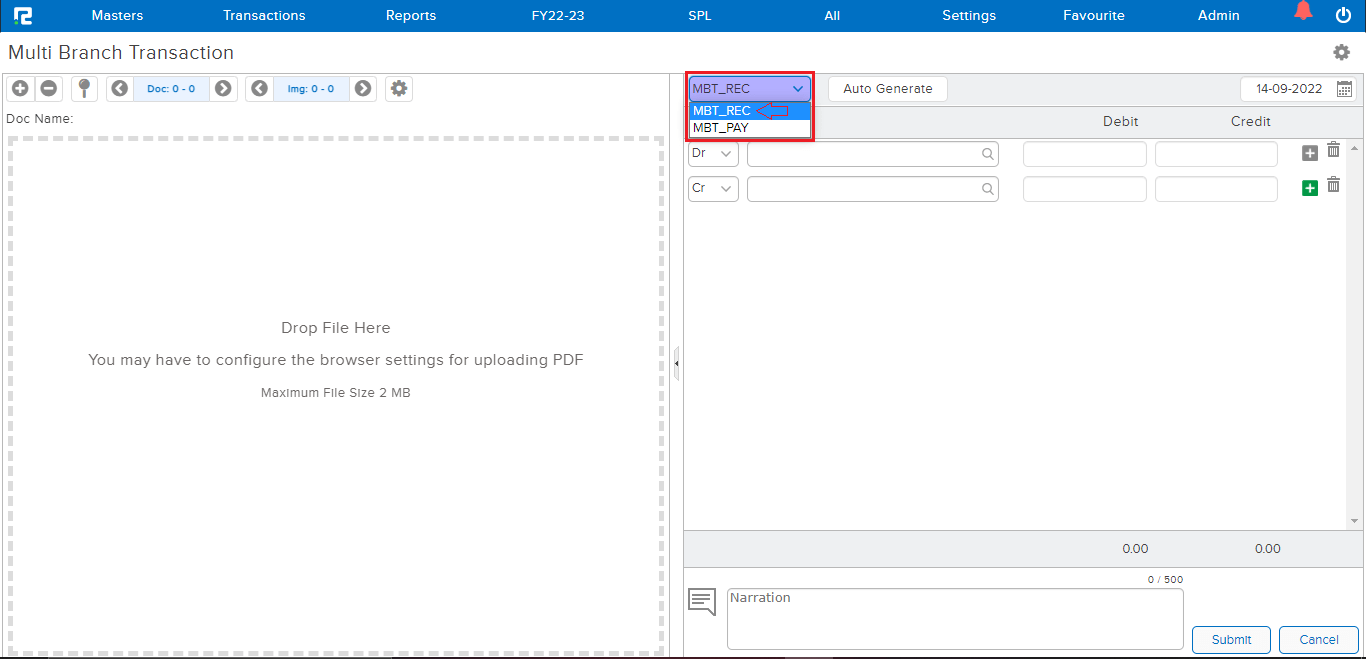
How to Create a Multi Branch Transfer Receipt
STEP 1: Transactions ⇒ Accounts⇒ Multi Branch Transfer

A Transaction Entry page will open. Select the Voucher type from the Dropdown list.
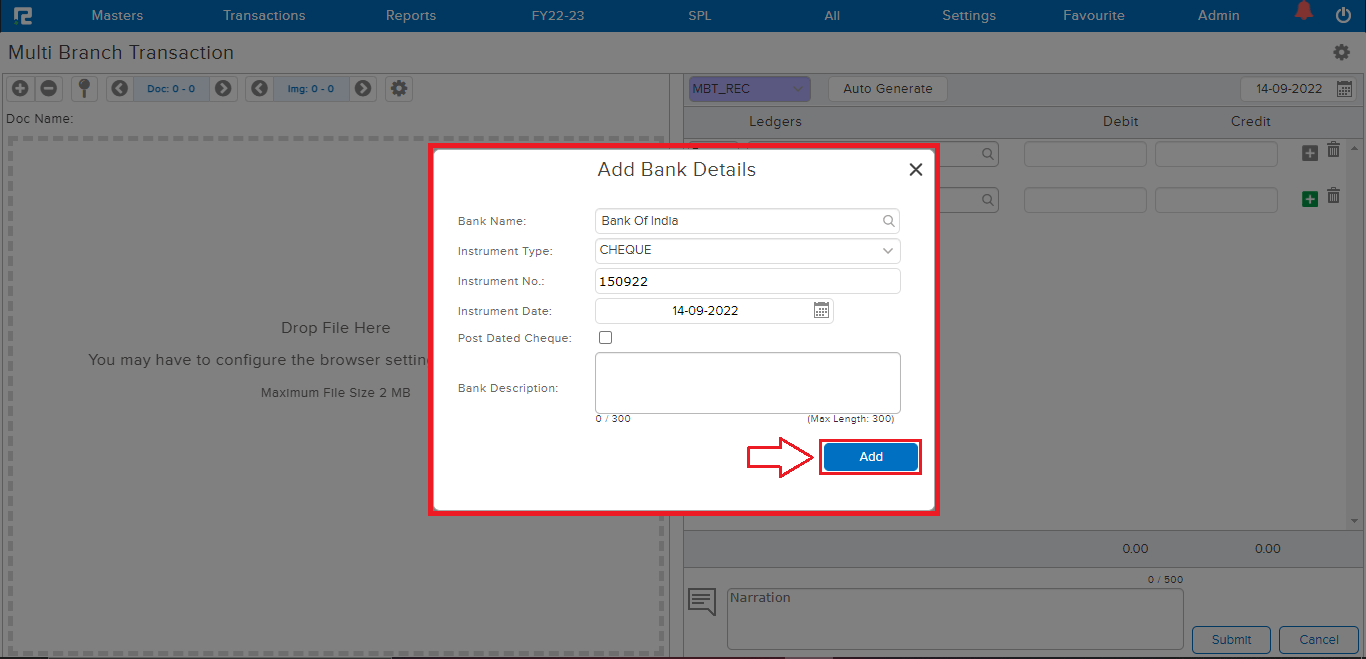
STEP 2: On the Debit Side, search the Bank/Cash ledger (type minimum 3 letters, then select the ledger) and put the amount.
Note: In case of Bank Ledger, if capture Bank Details is enabled in configurations, then whenever a bank ledger is selected, the bank details pop-up will open.
STEP 3: On the Credit Side, search the Vendor/Party ledger (type minimum 3 letters, then select the ledger) and put the party amount.
Note: The bill feature must be enabled in the vendor ledger master for posting MBT entries.
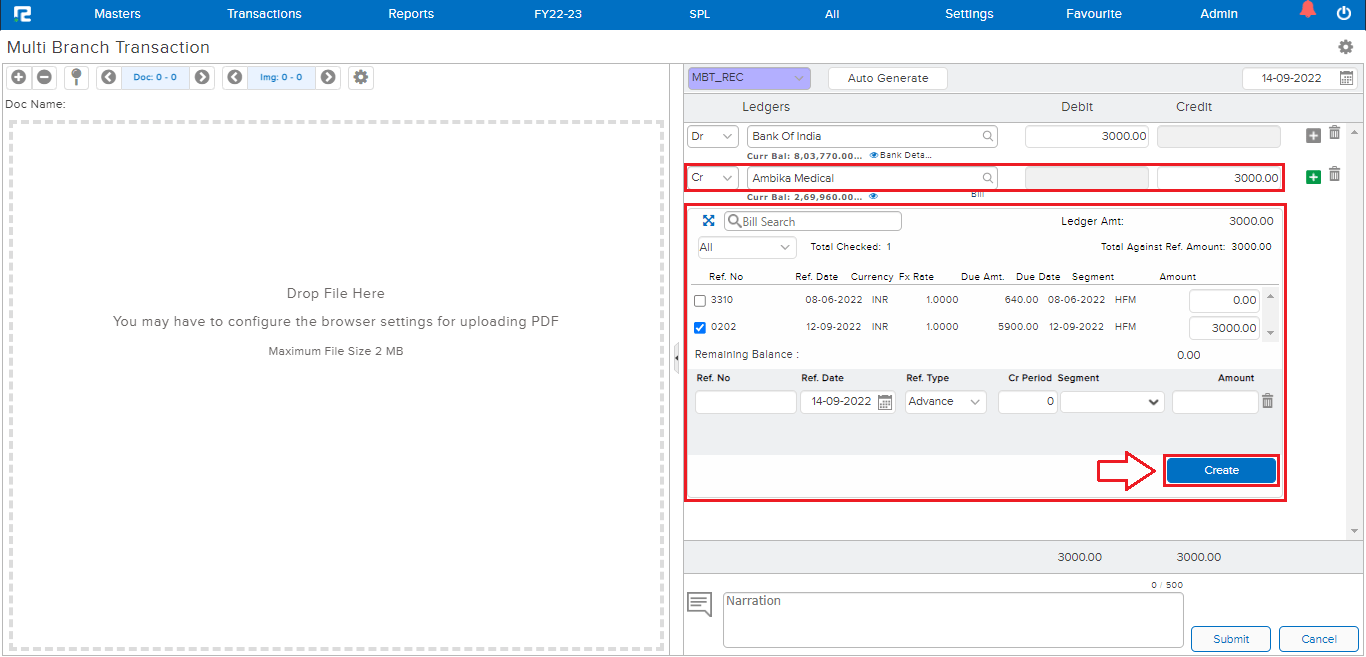
STEP 4: Tag the Bill reference, and click on Create.
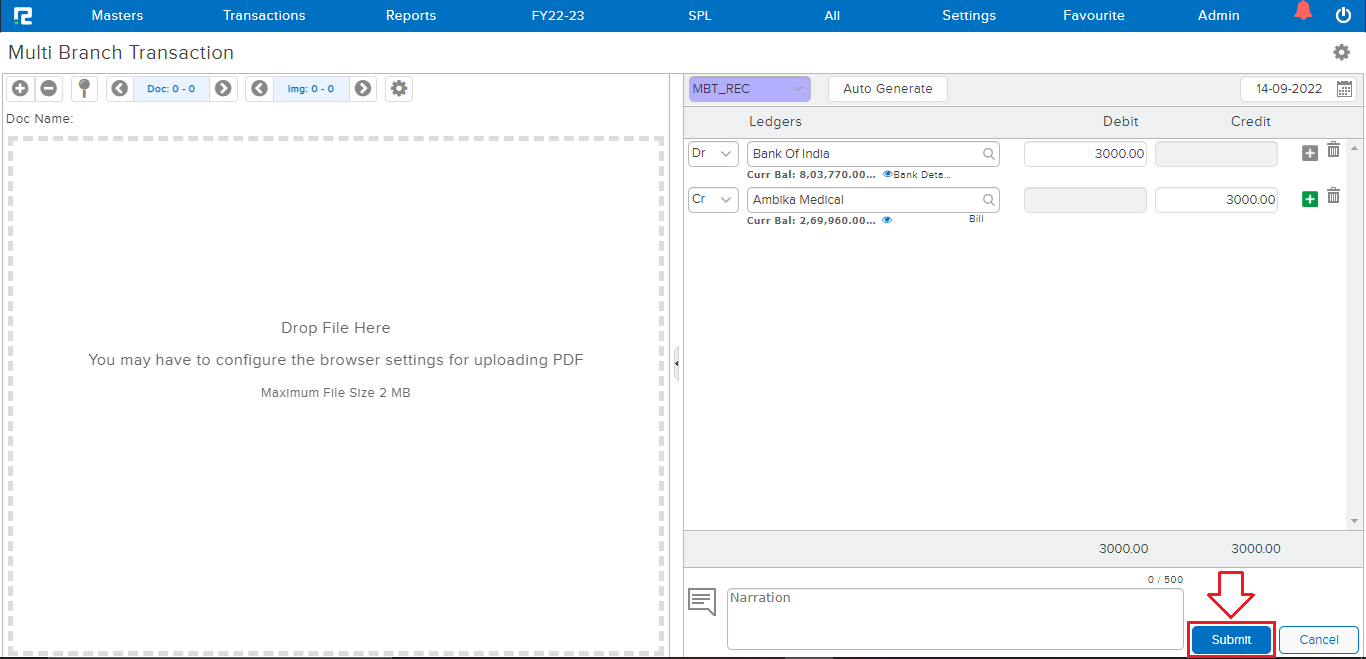
STEP 5: CLICK on the “SUBMIT” button to save the voucher.
Note: Multi-branch transfer is operational only at the company level.
How to Edit a Multi Branch Transfer Entry
Users can view, edit, cancel, or delete an MBT entry from almost every report available in the system. For ex: daybook, ledger report, etc.
TRANSACTION EDIT VIA DAY BOOK
Go to Reports⇒ Accounts⇒ Daily reports⇒ Day Book
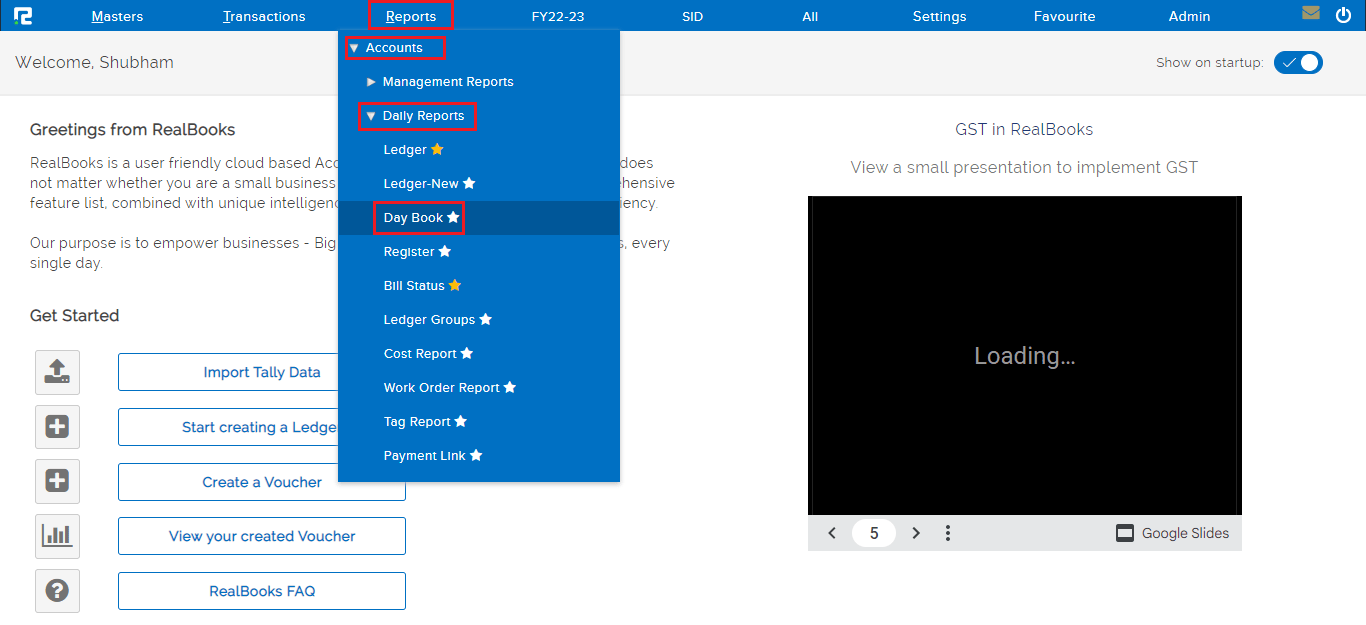
To edit an entry, click on the settings icon on the right-hand side of the entry & click on the Voucher Edit option, or alternatively, press Enter on the keyboard.

Do the necessary changes as required and click on the submit button.
Note: These are the parent entries which if edited will have an impact on the child entry automatically.
TRANSACTION EDIT VIA LEDGER REPORT
Go to Reports⇒ Accounts⇒ Daily reports⇒ Ledger
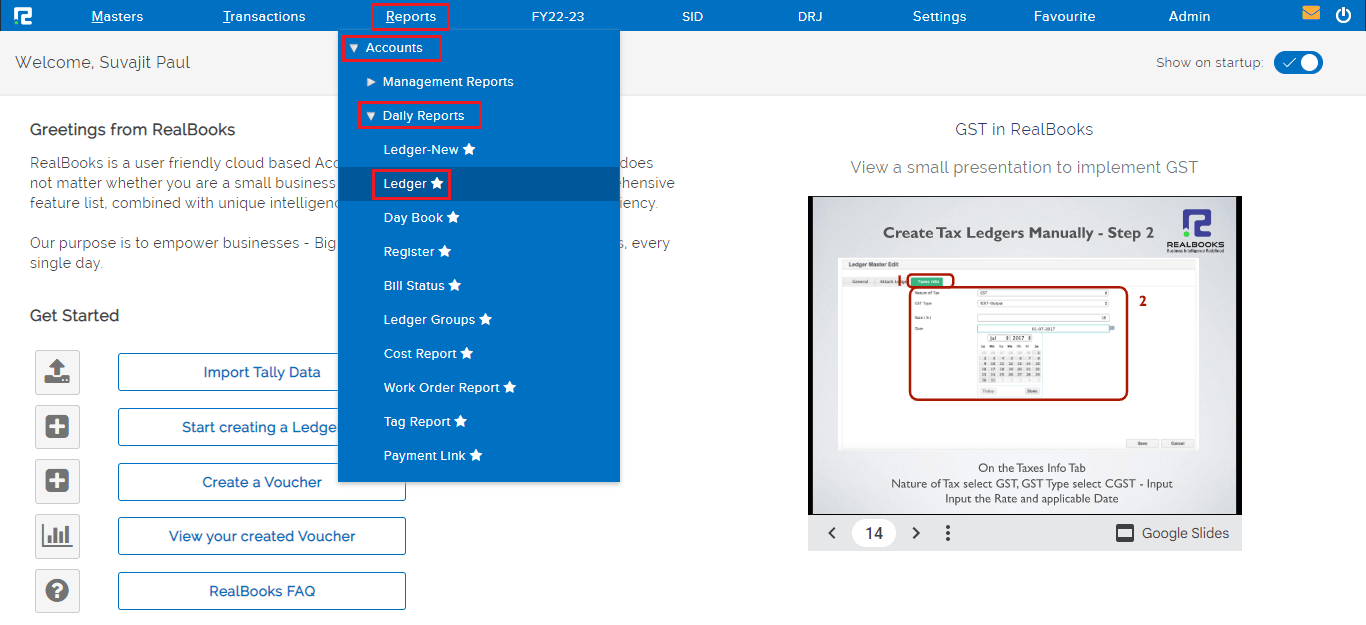
To edit an entry, click on the settings icon of the “M” marked entries, which denote that the entry is MBT, & click on the MBT Voucher Edit option.

Do the necessary changes as required and click on the submit button.
Note: These are the parent entries which if edited will have an impact on the child entry automatically.
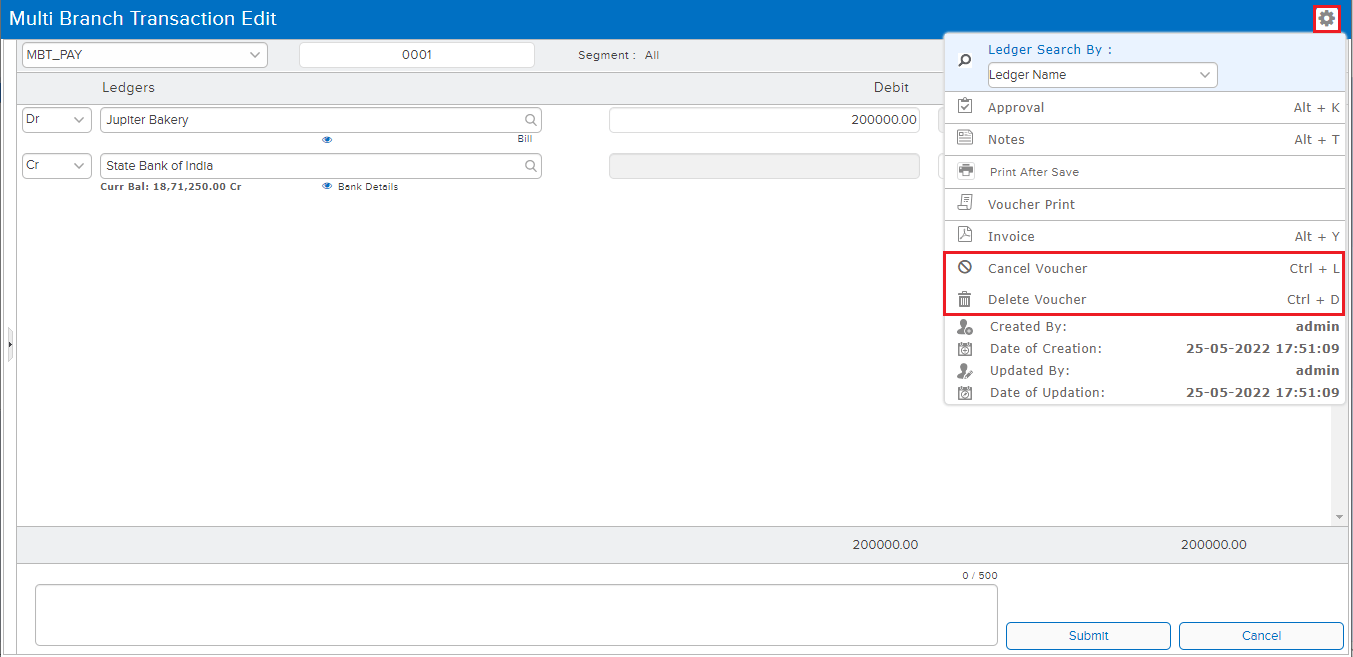
How to Delete or Cancel an Entry
DELETE/CANCEL– To delete/delete an entry, open the entry in edit mode, then go to the Settings icon on the right-hand side of the page. From the dropdown menu select the cancel/delete voucher as required, enter the reason for cancellation/deletion, and then click on cancel/delete.