Customize user access levels and permissions tailored to different roles within your organization, ensuring data security and confidentiality. With role-based control, manage who can view, edit, or delete specific information based on their responsibilities.
How to Configure Approval Workflow
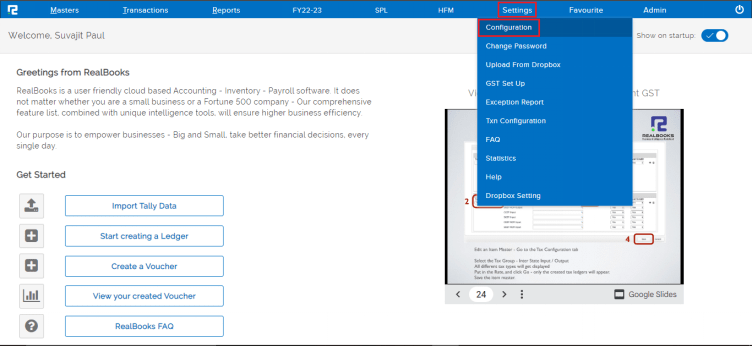
STEP 1: Go to Settings ⇒ Configuration
STEP 2: From Features⇒ General => Workflow and Approvals
Here, you need to enable the Workflow and Approvals option. 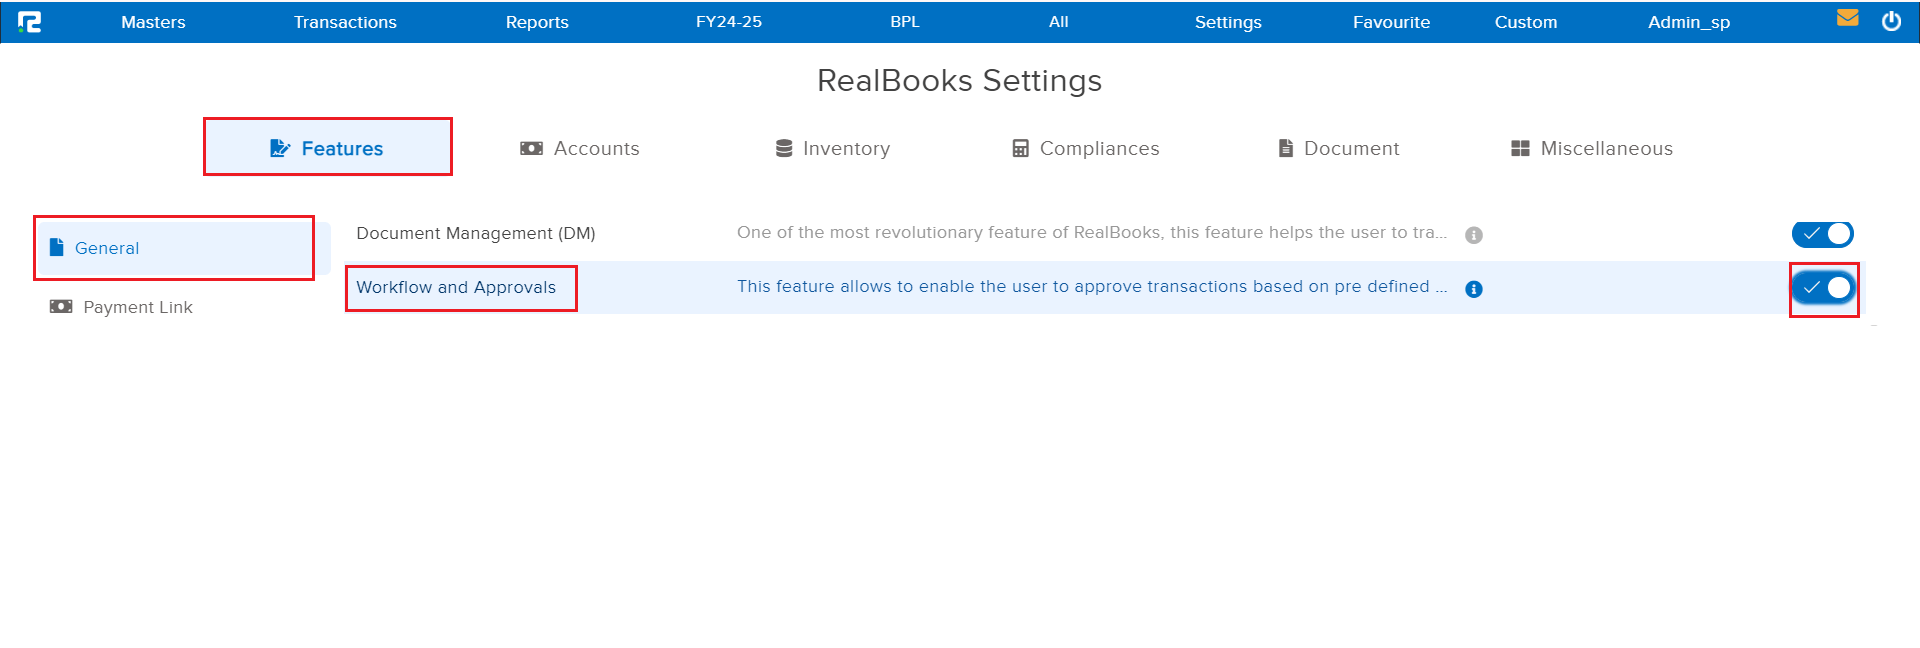
How to Create Approval Workflow
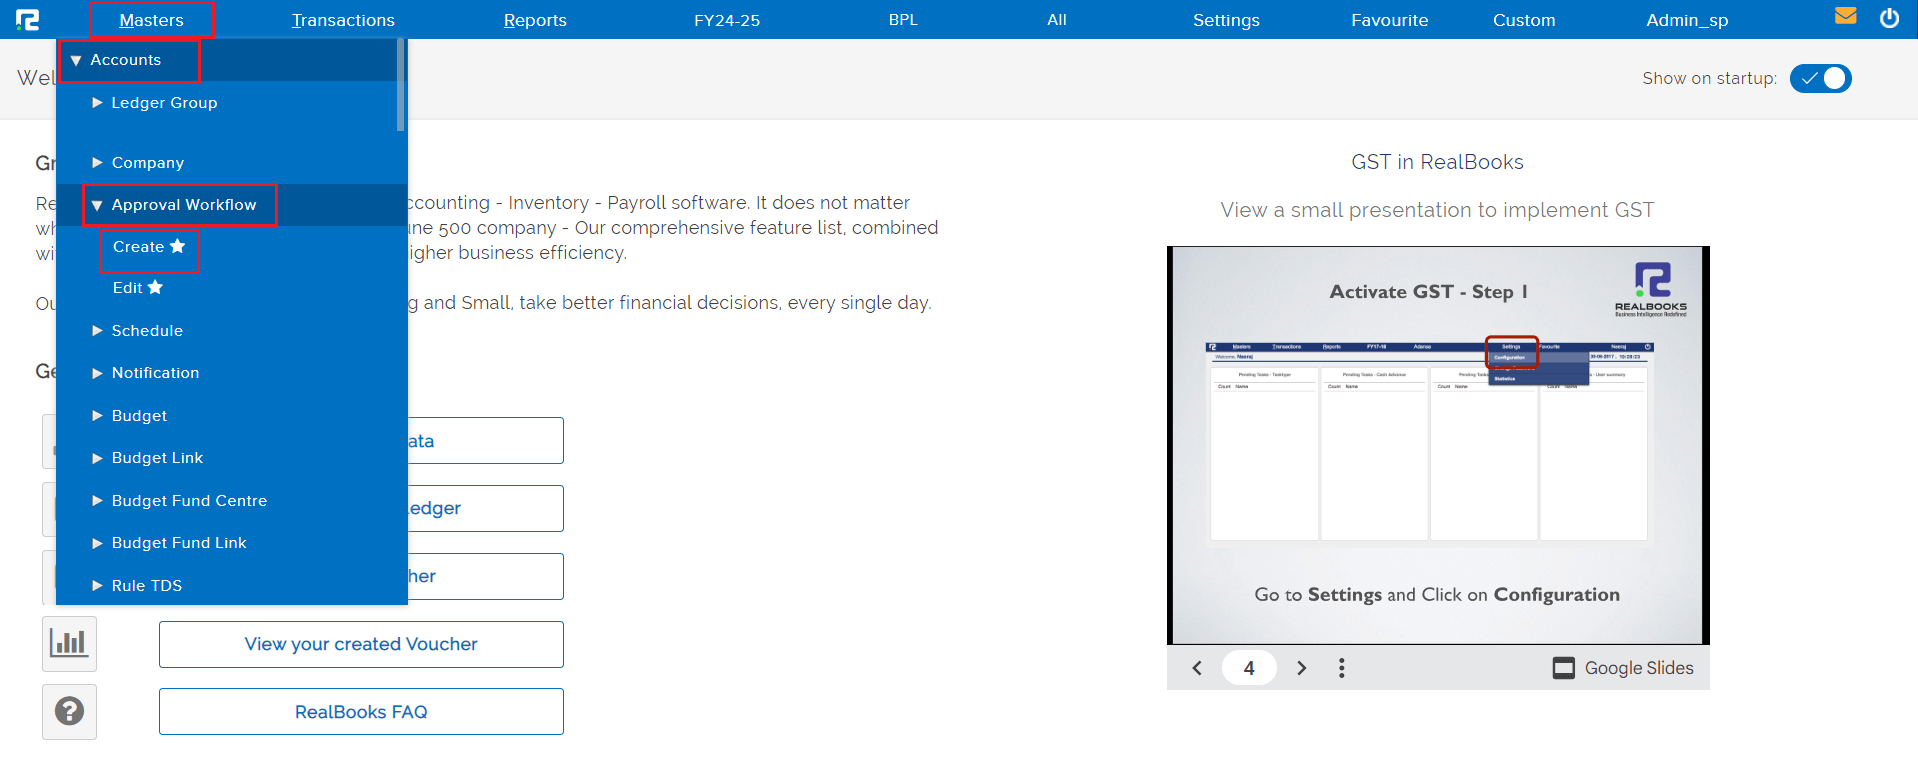
STEP 1: Masters ⇒ Accounts⇒ Approval Workflow ⇒ Create
STEP 2: Fill in the following details.
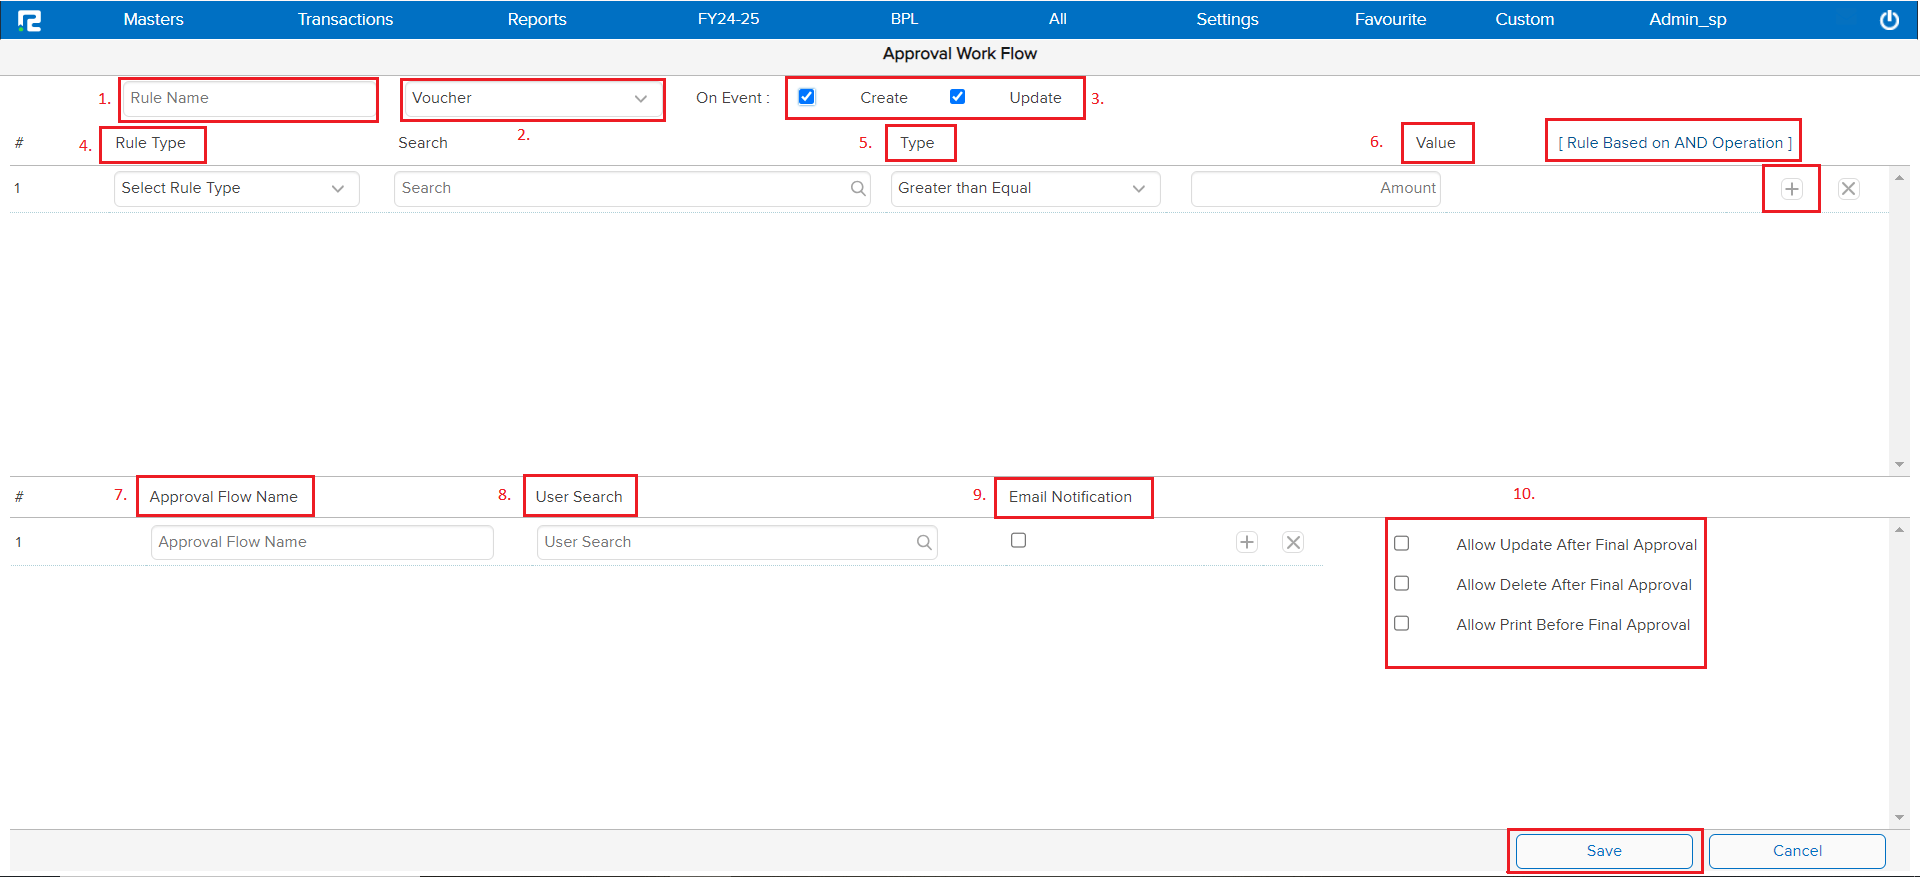
1. Rule Name: In this field, input a descriptive name for the rule, such as ‘Voucher Approval’.
2. Rule Type: Choose the type of rule you want to create from the Rule Type dropdown menu. Options may include “Voucher”, “Document”, etc.
a. Voucher: Choose “Voucher” as the Rule type to enable transaction approval.
b. Document: Choose “Document” as the Rule type to enable document generation approval following a transaction.
3. On Event: Select when the rule will be applicable. Indicate the event that triggers the rule by selecting either “Create” or “Update”. This specifies whether the rule applies when creating a new record or updating an existing one.
4. Rule Type: Select the rule type from the dropdown list, depending on the Rule type, and the search bar will appear.
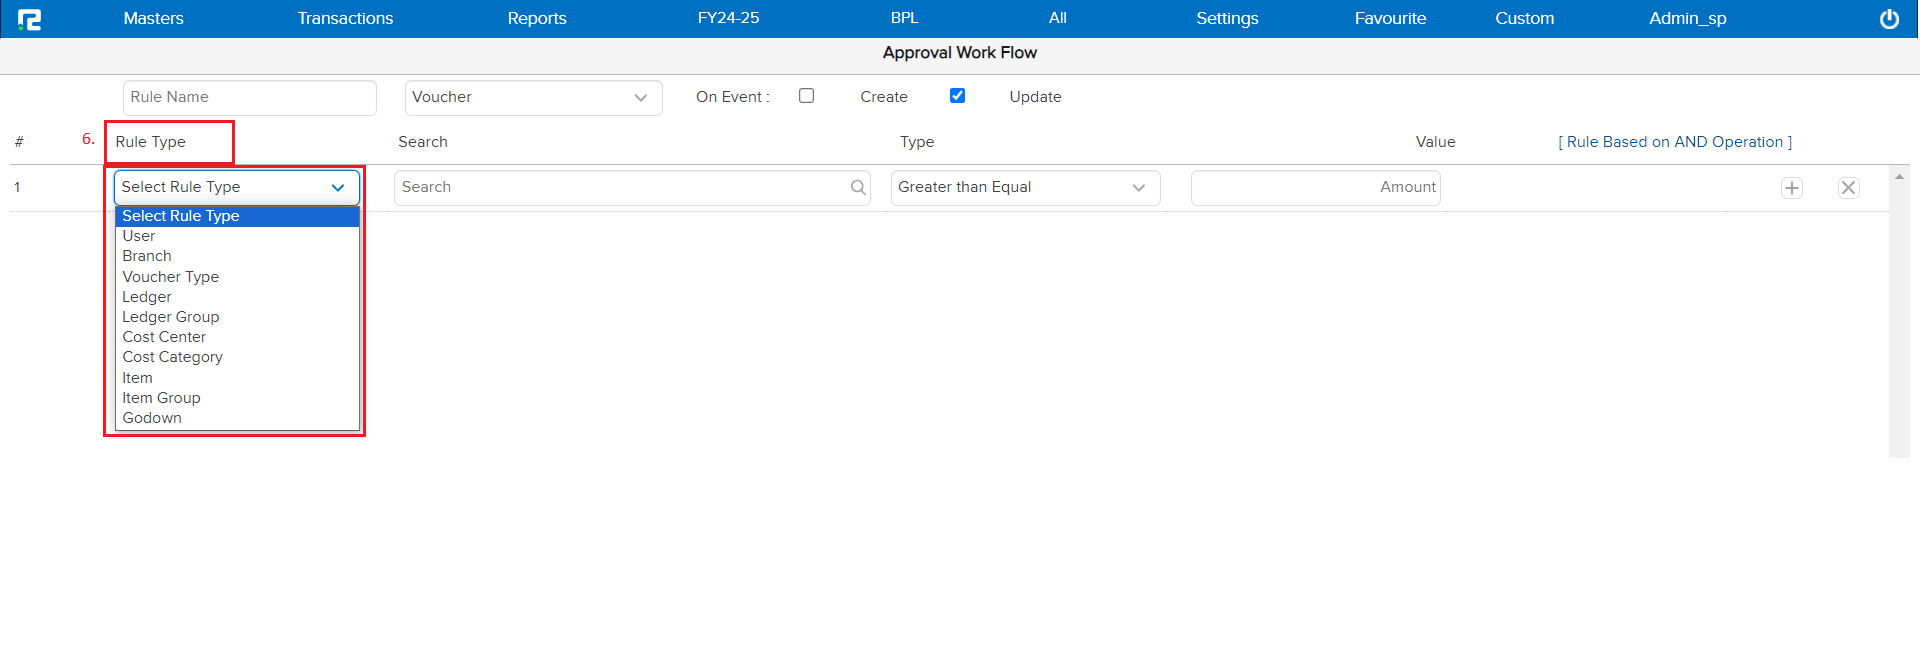 5. Type: In the Select Rule Type dropdown, choose the specific condition for the rule, such as “Greater than Equal“.
6. Value: Enter the value in the Amount field. This specifies the threshold amount for the rule.
7. Approval Flow Name: Enter a name for the approval flow, such as “Manager Approval“.
8. User Search: Search and select users who will be responsible for approval. This ensures specific individuals are assigned to approve the task.
9. Email Notification: Check the box if you want the selected users to receive email notifications about approval requests.
Note: Click the plus (+) icon to add this approval flow to the workflow list.
STEP 3:
a. Allow Update After Final Approval: To allow an update in the transaction after Final approval select this checkbox.
b. Allow Delete After Final Approval: To allow voucher deletion after final approval select this checkbox.
c. Allow Print Before Final Approval: To allow printing of the transaction before final approval select the Checkbox.
STEP 4: Click on the “Save” button, and the Approval Workflow will be saved successfully.
How to Edit Approval Workflow
STEP 1: Go to Masters⇒ Accounts⇒ Approval Workflow⇒ Edit
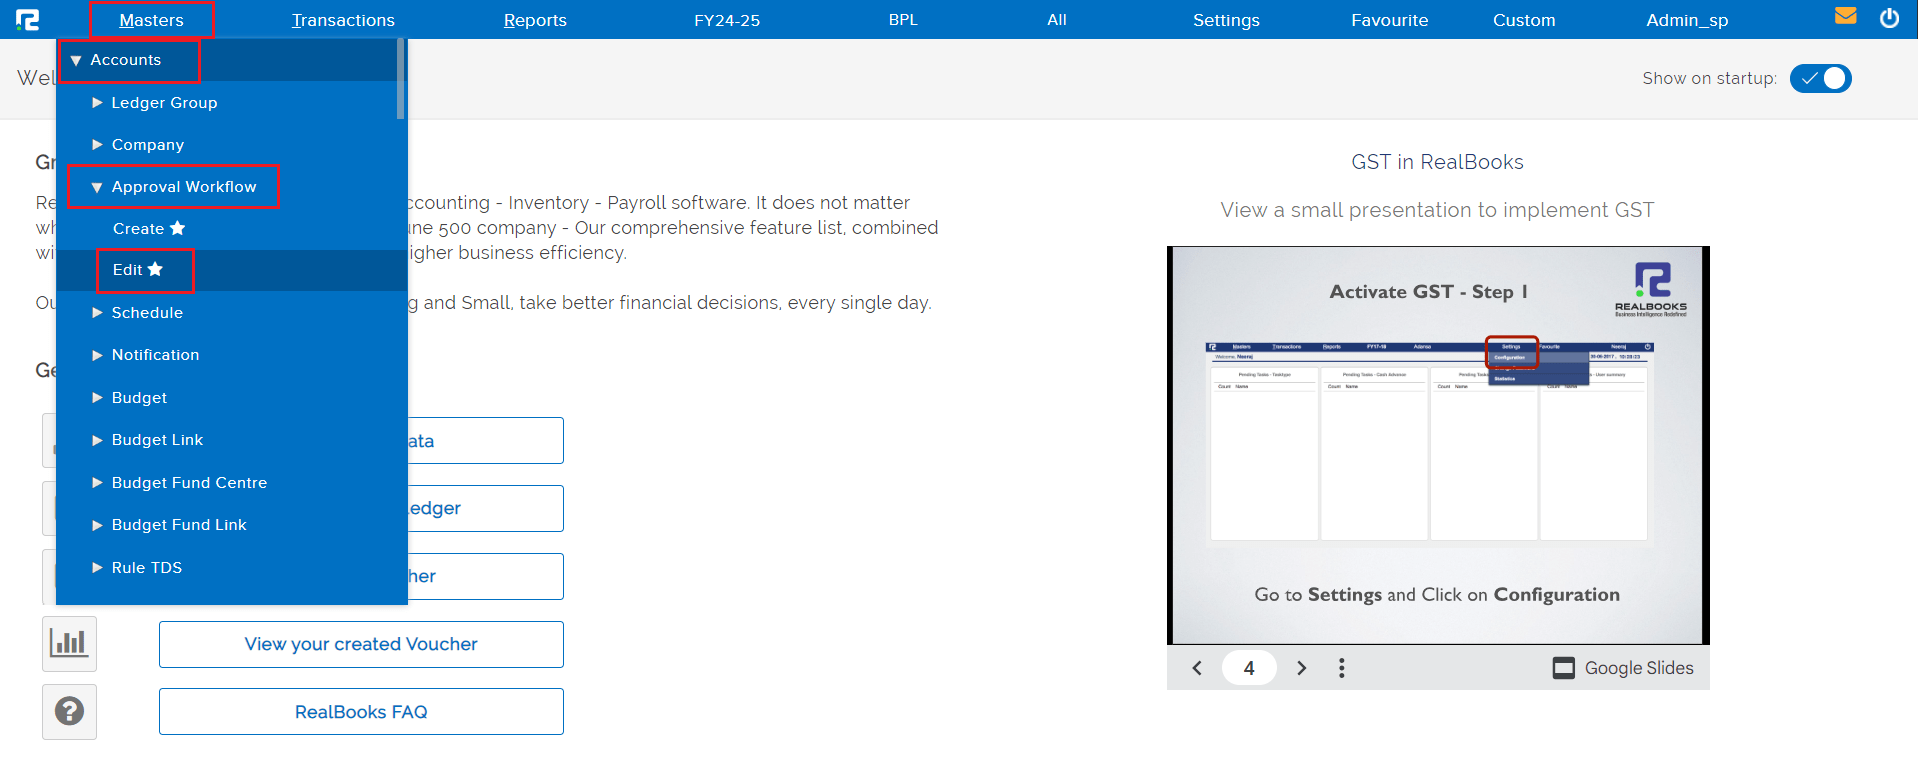
STEP 2: Once you click on the edit option, the Approval Workflow List will appear.
STEP 3: To edit any Approval Workflow CLICK on the “PENCIL” icon or select the Approval Workflow and press ENTER, Approval Workflow Update page appears, wherein the details can be edited.
STEP 4: Once the data is modified, CLICK on “SAVE” to update the details.
