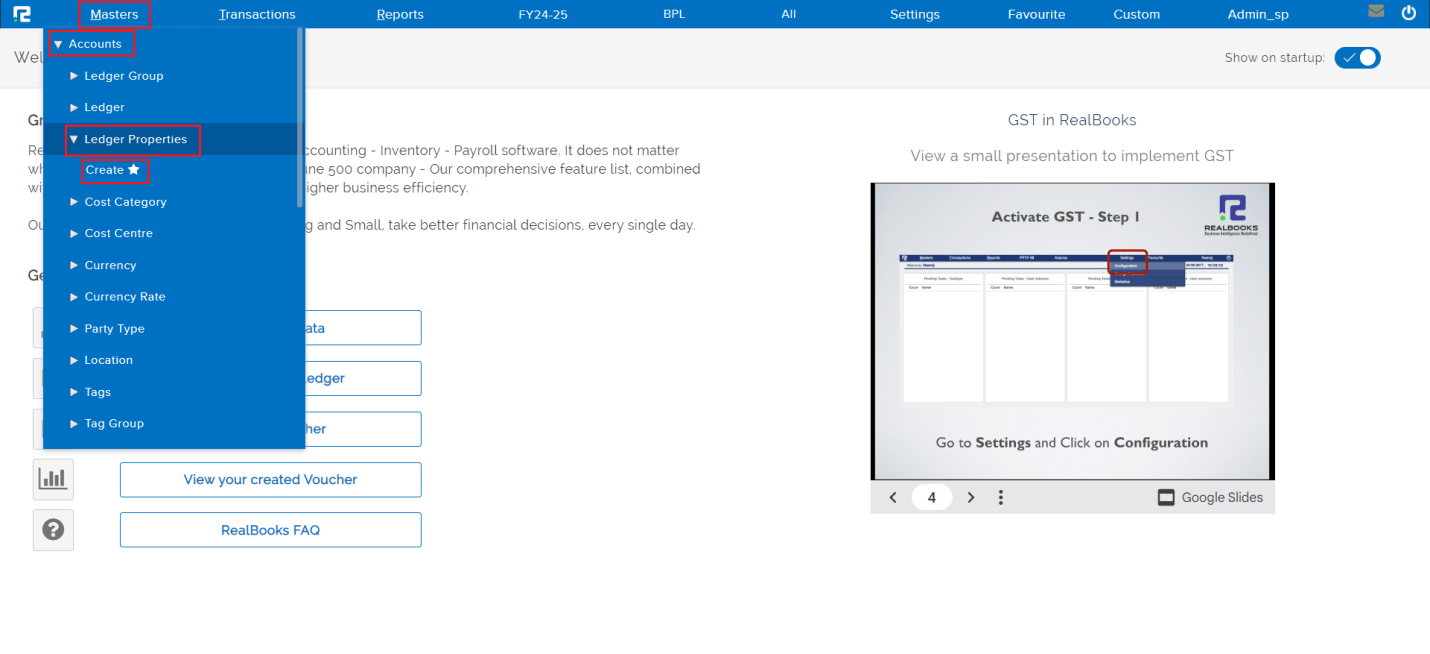
The Ledger Properties section in RealBooks allows users to create, manage, and customize ledger accounts efficiently. This guide will walk you through the process of creating a ledger and highlight the benefits of utilizing this feature.
How to Create Ledger Properties
Step 1: Go to Masters => Accounts => Ledger Properties => Create

Step 2: Fill in the following information after selecting the Create option

Step 3: Choose the appropriate ledger group from the drop-down list. This is a mandatory field, indicated by the asterisk (*).
Note: Ledger Group Options are available as per your Chart of Accounts in the books.
Step 4: After selecting the ledger group, click on the “GO” button to proceed.
How does it Work:

1. Key: In the “Key” field, input the required key associated with the ledger property. This is an important identifier for the ledger entry.
2. Mandatory:
a. Use the toggle switch next to “Mandatory” to specify whether the key is mandatory.
b. Toggle to the right (blue) to make it mandatory.
c. Toggle to the left (gray) if it is not mandatory.
3. Add Key: To add more keys click on the plus (+) button next to the “Mandatory” toggle.
4. Delete Key: To delete a key click on the Cross (x) button.
Once all fields are filled out, click on the “Save” button to save the ledger property.

