The stock journal is used for necessary stock adjustments and manufacturing process entries made by the user.
How to Create a Stock Journal
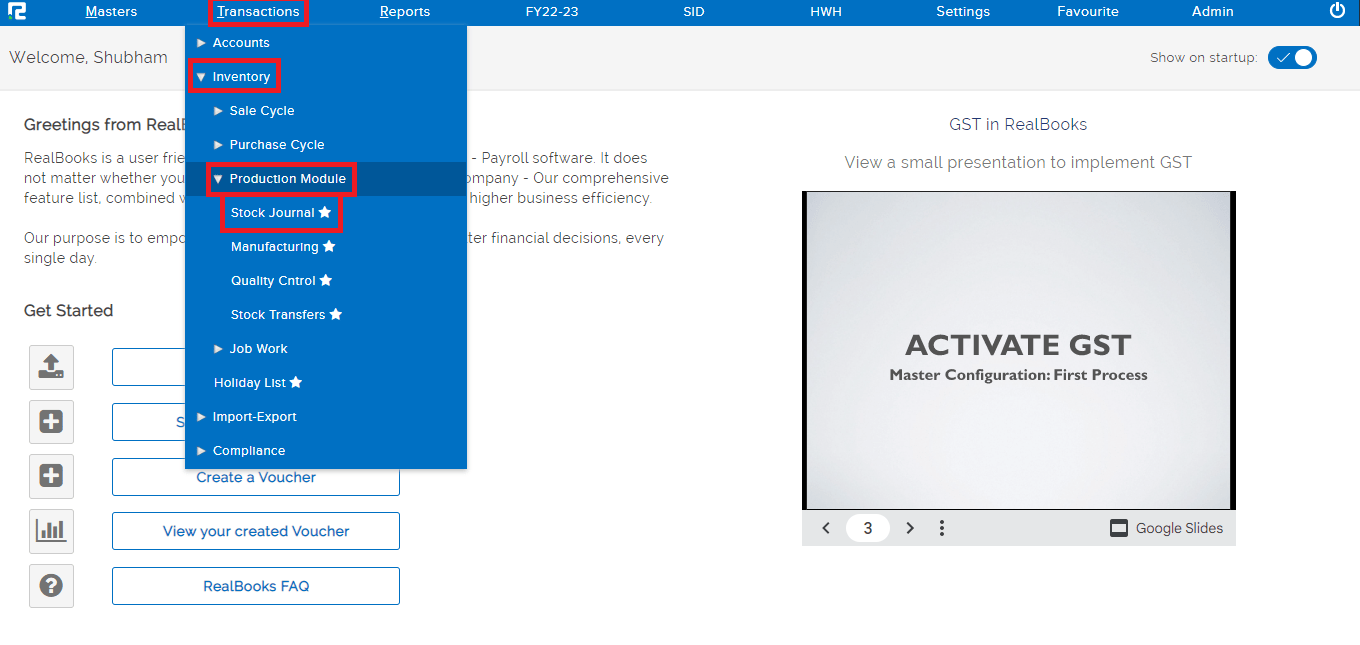
STEP 1: Go to Transaction⇒ Inventory ⇒ Production Module⇒ Stock Journal
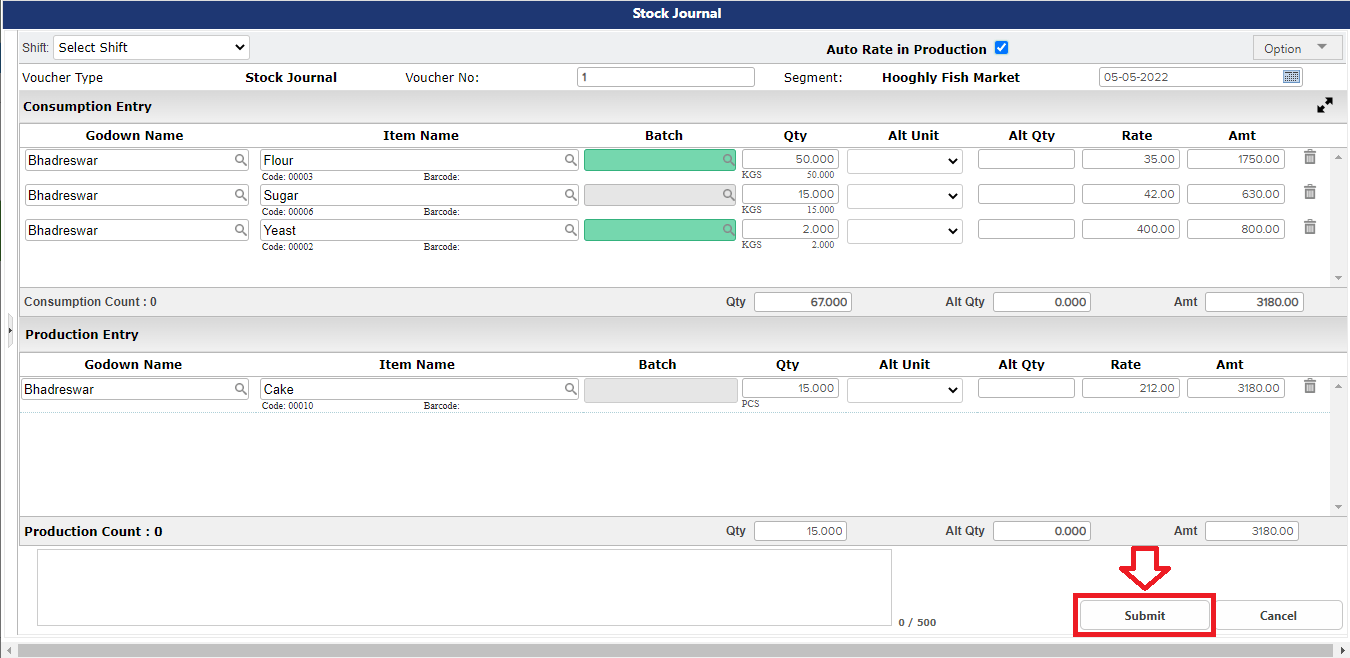
 A stock journal entry page will open-
a. Shift– Select the appropriate shift between day/evening and night.
b. Voucher Type– Select the Stock Journal from the dropdown list.
c. Voucher No– Based on the numbering pattern set in the voucher master, this number will be displayed.
Consumption Part is used for stock consumption or outflow of stock.
Under the consumption entry tab enter the following details-
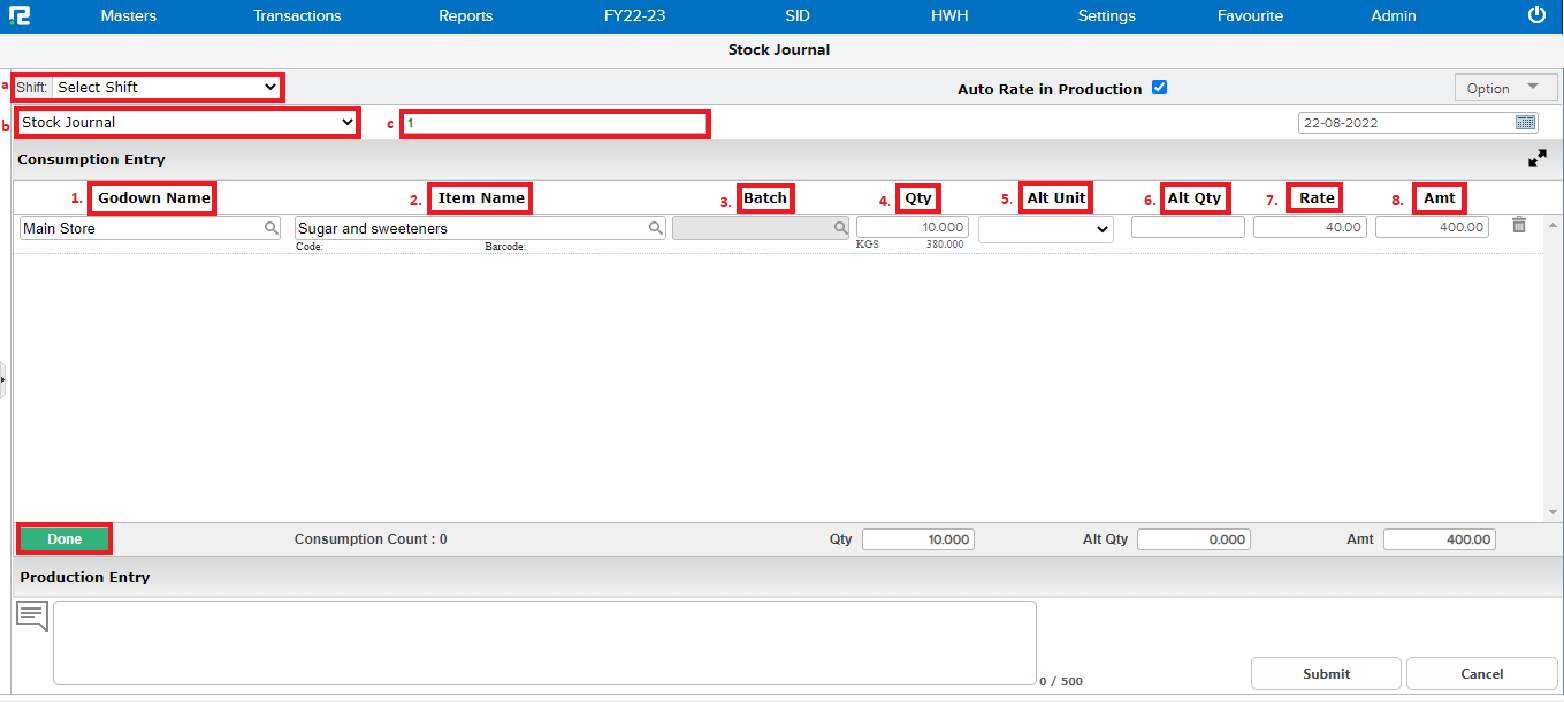
1. Godown Name– Search the name of the Godown, from which the stock outflow is to take place.
2. Item Name– Search the item name.
3. Batch– Enter the batch number of the stock. This field is applicable only where batch is enabled.
4. Qty– Enter the consumption/outflow quantity.
5. Alt unit– Alternative units of measurement, needs to be configured in item master.
6. Alt qty– To be entered only if alternative unit of measurement is enabled.
7. Rate– Enter the per unit rate of the item.
8. Amt– The amount is the value derived by multiplying Qty with Rate.
STEP 2: Click on the DONE button after you have entered all the details.
Another section of the page will open, namely, Production Entry, this part is used to capture stock inflow.
Fill in the following details-
1. Godown Name– Search the name of the godown, from which the stock inflow is to take place.
2. Item Name– Search the item name.
3. Batch– Enter the batch number of the stock. This field is applicable only where the batch is enabled.
4. Qty– Enter the production/inflow quantity.
5. Alt unit– Alternative units of measurement, needs to be configured in the item master.
6. Alt qty– To be entered only if an alternative unit of measurement is enabled.
7. Rate– Enter the per unit rate of the item.
8. Amt– The amount is the value derived by multiplying Qty with Rate.
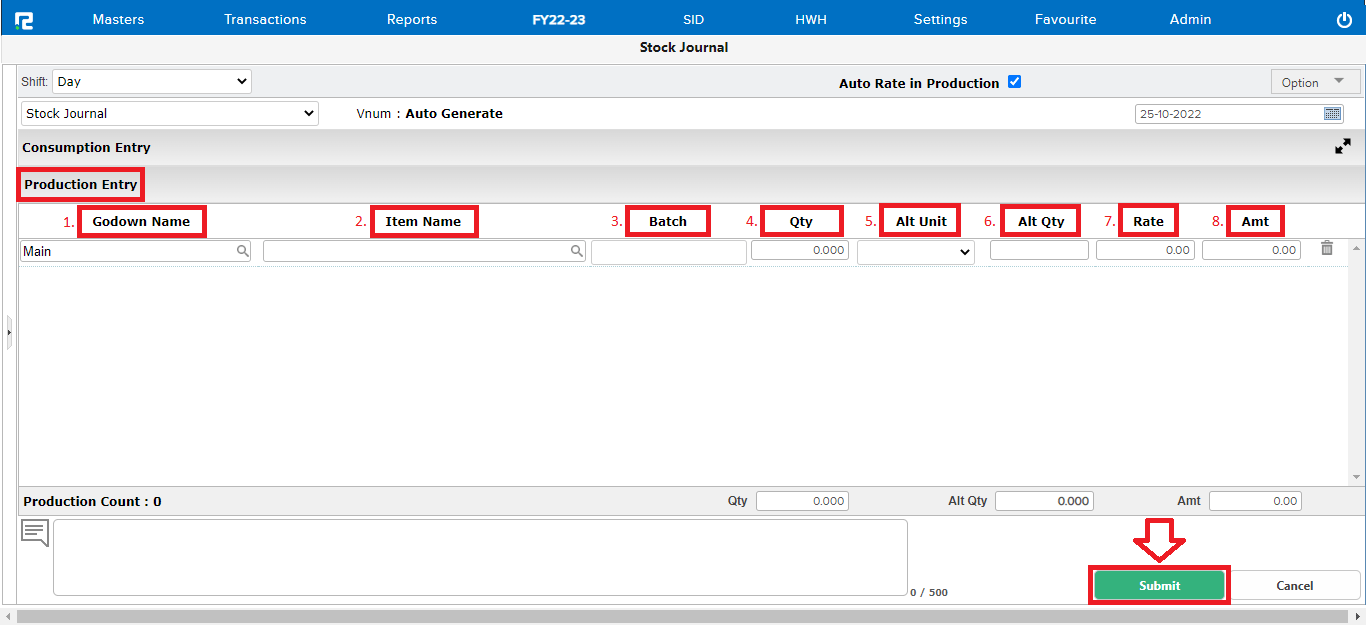
STEP 3: Click on the “SUBMIT” button, and the entry will be saved successfully.
Note: a) If Auto Rate in Production is enabled, then the production value will be considered the same as the total value of the consumption part. In case, the production value needs to be manually entered, please uncheck the option.
b) It is not mandatory to enter both consumption & production together, a user can create either a consumption entry or a production entry or both together, as per their requirement.
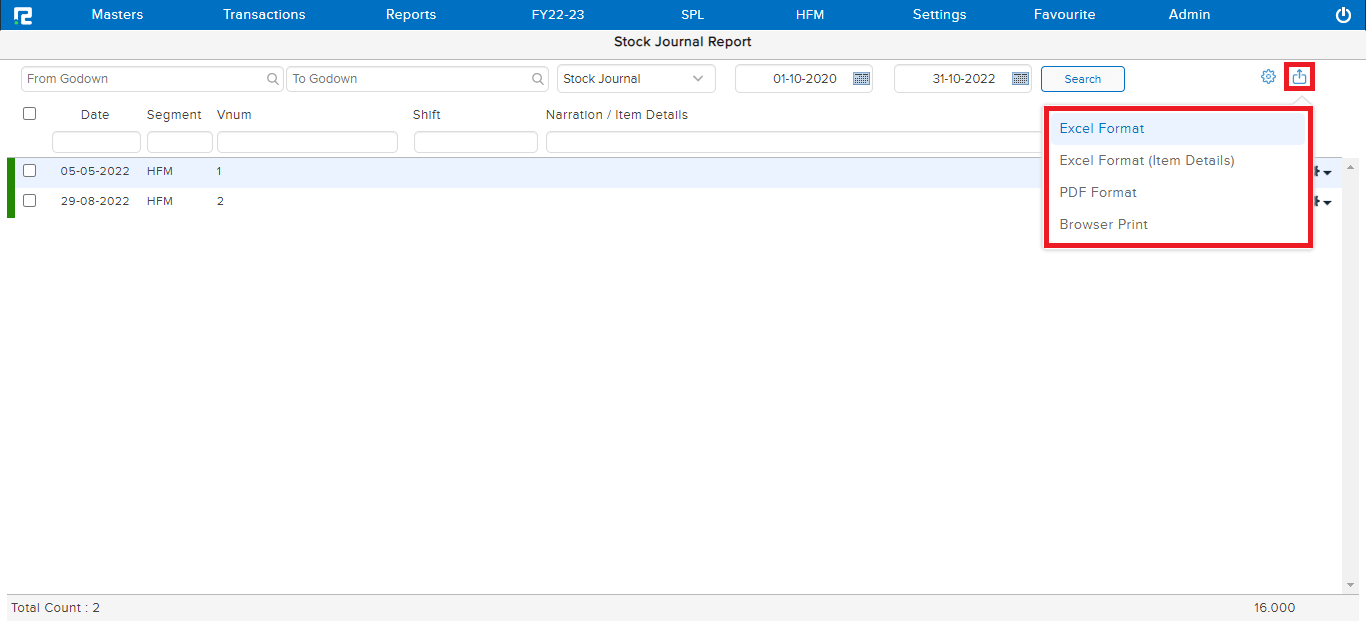
How To View Stock Journal Report
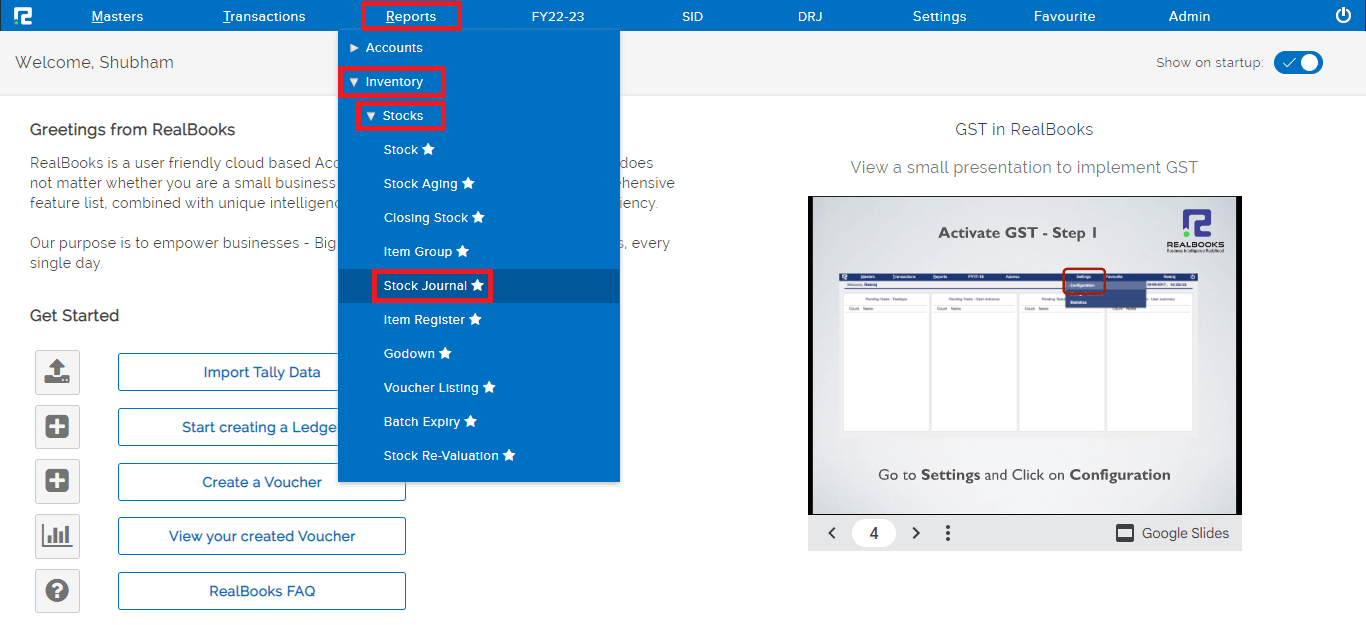
STEP 1: Go to Reports ⇒Inventory ⇒Stocks ⇒Stock Journal
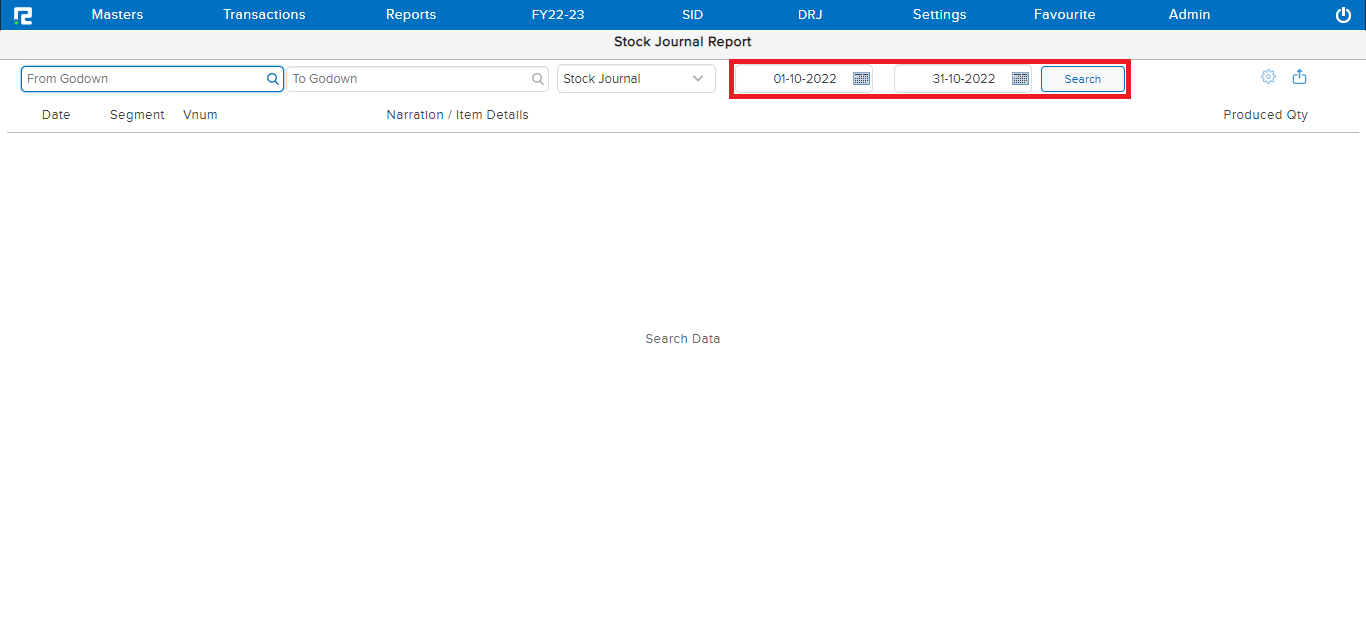
Select a date range and click on the search.
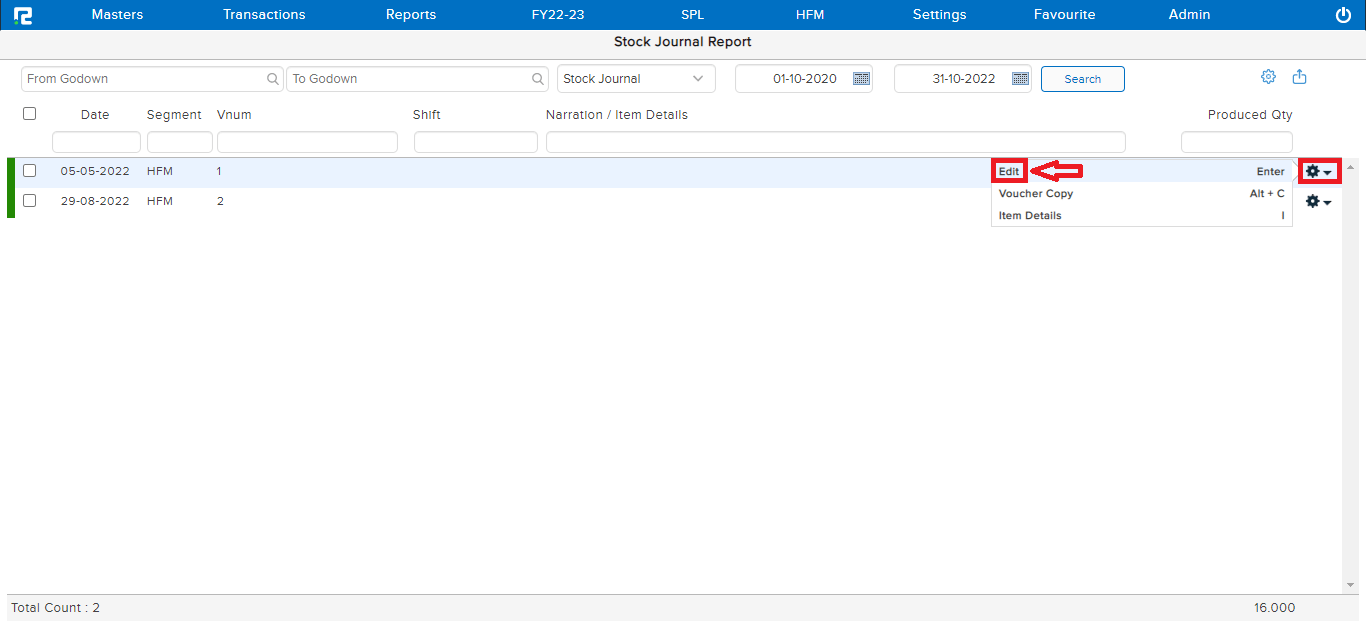
How to Edit an Entry
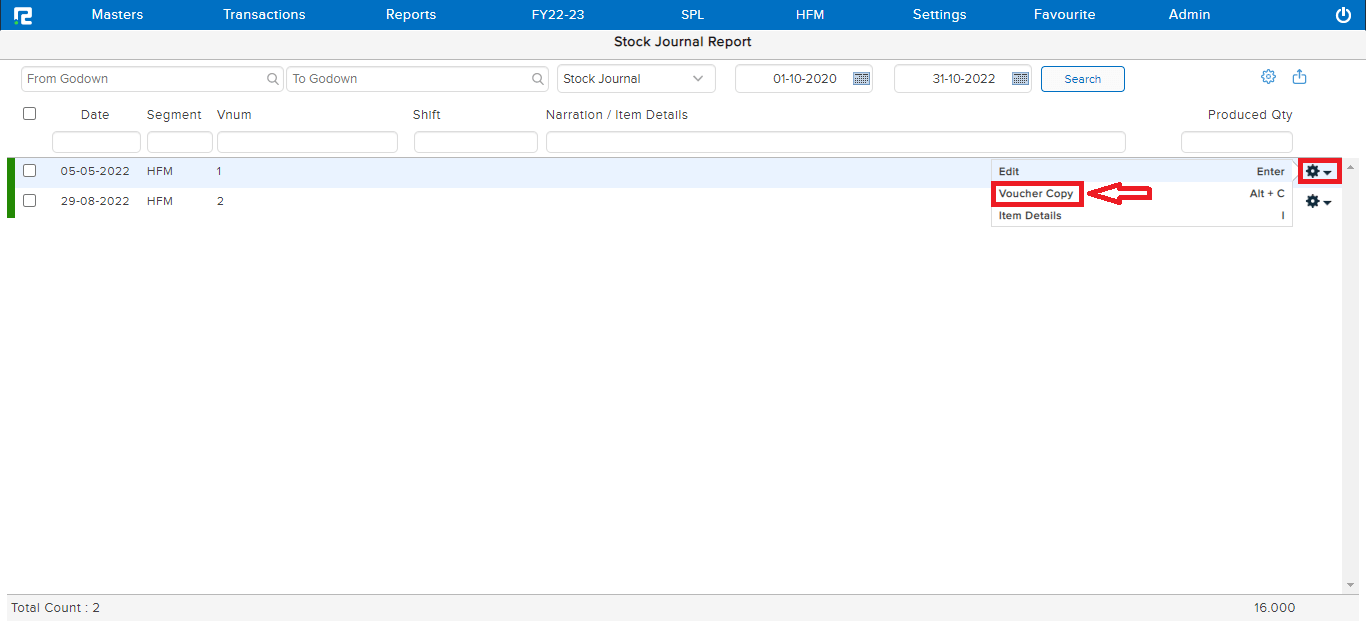
Click on the GEAR icon available on the right side of the entry and click on EDIT or press ENTER.
Once the Stock Journal Entry is modified, CLICK on “SUBMIT” to save the Entry.
How to Copy an Entry
Click on the GEAR icon available on the right side of the entry and click on VOUCHER COPY or press “ALT+C”.
For more filters, click on GEAR icon available on the top right side of the page.
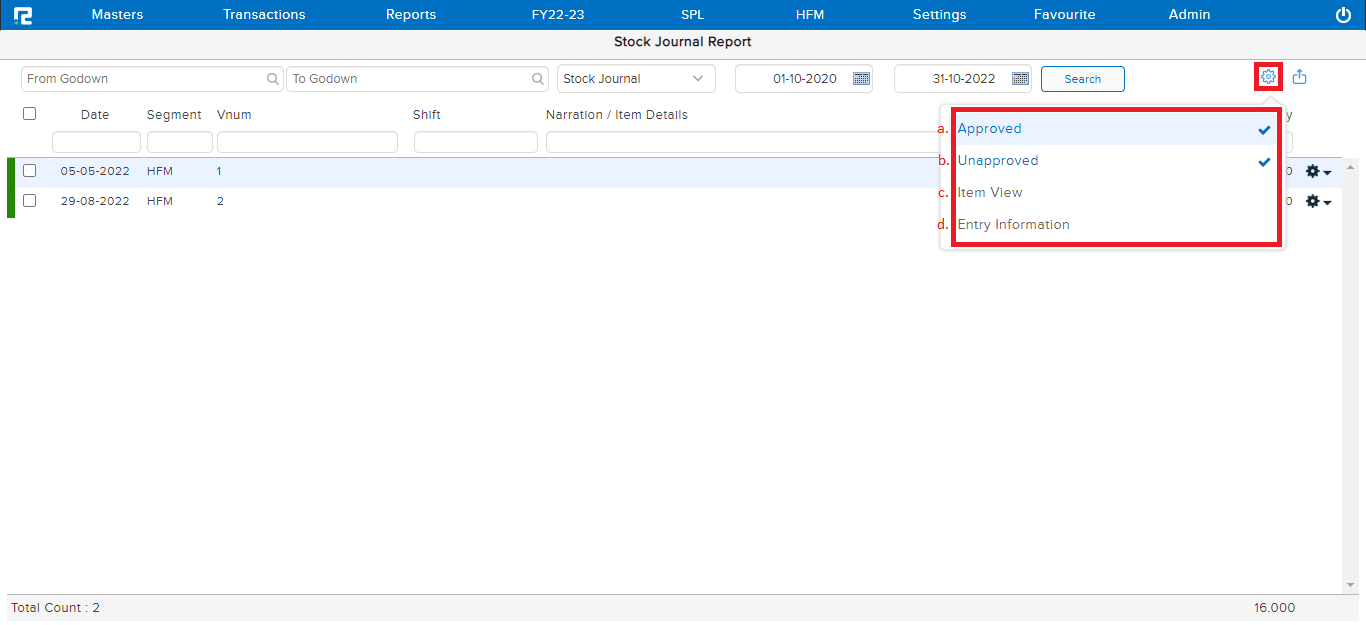
a. Approved: This option is selected by default to show the approved entries.
b. Unapproved: This option is selected by default to show the unapproved entries.
c. Item View: To view item details for the entire listing, click on Item View.
NOTE: To view specific stock journal details, click on the GEAR icon available on the right side of the entry and click on ITEM DETAILS.
d. Entry Information: To view the user information, i.e. which user has created or updated the entry, click on Entry Information.
To export reports, click on the EXPORT Icon available on the top right side of the entry and select the desired format.