Bank Reconciliation Report generally comprises balance as per books, Balance as per bank, and Open Line Items. This can be seen in the Summary Page of the bank Reconciliation Report.
To view the BRS Report
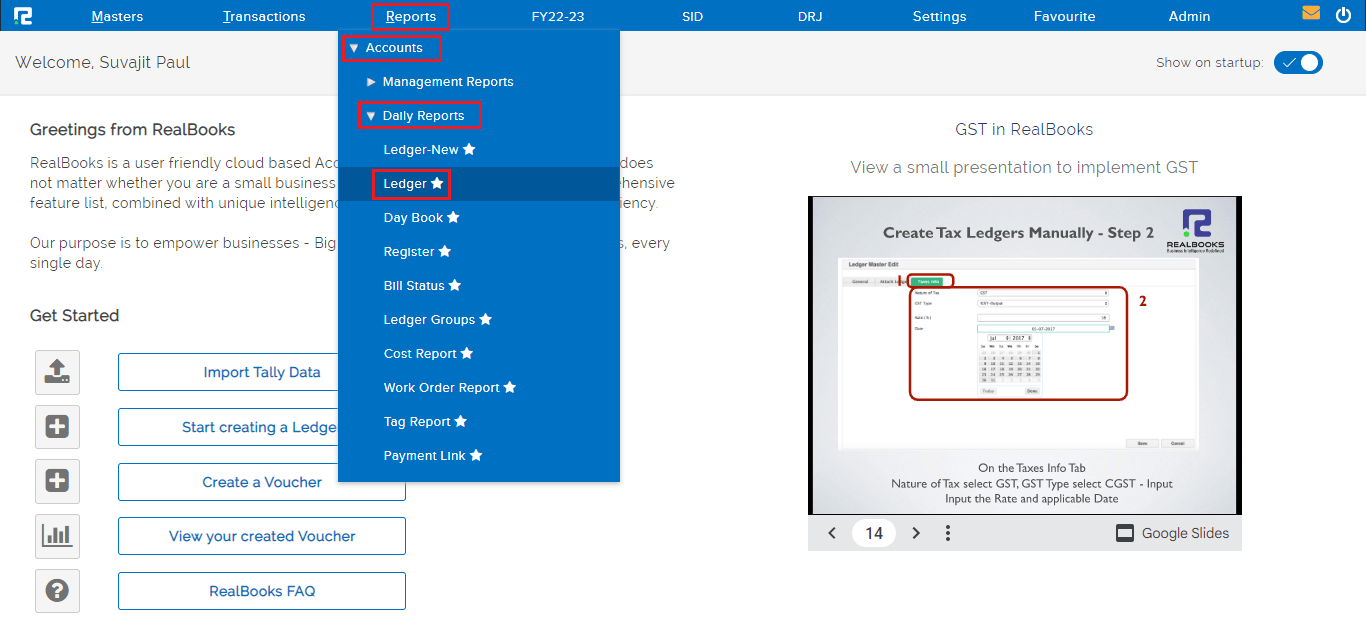
Go to Reports ⇒Accounts ⇒Daily Reports ⇒Bank Reconciliation

A bank reconciliation page will open
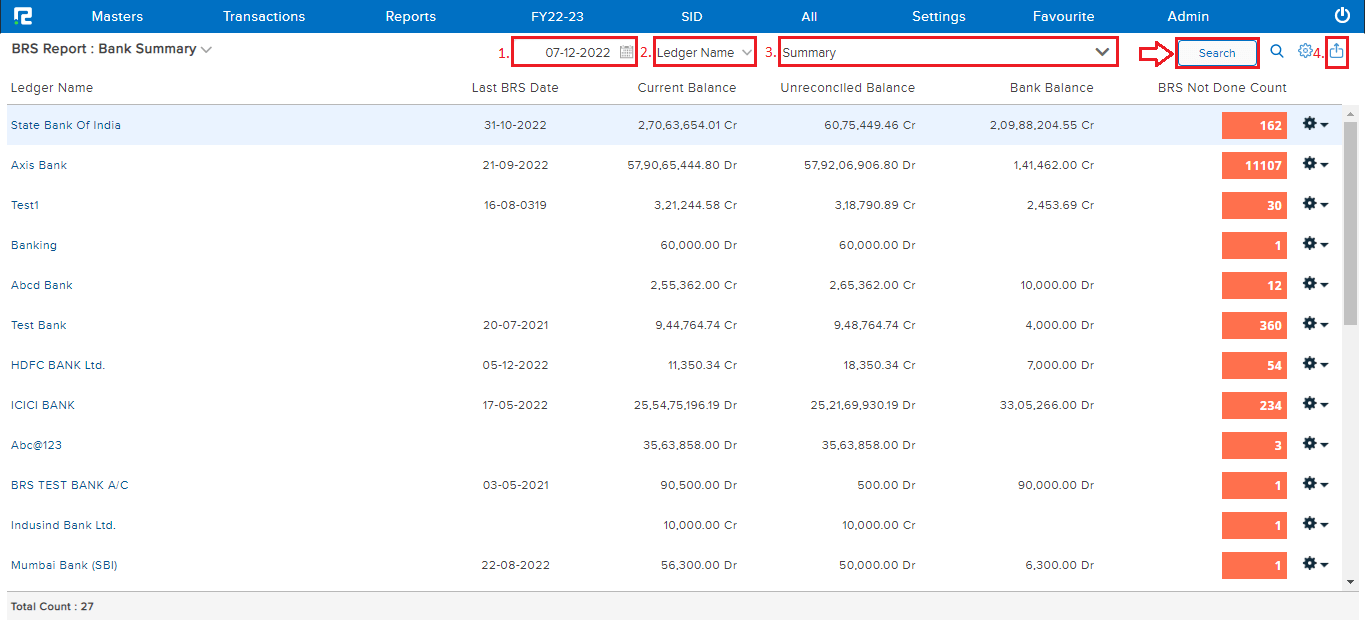
1. Date- Set a Date up till which you want to Reconcile the Entry.
2. Ledger search by – This option allows the user to decide how they want to search the ledger, by name or by the ledger code.
3. Search Ledger- By default it is selected SUMMARY, to view all bank ledger summary BRS reports, or the user can select a specific bank ledger from the dropdown list and click on SEARCH.
4. Export- To export the data select the appropriate template from the EXPORT dropdown list.
How To Reconcile an Entry
STEP 1: From the BRS report search a specific bank ledger⇒ Click on the BRS Entries

A bank reconciliation statement entry page will open
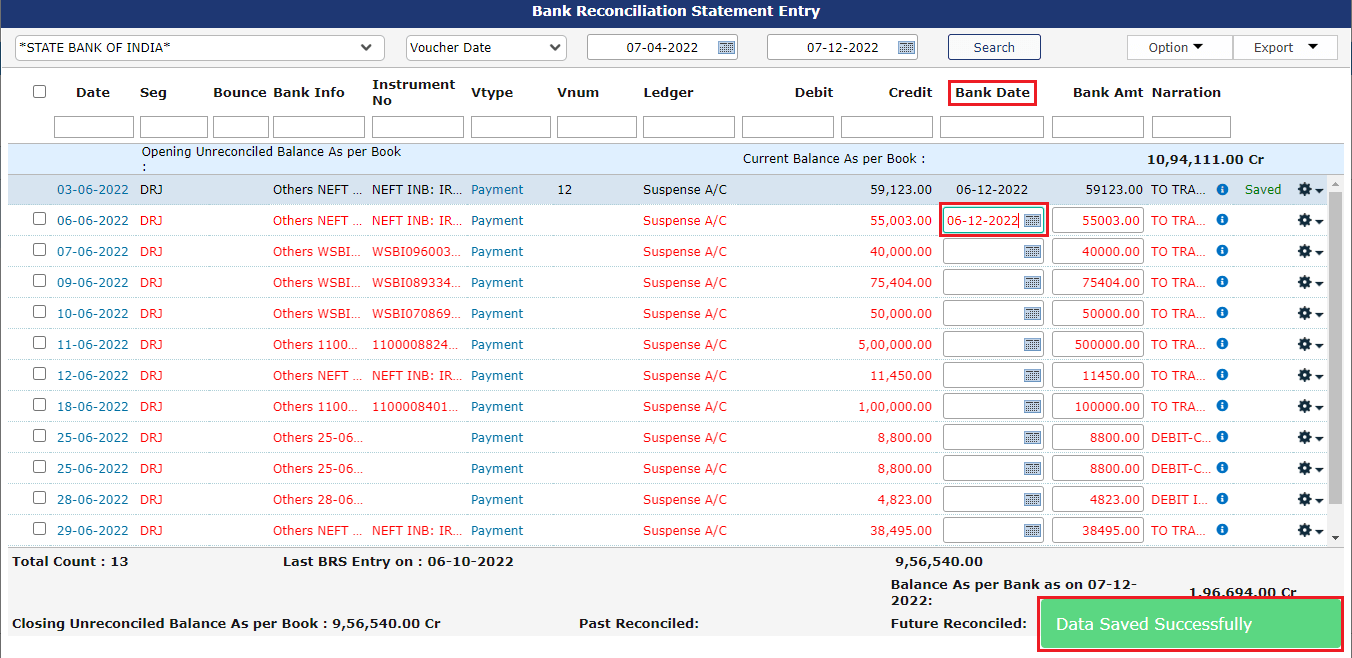
STEP 2: Set the date under the bank date field and press TAB to reconcile.
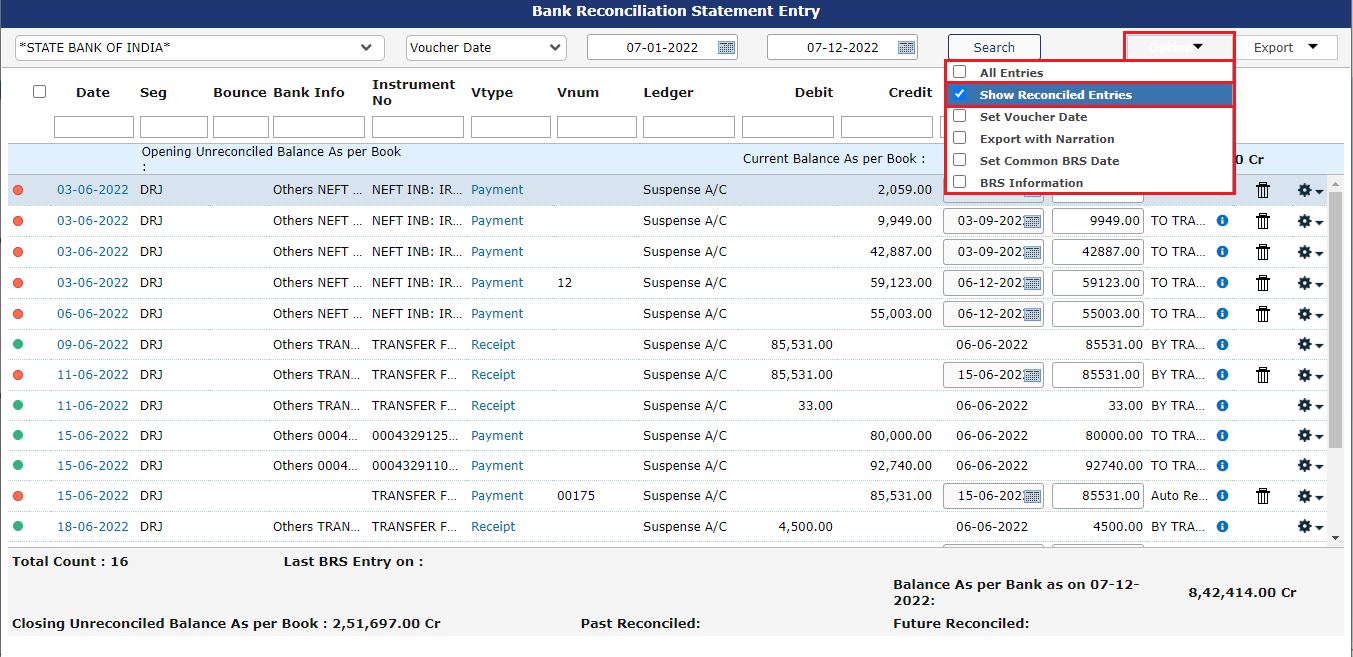
Options: Once the data is displayed on the screen, click on the options icon to explore more features. Any option enabled or disabled here affects the entire listing together.

1. All Entries: Click to view all entries whether reconciled or unreconciled.
2. Show Reconciled Entries: To view all reconciled entries for the specified time period.
3. Set voucher date: If the bank date is equal to the voucher date click on the checkboxes next to those entries and select this option.
4. Export with narration: To export BRS reports with narration via Excel or other formats.
5. Set common BRS date: To reconcile multiple entries on a common date click on the checkboxes next to those entries and select this option, then enter the date and confirm.
6. BRS information: To view the BRS report with more information select this option.
How To Unreconcile an Entry
STEP 1: click on the option available on the top right of the screen⇒ Select Show reconciled entries
All the reconciled entries are displayed here.
STEP 2: Click on the dustbin icon available on the right side of entries to unreconciled the entries.
![]()
Note: The entry won’t be deleted from Ledger, it will only be Unreconciled as shown in.
How To Auto-Post a Cheque Bounce Entry
In the Bank Reconciliation Statement Entry page against each receipt entry, a checkbox appears under the bounce column.
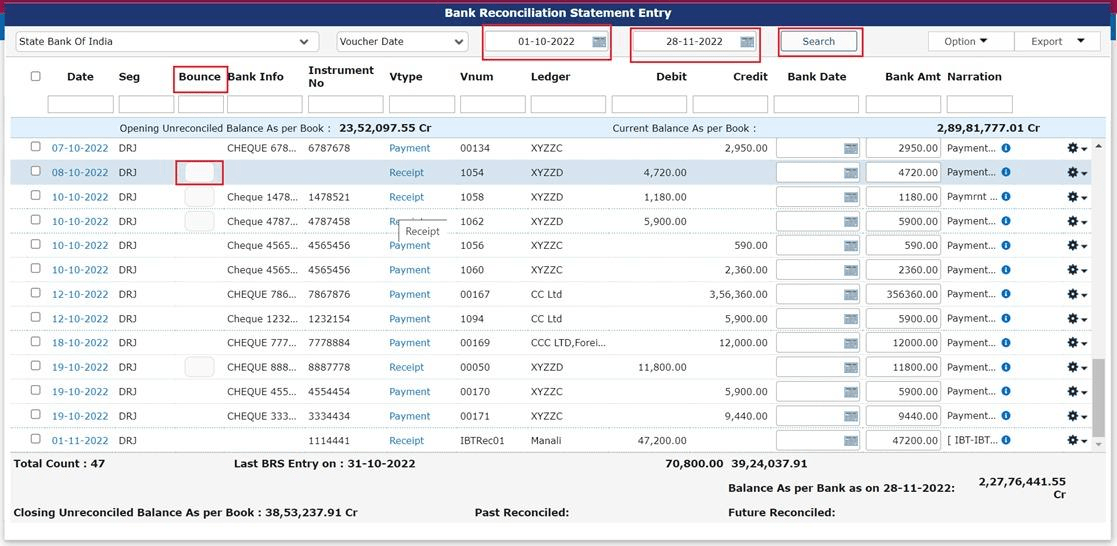
Click on the checkbox against the receipt that needs to be marked as a bounce.
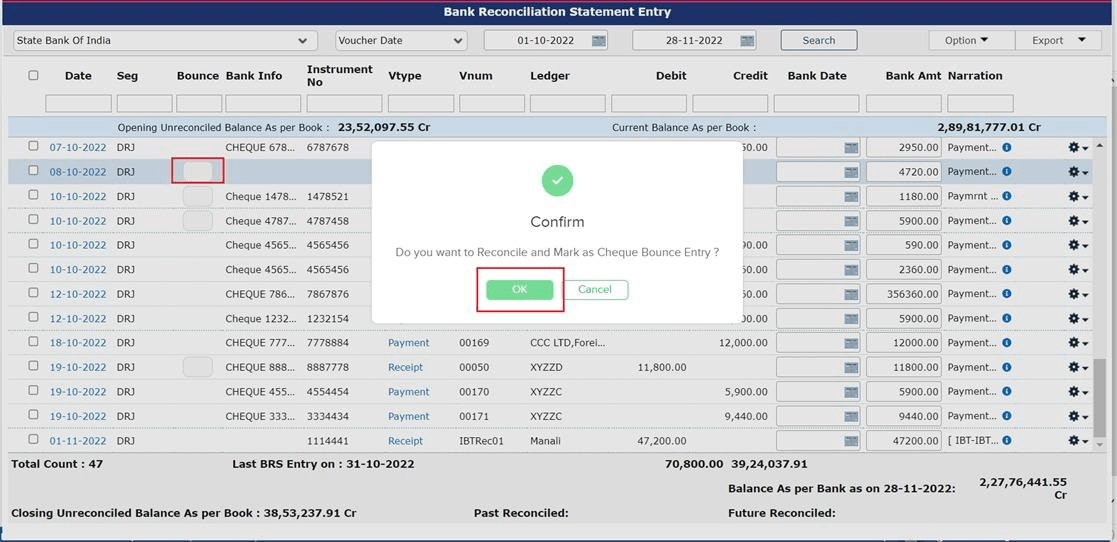
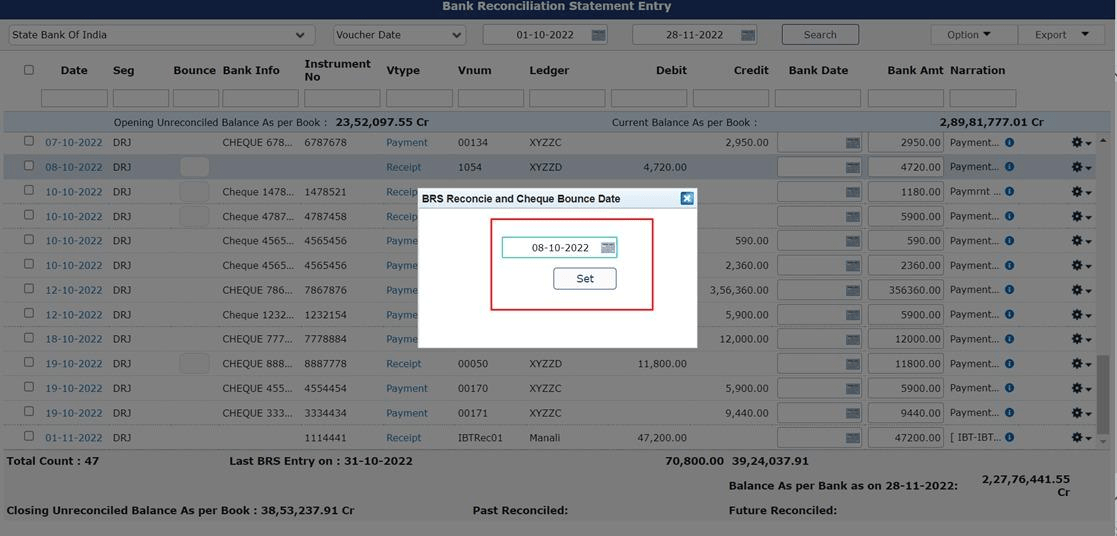
A popup will appear asking for a confirmation for auto-posting the bounce entry, Click on ok, insert the date, and click on set.
The bounce entry will be auto-posted to the ledger on the mentioned date.
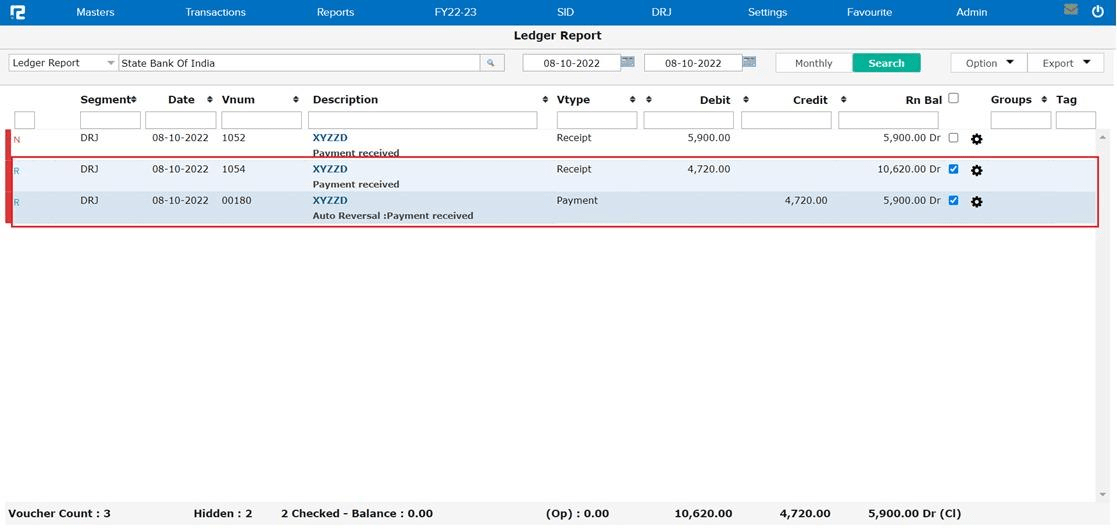
The BRS date will be inserted for both the receipt and reversed entry.
How To Identify Whether an Entry Is Reconciled or Not
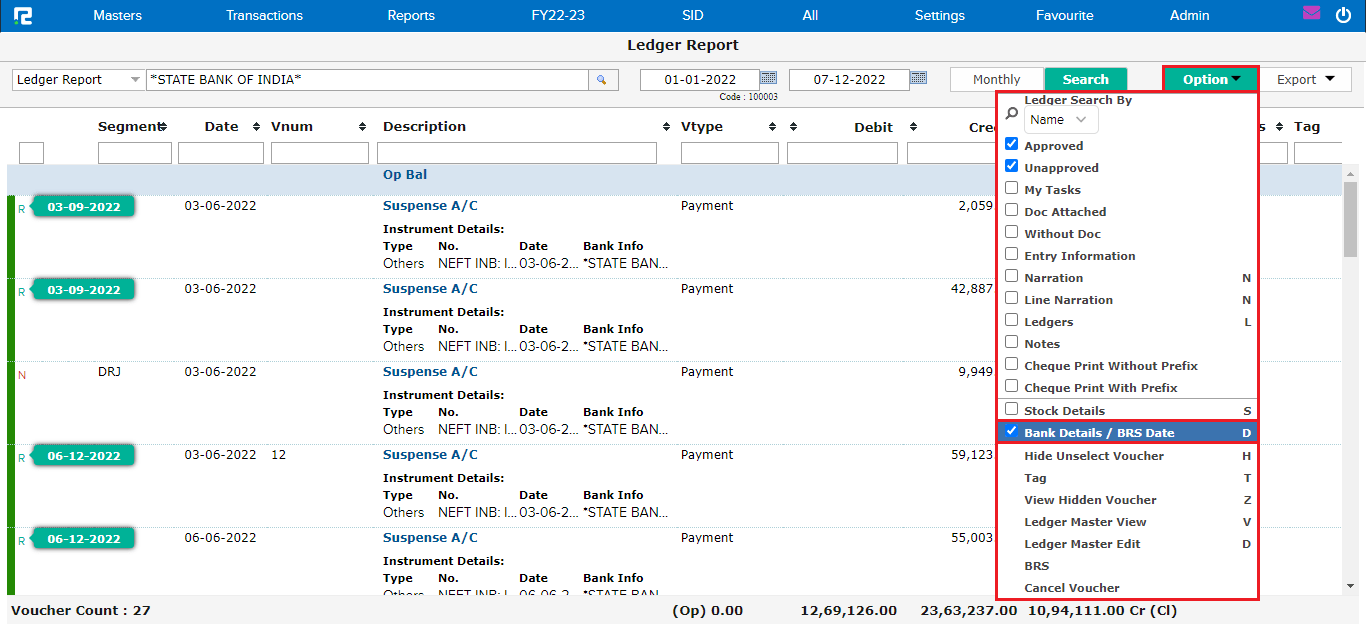
STEP 1: Go to Reports⇒ Accounts⇒ Daily Reports⇒ Ledger
STEP 2: Search the bank ledger in the ledger report.
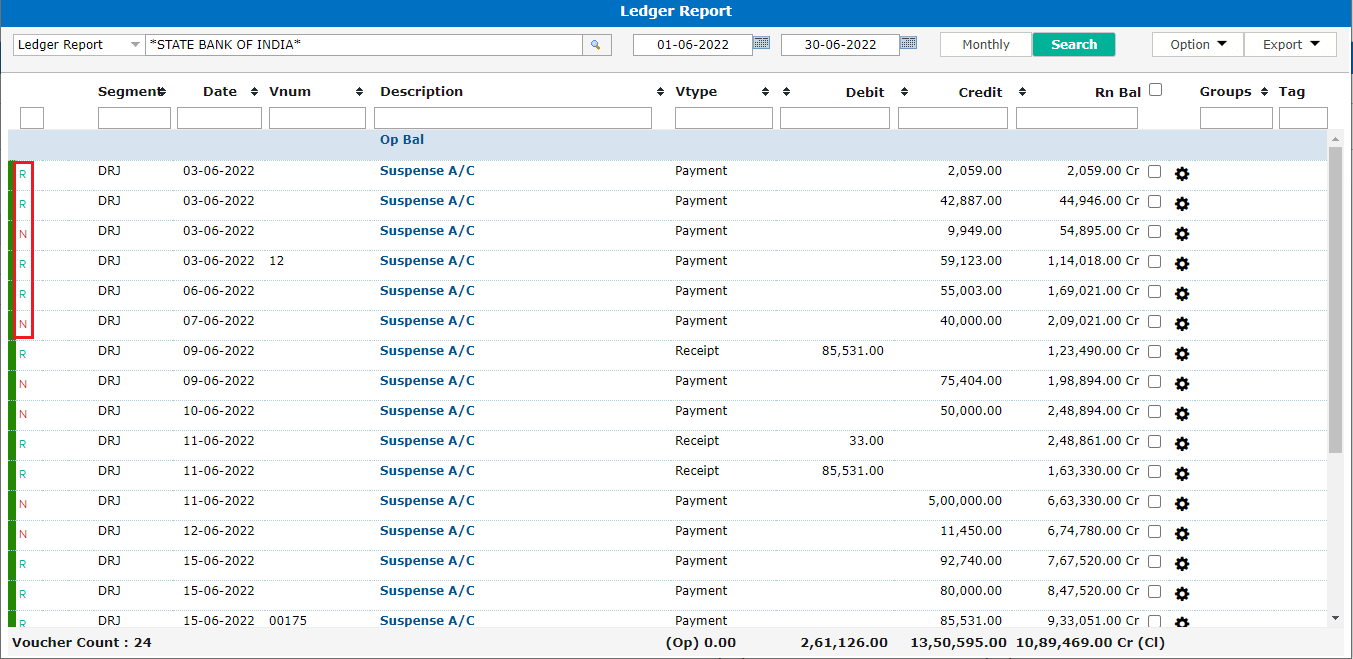
Users can identify the entries by the ‘R’ and ‘N’ signs. ‘R’ stands for Reconciled Entry and ‘N’ stands for Non-Reconciled Entry.
To view the bank date for the reconciled entries, Go to options then click on “Bank Details/BRS Date” or press D.