The voucher listing is an Inventory Day Book in which only the inventory-related transactions, both financial and non-financial, are displayed as and when they occur.
To View the Voucher Listing Report
Go to Reports⇒ Inventory⇒ Stocks⇒ Voucher Listing
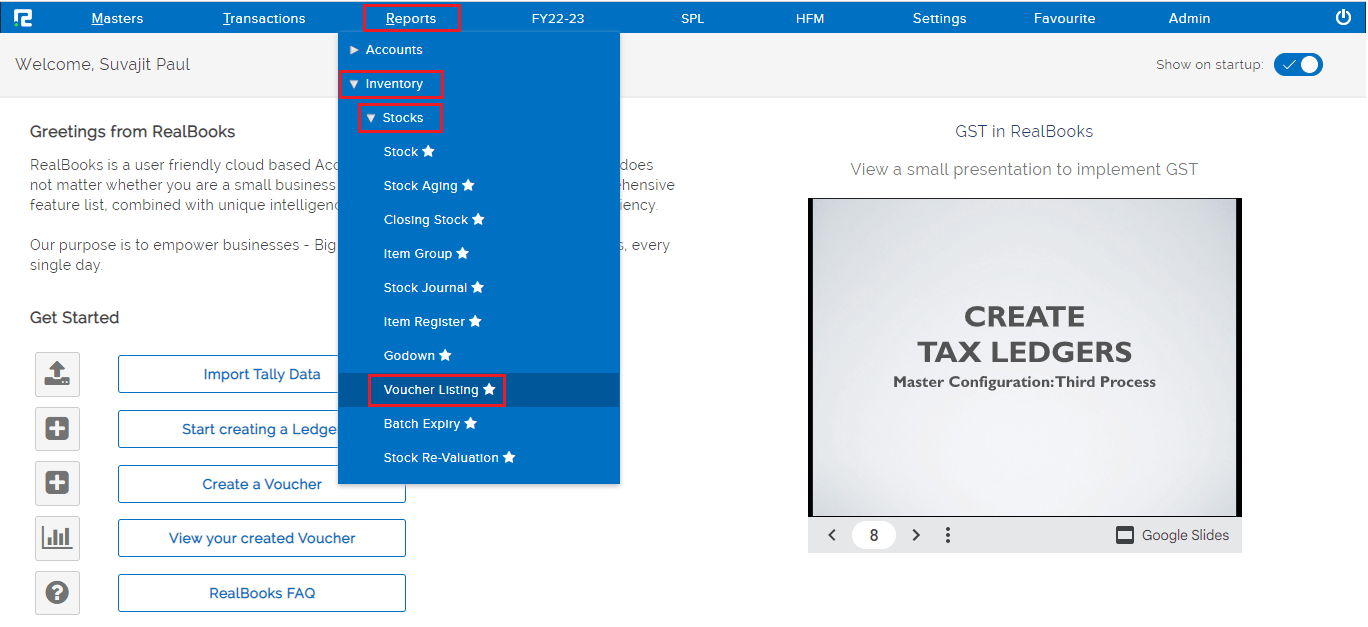
An Inventory Day Book report page will open
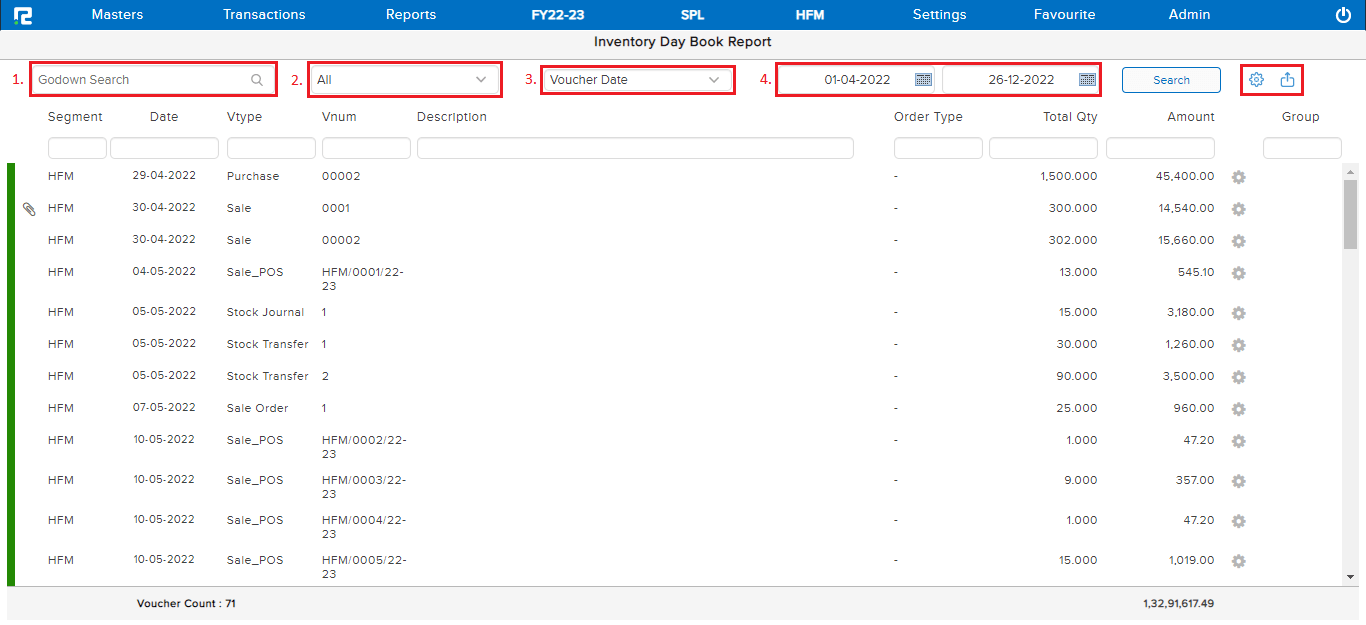
1. Godown Search– This box helps to filter out data specifically of anyone godown or all the data can be searched at once by selecting ALL.
2. Voucher Type– Select the voucher types from the drop-down list displayed.
3. Date modification– Select the required option from the date filter. By default, it is set as a voucher date.
a. Voucher date – To search data based on the voucher date, select the voucher date option.
b. Date of creation – To search data based on the date on which the transaction has been entered into the system.
c. Date of modification – To search data based on the date on which the entry has been altered or modified in the system.
4. From date to date– Set the date range for which the data needs to be searched.
Click on the Search button.
The data for the specified date range will be displayed.
Options – To look into more details for the entire listings together, click on the option, then mark the appropriate option from the drop-down list.

a. User Information – To identify the user ID from which the entry has been created or modified along with the date and time.
Note: The modification details shown are the latest ones.
b. Approved – To filter out the data that have been approved.
c. Unapproved – To filter out those data that have not been approved.
d. Ledger – To view the ledgers associated with each entry enable this option.
e. Item View– To view the item details of each entry, enable this option.
Export icon – To export the data select the appropriate template from the EXPORT drop-down list.
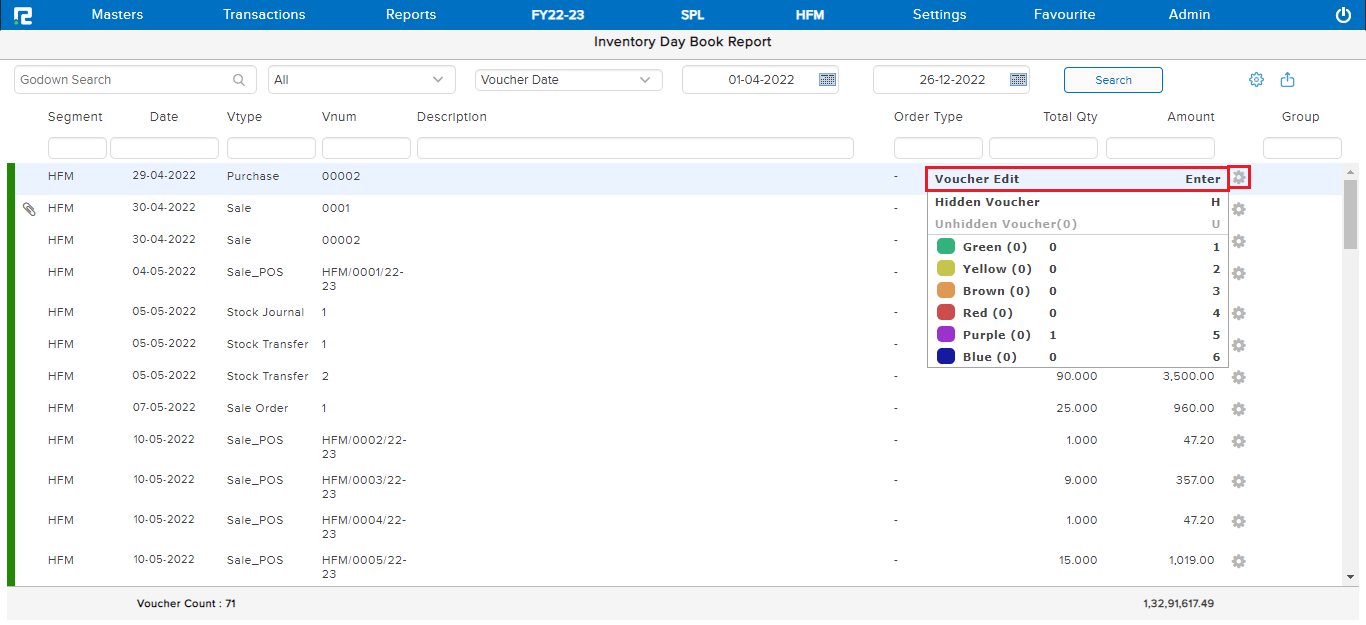
To explore more about the transaction menu, click on the settings icon beside the transaction row
A drop-down list appears-
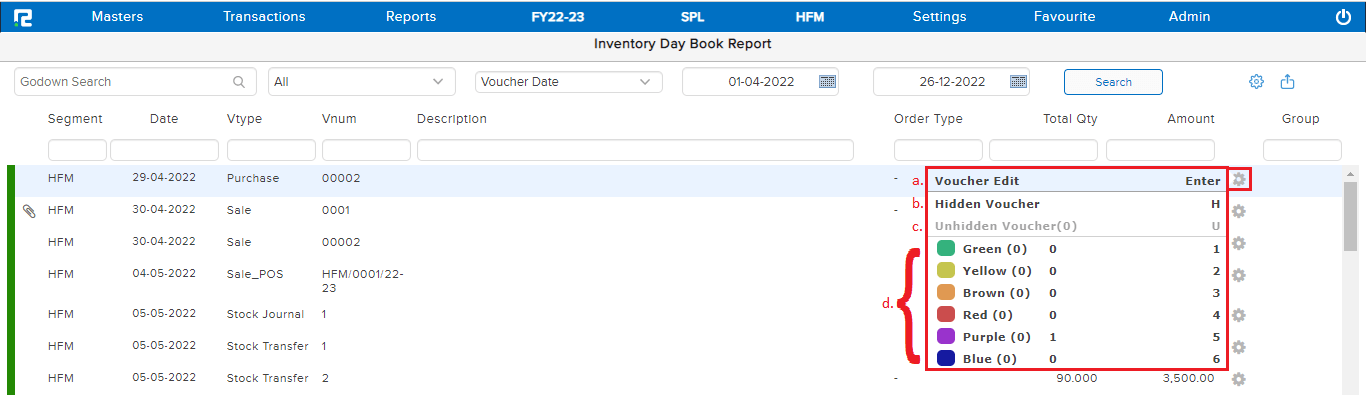
a. Voucher Edit – To edit an entry click on the voucher edit or press enter.
b. Hidden Voucher – To hide a specific voucher click on this option or press H.
c. Unhidden Voucher – To unhide the hidden vouchers click on this option or press U.
d. Colour Mark – To colour mark, the transactions for future reference use the numbers mentioned against each colour.
The transactions can also be filtered using the colour names.
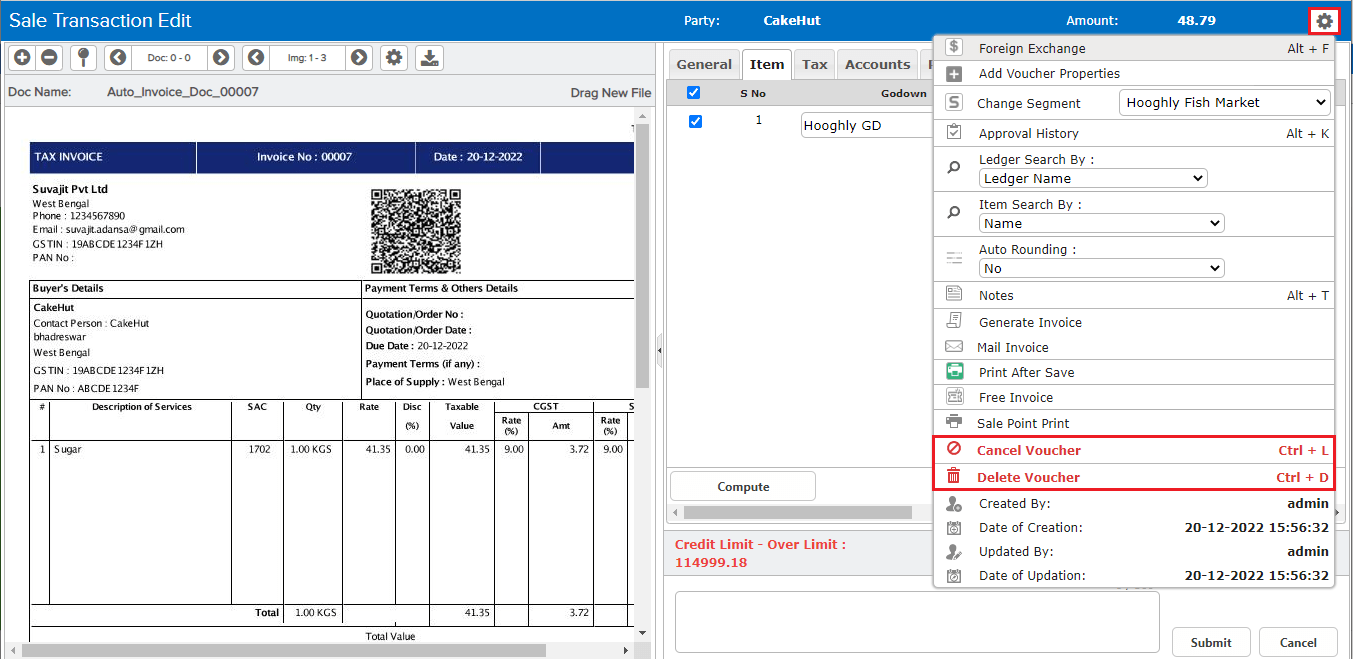
How To Edit, Cancel and Delete an Entry
Edit– To edit an entry, click on the settings icon on the right-hand side of the entry & click on the Voucher edit option, or alternatively, press Enter on the keyboard.
Do the necessary changes. Click on Submit to Save.
CANCEL/DELETE– to cancel/delete an entry, open the entry in edit mode, then go to the settings icon on the right-hand side of the page. From the drop-down menu select the cancel/delete voucher as required, enter the reason for cancellation/deletion, and then click on cancel/delete.