The key information about an inventory item is contained in the item master record. This information could contain the item’s description, the measurement unit, the quantity ordered, and other specifics.
How to Create an Item
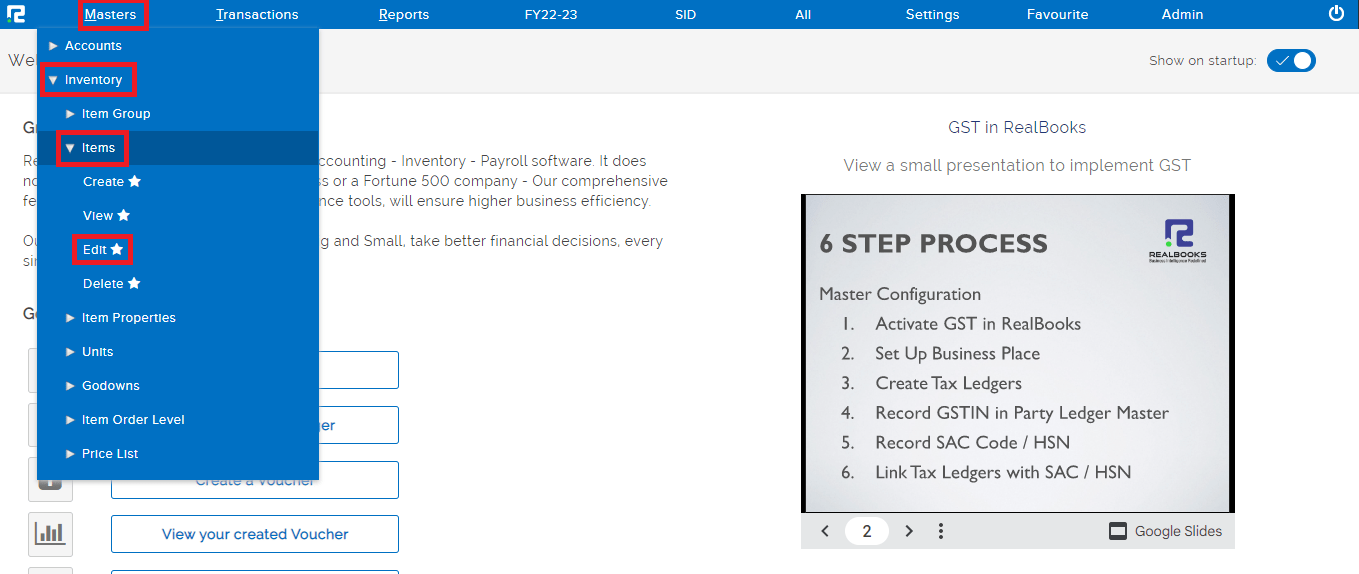
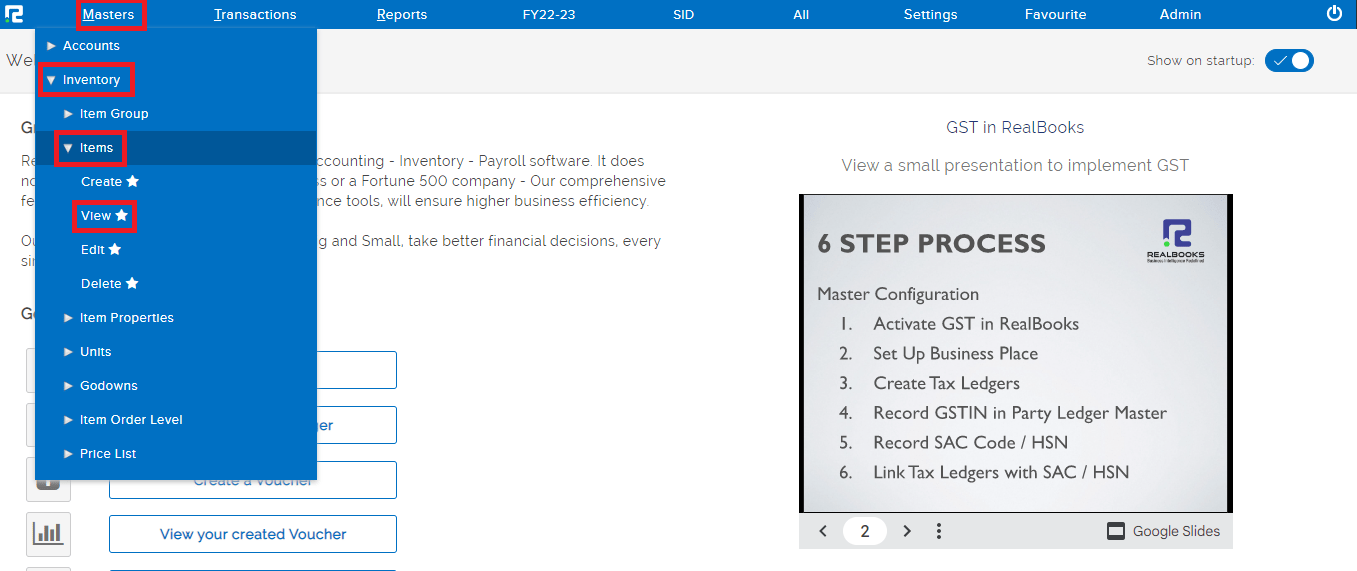
STEP 1: Go to Masters ⇒ Inventory ⇒ Items ⇒ Create

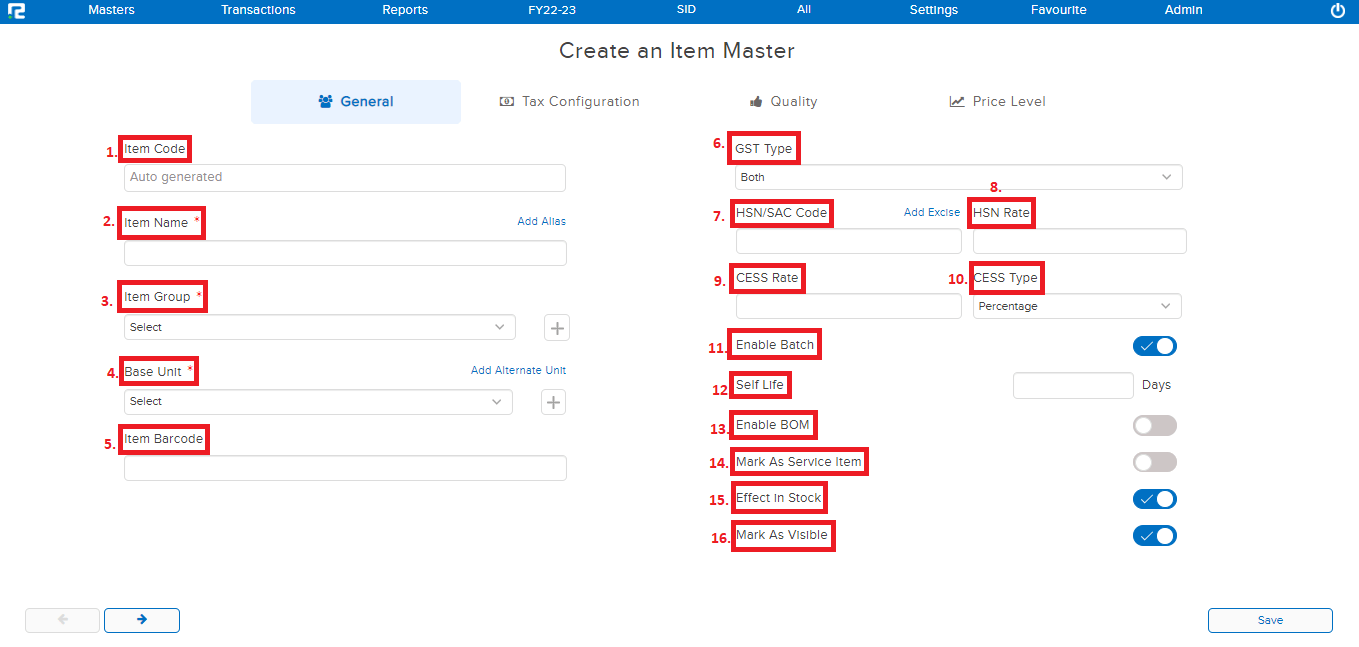
STEP 2: Fill in the following information after selecting the create option under general.
1. Item code- If applicable, the Item Code (Now the item code can be auto-generated as well).
2. Item name- Enter the name of the item.
3. Item group- Assigning item groups is mandatory to maintain a proper hierarchy. Select the item group from the dropdown list.
4. Base unit- Base Unit or UOM is the standard unit of measurement that needs to be assigned to the items to express them in quantity.
The base unit can be created either from the Unit Master screen or by clicking on the “+” icon beside the Base Unit field.
Alternative Unit – Additionally, the user can define alternative units of measurement as well, for each item.
Though the Reports are generated as per Base unit, alternative units, however, can be used for Transactional/Invoicing purposes.
5. Item barcode- This is to be entered only when the Barcode feature is in use.
6. GST type- Whether GST is to be configured for both Input & Output or not needs to select from the dropdown list
7. HSN code- Type the appropriate HSN code, if any.
8. HSN rate- Provide the appropriate GST rate.
9. CESS rate- Provide the appropriate CESS rate.
10. CESS type- Select the relevant CESS type from the dropdown list displayed.
Data provided against Points no. 6 to 10 helps in the auto-configuration of GST & Cess in the item master.
11. Batch- If this feature is enabled, then the batch will be activated for this particular item.
12. Shelf-life- Where the Batch is enabled, the shelf-life field gets visible. Enter the Shelf life in days.
13. BOM- BOM needs to be enabled in the item master, to create BOM using this item.
14. Mark as service item-If this feature is enabled, then this item will not be treated as stock-in-trade. Hence it will not have any inventory impact.
15. Effect in stock- If this feature is enabled, then this item will be treated as stock-in-trade.
16. Mark as visible- If this feature is enabled, then the item will be available for further use in transactions, and vice-versa.
If GST automatic configuration is not being used, then to configure the same manually, Click on the “TAX CONFIGURATION” tab.
STEP 4: Select the nature of the tax as per the applicability and configure the tax rates.
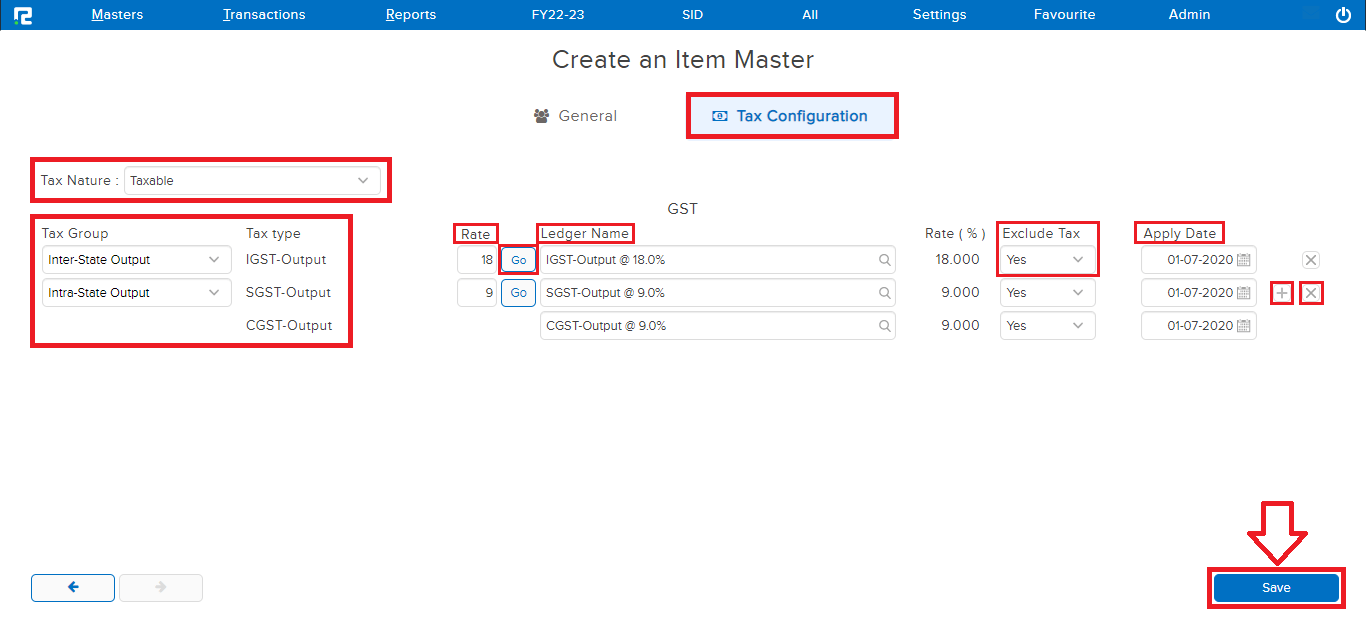
STEP 5: CLICK on GO the GST ledgers will be auto-populated, based on the rates provided.
STEP 6: EXCLUDE TAX needs to be marked as NO if the MRP/Rate of the item will include the GST, and vice-versa.
APPLY DATE is the date from which the provided rate shall be applicable on the item.
CLICK on the “+” icon to add more rows and the “x” icon to remove a row.
STEP 7: Click on the “SAVE” button the item master created will be saved successfully.
How to Edit Item
STEP 1: Go to Masters ⇒ Inventory ⇒ Items ⇒ Edit
STEP 2: Enter the name of the item you are looking for under the item name that you want to edit or type “ALL” and all of the item that you created will be displayed.
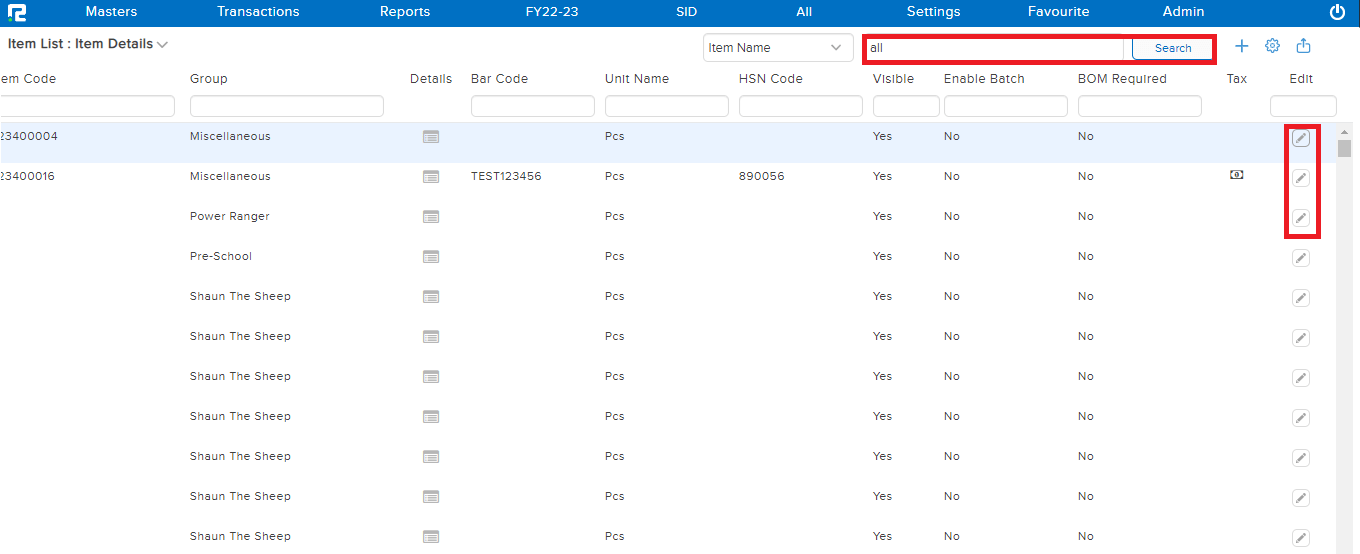
STEP 3: At the right end of each item group a “PENCIL” icon is available, click on it to make the relevant changes to a particular item.
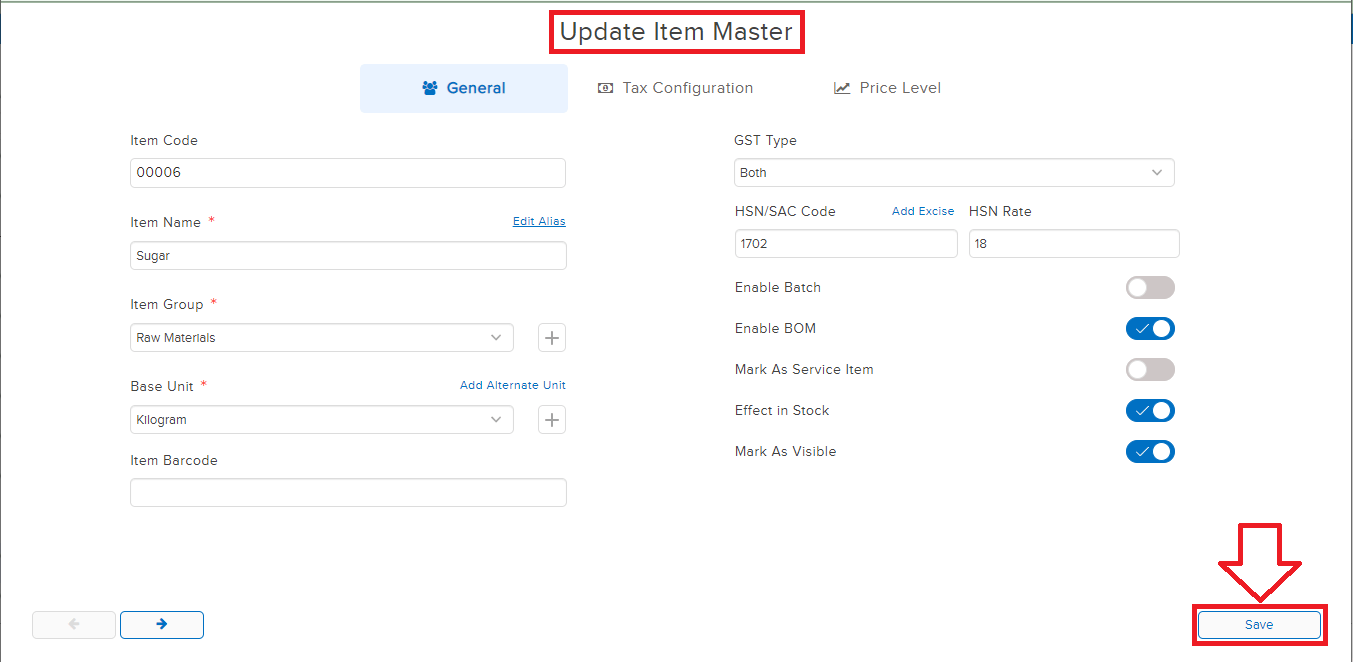
The Item Master update screen will appear, make the necessary changes. Click on “SAVE “
How to View The Item
STEP 1: Go to Masters ⇒ Inventory ⇒ Items ⇒ View
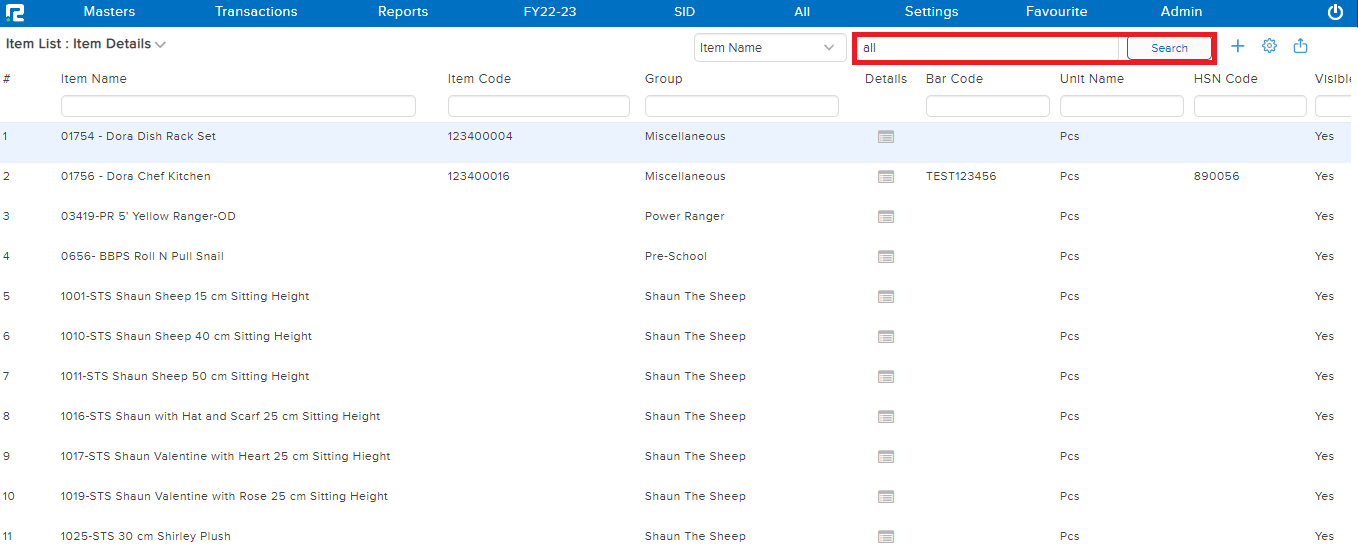
STEP 2: Enter the name of the item you are looking for under item name or
Type “All” and all the item that you have created will be displayed along with the tabs that you had enabled while creating item.
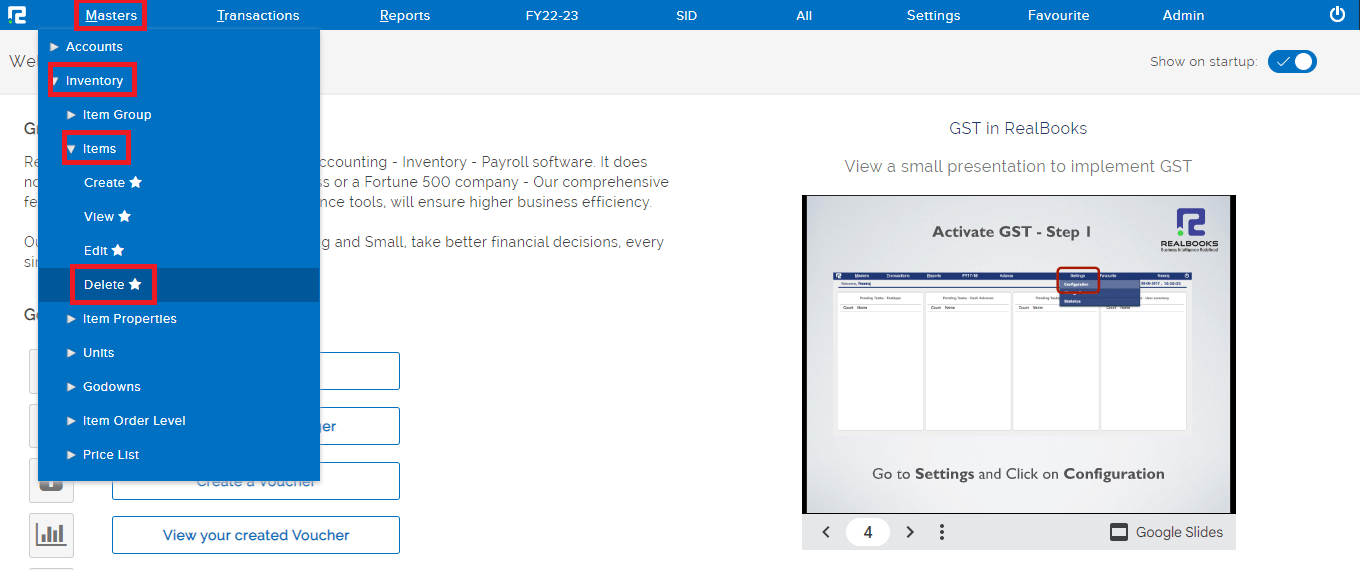
How to Delete an Item
STEP 1: Go to Masters ⇒ Inventory ⇒ Items ⇒ Delete
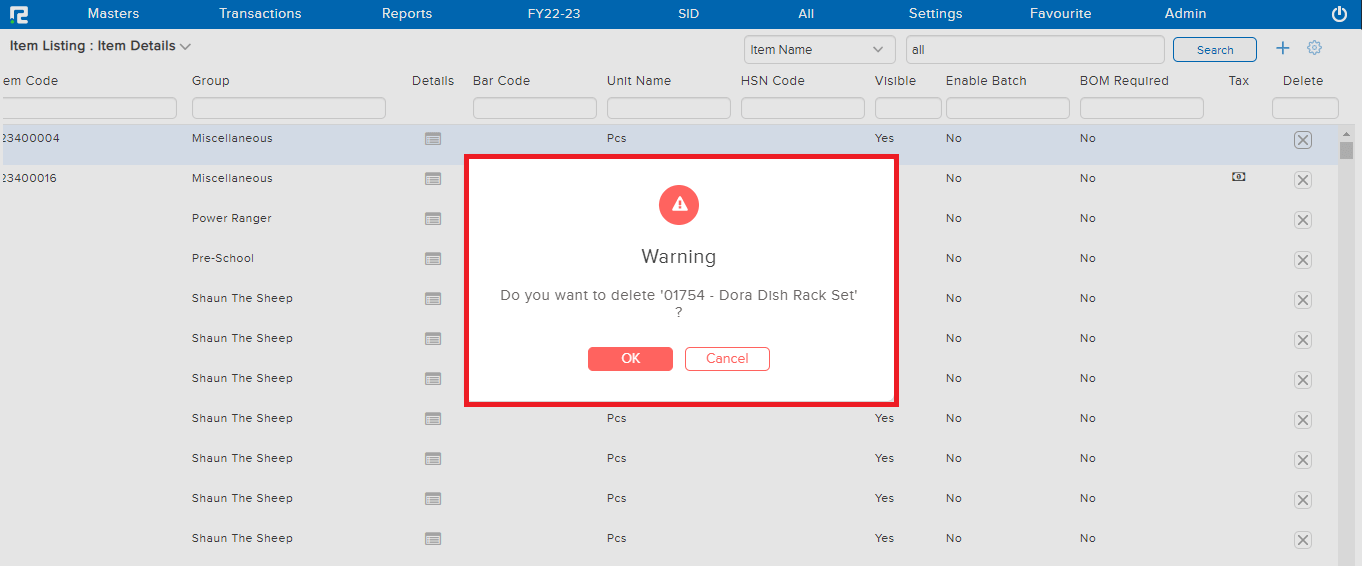
Enter the name of the item you are looking for under the item name that you want to delete or type “ALL” and all of the item that you created will be displayed.
STEP 2: At the right end of each item there is a “x” icon click on it to delete a particular item.
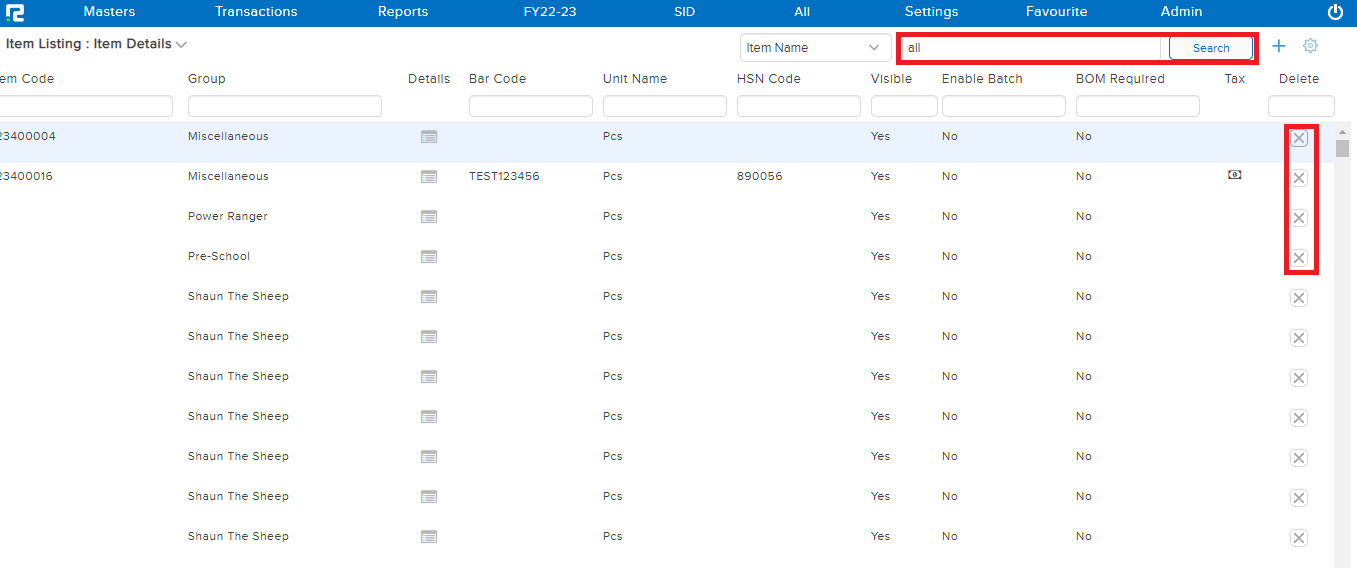
STEP 3: A confirmation box will appear, click on “OK” and the item will be deleted successfully.