Schedule your reports using the RealBooks Scheduler feature. The feature notifies you and sends you automated reports through email regularly. You can use this feature for all kinds of accounts and inventory reports.
How to Configure Scheduler
Go to Settings⇒ Configuration⇒ Features
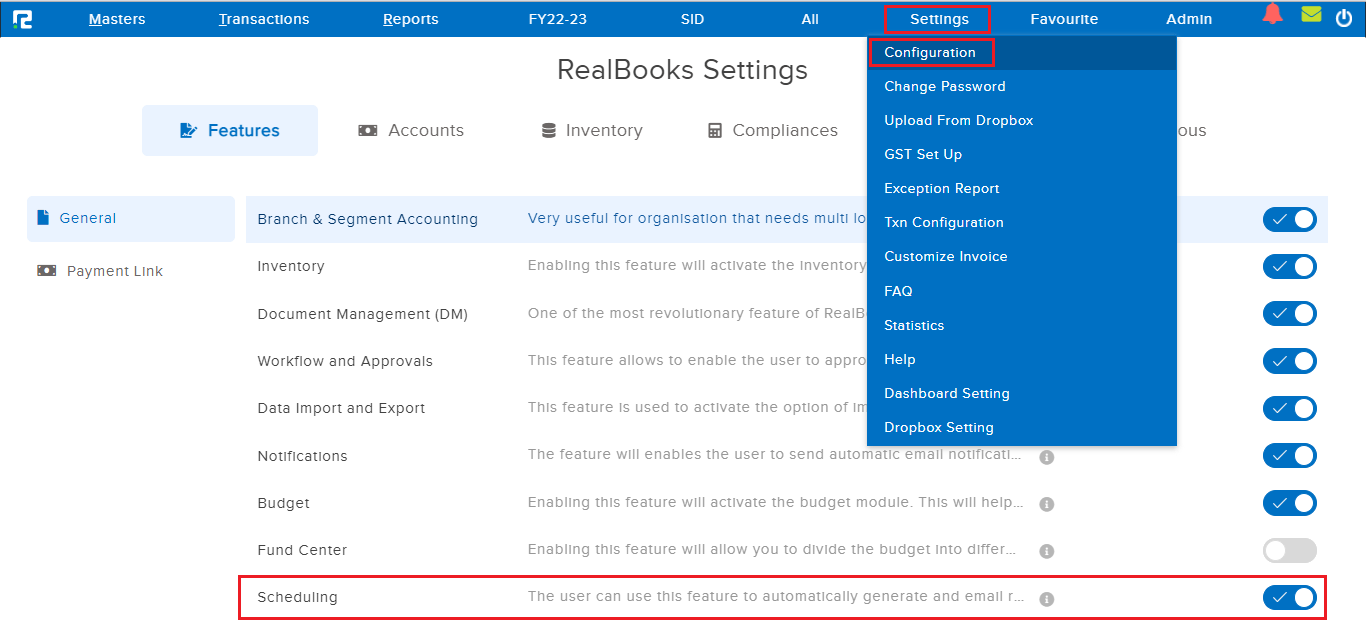
Enable the Scheduling feature.
Your Accounts Masters will now display the Schedule feature.
How to Create a Scheduler
STEP 1: Go to Masters⇒ Accounts⇒ Schedule⇒ Create
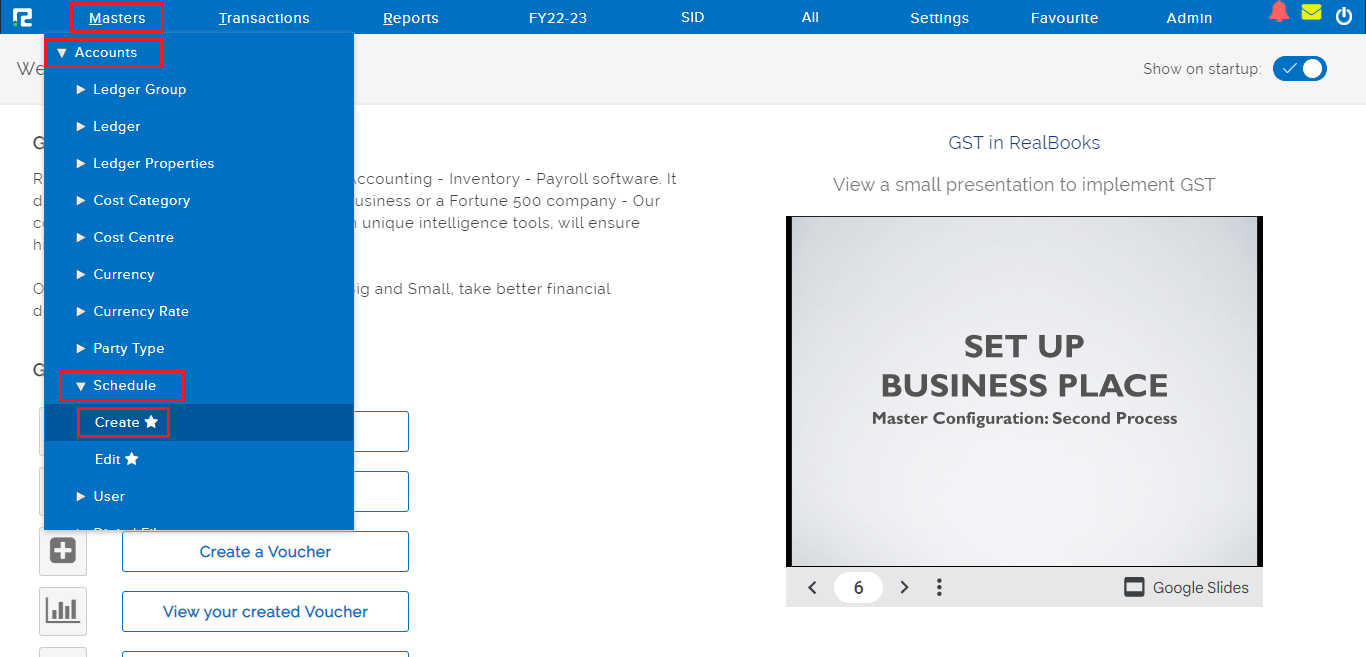
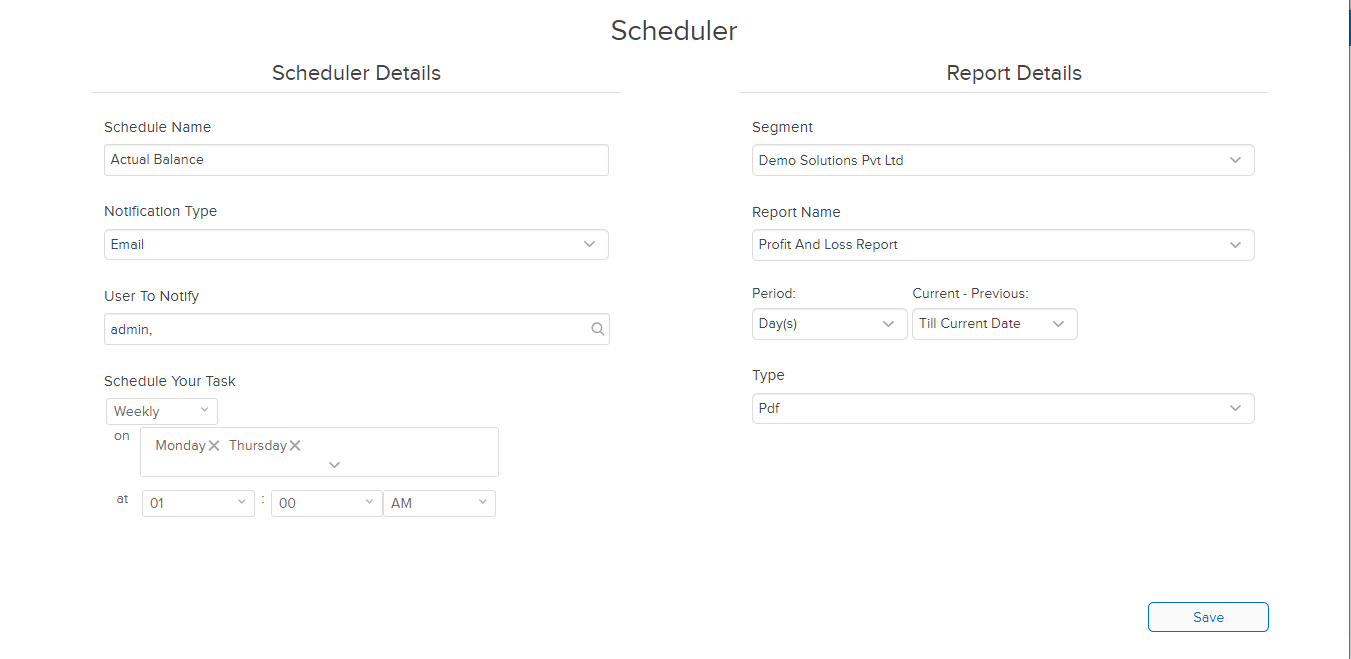
STEP 2: Fill in the following information after selecting the CREATE option.
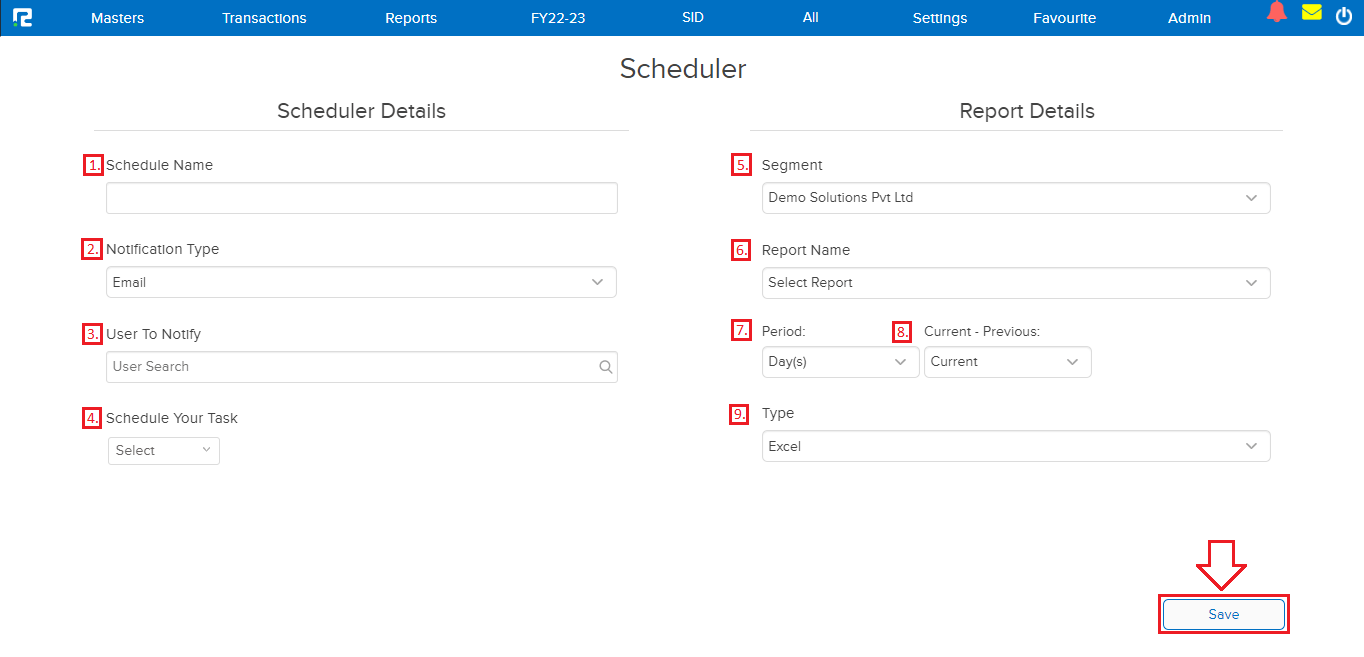
1. Schedule Name: Enter a template name for the scheduler.
2. Notification Type: From the dropdown choose how you want to get notified.
3. User to Notify: Select the users to whom the reports must be sent per the schedule.
4. Schedule Your Task: Set the date, time, and interval for the report to be shared.
5. Segment: Where Segment is enabled, choose the segment for which this scheduler template applies.
6. Report Name: Choose the report for which the scheduler is to be created.
7. Period: Select the date range combination for the report generation.
8. Current – Previous: Select the reporting period combination from the dropdown list, i.e. whether the report is to be sent only for the current period or for the current & previous period together allowing comparisons.
9. Type: Select the format from the dropdown.
STEP 3: Click on the “SAVE” button the scheduler will be saved and activated.
How to Edit/Delete a Scheduler
STEP 1: Go to Masters ⇒ Accounts ⇒ Schedule ⇒ Create
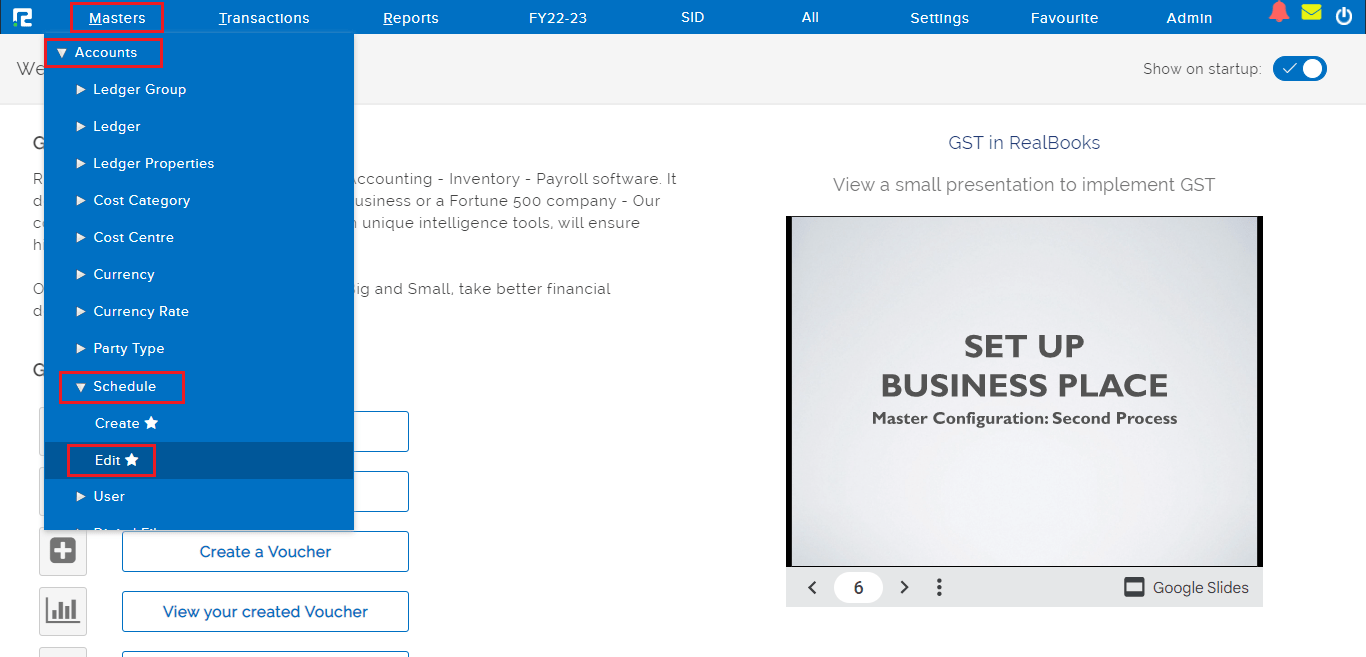
STEP 2: Once you click on the edit option, the entire list of existing schedulers will be displayed here.

STEP 3: To edit any scheduler, CLICK on the “PENCIL” icon or select the schedule and press ENTER, scheduler update page appears, wherein the details can be edited.
STEP 4: Once the data is modified, CLICK on “SAVE” to update the details.
STEP 5: To delete a scheduler, click on the ‘X’ icon to delete a particular schedule.

STEP 6: A confirmation box will appear once you click on “OK” and the scheduler will get deleted.