Units or UOM are the standard units of measurement that need to be assigned to the items to express them in quantity.
How To Create a Unit
STEP 1: Go to Masters⇒ Inventory⇒ Units⇒ Create
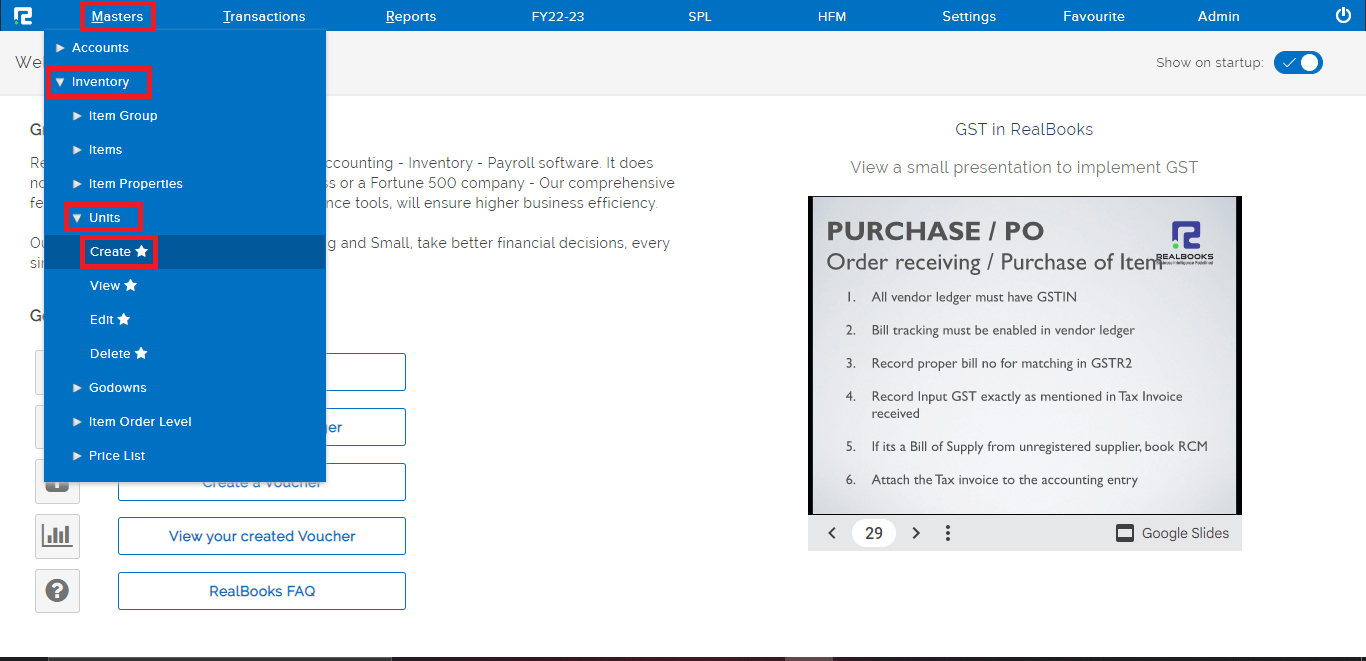
STEP 2: Fill in the following information after selecting the “CREATE” option.
1. Unit name– Enter the name of the unit.
2. Short name– Provide a short name for the unit. This name is displayed on the Transaction screen & reports.
(Maximum 3 characters allowed)
3. Display name– It is not mandatory, but can be used in case of customized invoice templates.
4. Decimal– The decimal field helps to specify, that the item quantity will be denoted by how many decimal places.
5. GST UQC– Select the relevant unique quantity codes as per GST from the dropdown list displayed.
6. Type– This needs to be kept Simple.
If the visible button is enabled, then the unit will be available for further use, and vice-versa.
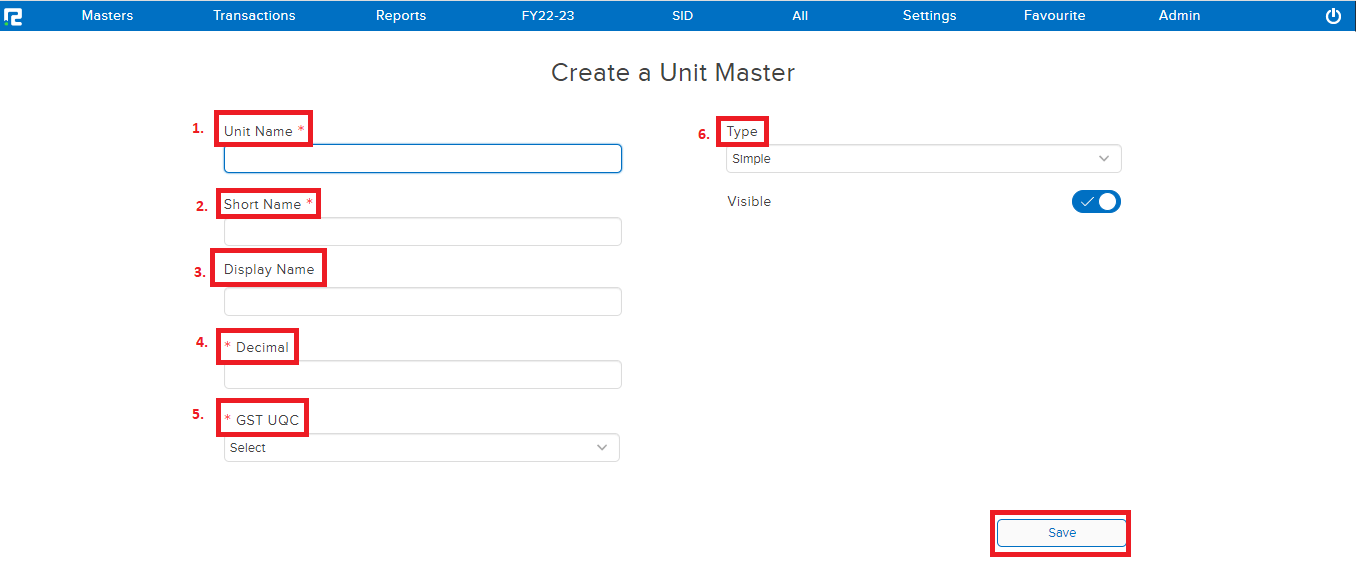
STEP 3: Click the “SAVE” button and the created unit will be saved successfully.
How to Edit a Unit
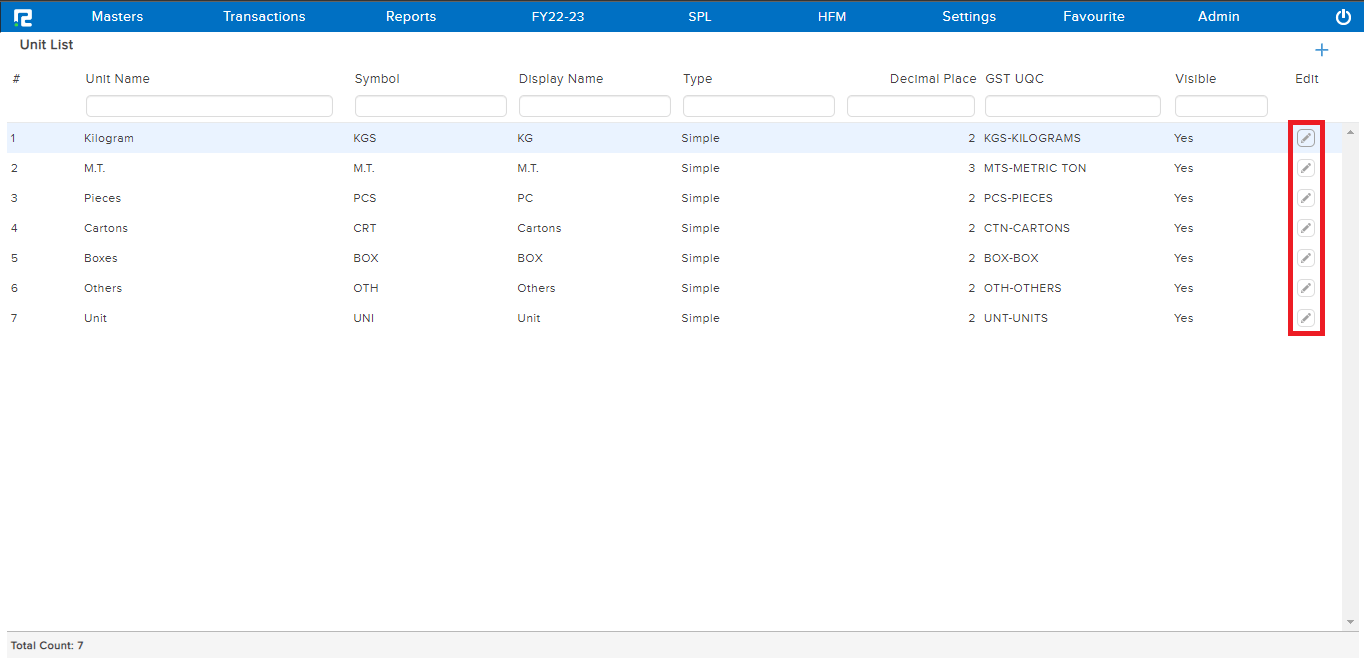
STEP 1: Go to Masters⇒ Inventory⇒ Unit⇒ Edit
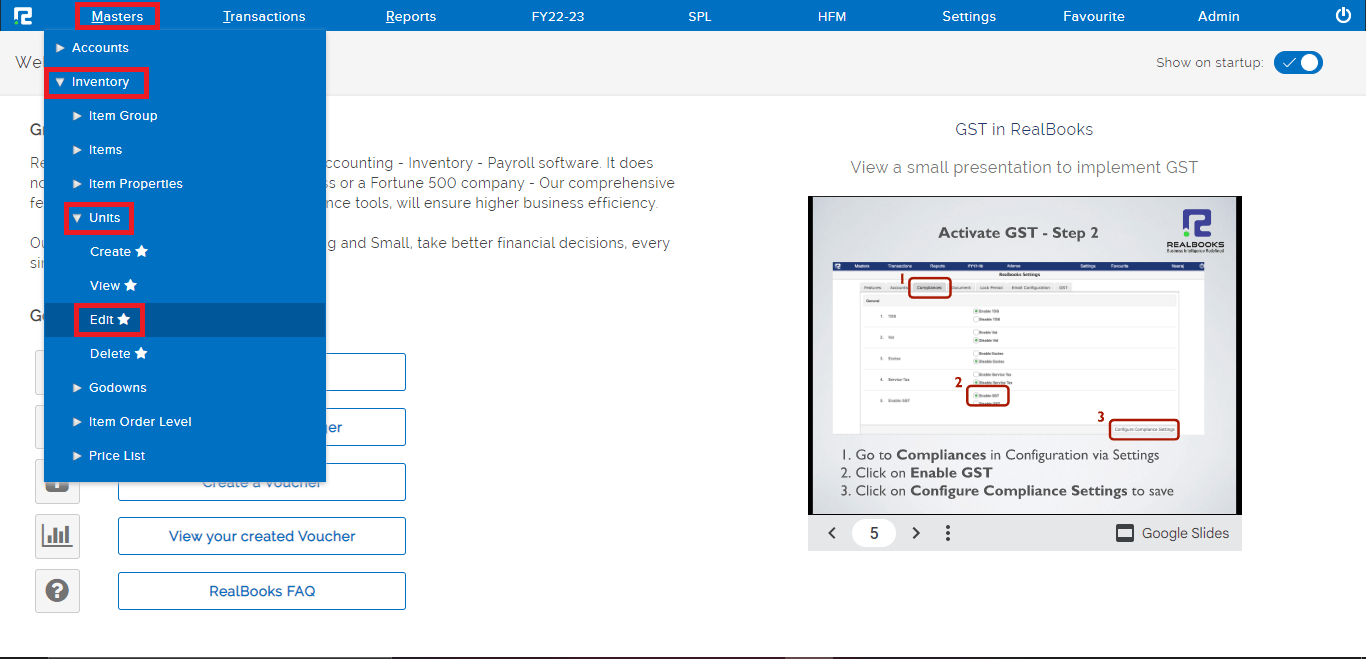
STEP 2: The entire list of existing units will be displayed here. In the case of long lists, it is easy to filter the data by searching for the data using column filter.
STEP 3: At the right end of each unit a “PENCIL” icon is present, click on it to make the relevant changes to a particular unit.
STEP 4: The Unit Master Update screen will appear, make the necessary changes. Click on “SAVE “.
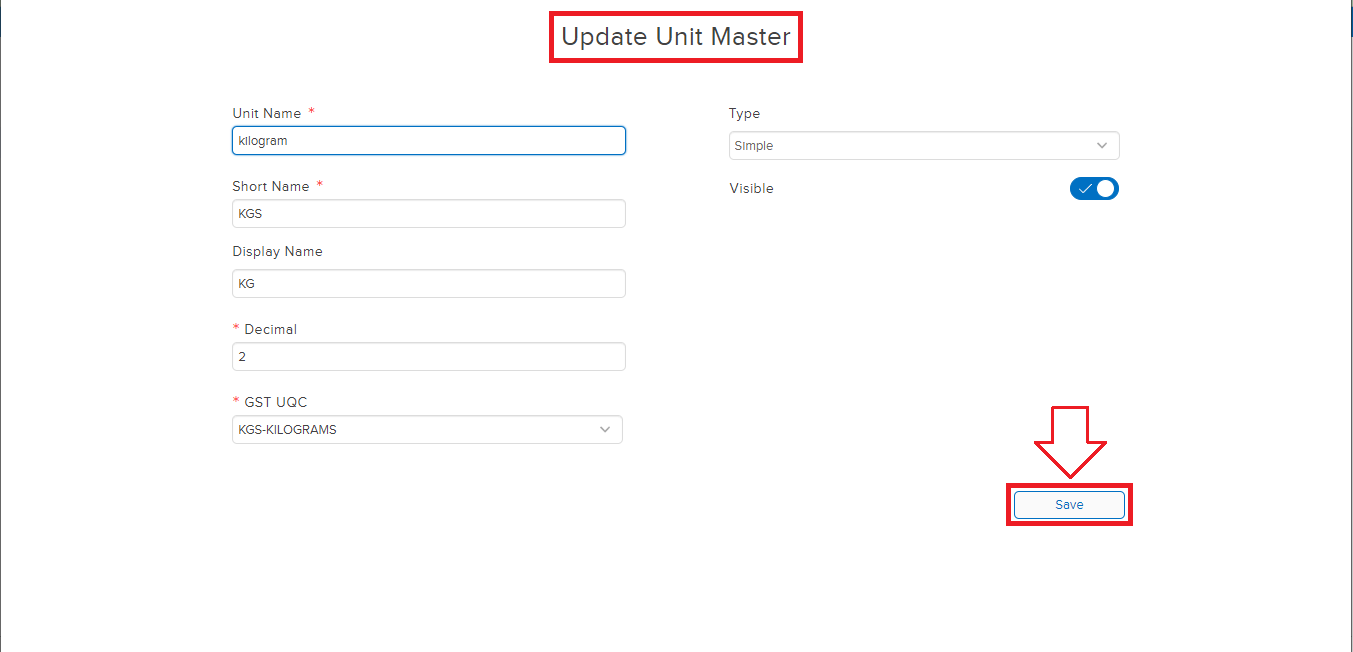
The changes made will be saved successfully.
How to View a Unit
STEP 1: Go to Masters ⇒ Inventory ⇒ Units ⇒ View
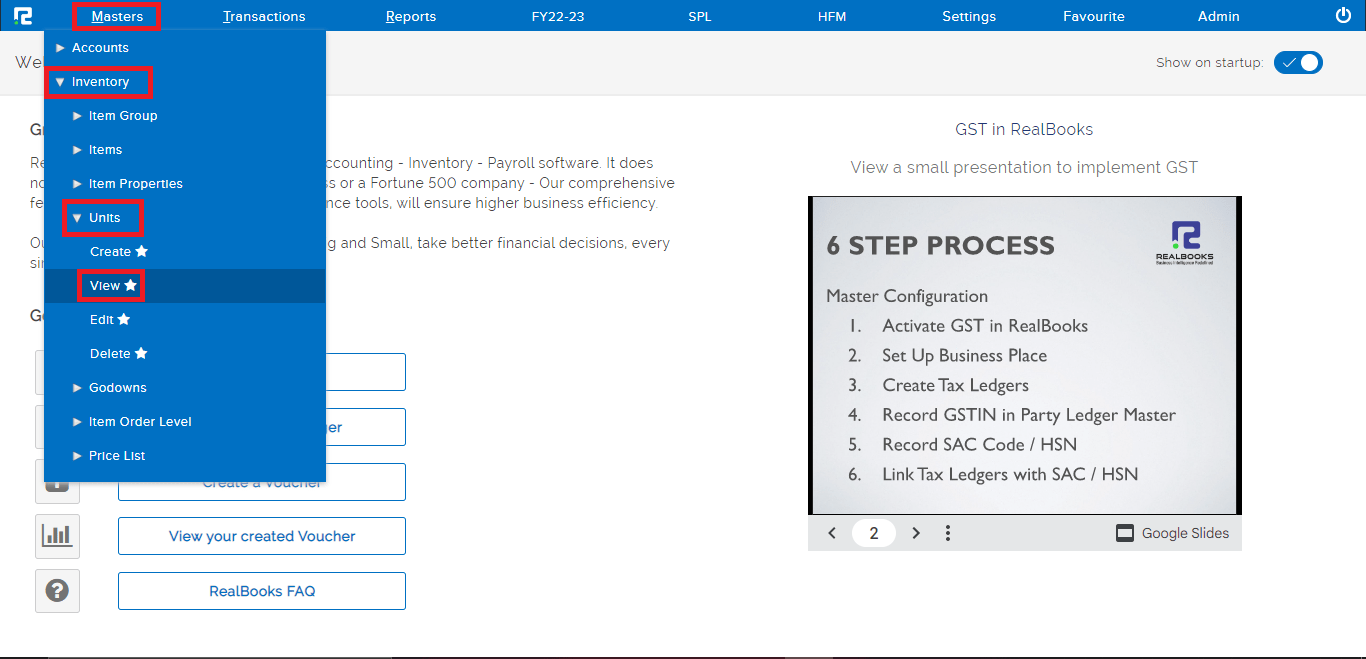
STEP 2: The entire list of existing units will be displayed here. Filter data as required using a column filter.
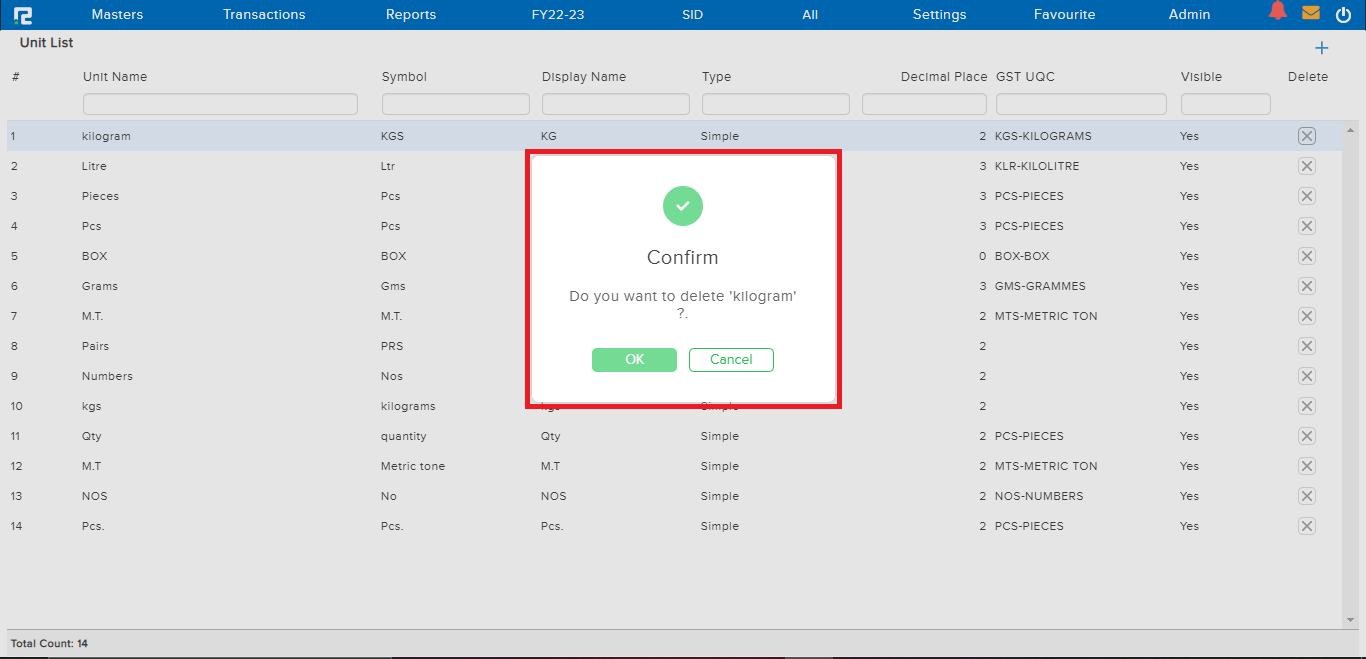
How to Delete a Unit
STEP 1: Go to Masters ⇒ Inventory ⇒ Units ⇒ Delete
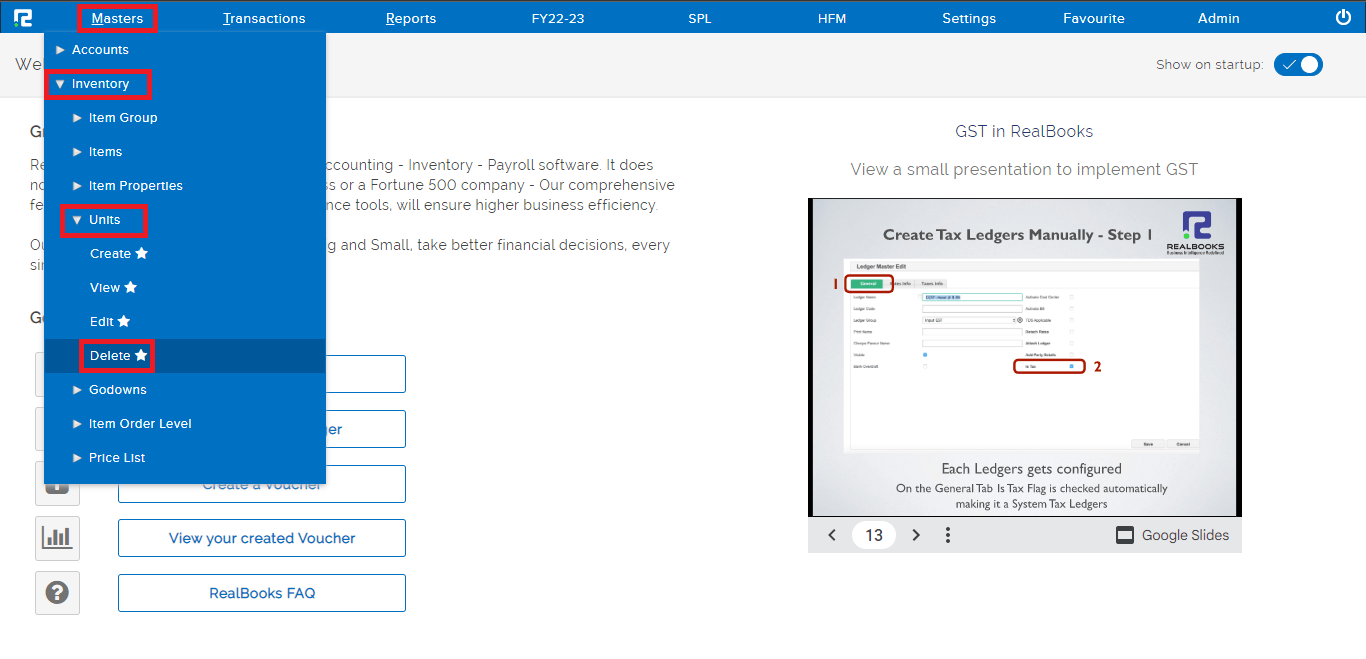
The entire list of existing Units will be displayed here. Filter data as per the requirement using a column filter.
STEP 2: At the right end of each unit there is an “x” icon click on it to delete a particular unit.

STEP 3: A confirmation box will appear, click on “OK” and the unit will be deleted successfully.