Users are the individuals, who are given access to the company companies segments’ books, based on their user edition and assigned permission roles.
How To Create a User
STEP 1: Go to Masters ⇒ Accounts⇒ User ⇒Create
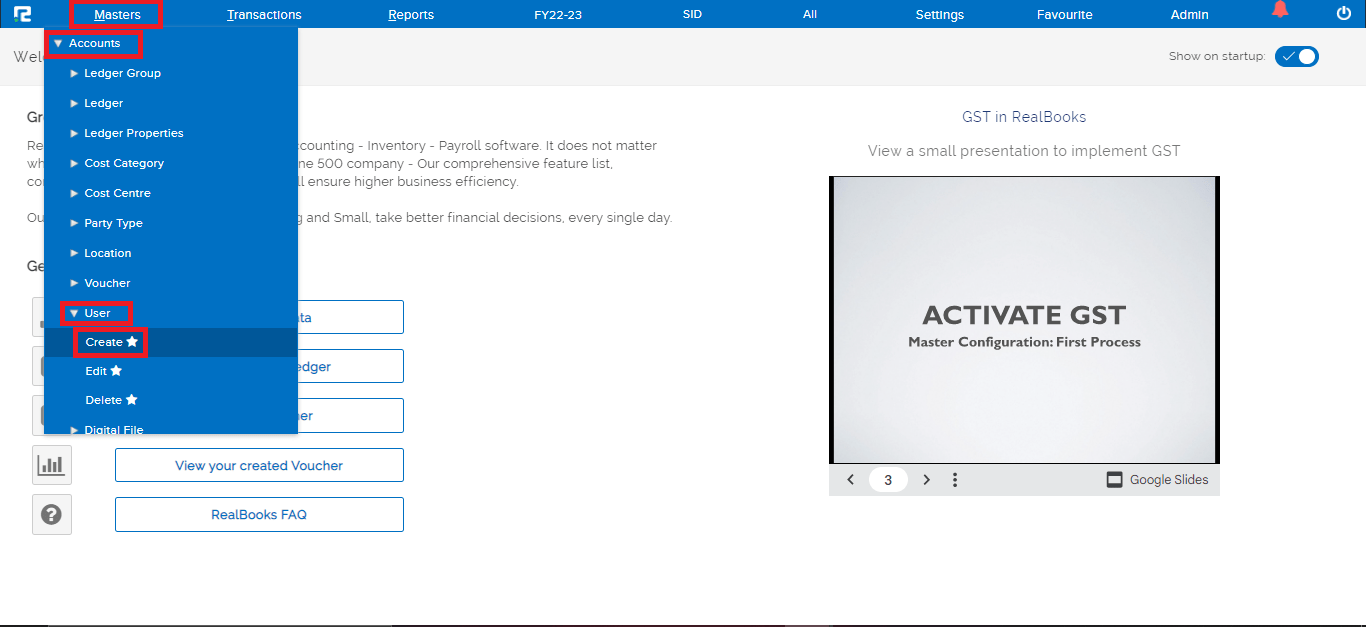
A user create page will be displayed.
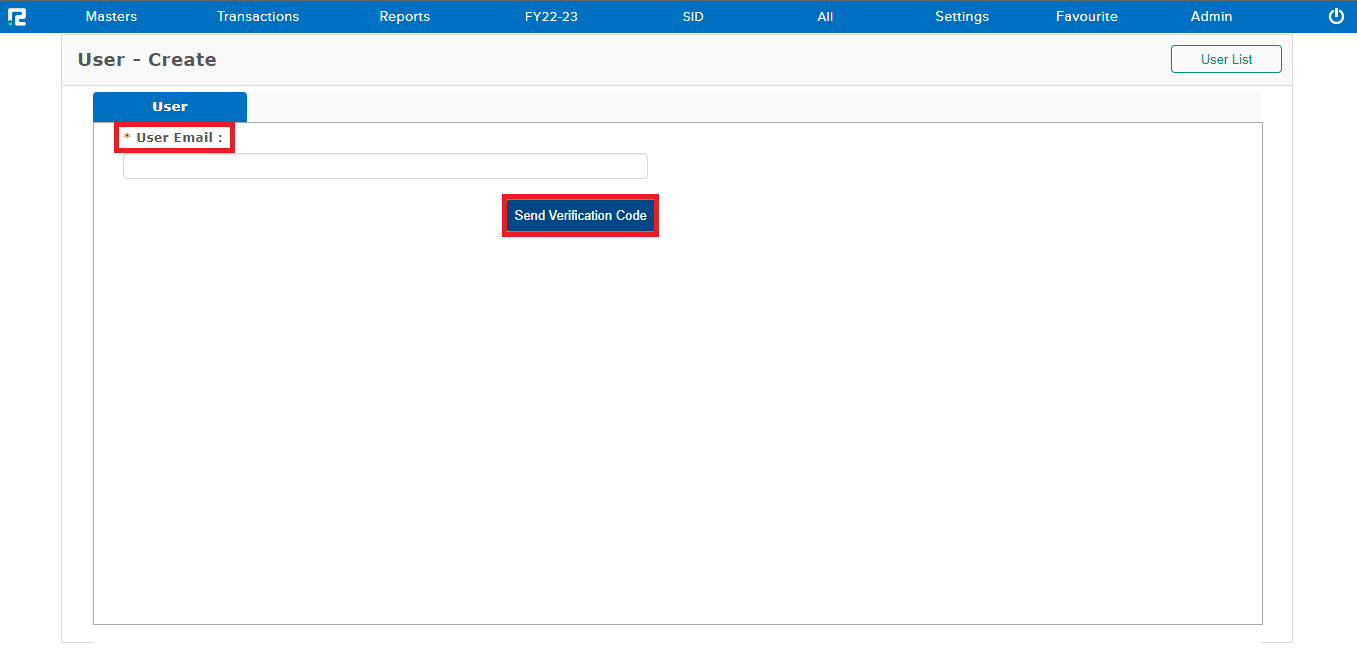
STEP2: Enter the email in the user email field and CLICK on “SEND VERIFICATION CODE”.
STEP 3: Enter the verification code received on the provided email id.
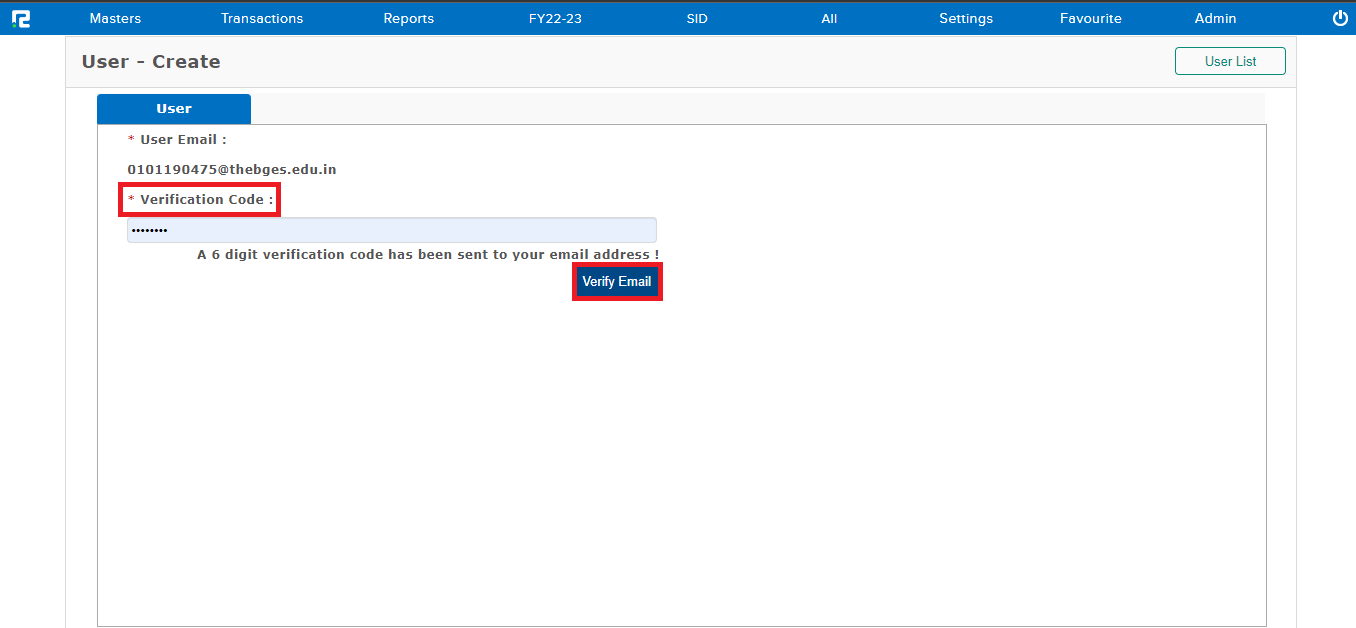
STEP 4: CLICK on the “VERIFY EMAIL” button.
A user detail tab will open, fill in the following information:
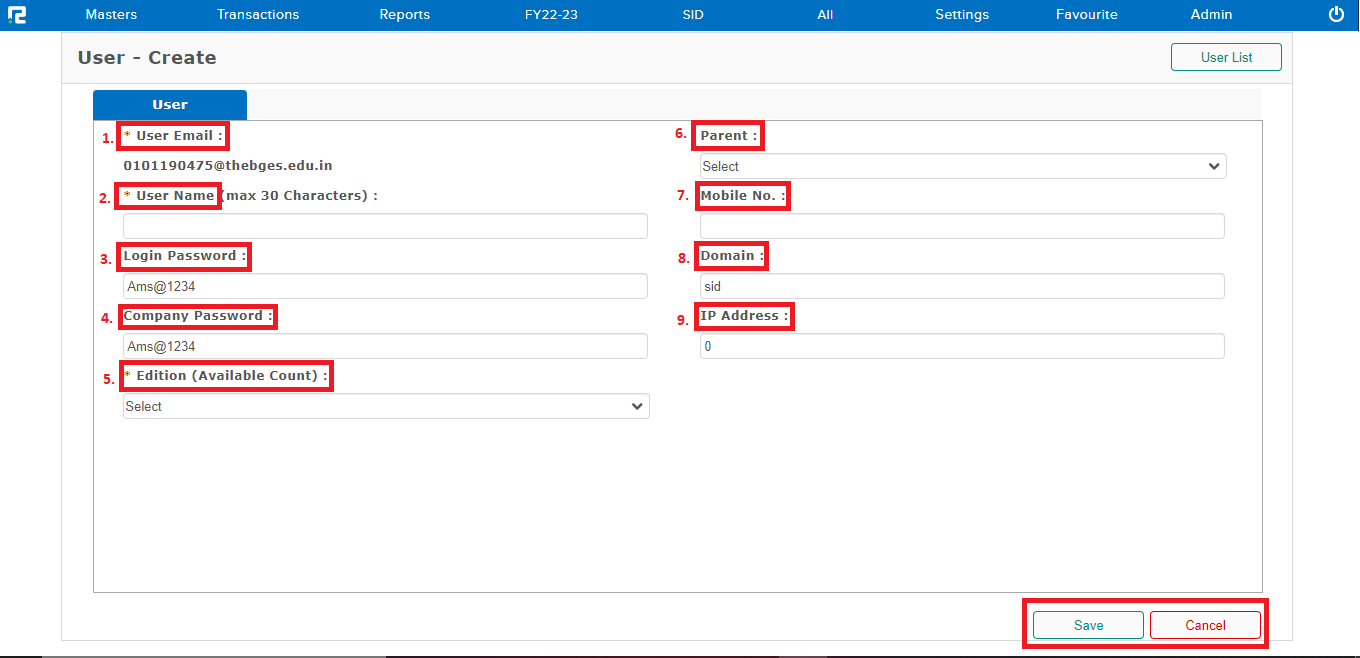
1. User email– Email ID will be displayed in a non-editable format.
2. User name– Assign a name to the user. (This name helps in keeping a track of user-wise activity)
Note: Maximum 30 characters allowed.
3. Login password– Set a login password for the user. (By default, it is kept as Ams@1234)
4. Company password– It will be the same as the login password.
5. Edition– The edition will be listed in the dropdown, based on the licenses purchased. Select the applicable edition for the user.
6. Parent- Assign the user hierarchy.
7. Mobile number– Enter mobile number.
8. Domain– This is the account name under which the user is being created. (It gets auto-populated)
9. IP address– This field helps you to add restrictions based on IP address.
STEP 5: CLICK on SAVE and the data will be saved successfully.
Subsequently, a permission page opens. This page displays the list of companies created under the same account.
To let users, access the company, we need to assign them permissions.
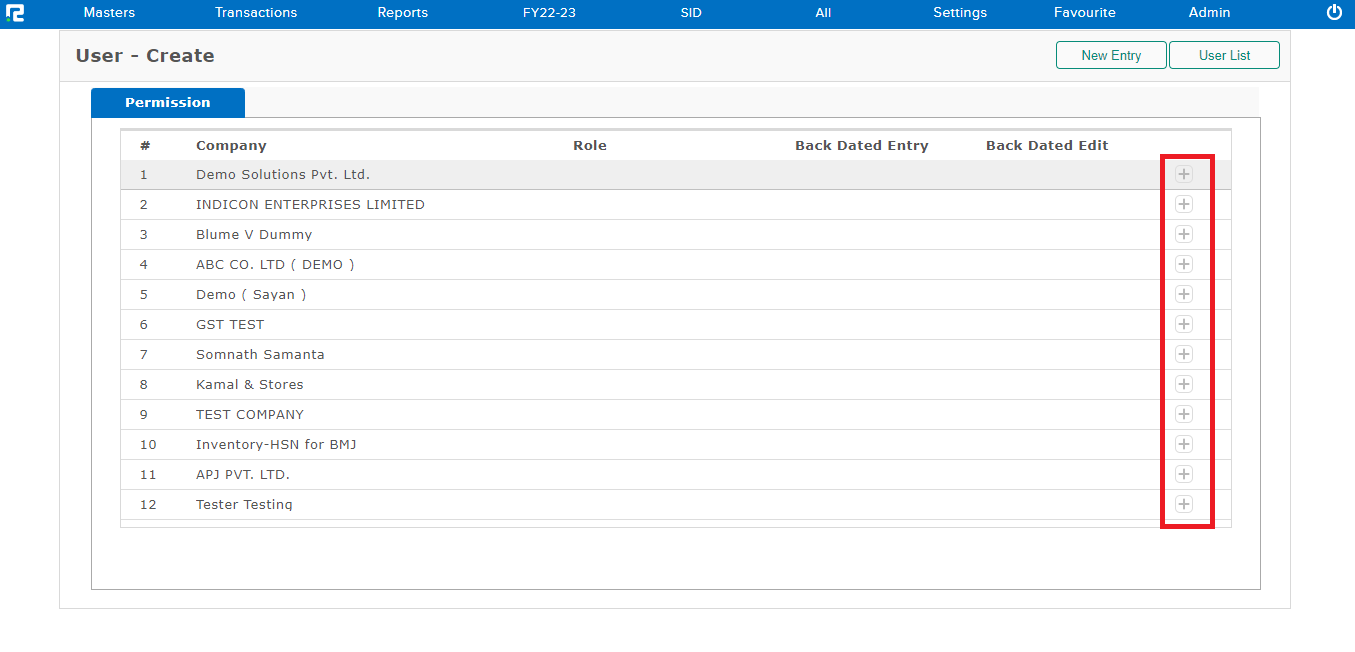
STEP 6: CLICK on the “+” icon present on the right side of the company and fill in the following details-
1. Permission role– This option helps to assign role-based permission templates to the user.
2. Backdated entry– Whether a user will be able to post backdated entry or not, is dependent on this feature.

a. System default– It means the user will have the permission same as that is assigned in company configurations.
b. Unlimited Days– This option allows a user to create backdated entries for a non-restricted period.
c. Limited Days– This option allows the user to create back-dated entries for a limited number of days, which is specified by the user.
d. Not allowed– This option completely restricts the user from creating back-dated entries.
e. Allowed from– This option allows the user to create the entries from a specified date.
3. Backdated edit– Whether a user will be able to edit a backdated entry or not, is dependent on this feature.

STEP 7: CLICK on the SAVE button.
How To Edit a User
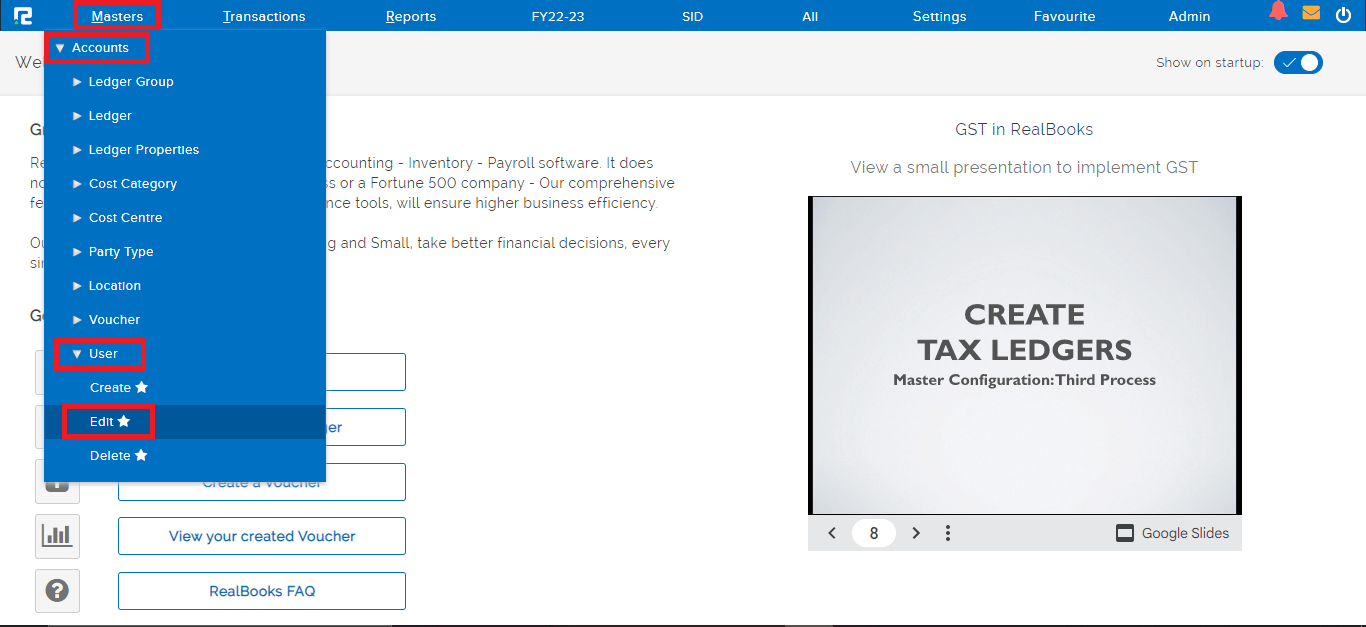
STEP 1: Go to Masters ⇒ Accounts ⇒ user ⇒ edit
STEP 2: Once you click on the edit option, The entire list of existing users will be displayed here. In the case of long lists, it is easy to filter the data by searching for the name under the User Name.
License: This option shows the purchased and used license details.
Active & Suspended: This button is used to suspend or activate a user.

Click on the setting icon to view the information of the user who has created/updated the user licenses.

Click on the export option to download the user master in Excel format.
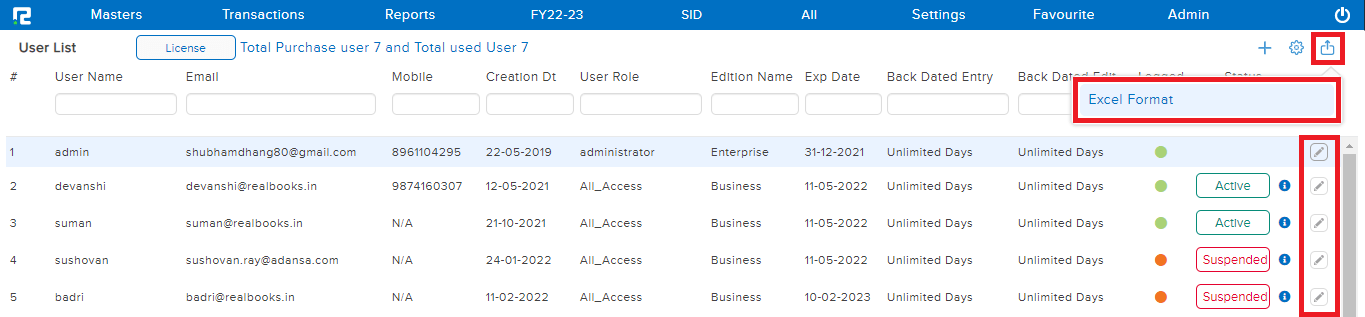
STEP 3: To edit any user CLICK on the “PENCIL” icon or select the user and press ENTER, User Update page appears, wherein the details can be edited.
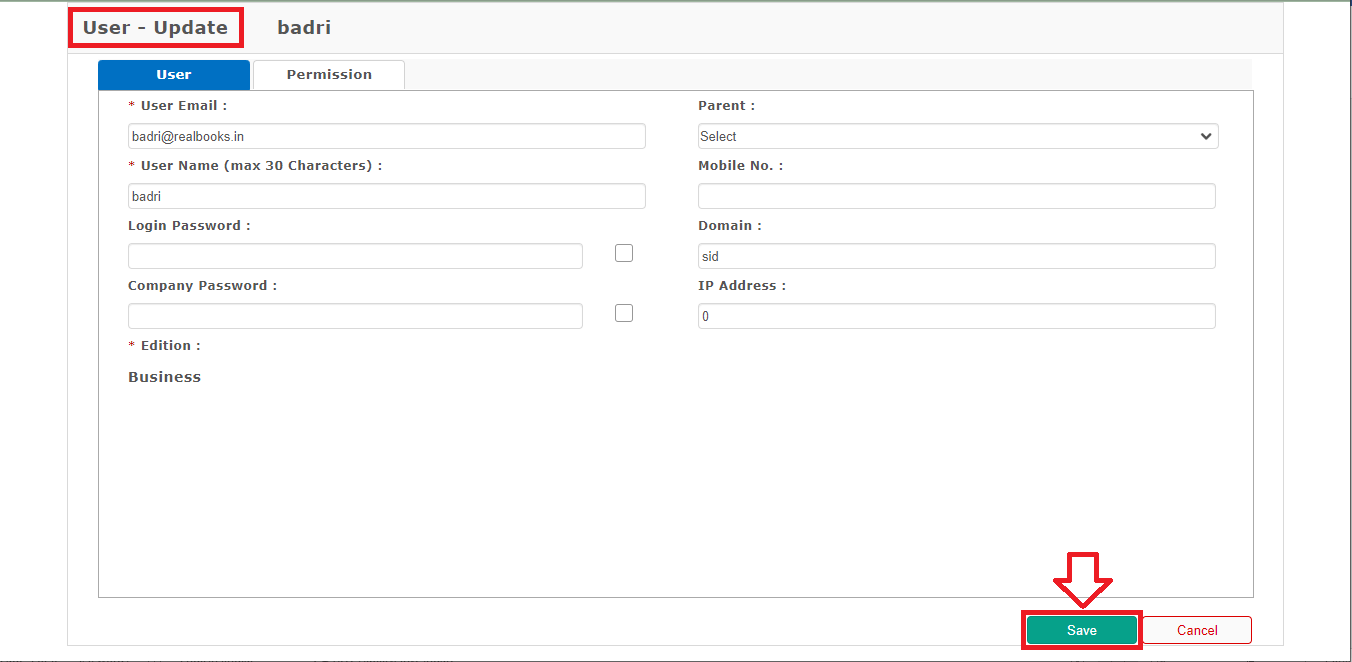
STEP 4: CLICK on SAVE to update the details.