Beta Release — 21-08-2026
📌 What Was Needed
In the Approval Workflow, when a checker wanted to reject an entry that ultimately needed to be cancelled, there was no direct way to cancel it from the Approval screen itself — the checker could only Approve or Reject, and cancelling the entry required a separate step afterward.
🌟 What This Means for You
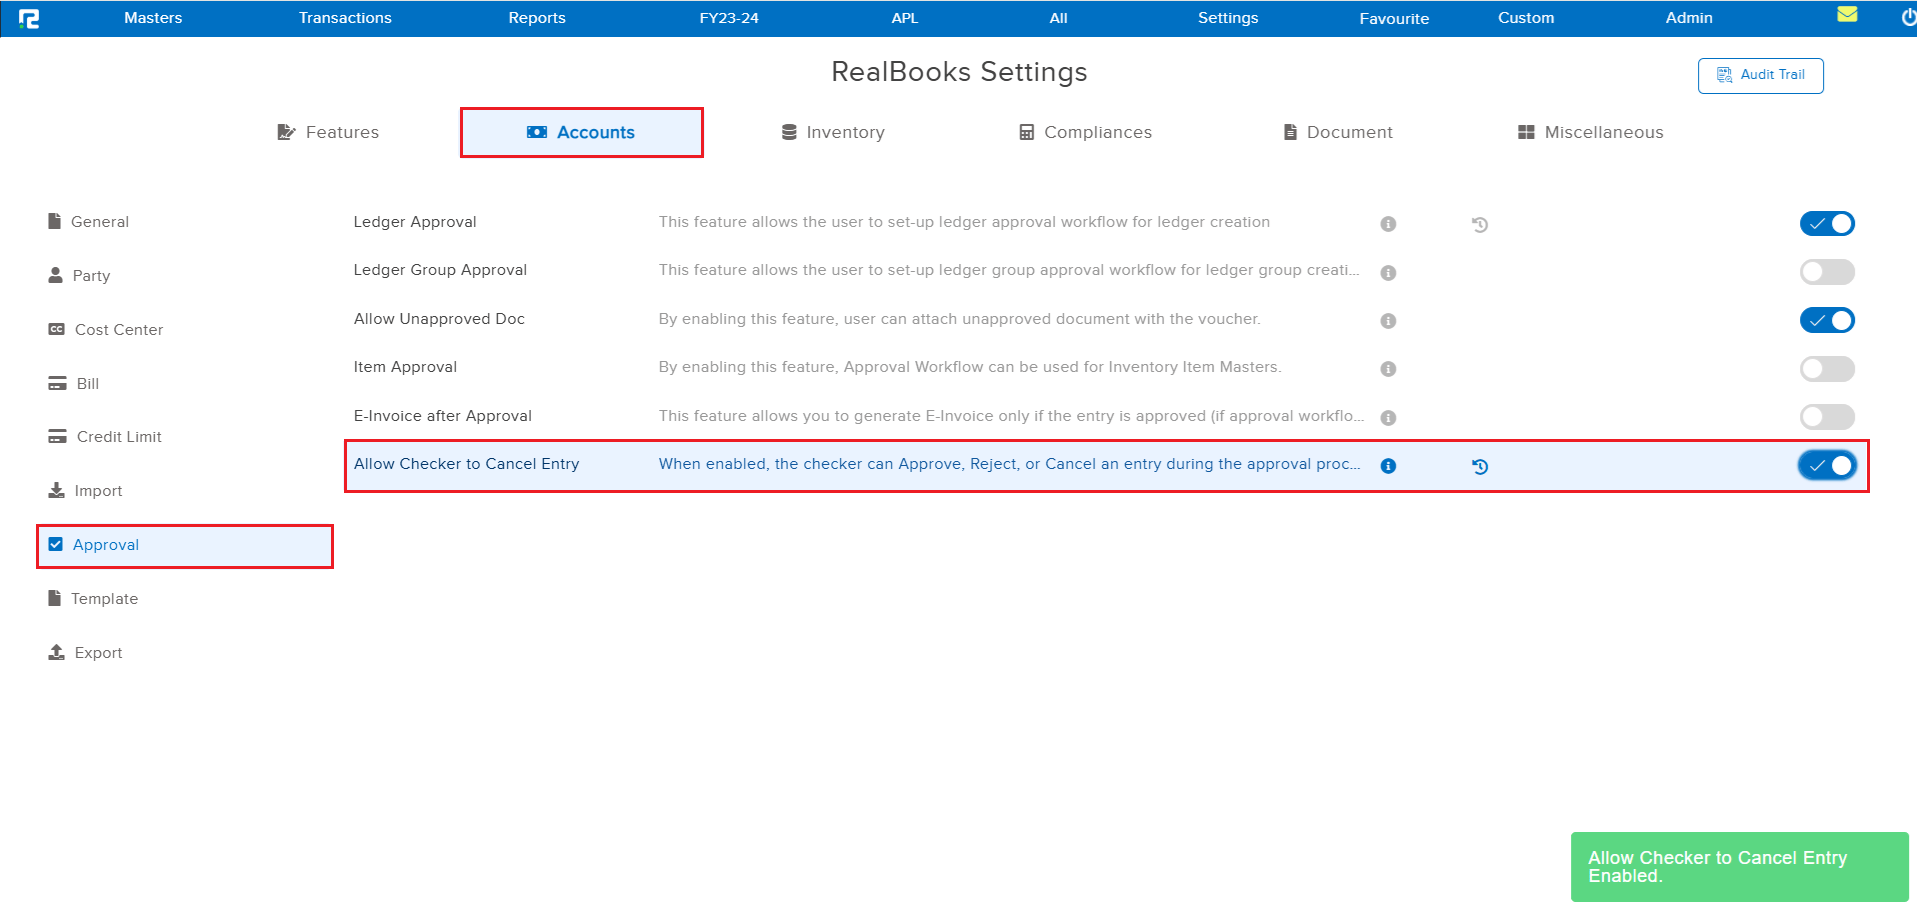
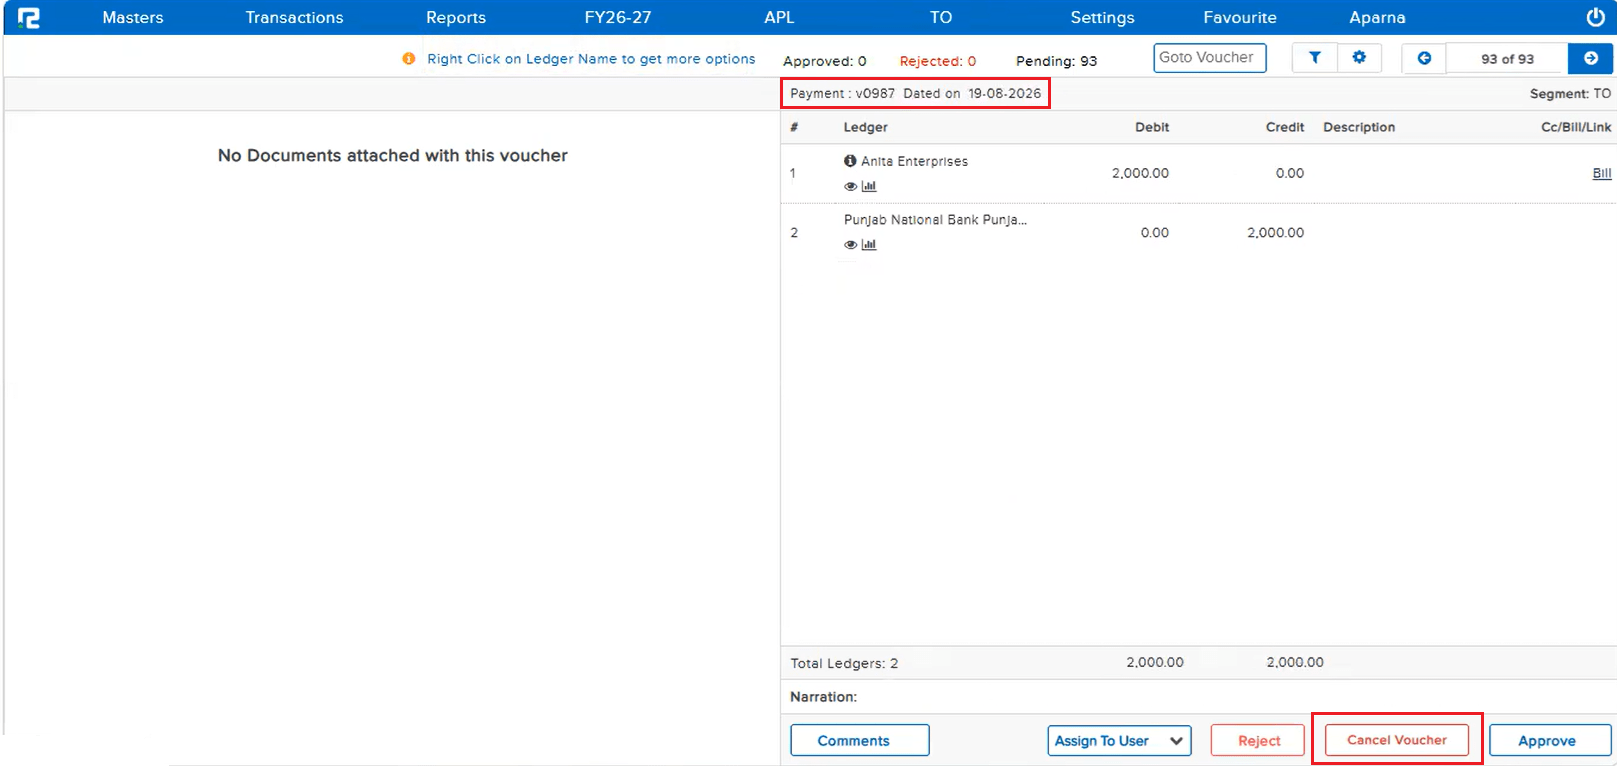
A new Cancel Voucher button is now available on the Approval screen alongside Reject and Approve, so an entry can be cancelled immediately during the approval process itself. This is a parametric feature and works only when both of the following are true:
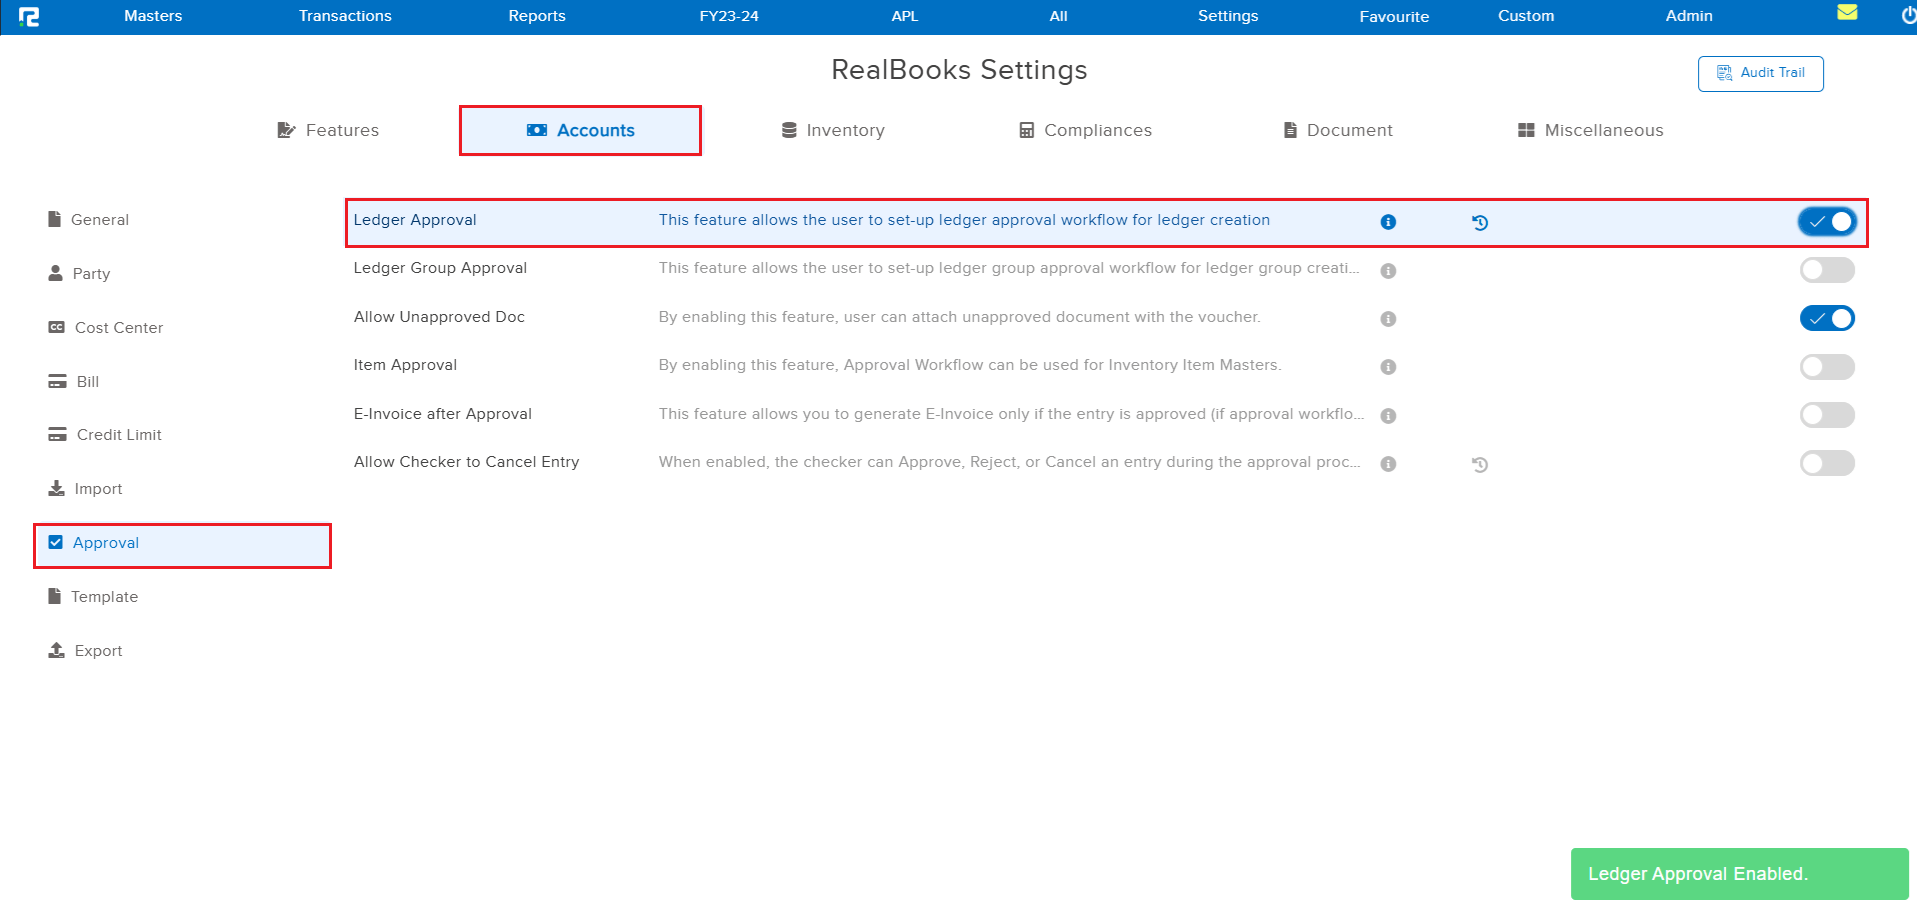
• The new “Allow Checker to Cancel Entry” setting is enabled from the Settings page.
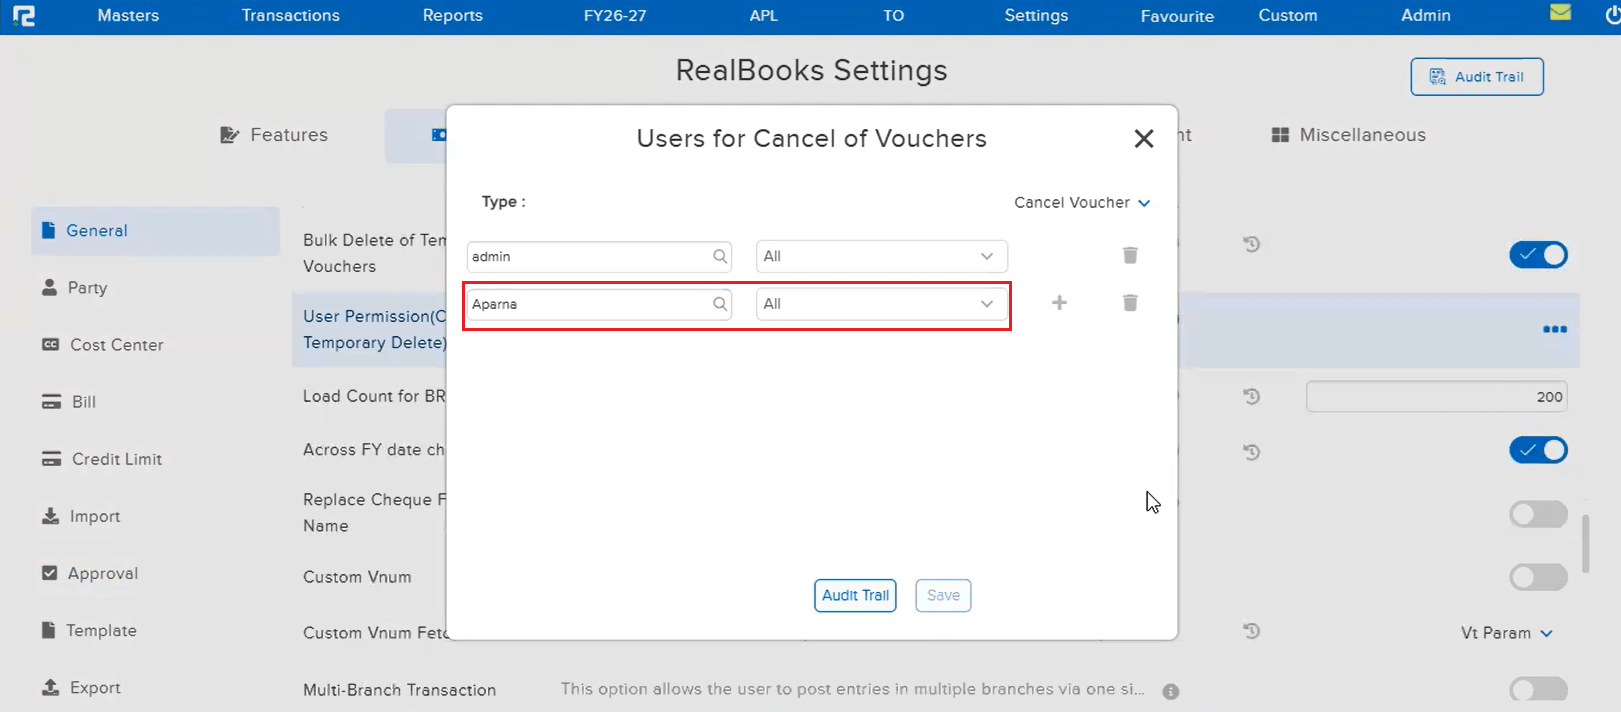
• The user cancelling from the Approval screen has the existing cancellation permission configured under Users for Cancel of Vouchers.
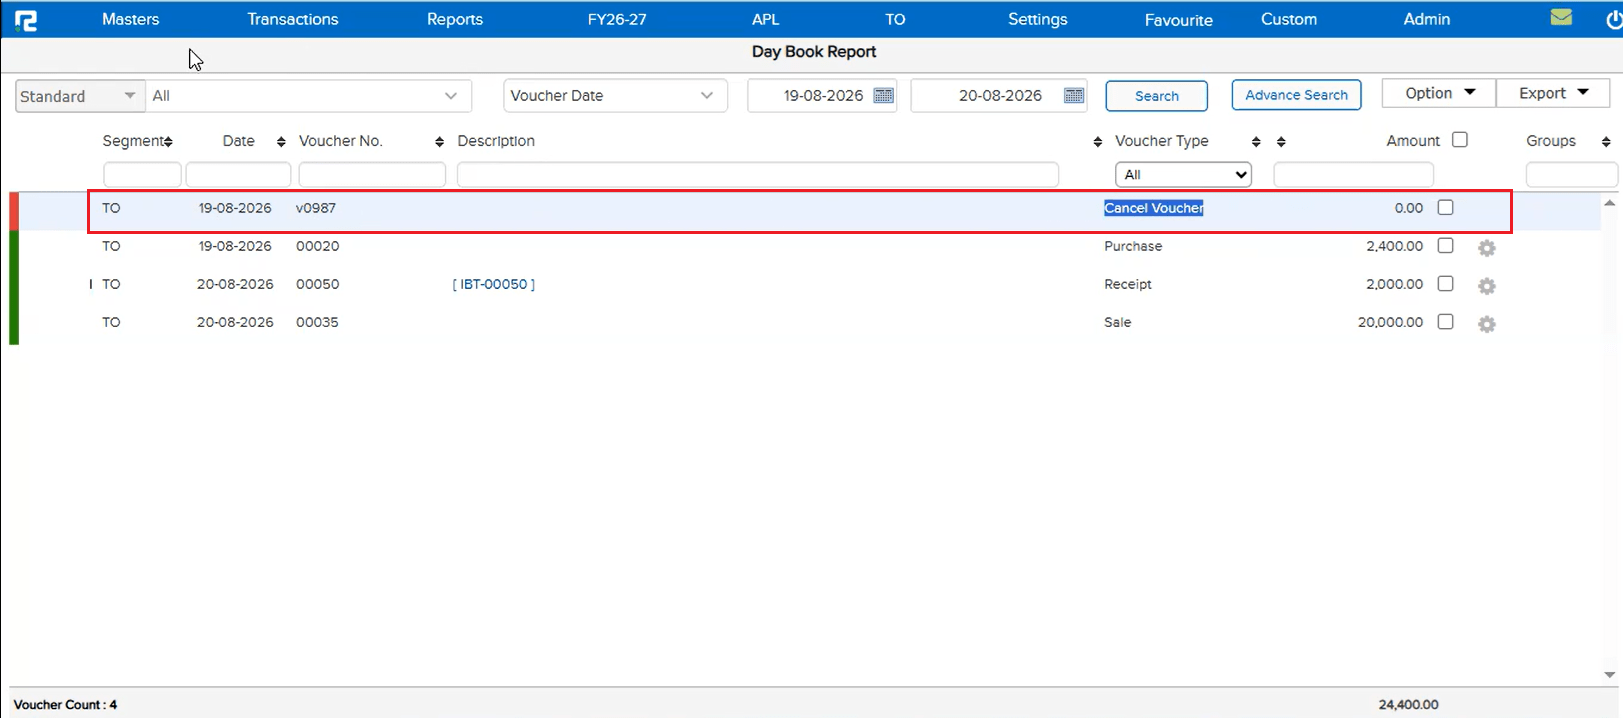
When both conditions are met, clicking Cancel Voucher cancels the entry right away; otherwise, the existing Approve / Reject process continues to work exactly as before.
🎬 Where to Find It
📷 See It in Action
📌 What Was Needed
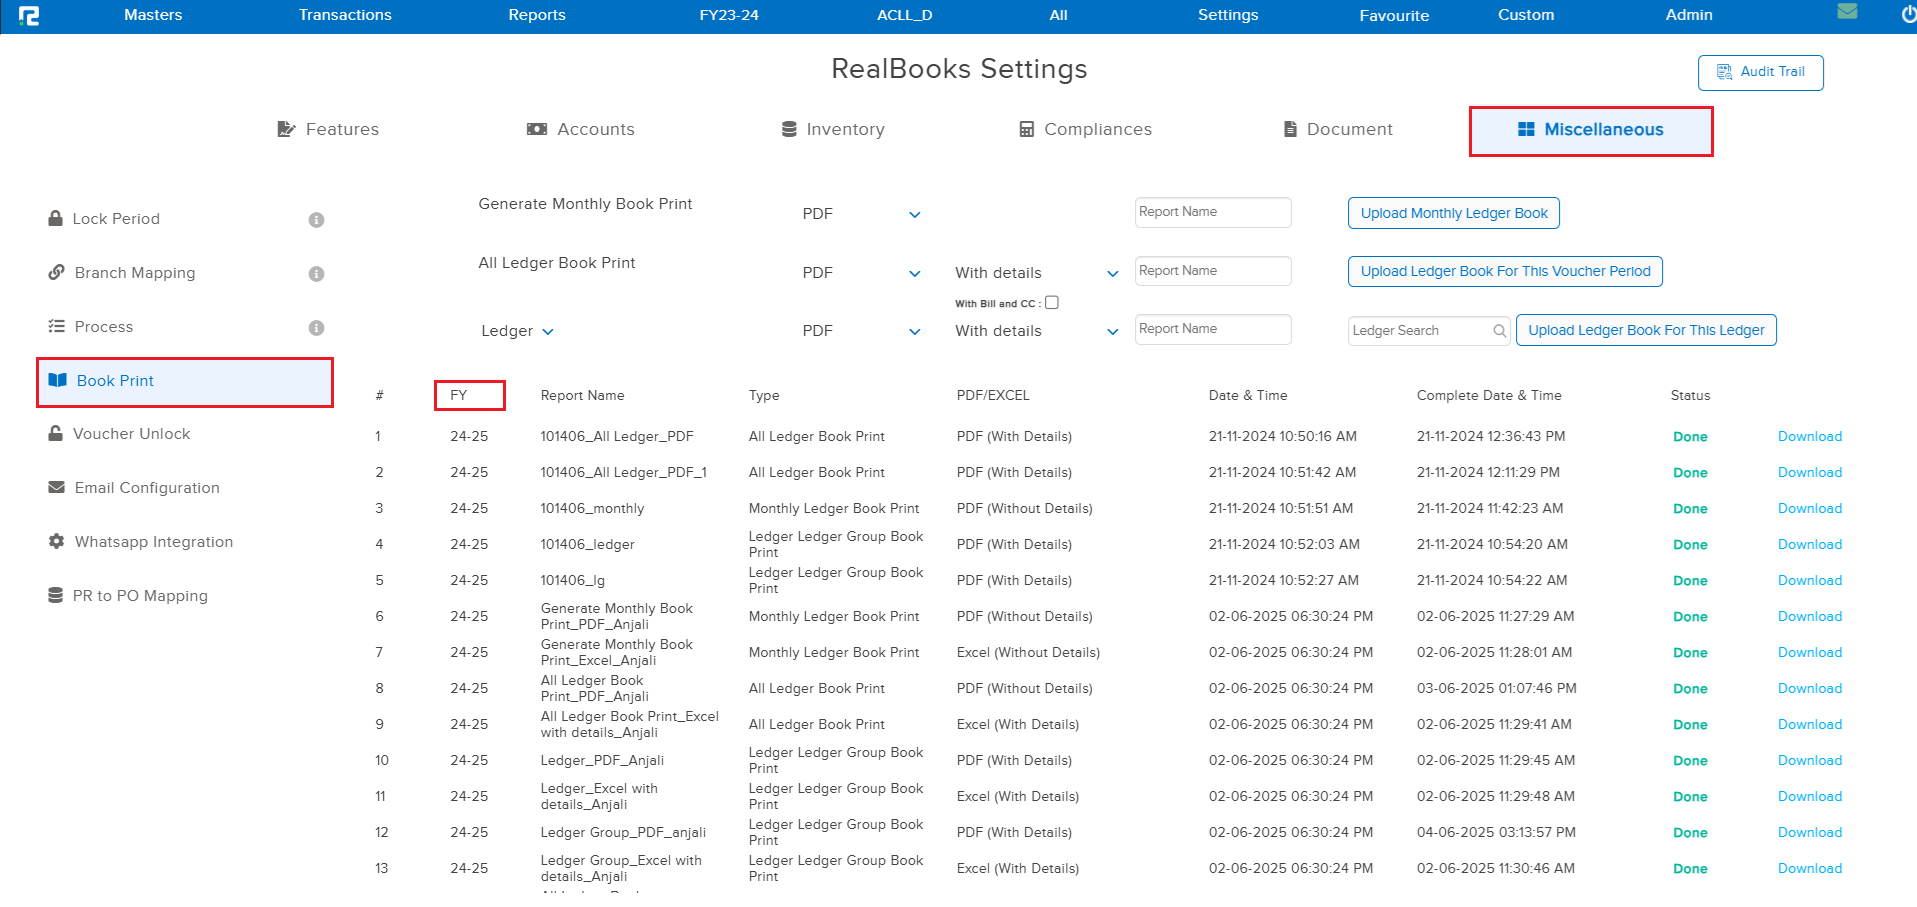
On the Book Print request listing under Settings, each processed request showed its Report Name, Type, Date & Time, and Status — but there was no way to tell which Financial Year a given request had been generated for.
🌟 What This Means for You
A new FY column has been added to the Book Print request listing, showing the Financial Year (e.g. 24-25) for which each request was processed — making it easy to identify the right entry when multiple years’ requests are listed together.
🎬 Where to Find It
📷 See It in Action
📌 What Was Needed
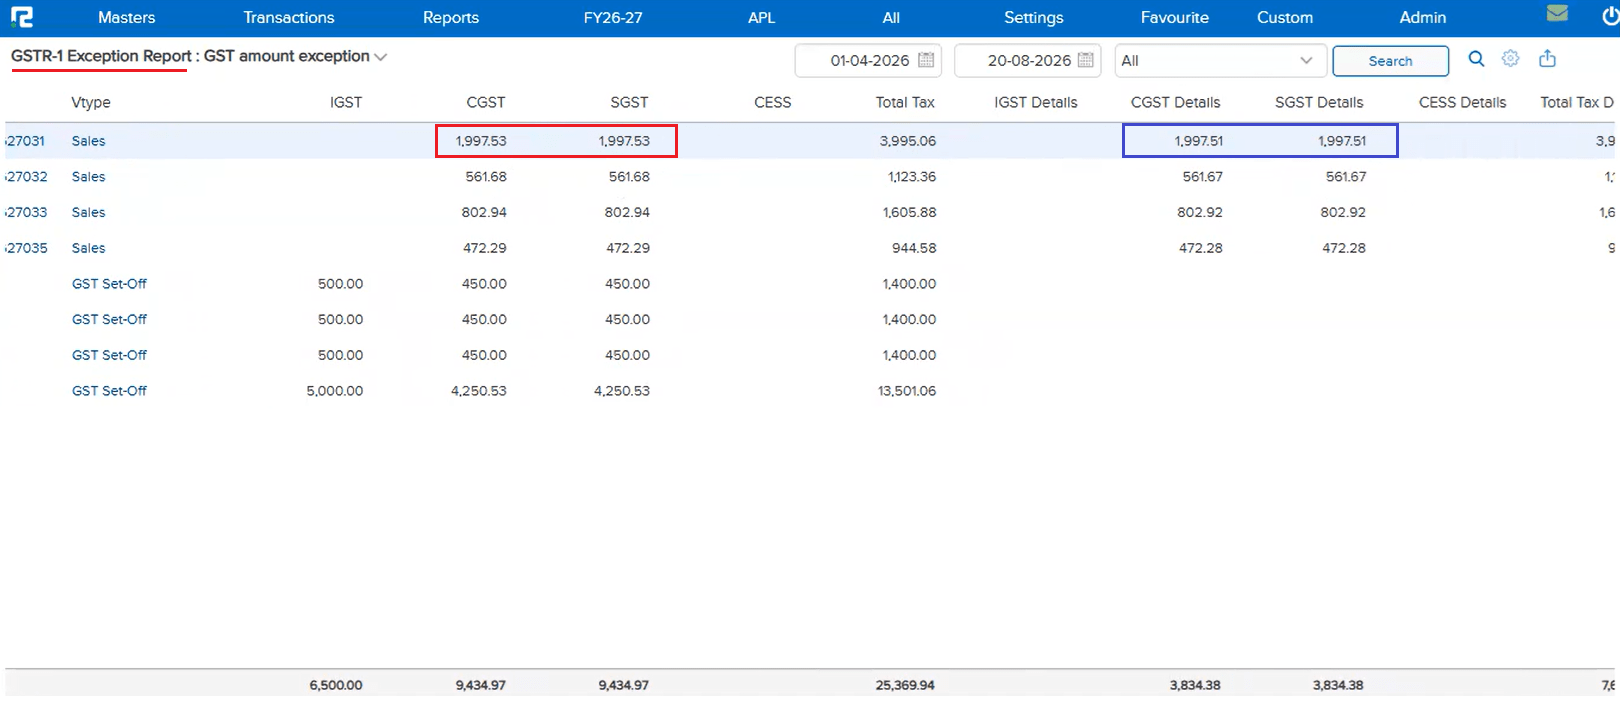
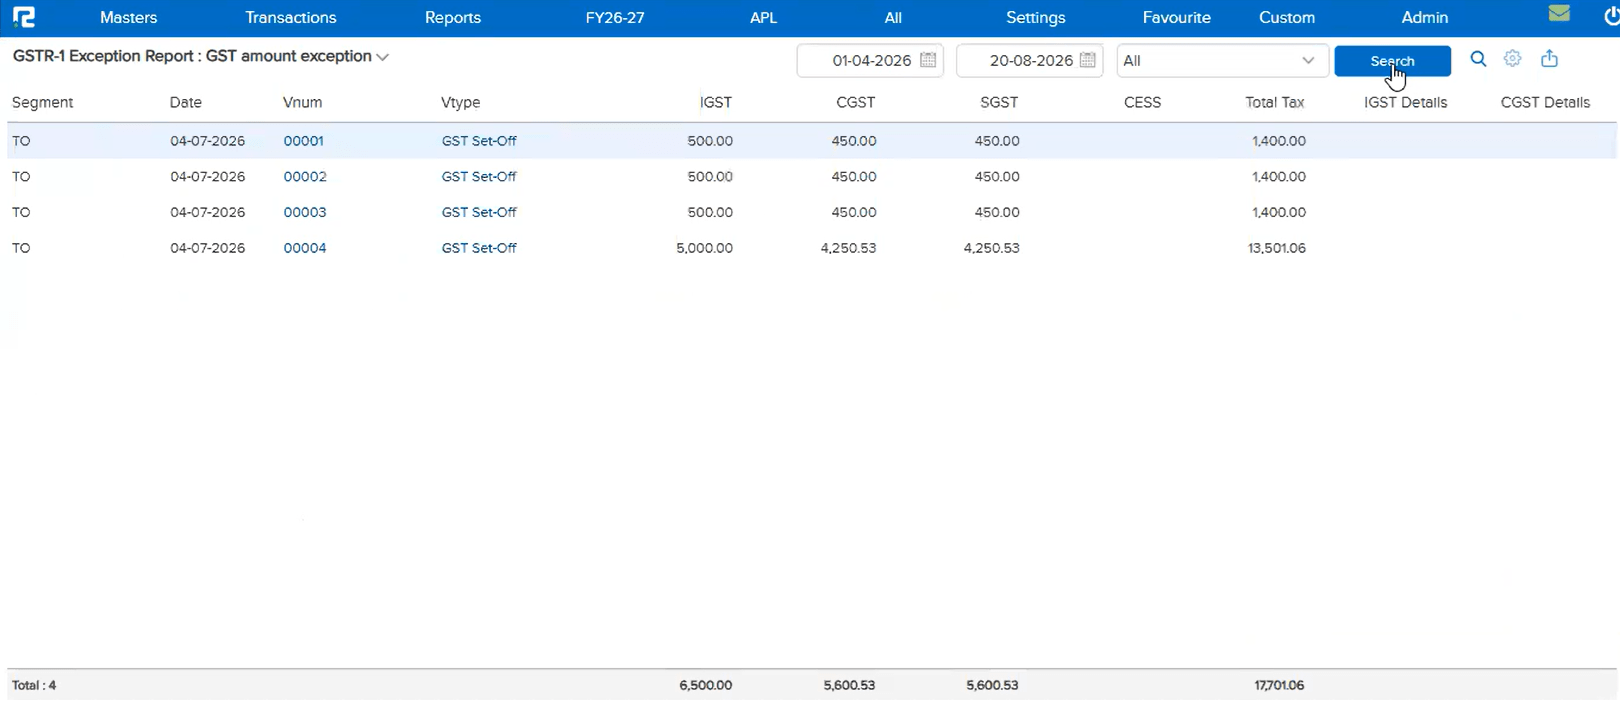
On the GSTR-1 → Exception → GST Breakup Exception Report (GST amount exception), minor mismatches between the item-level tax and the ledger-level tax — e.g. a difference of a few paise in CGST / SGST — were still listed as exceptions, even though such small differences did not need attention. There was no way to configure a Tolerance Limit for GSTR-1, unlike the existing GSTR-2B Tolerance Limit feature.
🌟 What This Means for You
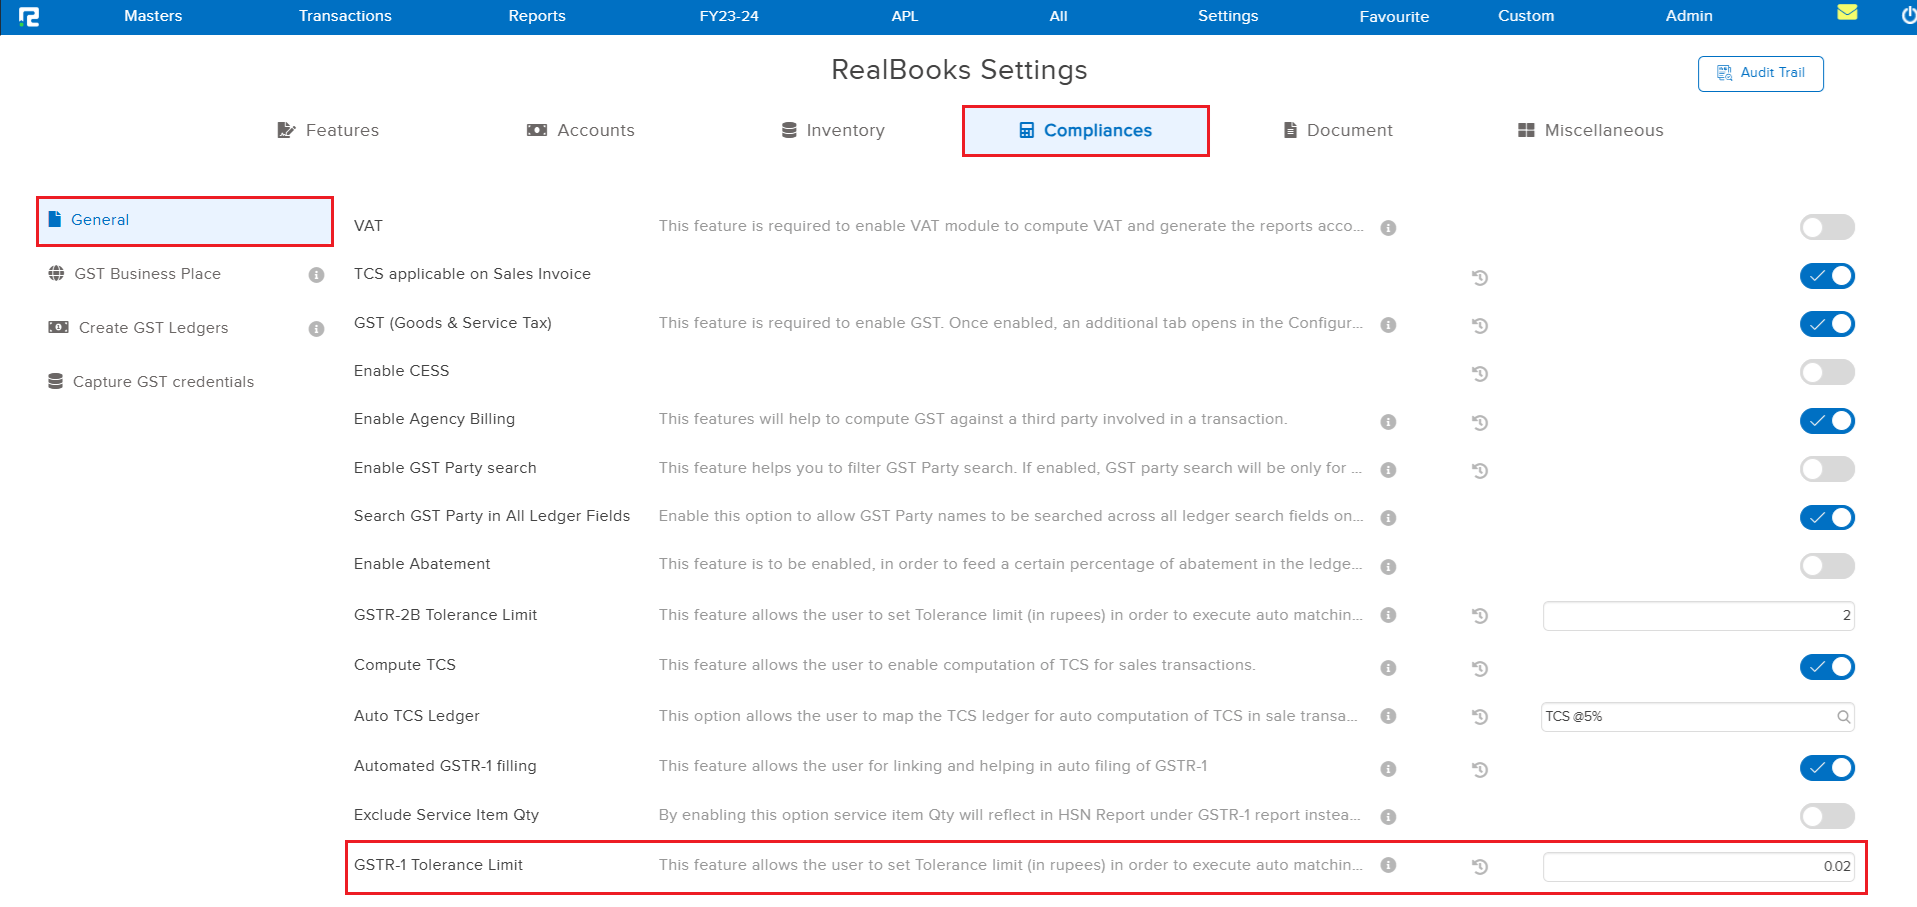
A new GSTR-1 Tolerance Limit configuration has been added under Configuration → Compliance, working just like the existing GSTR-2B Tolerance Limit. Once a tolerance amount (in rupees) is set, entries whose tax mismatch falls within that limit are automatically ignored and excluded from the GST Breakup Exception Report, leaving only genuine exceptions to review.
🎬 Where to Find It
📷 See It in Action
📌 What Was Needed
There was no way for a user to get an overview of the Maker-Checker Approval workflow — how many approvals were pending, and with which Checker each one was currently sitting. Identifying who a pending entry was waiting on required checking manually, entry by entry.
🌟 What This Means for You
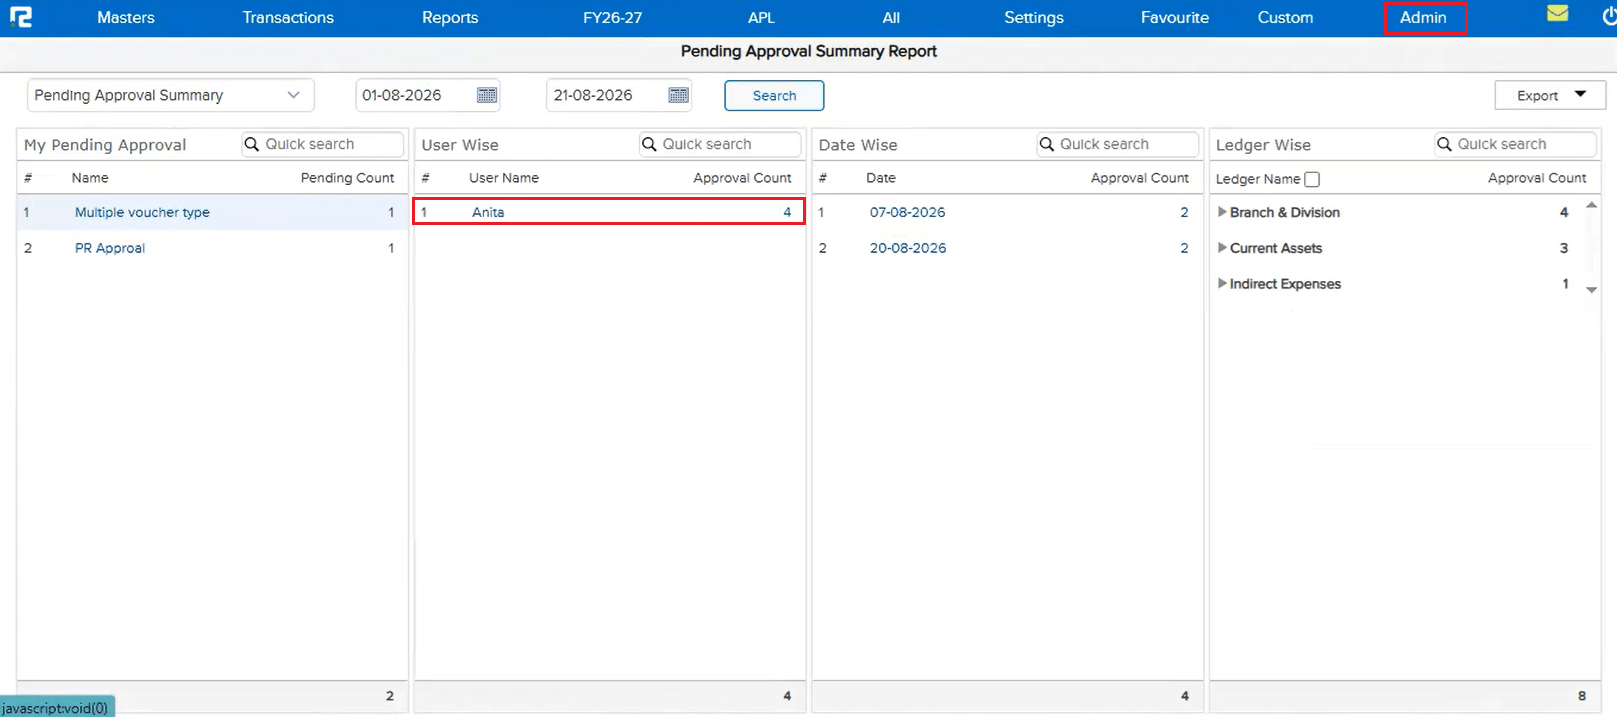
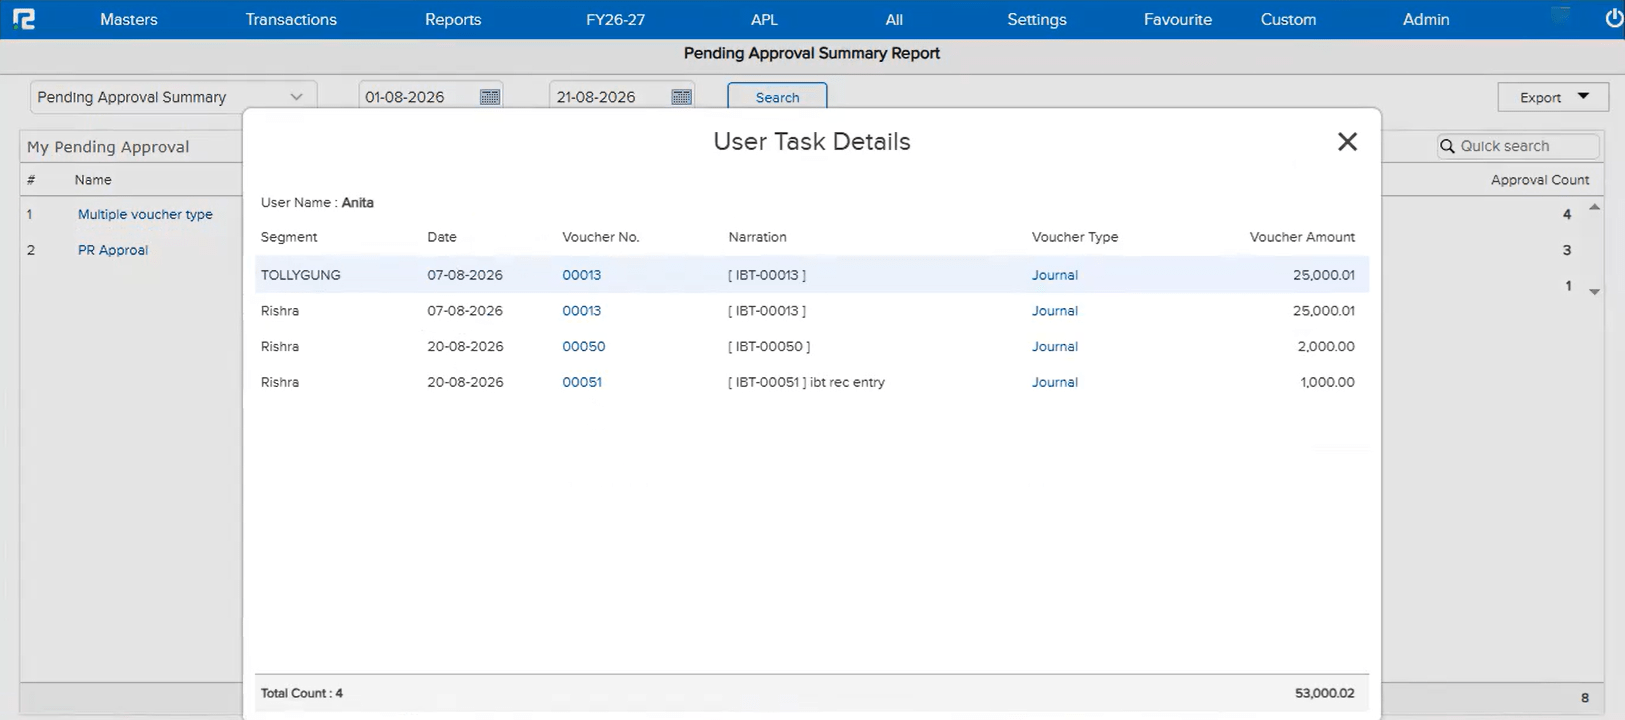
A new Pending Approval Summary Report is now available, breaking down pending approvals across four panels — My Pending Approval, User Wise, Date Wise, and Ledger Wise — each showing the Approval Count. Clicking a Checker’s name under User Wise opens a User Task Details popup listing every entry currently pending with that Checker, including Segment, Date, Voucher No., Voucher Type, and Amount. The report is available to any user with access permission to this screen — it is not restricted to the Admin.
🎬 Where to Find It
📷 See It in Action
📌 What Was Happening
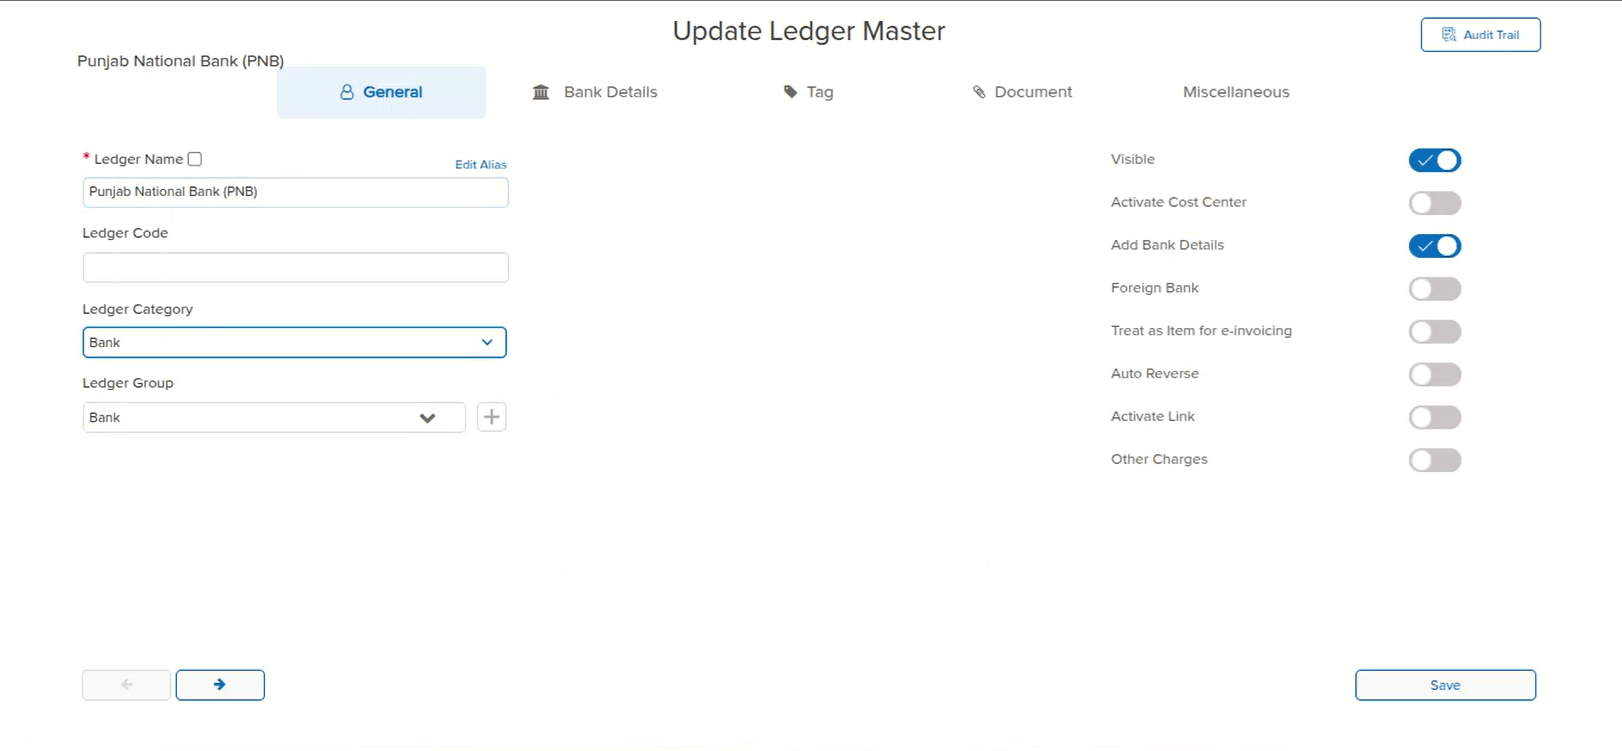
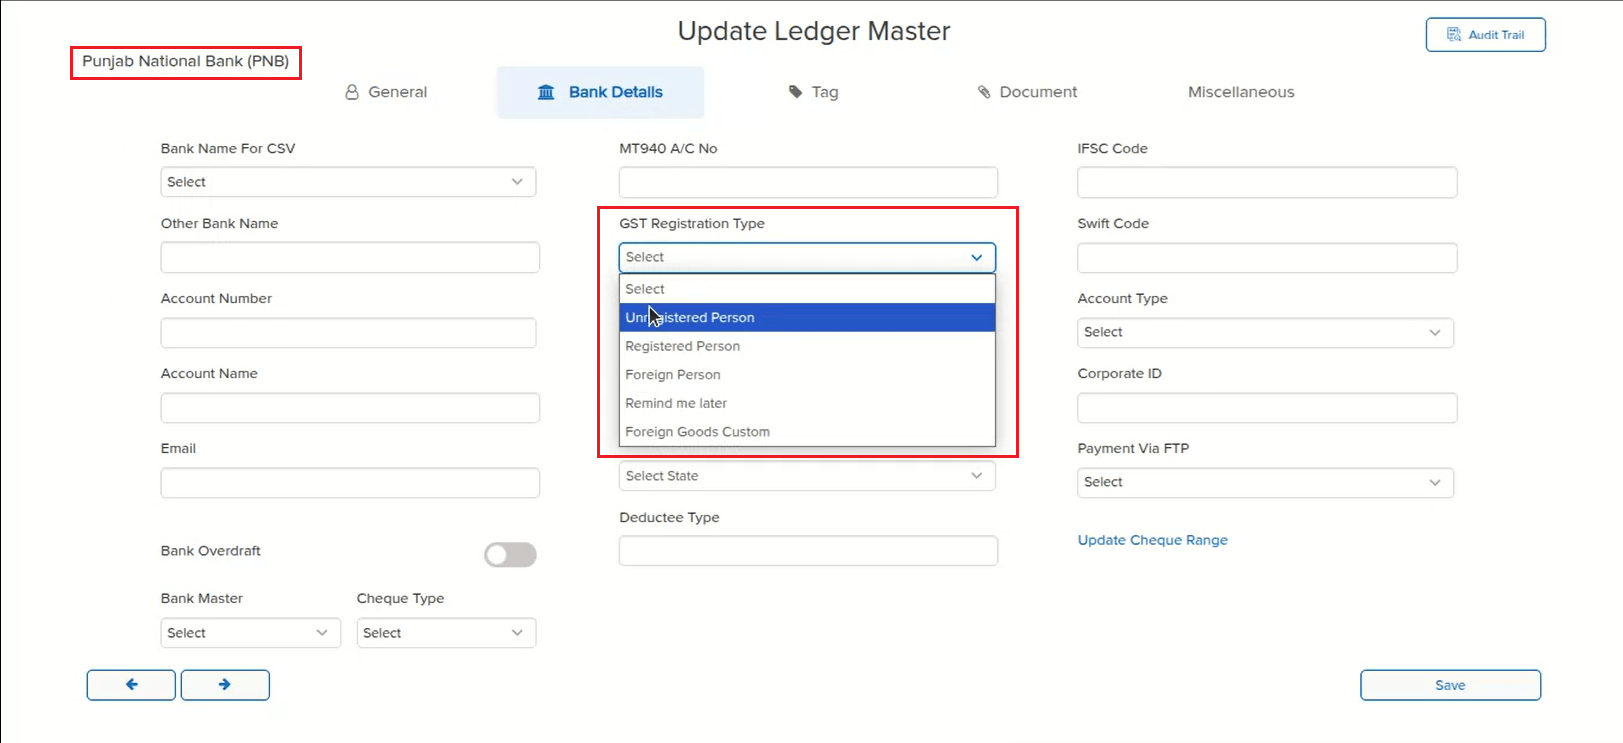
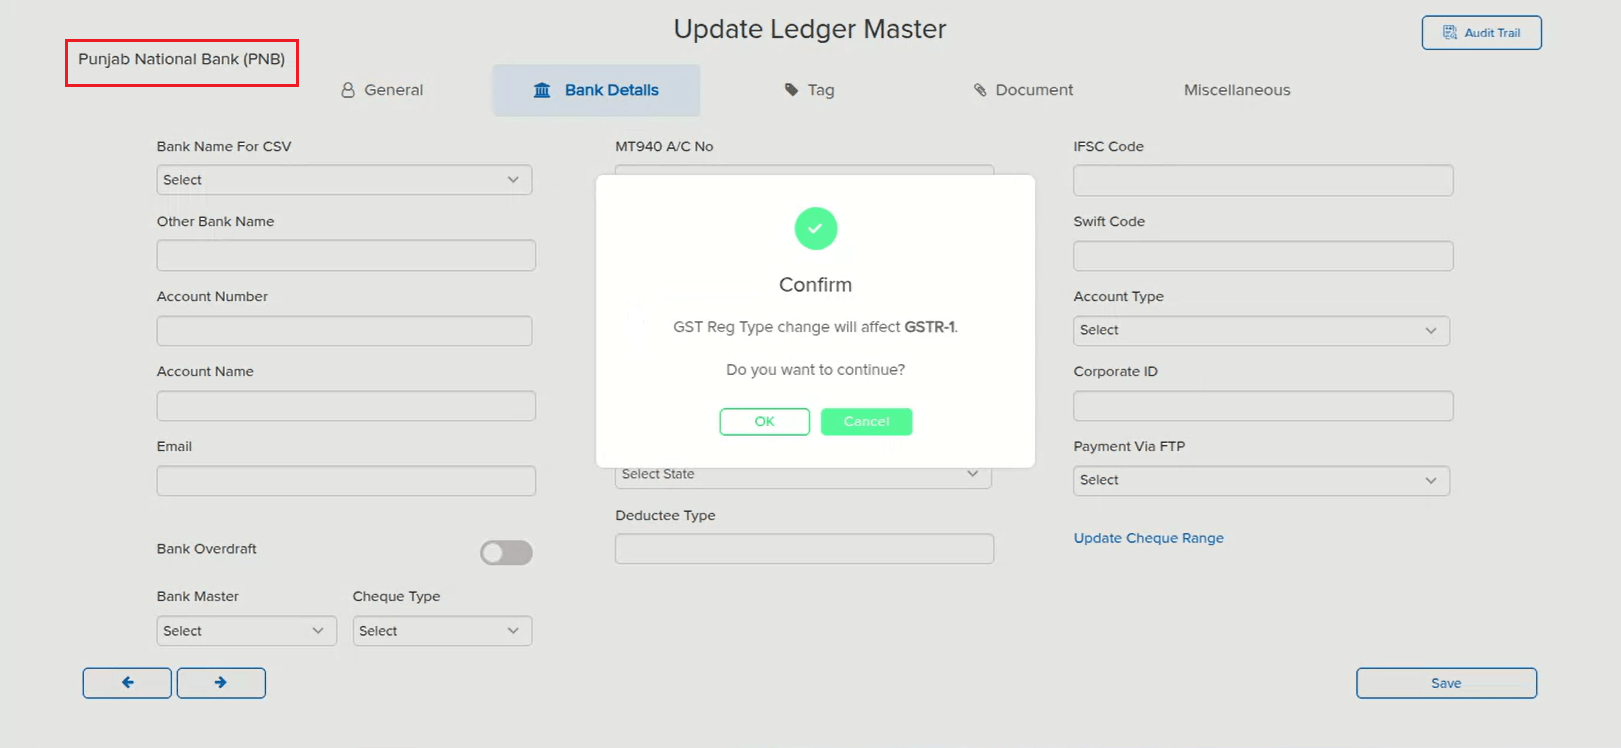
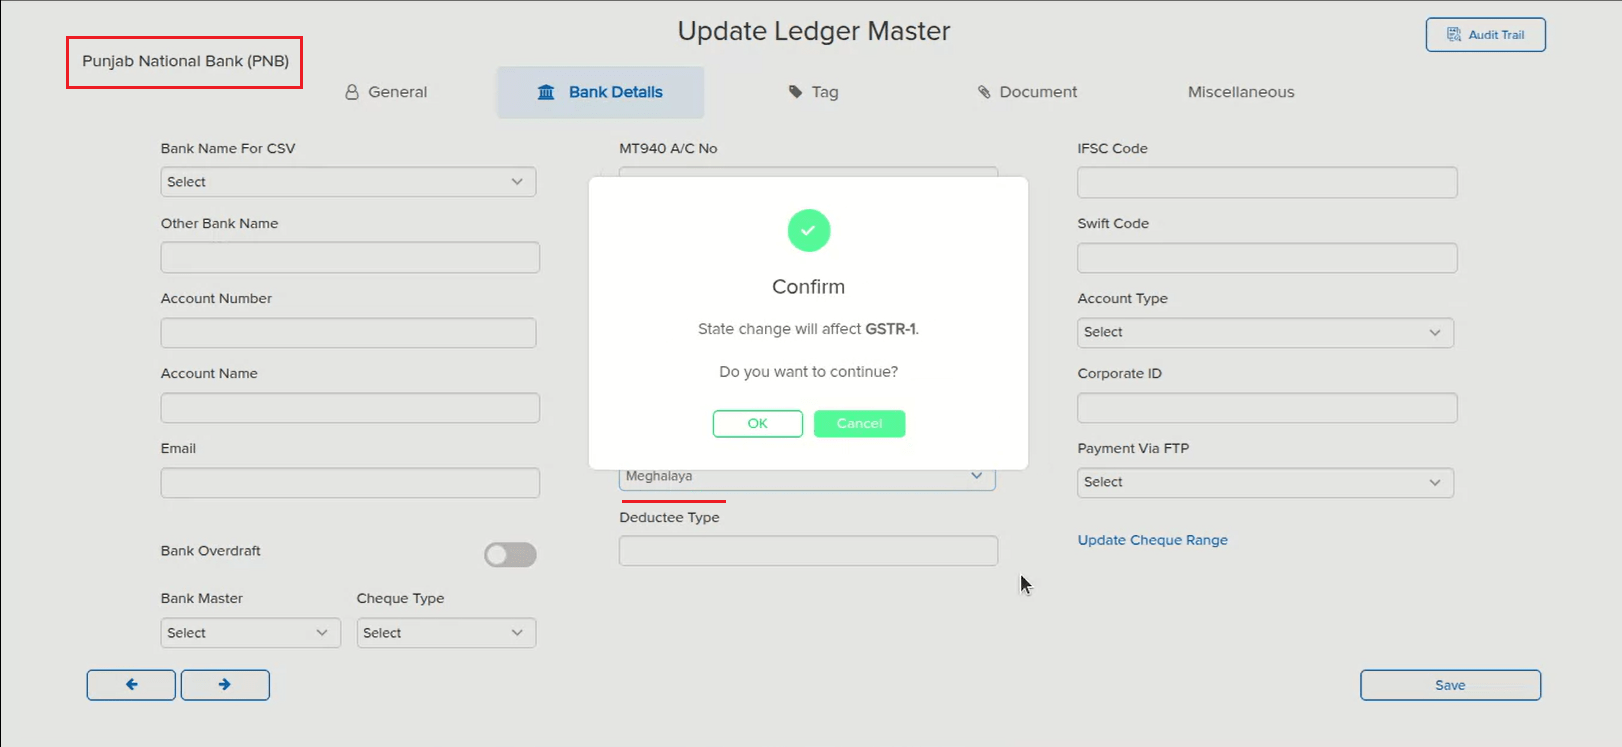
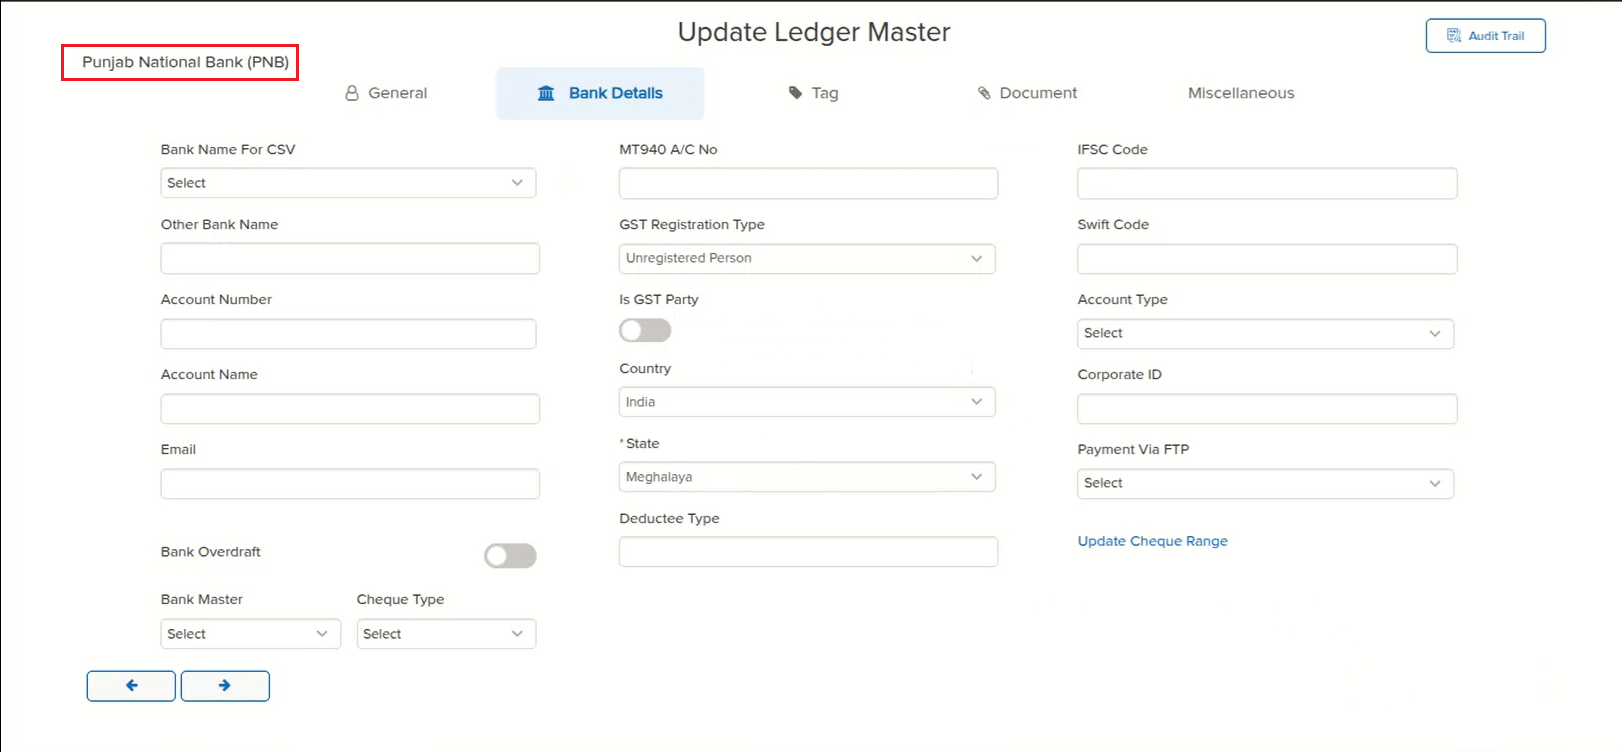
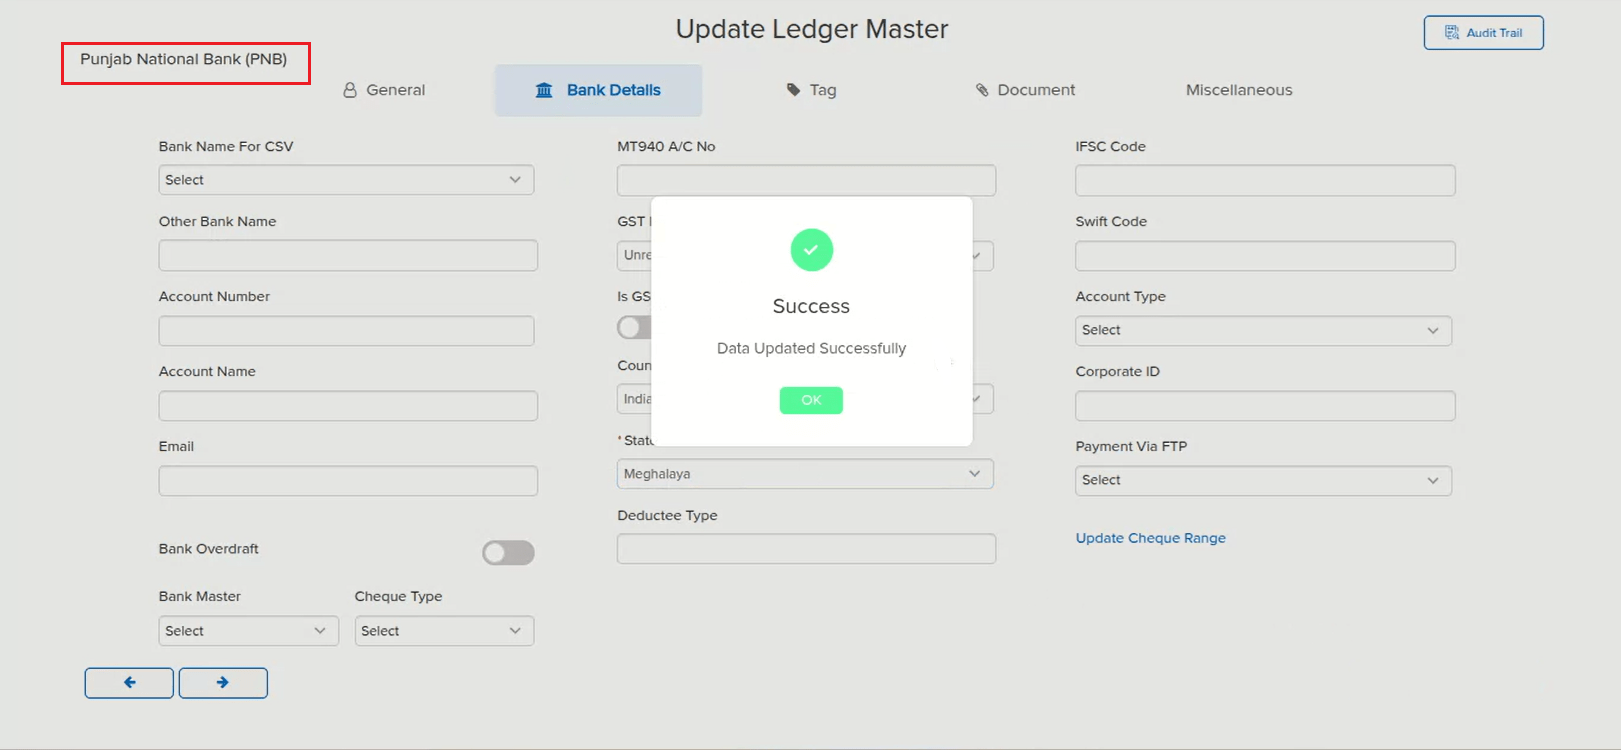
On the Bank Ledger Master, when a client tried to change the GST Registration Type and save it, the changed details were not getting saved. This happened because the confirmation alert meant for the Party Ledger Master when switching GSTIN was incorrectly triggered for the Bank Ledger Master as well — causing the registration-type-change alert to go into a loop and block the save.
🌟 How This Helps You
This is now fixed — the confirmation alert correctly applies only where intended, so changing the GST Registration Type (and the related State) on a Bank Ledger Master now saves successfully without looping.
🎬 Where to Find It
📷 See It in Action
📌 What Was Happening
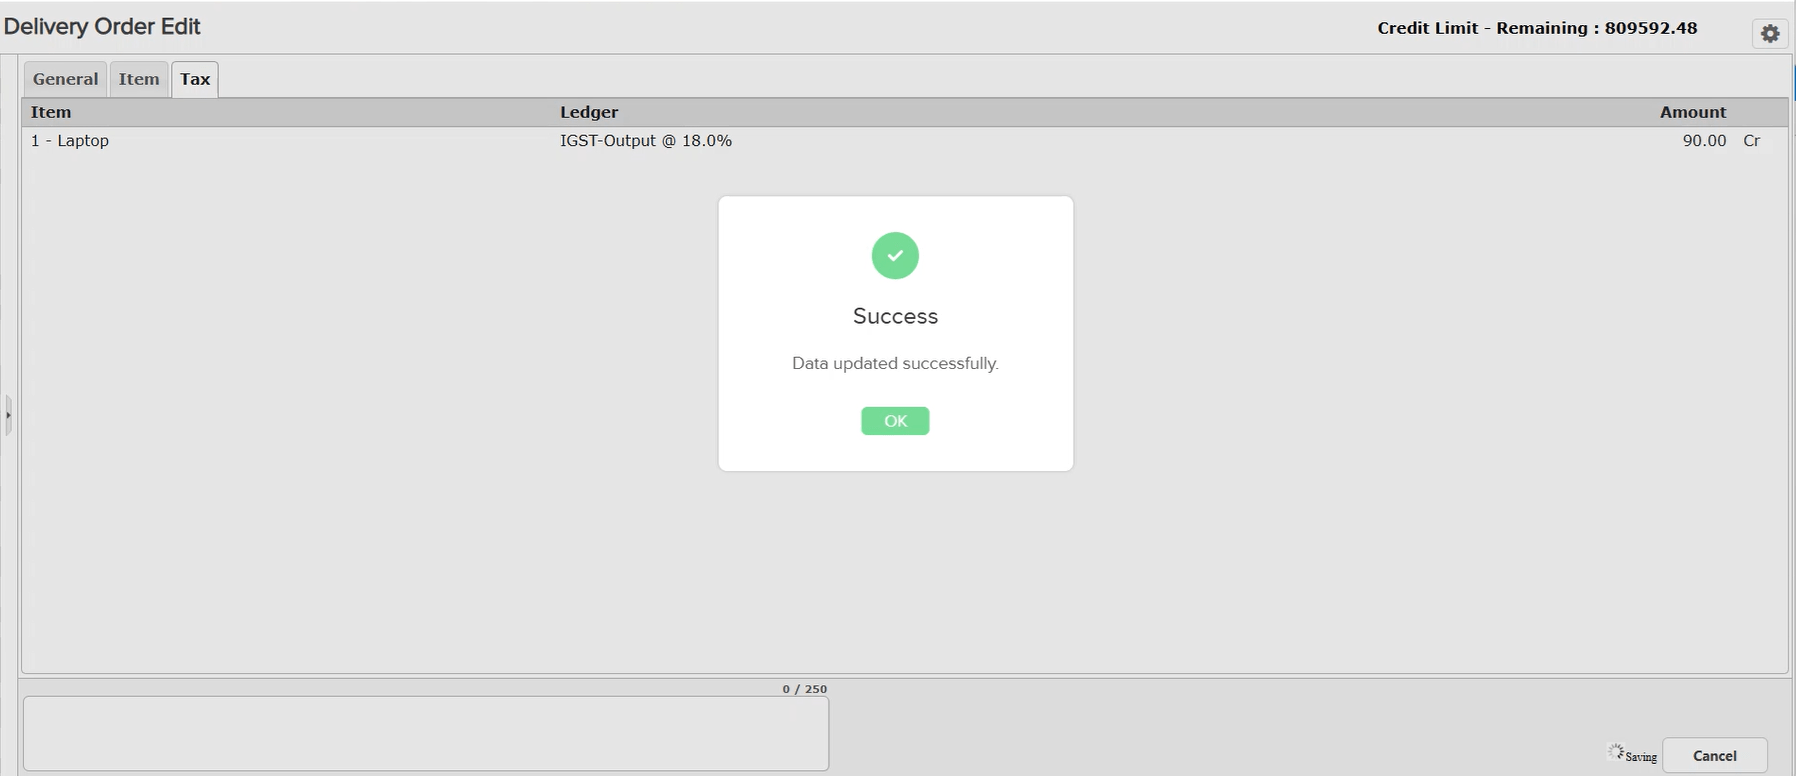
On a Delivery Order already saved with tax computed on the Tax tab, opening the entry for edit and changing the Party caused the tax amount to disappear. This happened because of a bug in the alert shown for switching the party’s GSTIN — the same alert logic used for the party ledger master — which interfered with the tax computation when the party was changed mid-edit.
🌟 How This Helps You
This is now fixed — changing the Party while editing a transaction no longer clears the computed tax, so the Tax tab continues to reflect the correct tax amount.
🎬 Where to Find It
📷 See It in Action
📌 What Was Happening
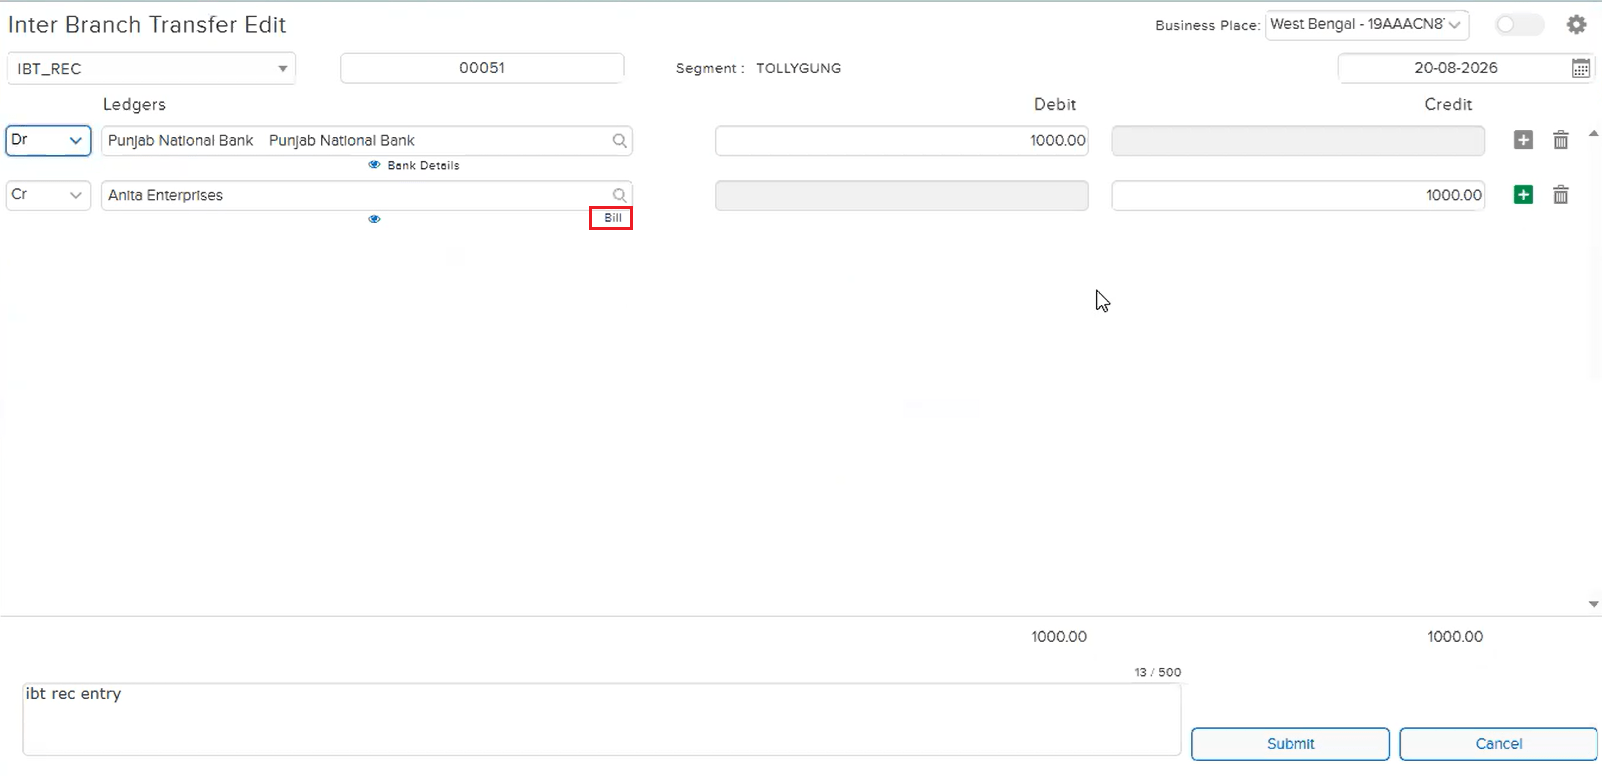
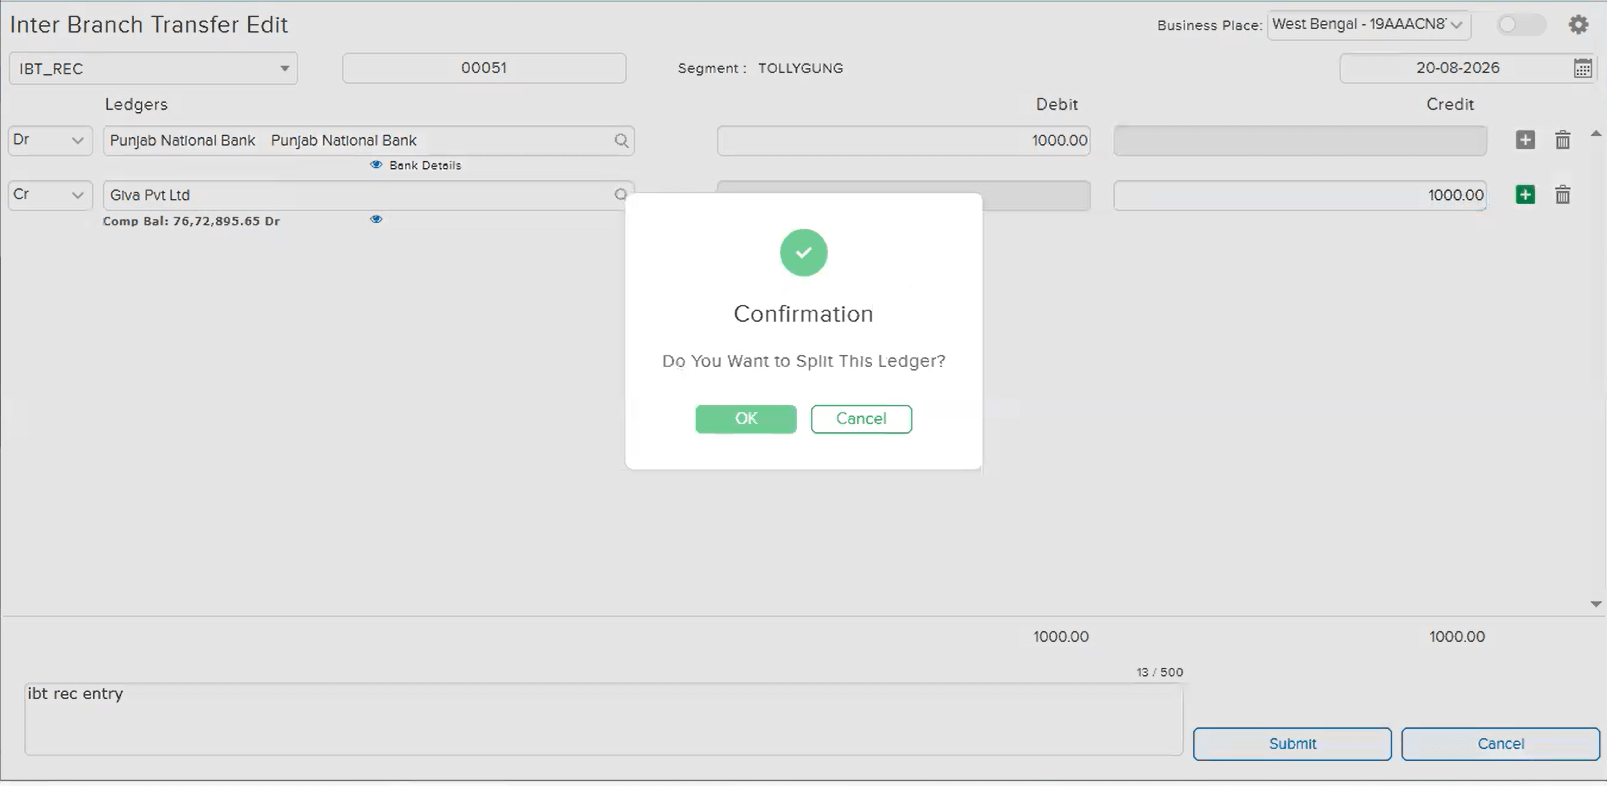
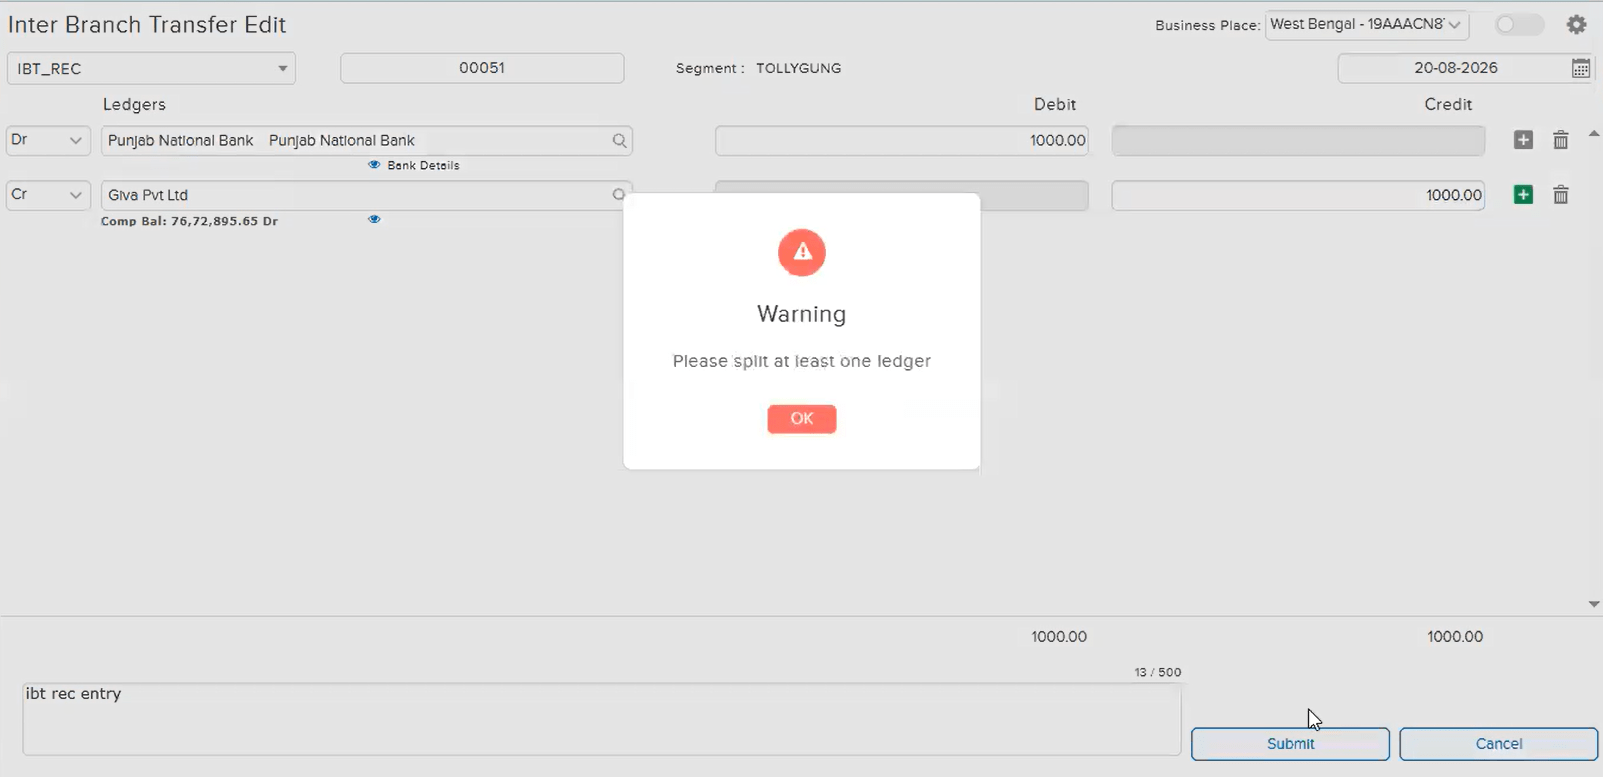
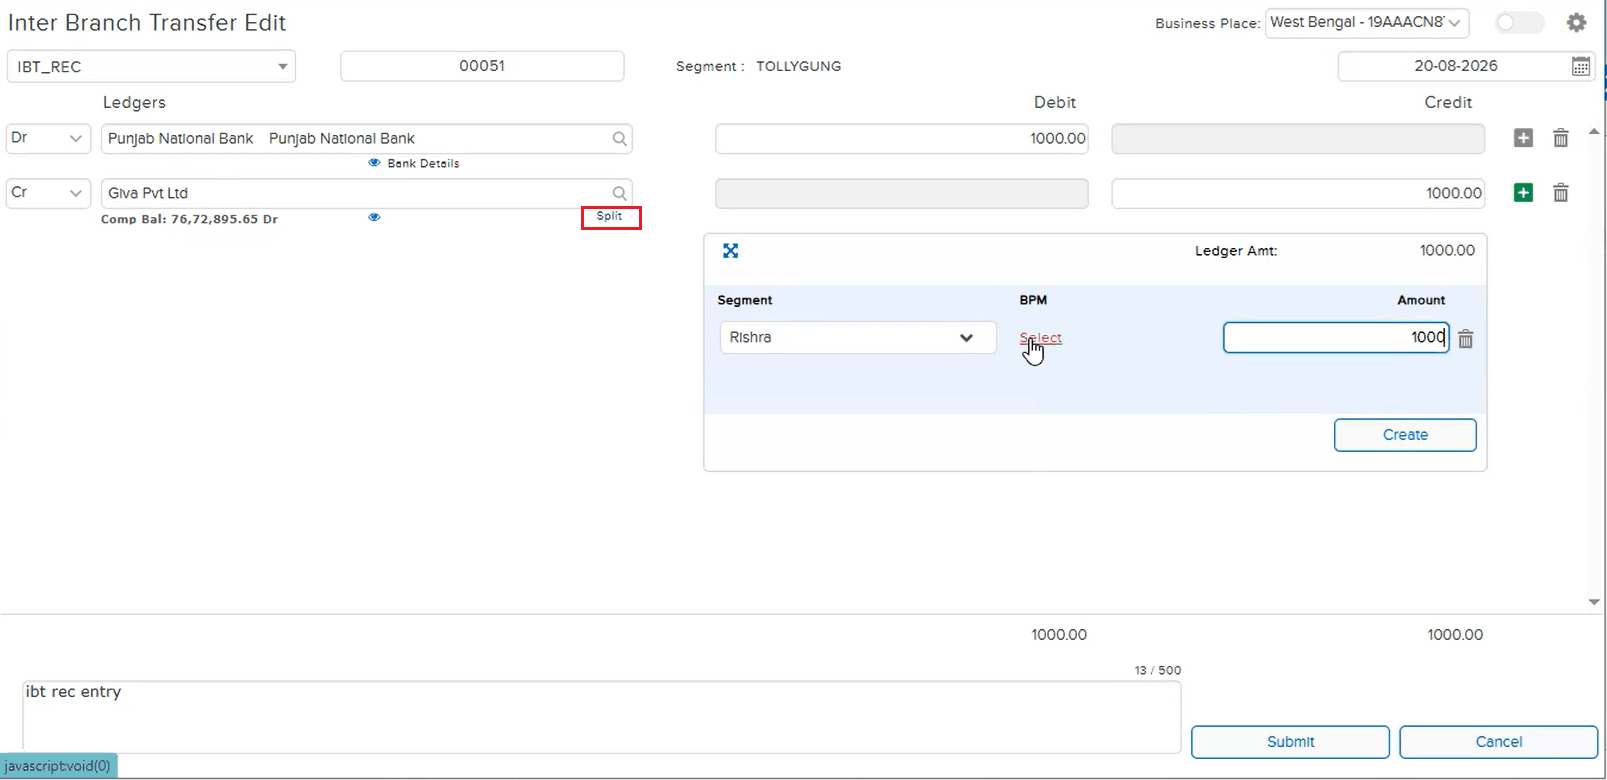
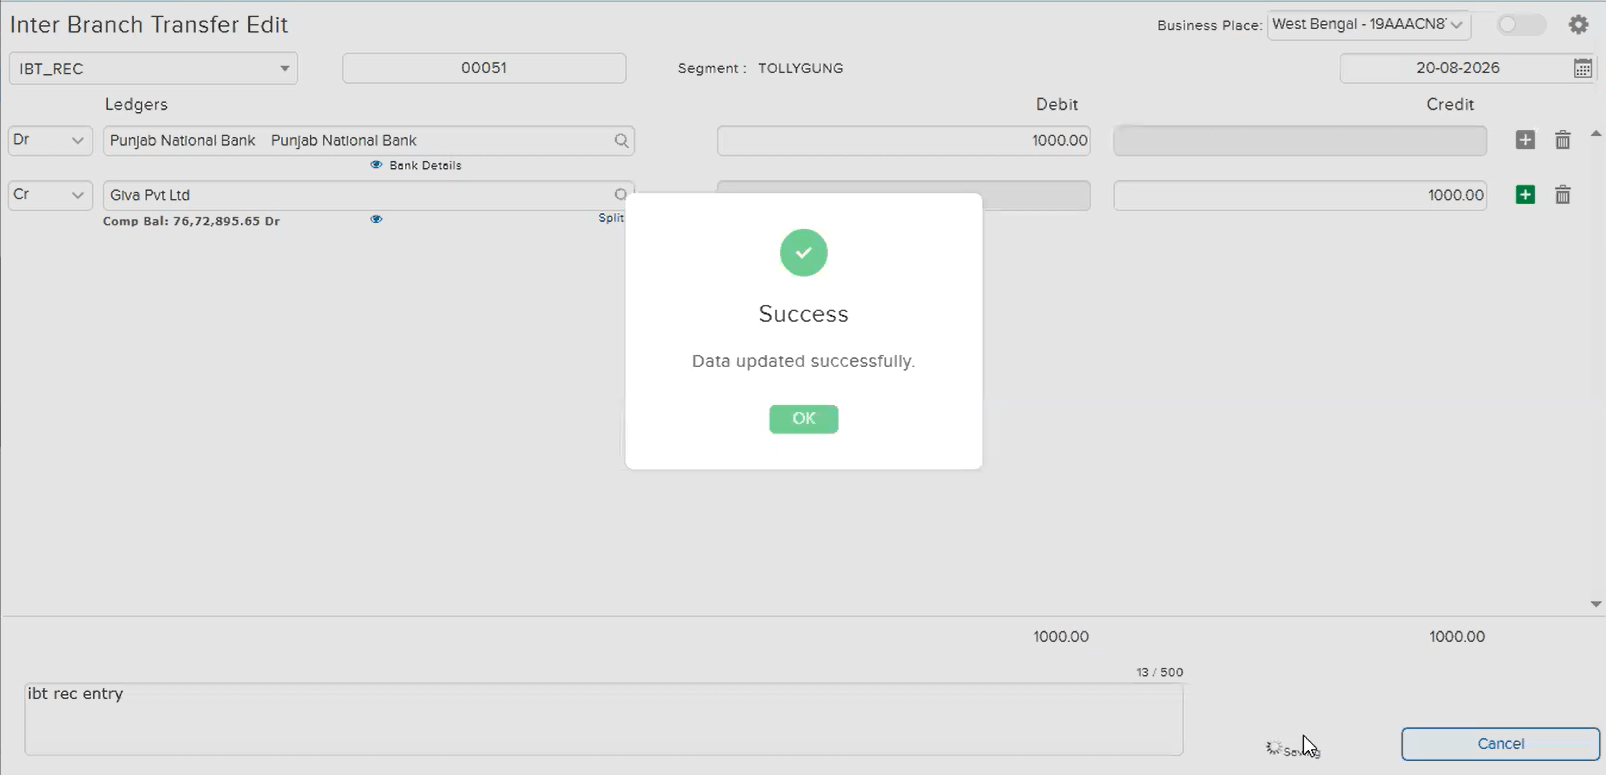
On an IBT_REC entry, when the user opened it in Edit mode and replaced the existing Bill-enabled party ledger with a new ledger that is Non-Bill or Cost Centre (CC), the system correctly displayed a “Do You Want to Split This Ledger?” confirmation. If the user clicked Cancel on this popup instead of splitting, a warning — “Please split at least one ledger” — appeared, but the Split section itself showed blank Segment / BPM / Amount fields instead of the split data entered earlier. The entry could still be saved in this state, and reopening the same entry in Edit mode again continued to show the split data as blank.
🌟 How This Helps You
This is now fixed — replacing a Bill-enabled party ledger with a Non-Bill or CC ledger in Edit mode and cancelling the split confirmation no longer leaves the Split section blank, and previously entered split data is correctly retained when the entry is reopened.
🎬 Where to Find It
📷 See It in Action
📌 What Was Happening
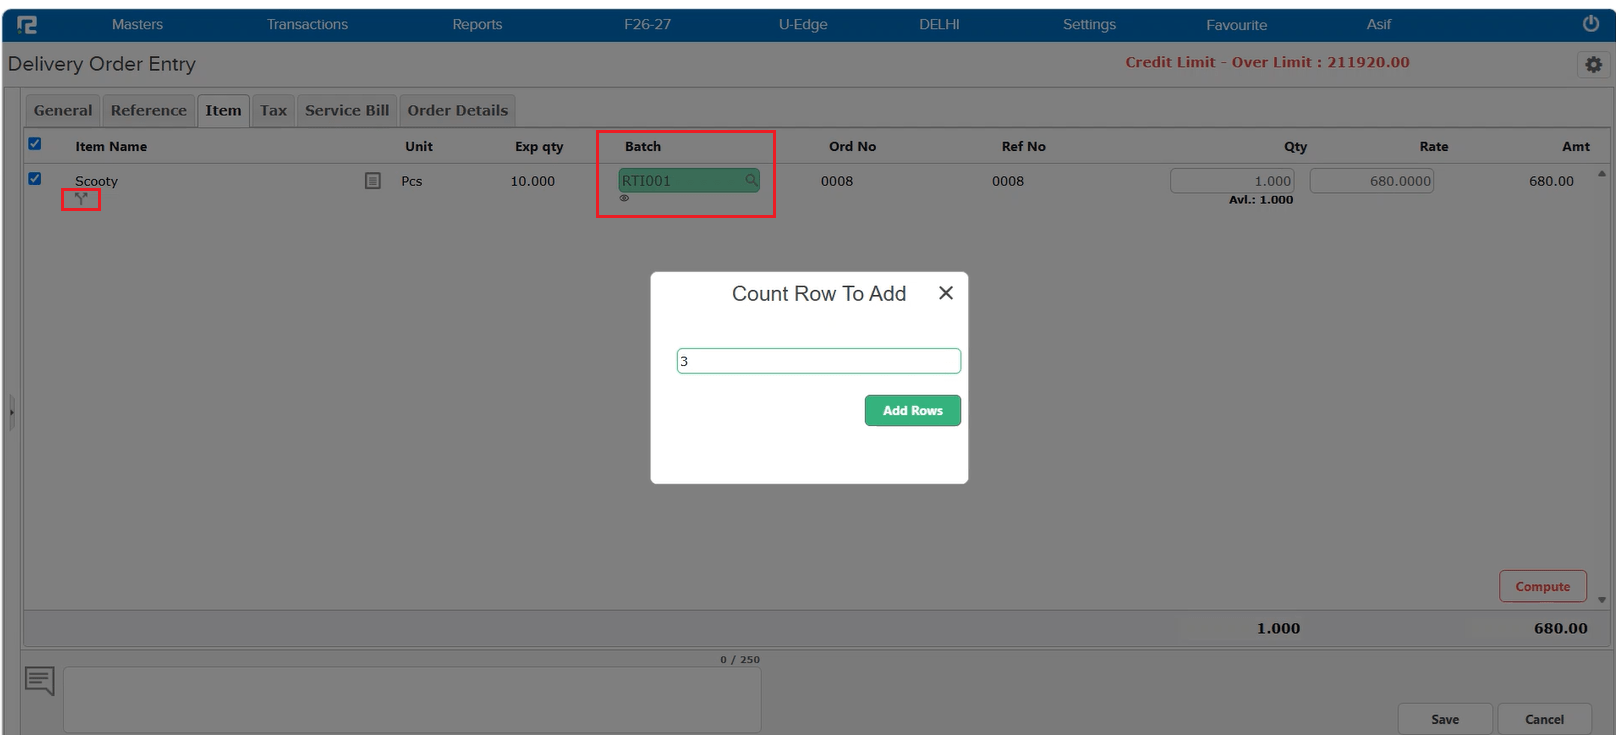
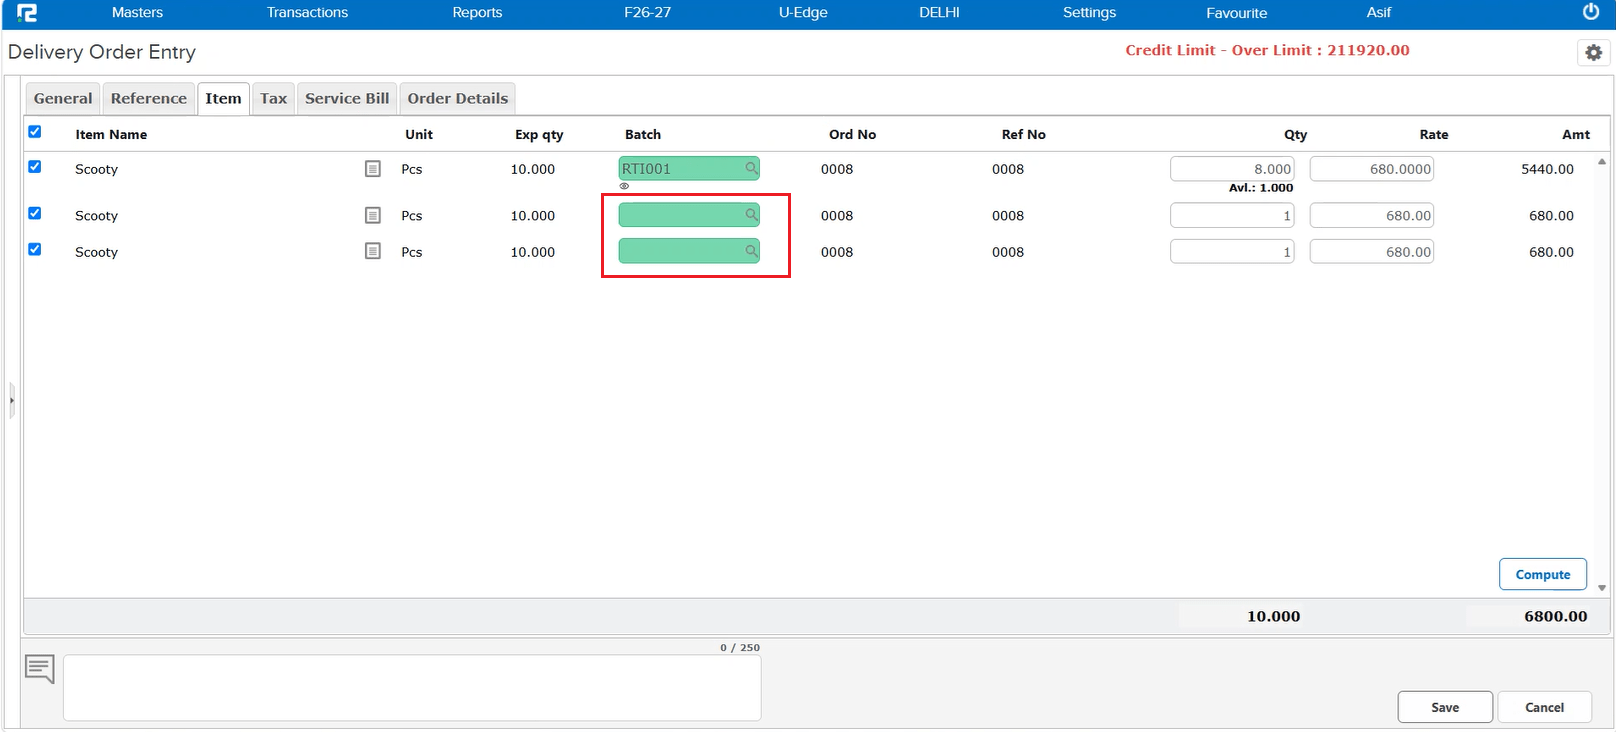
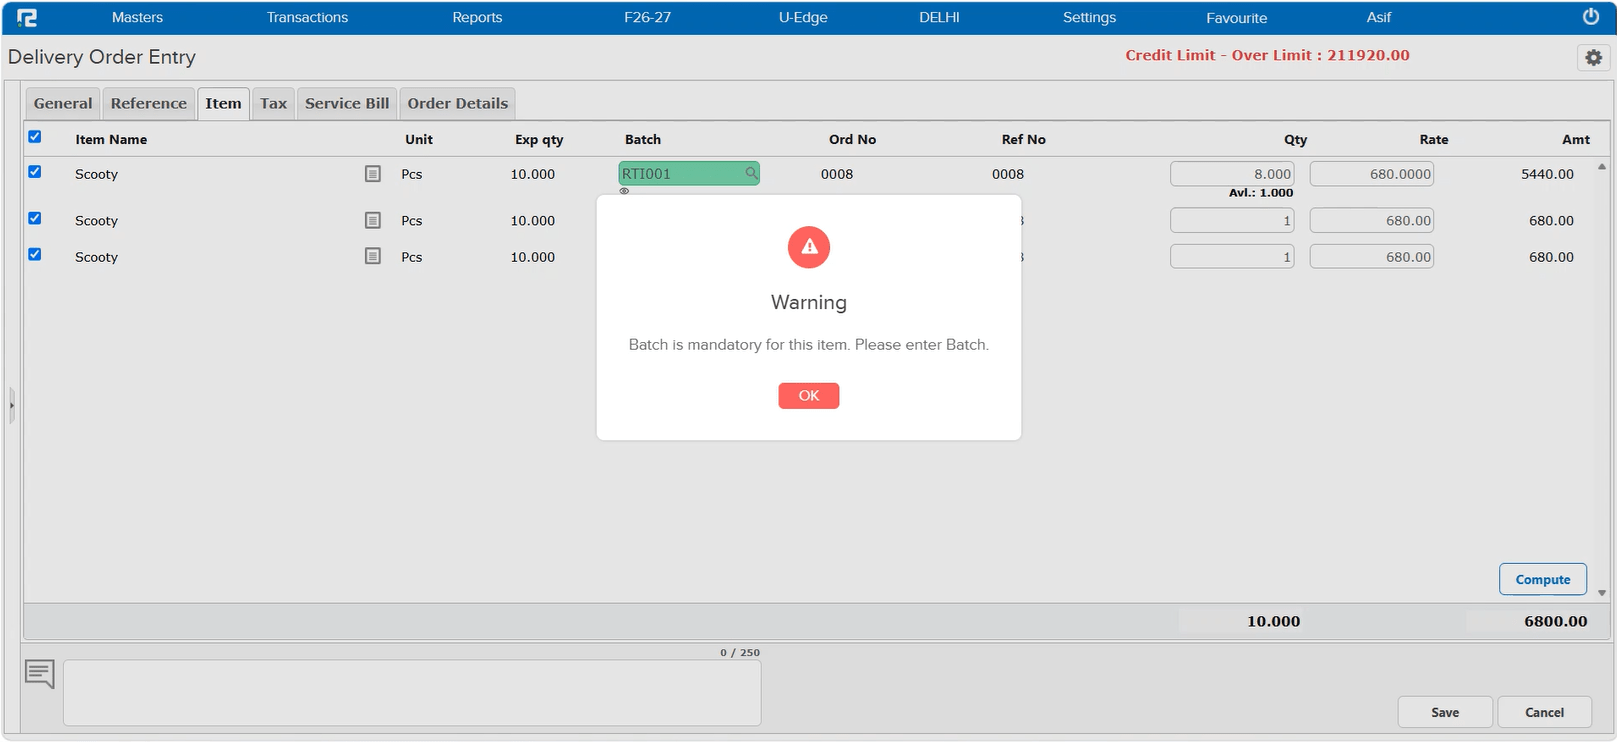
On the Delivery Order Entry screen, with Batch Split and Batch both enabled for an item, splitting a row into multiple rows (using the split icon) carried the Batch over to only the first row — the remaining split rows were left with a blank Batch. Despite Batch being mandatory for the item, the entry was still allowed to save successfully with these rows blank. This was introduced as a side effect of a recent optimization to the Delivery Order screen.
🌟 How This Helps You
This is now fixed — when Batch is mandatory for an item, every row created by splitting must have a Batch entered. Attempting to Save with any split row left blank now correctly blocks with a “Batch is mandatory for this item. Please enter Batch.” warning.
🎬 Where to Find It
📷 See It in Action
📌 What Was Happening
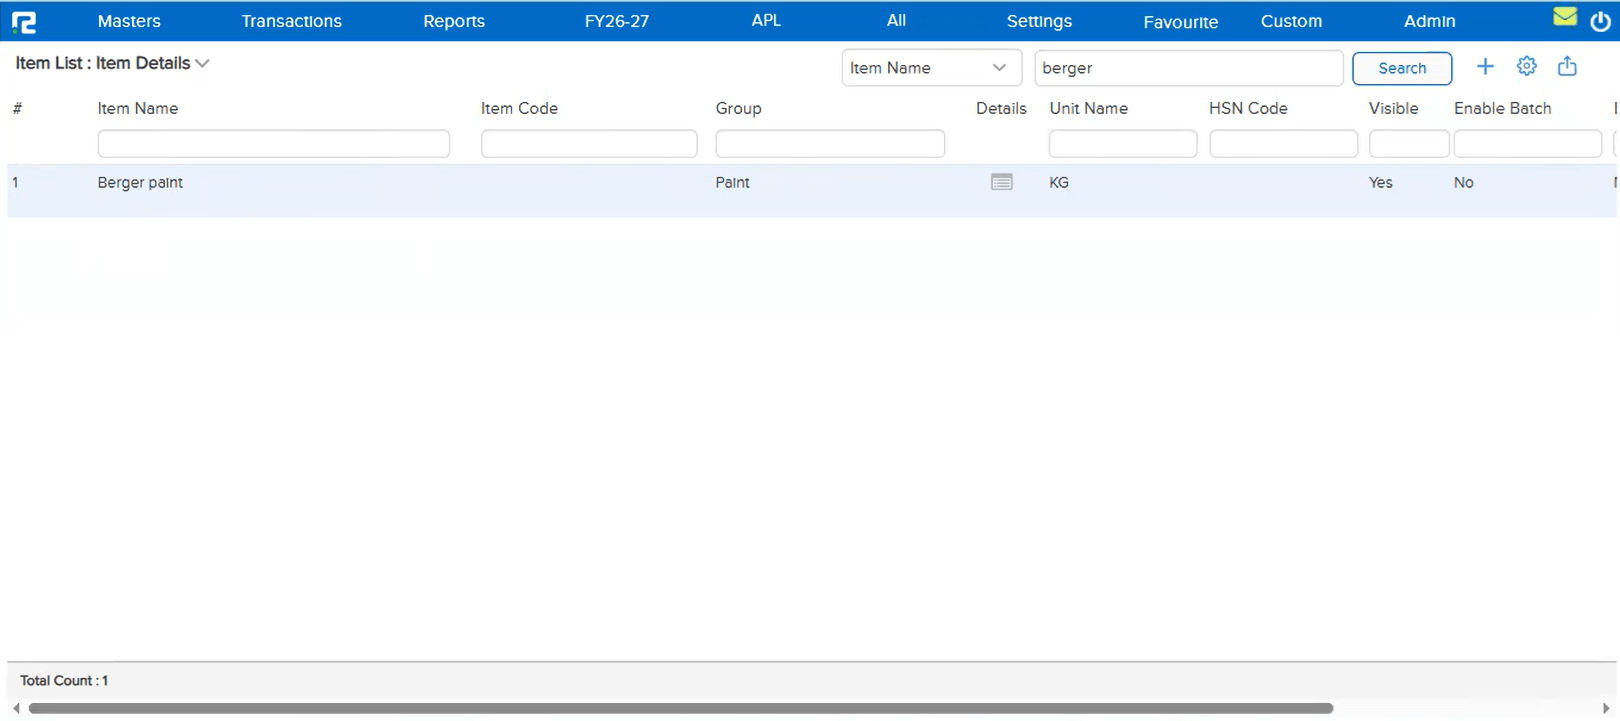
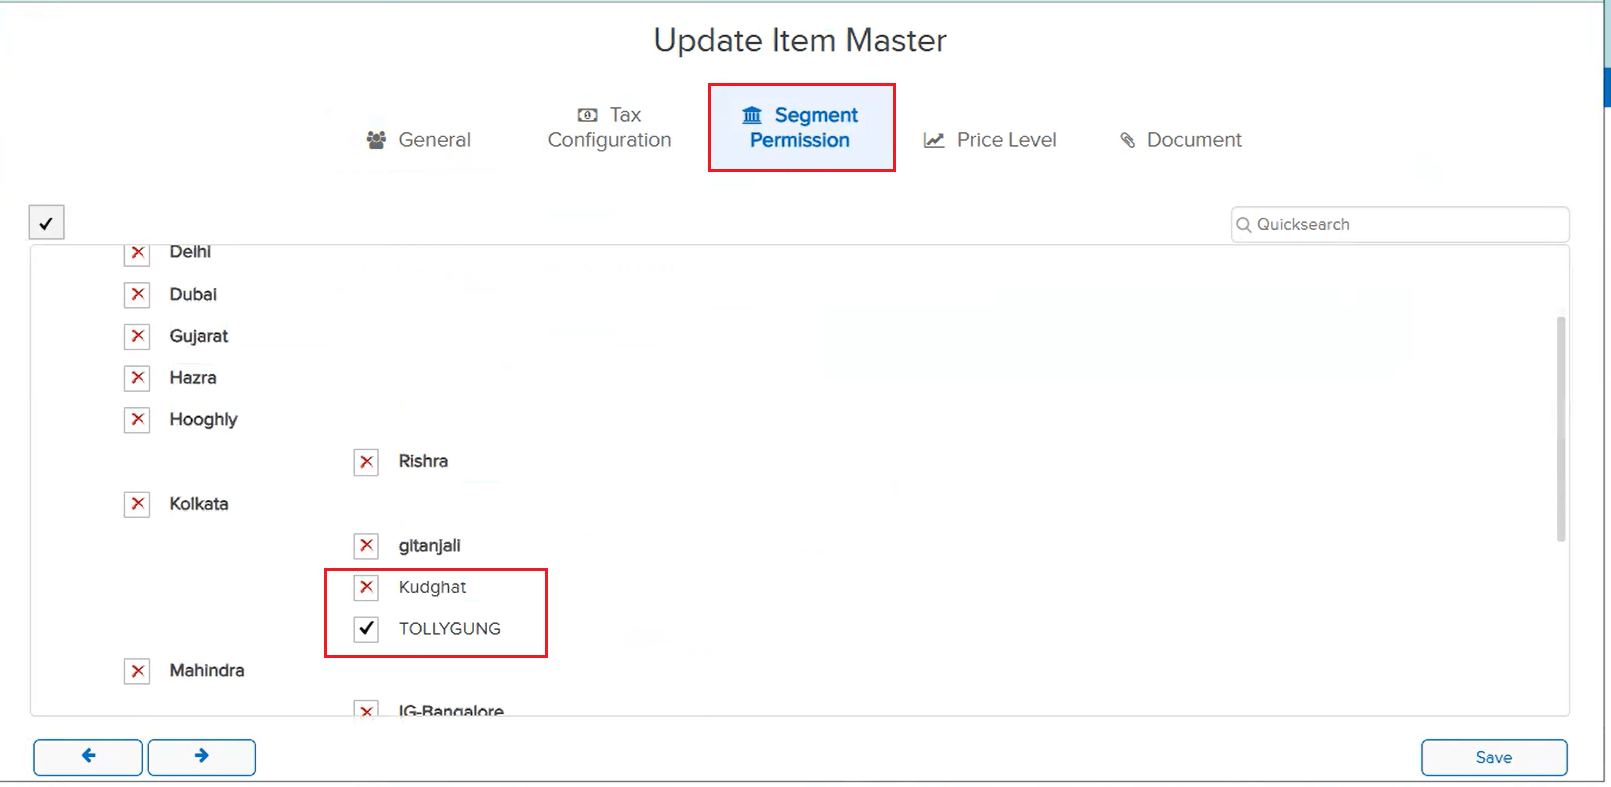
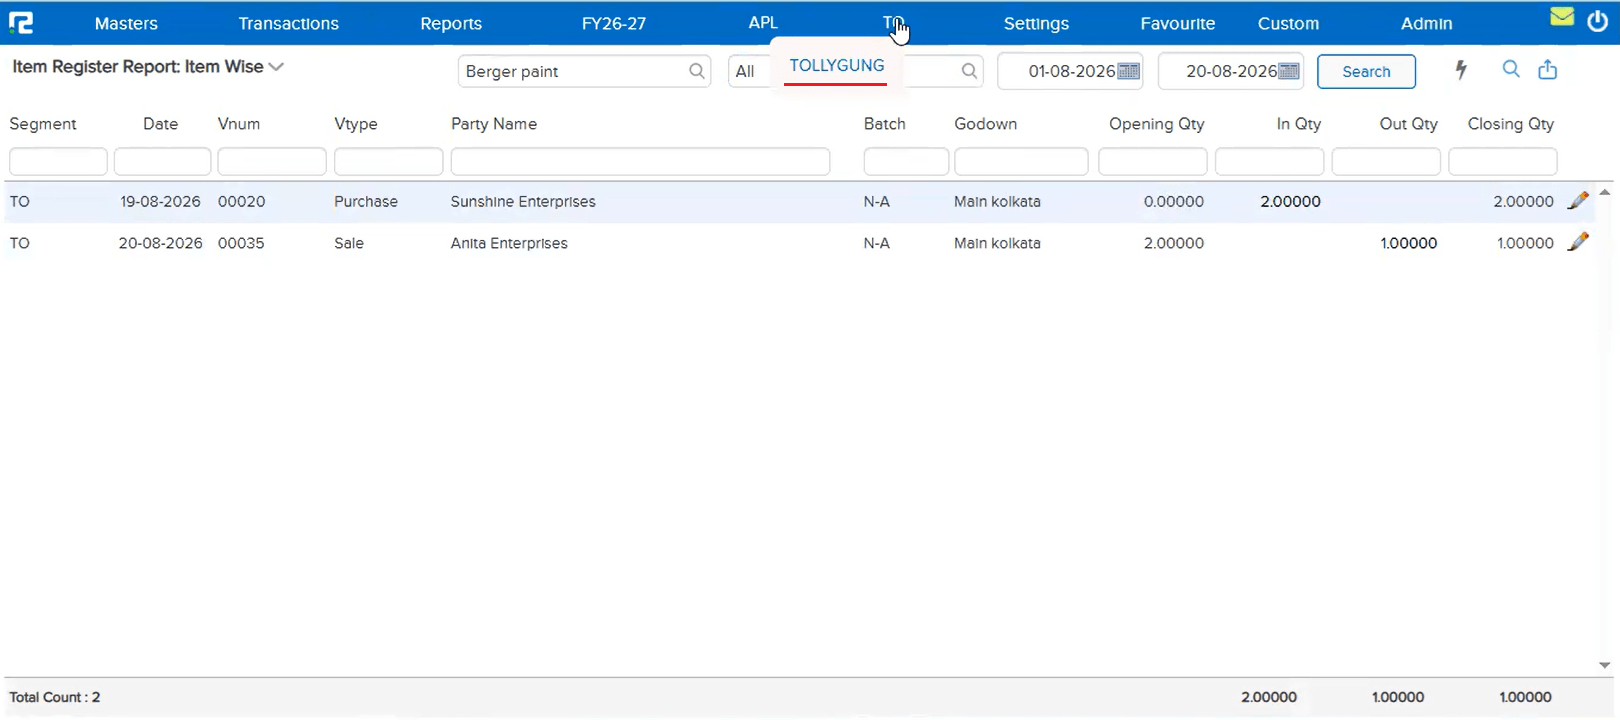
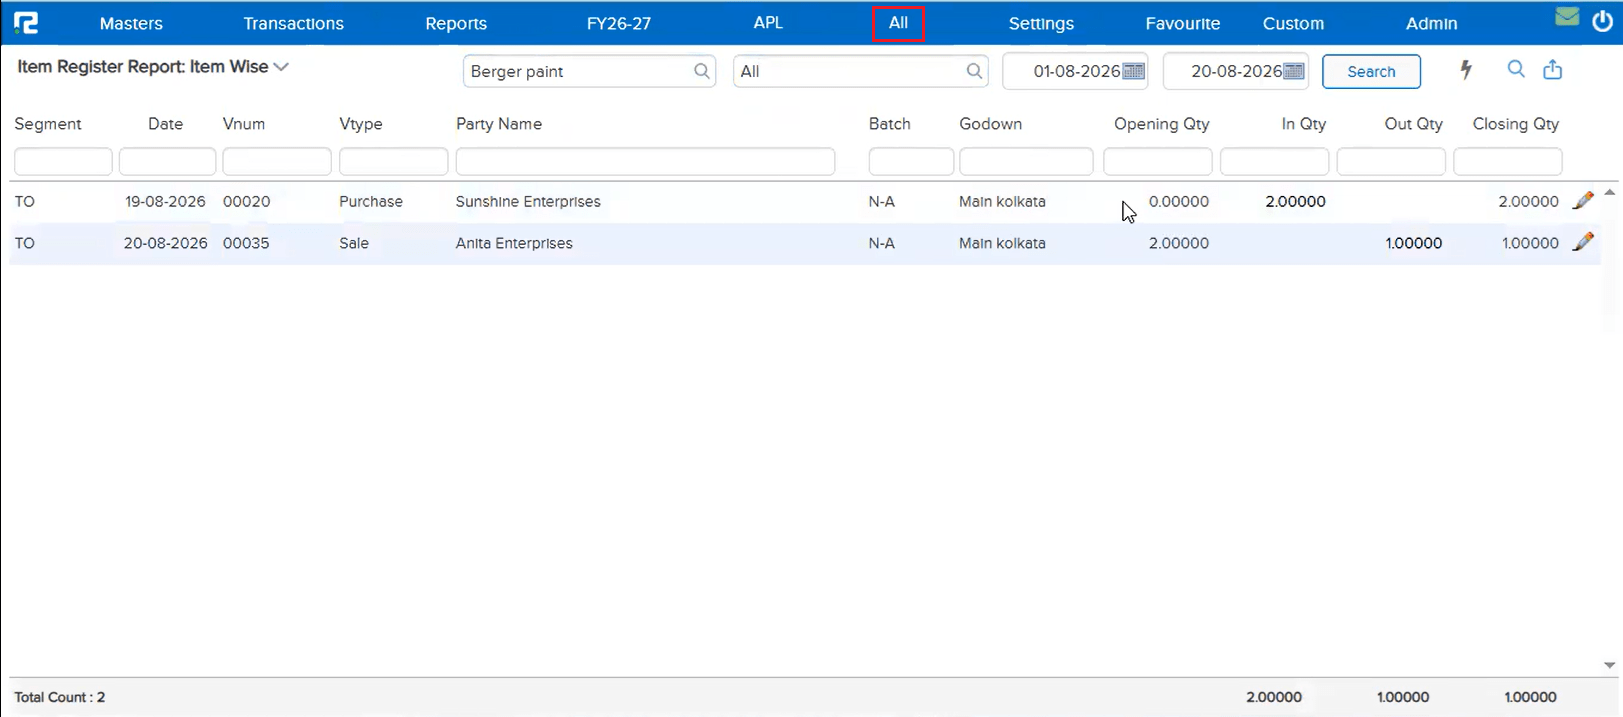
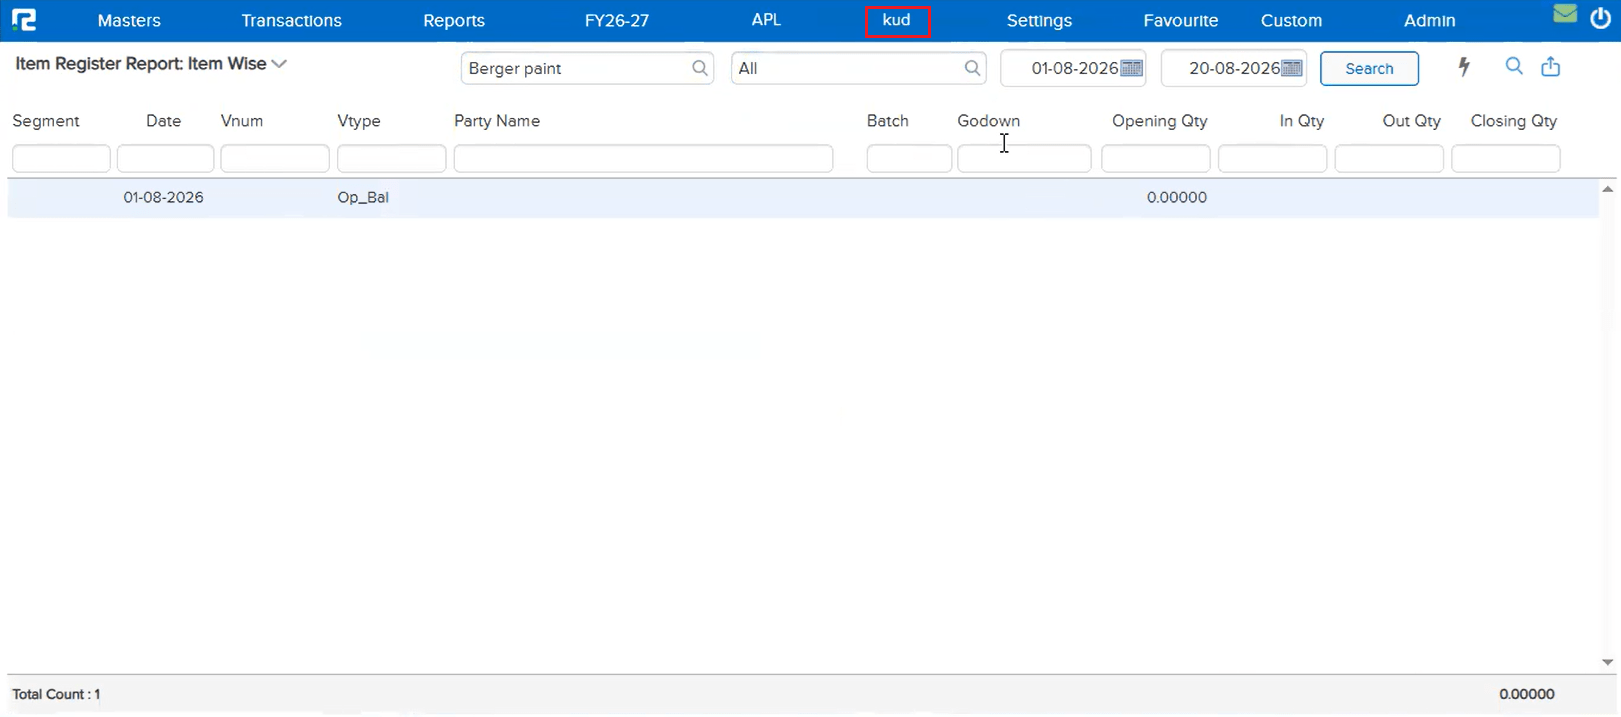
An item assigned to a specific Item Segment (via Segment Permission on the Item Master) was not appearing in the Item Register Report: Item Wise when searched with All Segments selected — even though the user had access to the report and to that segment. The item showed up only when its specific segment was selected in the search. This happened because the old logic applied Item Segment permissions to report searches as well — restricting an item to being found only from the segment(s) it was permitted for, whether searching at a specific segment or at All / Company level.
🌟 How This Helps You
This is now fixed — Item Segment permission now controls only transactions, not reports. As long as the user has access to the report itself, an item is correctly searchable across every segment (including All Segments) wherever a transaction for it exists, regardless of which segment(s) the item is permitted for.
🎬 Where to Find It
📷 See It in Action
📌 What Was Happening
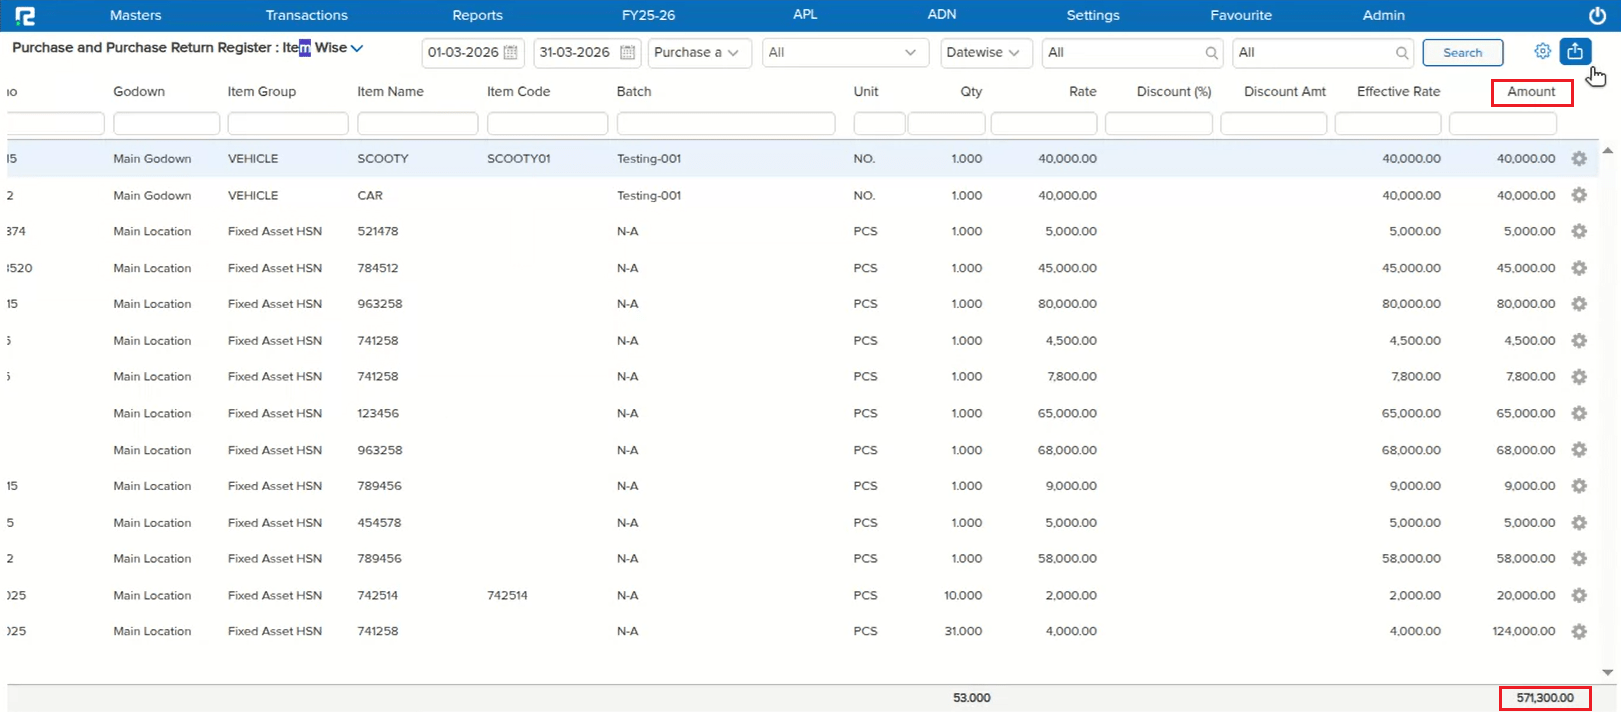
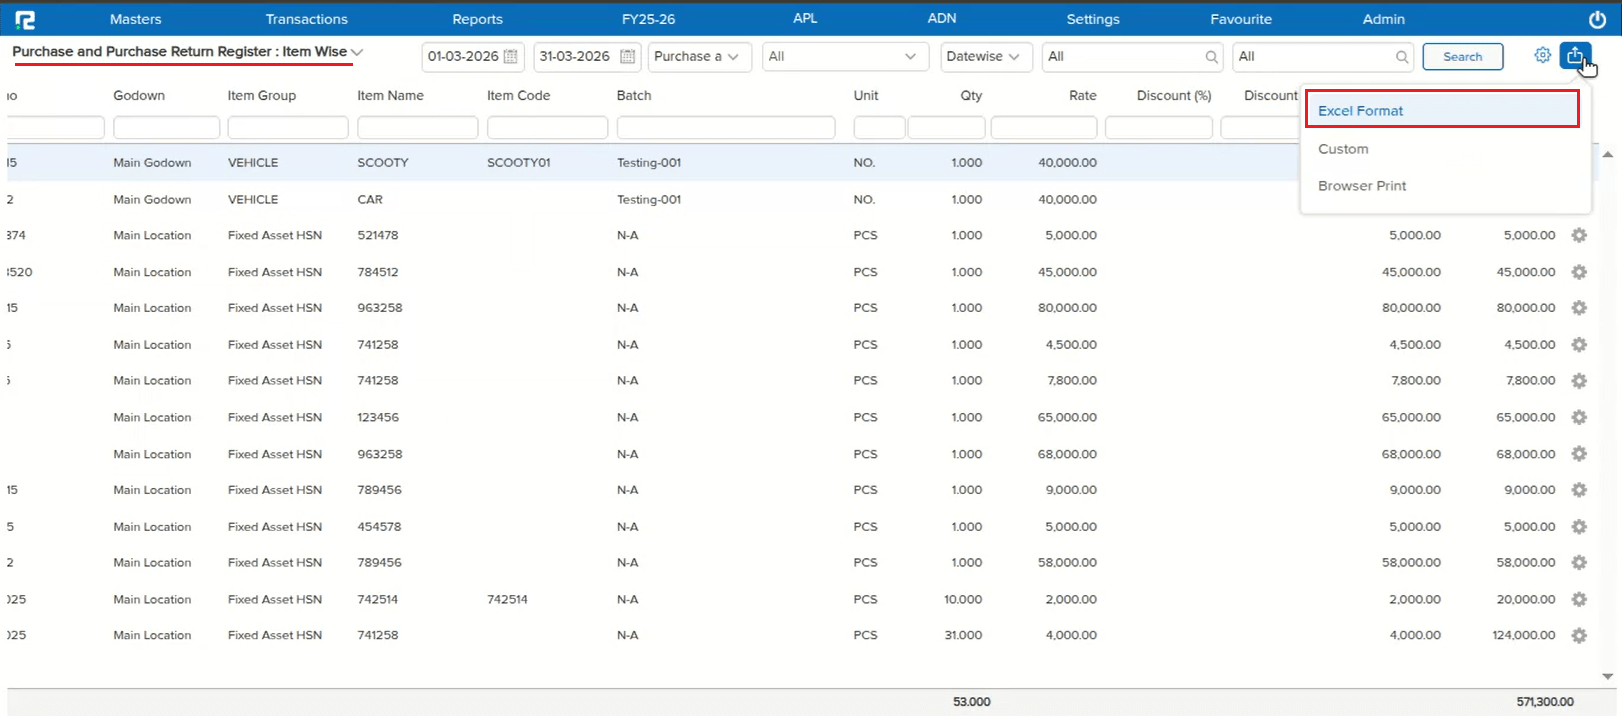
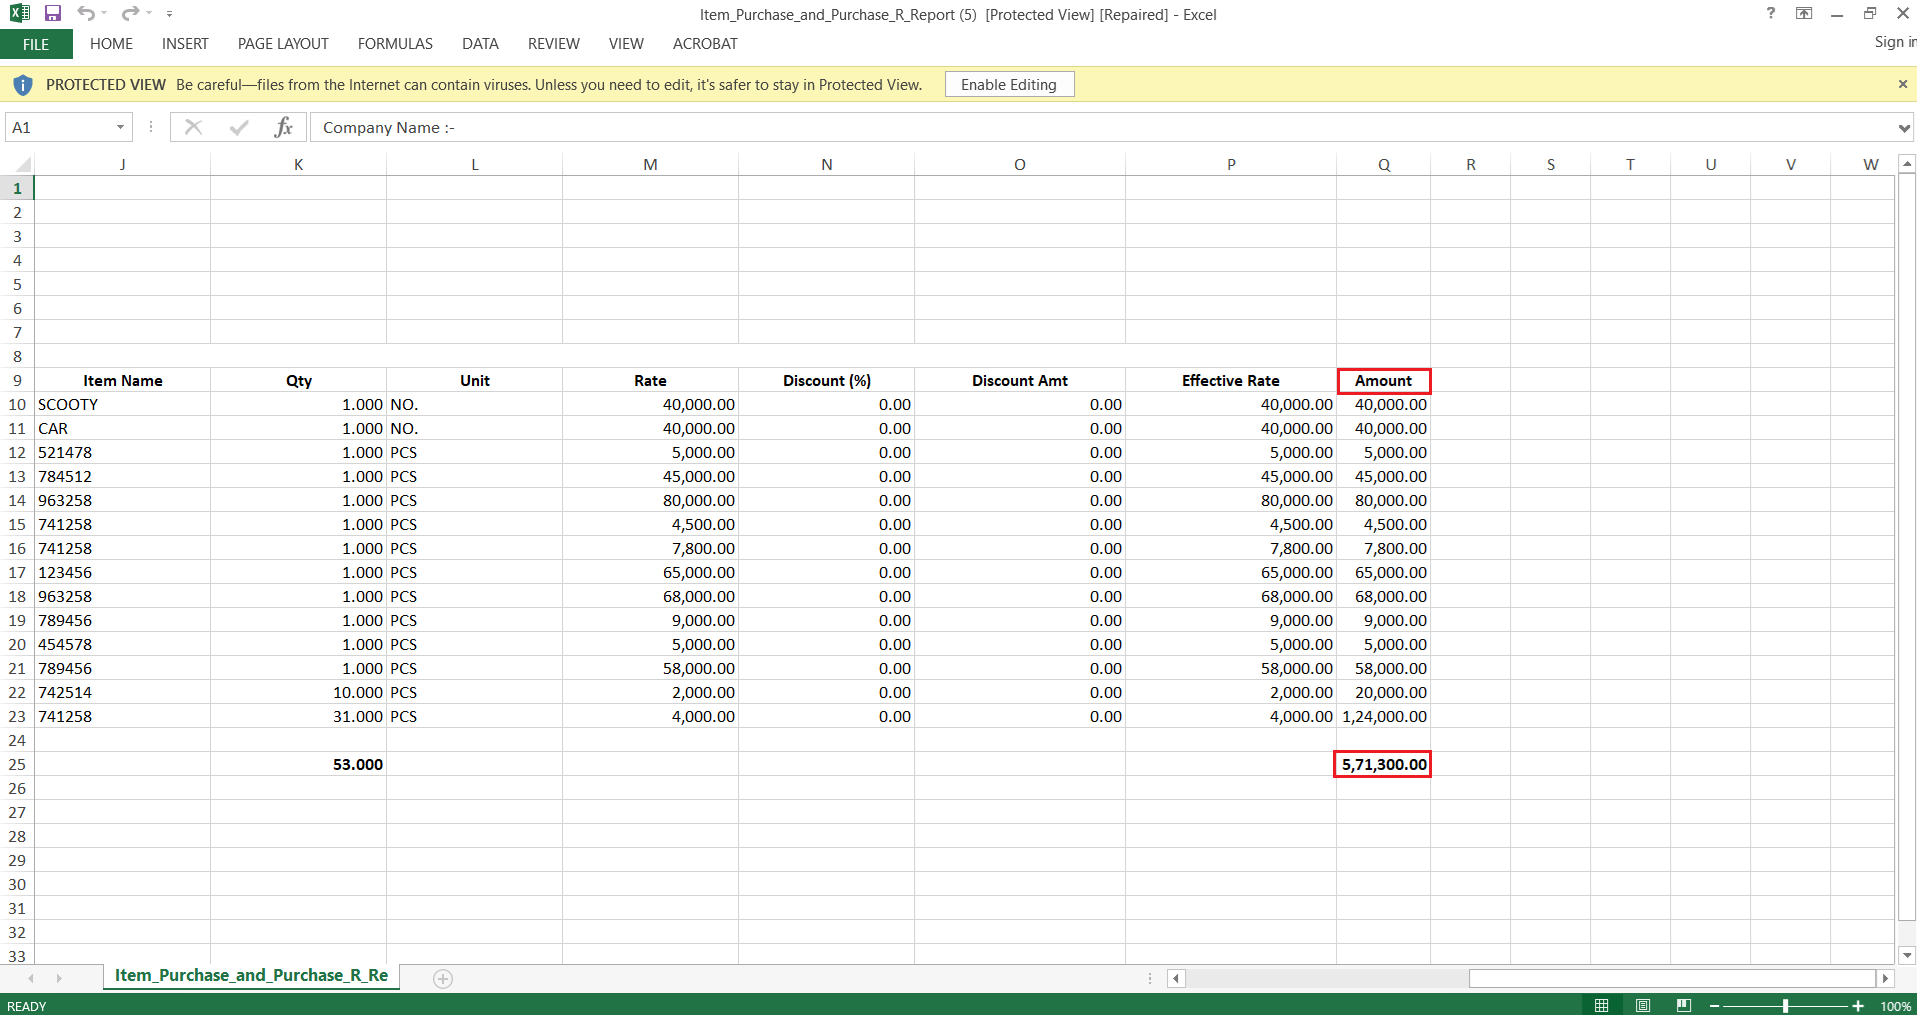
On the Purchase and Purchase Return Register: Item Wise screen, exporting to Excel produced a file where the column headings did not match the data — the Effective Rate column was exported with the heading “Amount”, while the actual Amount column next to it exported with a blank heading. The underlying data in both columns was correct; only the column headers in the exported file were mismatched.
🌟 How This Helps You
This is now fixed — the exported Excel file correctly shows “Effective Rate” and “Amount” as separate, correctly labeled column headers, matching the data beneath them.
🎬 Where to Find It
📷 See It in Action