A debit note is sent from a buyer to a seller in order to request a return for defective or damaged goods or other specified reasons.
How to Record a Debit Note (With Manual GST)
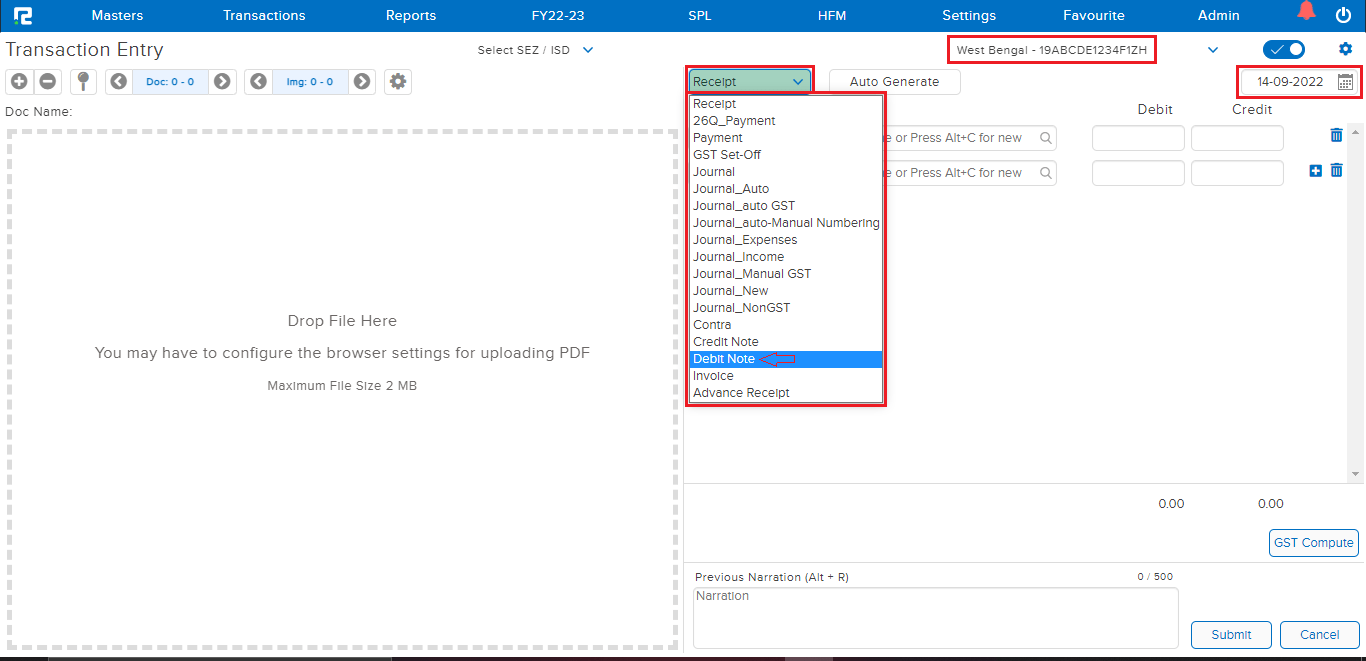
STEP 1: Go to Transactions ⇒Accounts⇒ vouchers
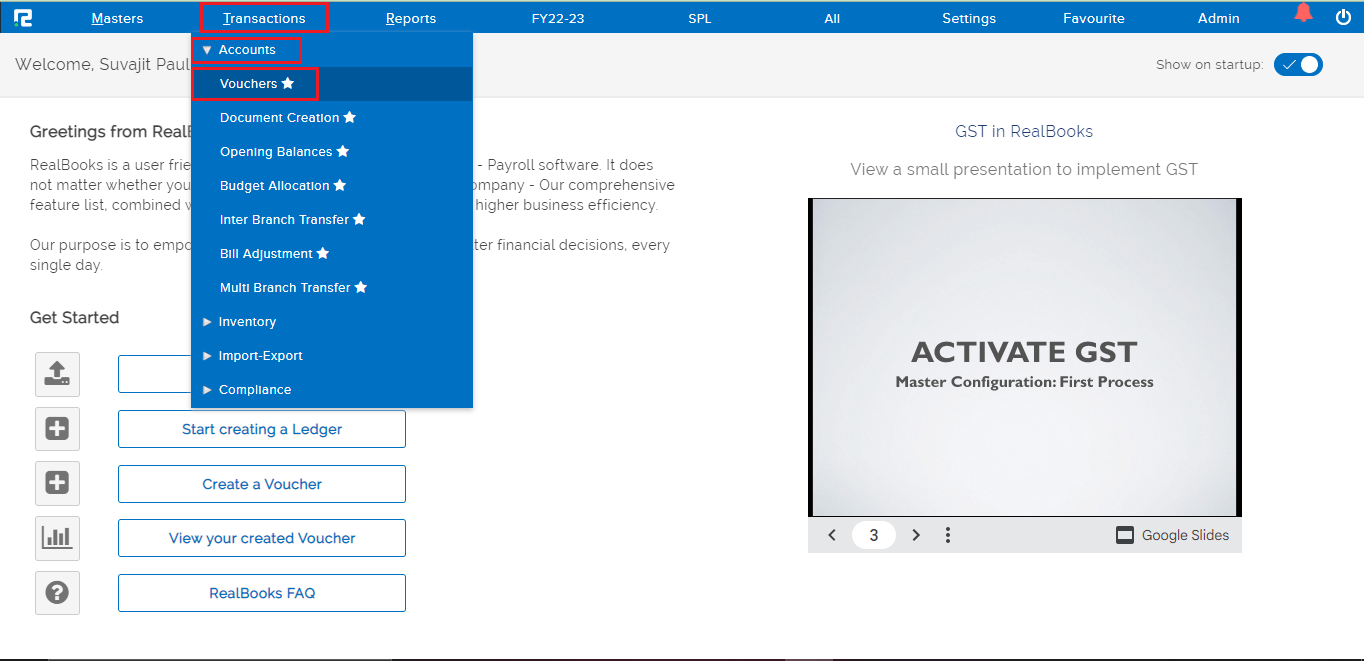
A Transaction Entry page will open. Select the Voucher type from the Dropdown list. The Business place as per GST is displayed by default, however in the case of Multiple Business Places, the same can be selected from the Dropdown list.

STEP 2: On the Debit Side, search the vendor/party ledger (type minimum 3 letters, then select the ledger) and put the bill amount.
If the Bill Feature is enabled in the Vendor ledger master, the Bill Table will open.
STEP 3: On the Credit side, search the Expenses ledger and enter the expenses amount.
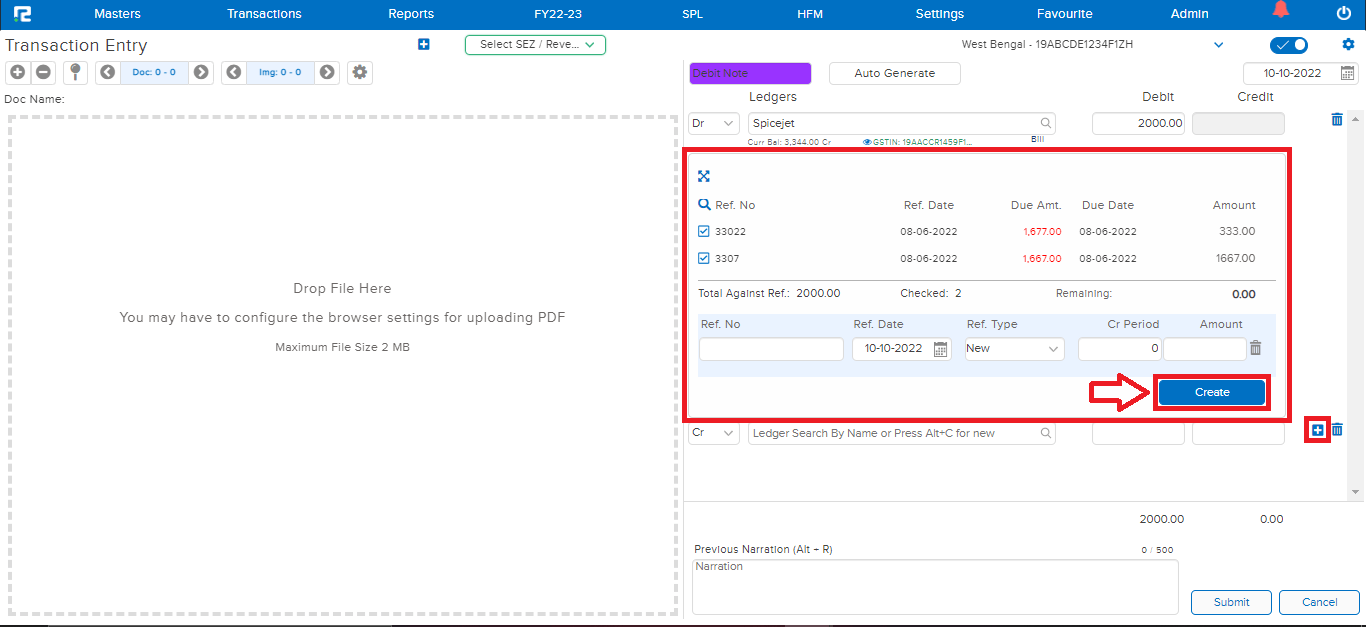
STEP 4: Enter the Bill details, and click on Create.
To insert the GST details, click on the “+” icon or press enter, so that new row gets added.
STEP 5: Search the Input GST Ledger, on selecting the same, the GST Breakup pop-up will appear, make the necessary changes, click on Save GST Breakup.
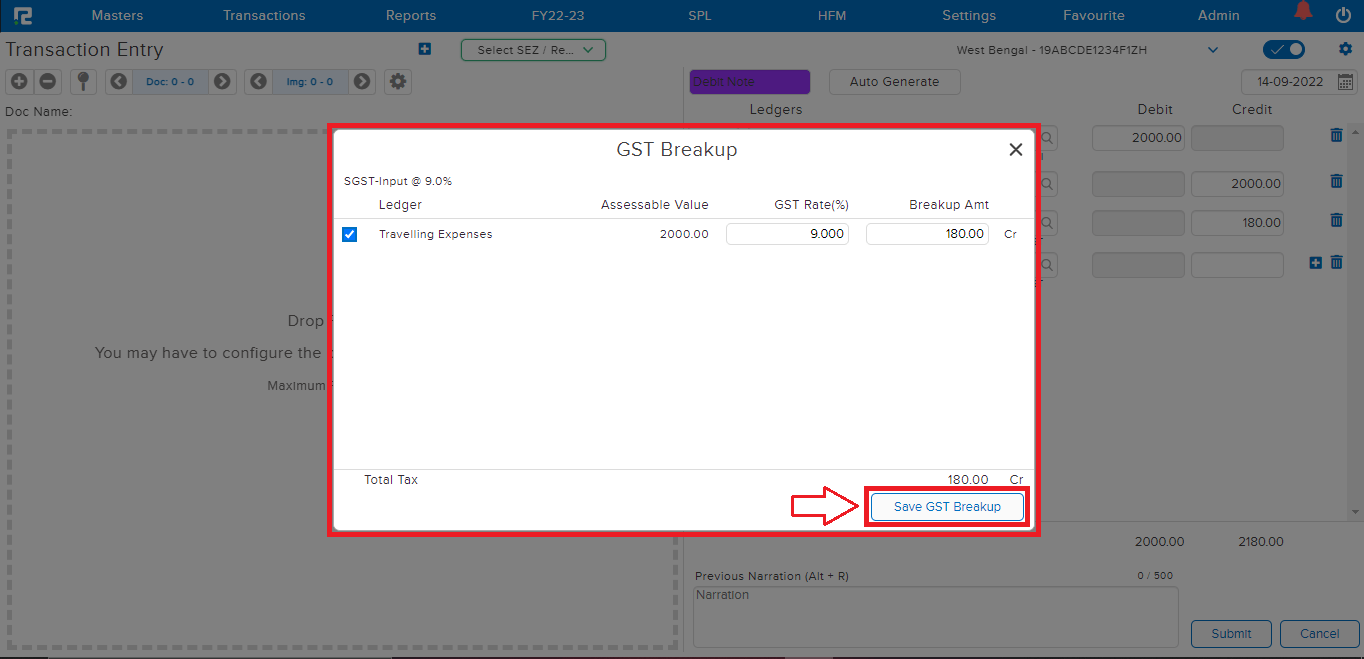
STEP 6: The GST amount as per the break up will populate on the Debit Side. In case of Intra-State GST, both SGST & CGST needs to be entered, in case of IGST only one row for IGST input needs to be entered.

STEP 7: CLICK on the “SUBMIT” button to save the voucher.
Note: Supporting Documents can be attached by simply dragging & dropping them in the left half of the screen.
How to Record a Debit Note (With Automatic GST)
STEP 1: Go to Transactions ⇒Accounts⇒ Vouchers

A Transaction Entry page will open. Select the Voucher type from the Dropdown list. The Business place as per GST is displayed by default, however in the case of Multiple Business Places, the same can be selected from the Dropdown list.
STEP 2: On the Debit Side, search the vendor/party ledger (type minimum 3 letters, then select the ledger) and put the bill amount.
If the Bill Feature is enabled in the Vendor Ledger master, the Bill Table will open.
STEP 3: On the Credit side, search the Expenses ledger and enter the amount of the expense.
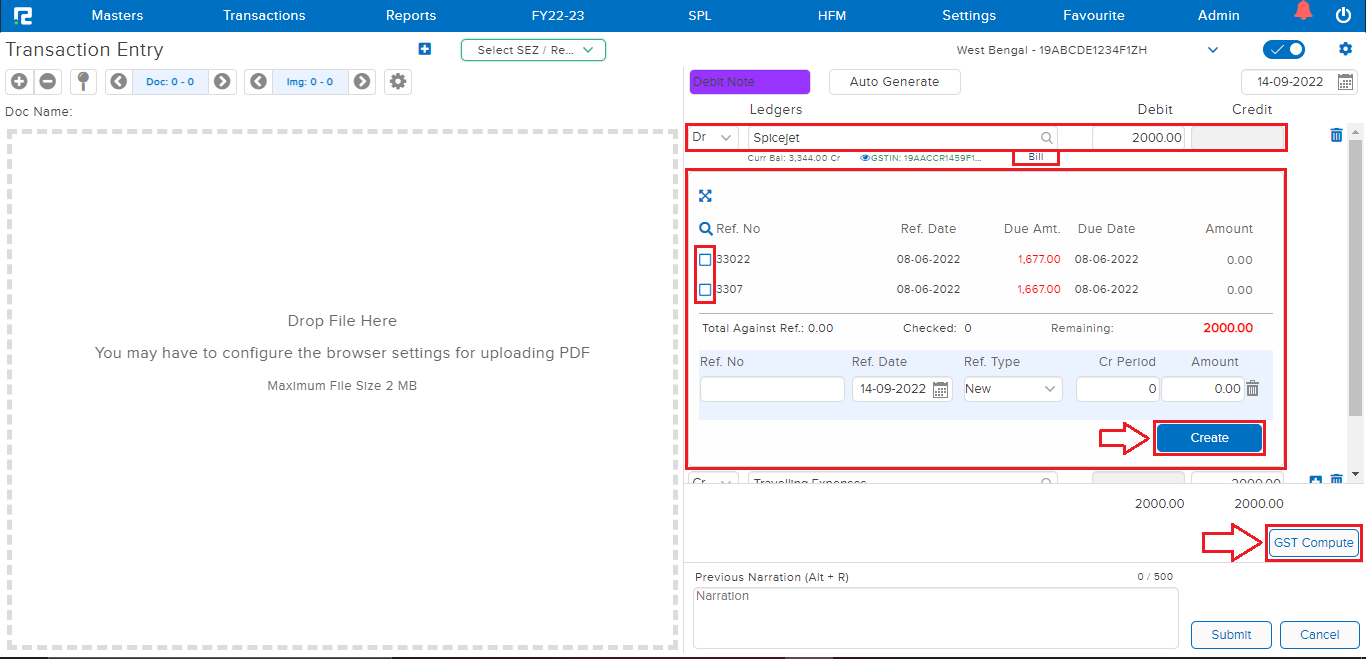
STEP 4: Enter the Bill details, and click on Create.
STEP 5: CLICK on “GST COMPUTE” to auto-calculate the GST as per the Tax rate configured in the expense ledger master.
Note: To use Automatic GST computation, configure GST Calculation as Automatic in Voucher Master.

STEP 6: CLICK on the “SUBMIT” button to save the voucher.
Note: Supporting Documents can be attached by simply dragging & dropping them in the left half of the screen.
How to Edit a Debit Note
Users can view, edit, cancel, or delete a debit note from almost every report available in the system. For ex: daybook, ledger report, etc.
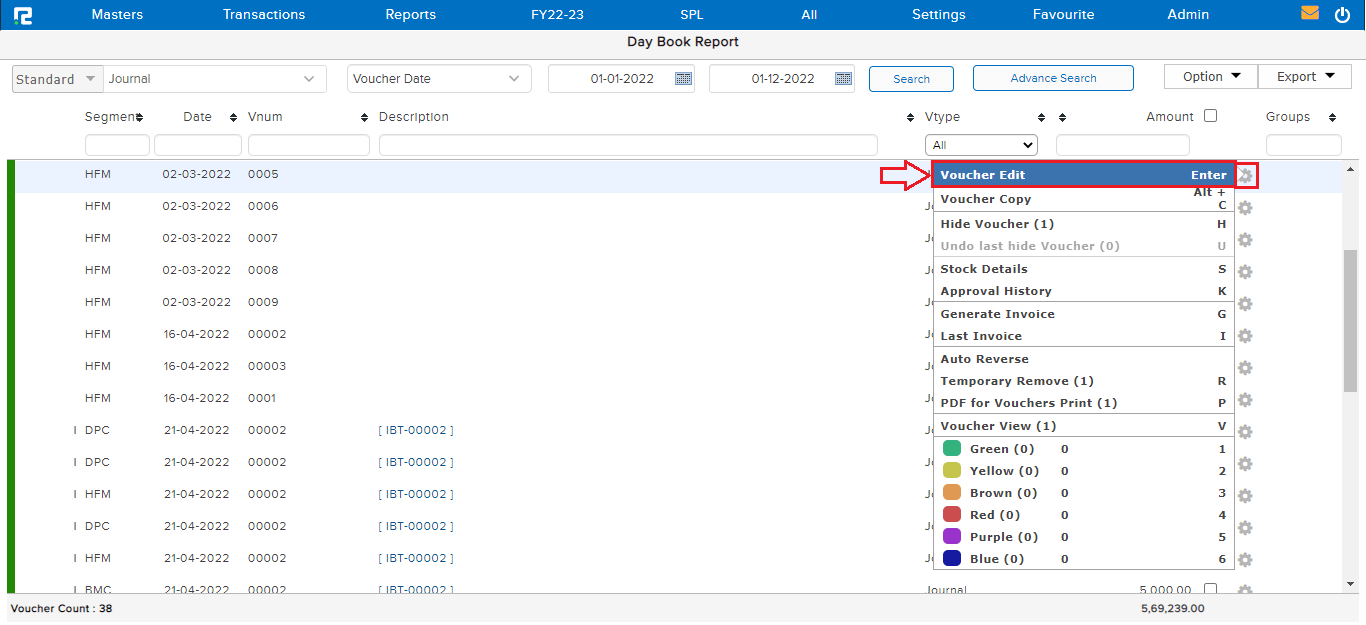
TRANSACTION EDIT VIA DAY BOOK
Go to Reports⇒ Accounts⇒ Daily reports⇒ Day Book

To edit an entry, click on the settings icon on the right-hand side of the entry & click on the Voucher Edit option, or alternatively, press Enter on the keyboard.
Do the necessary changes as required and click on the submit button.
TRANSACTION EDIT VIA LEDGER REPORT
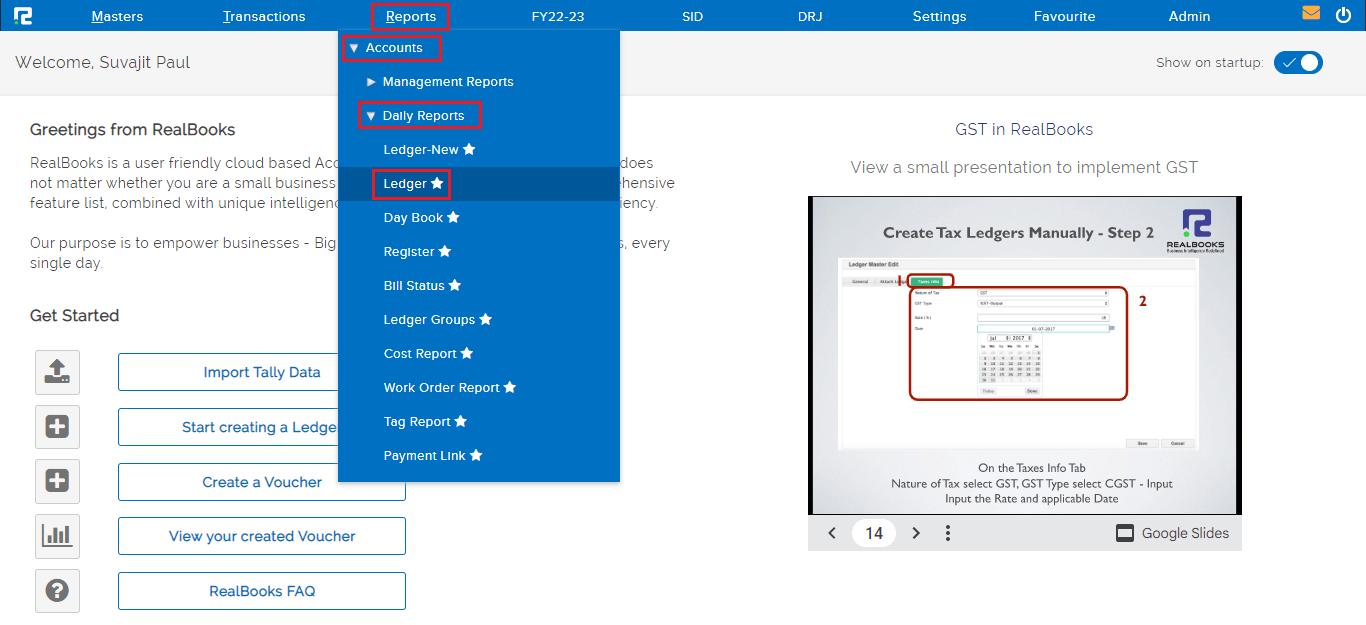
Go to Reports⇒ Accounts⇒ Daily reports⇒ Ledger
To edit an entry, click on the settings icon on the right-hand side of the entry & click on the Voucher Edit option, or alternatively, press Enter on the keyboard.
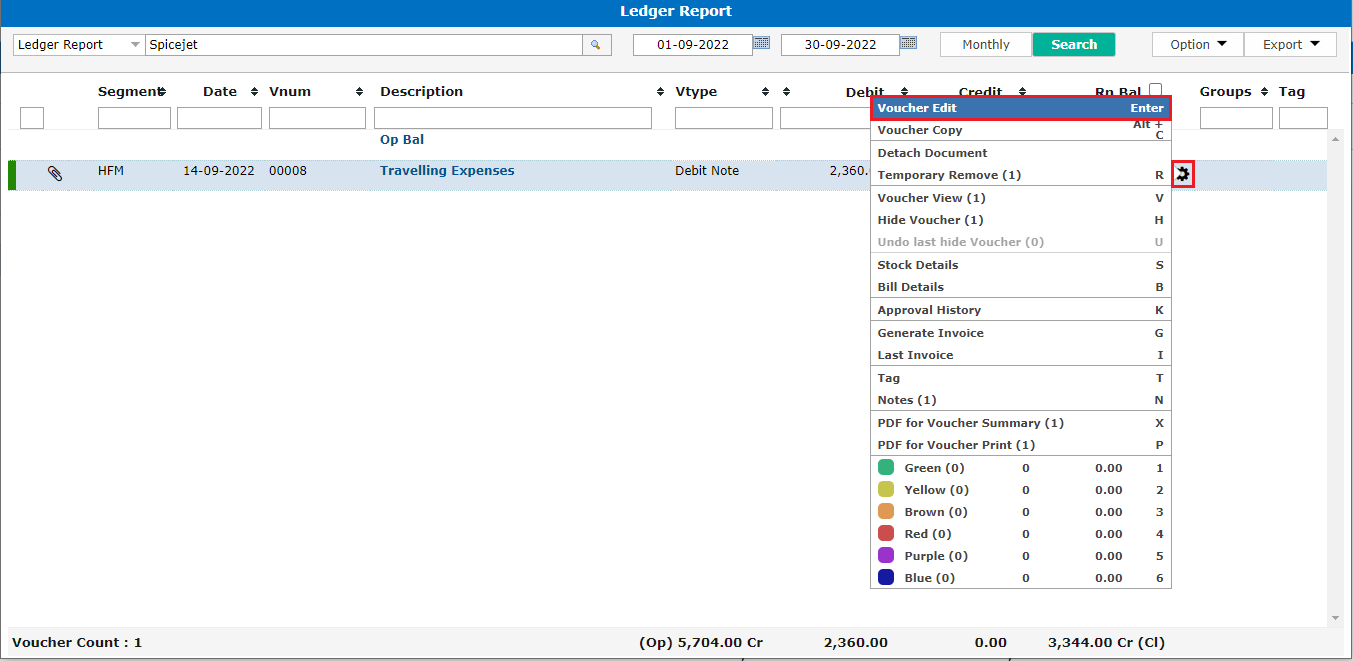
Do the necessary changes as required and click on the submit button.
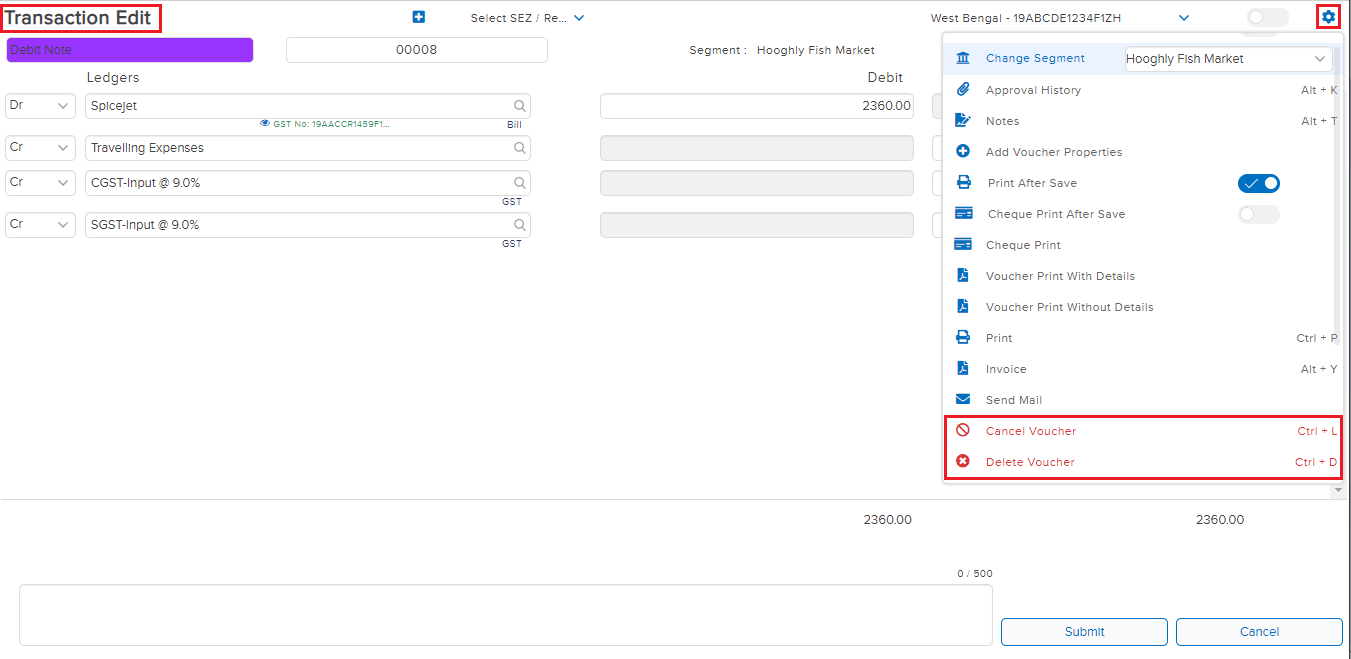
How to Delete or Cancel an Entry
DELETE/CANCEL– To cancel/delete an entry, open the entry in edit mode, then go to the Settings icon on the right-hand side of the page. From the dropdown menu select the cancel/delete voucher as required, enter the reason for cancellation/deletion, and then click on cancel/delete.