A Day Book is a book of original entries in which all financial transactions are displayed as and when they occur.
To view the Day Book Report
STEP 1: Go to Reports⇒ Accounts⇒ Daily Reports⇒ Day Book
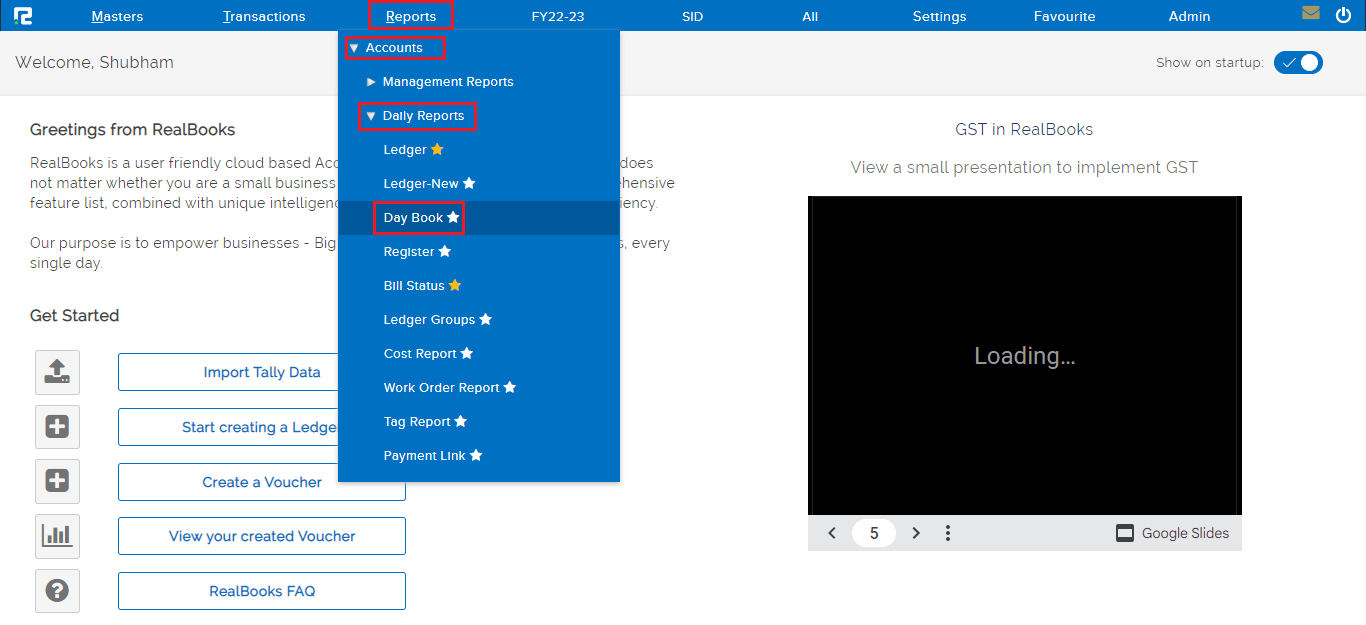
A Day Book report search page will open.
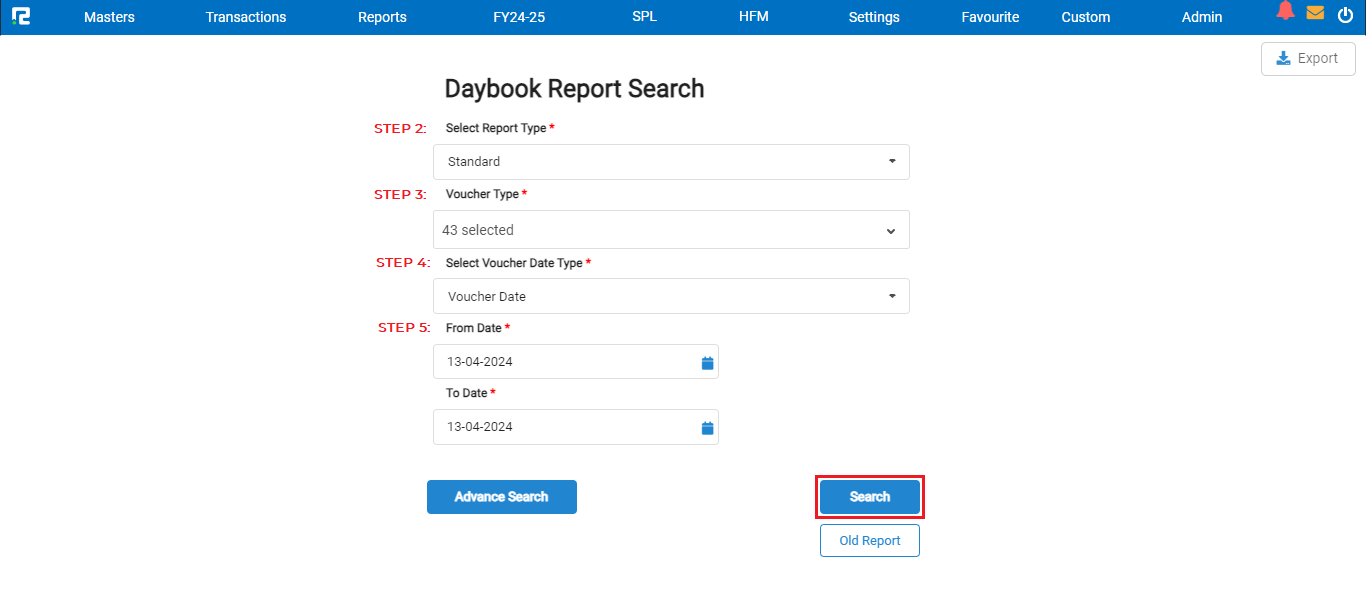
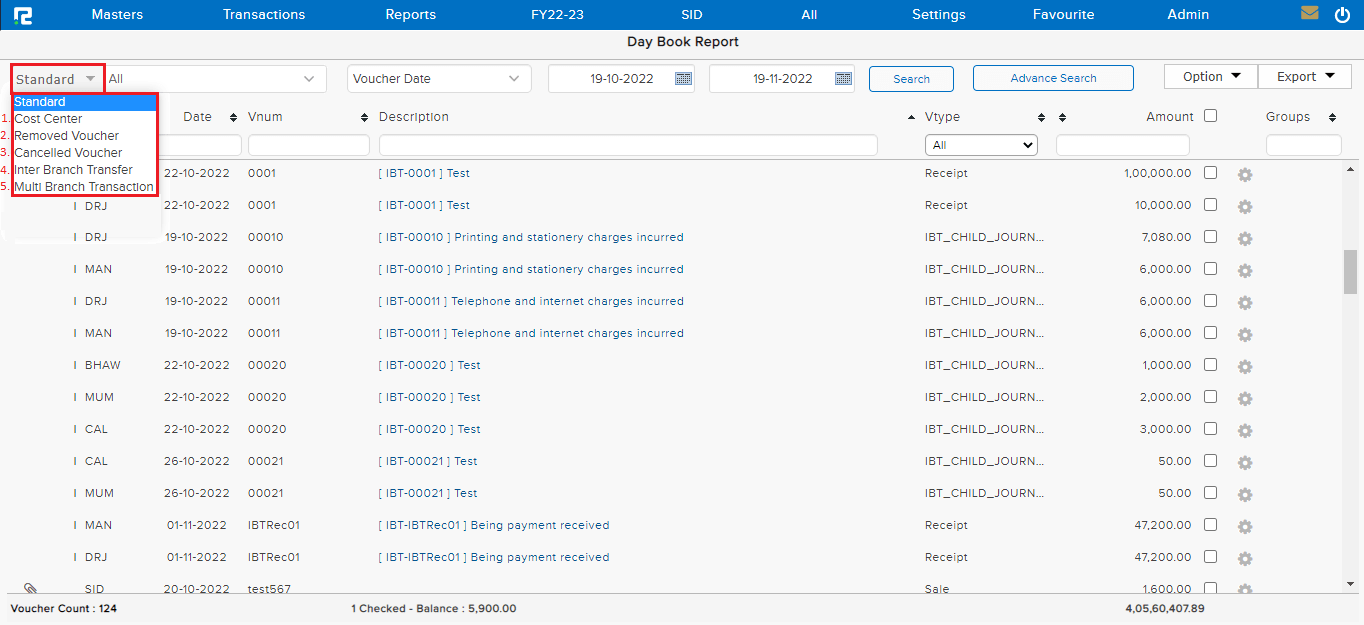
STEP 2: Select the report types from the dropdown list displayed.
STEP 3: Select the voucher types from the dropdown list displayed.
STEP 4: Select the required date type from the date filter. By default, it is set as a voucher date.
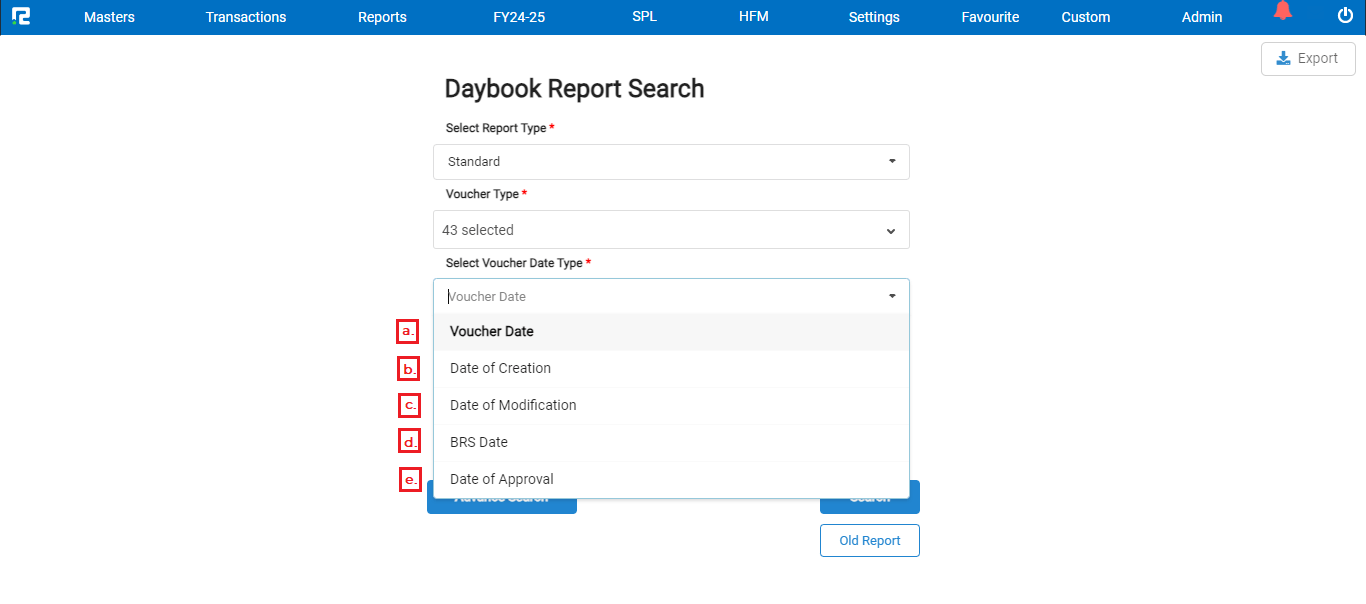
a. Voucher date– To search data based on the date set as voucher date, select the voucher date option.
b. Date of creation– To search data based on the date on which the transaction has been entered into the system.
c. Date of modification– To search data based on the date on which the entry has been altered or modified in the system.
d. BRS date– To search data based on the Bank Reconciliation date.
e. Date of approval– To search data based on the date on which any entry has been approved. (This is useful only where Approval Workflow is in use.)
STEP 5: Set the date range for which the transactions need to be searched.
Click on the SEARCH option.
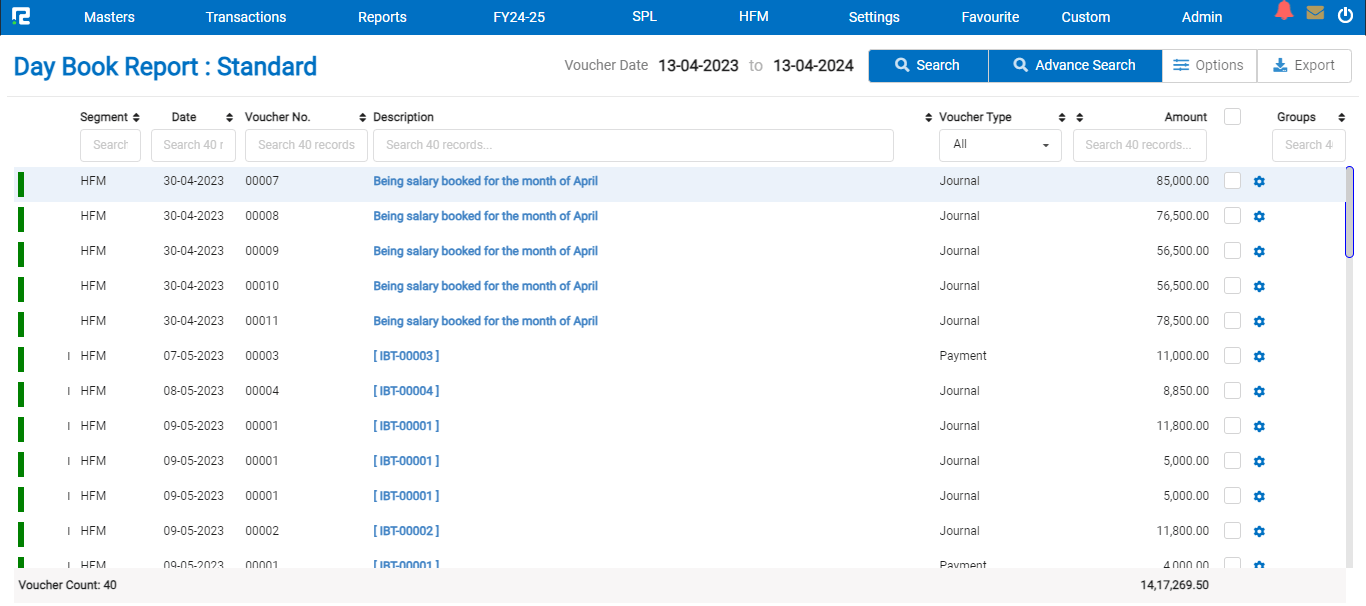
The data for the specified date range will be displayed.
Advance Search– To search the data more specifically use the advance search.
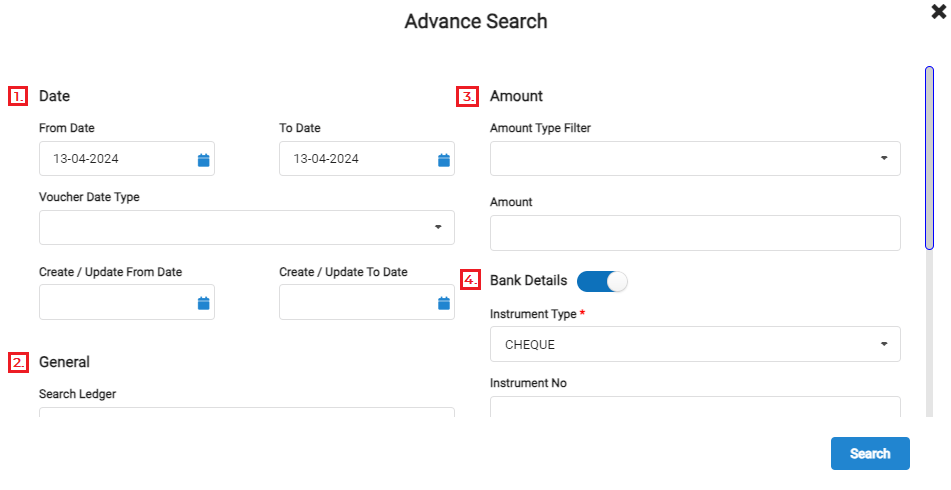
1. Date– For searching any data from a particular date range based on voucher date.
- Create / update date– Use this field to search data based on the creation/modification date.
Note: Select the date type from the dropdown as create / update date.
2. General– To search any data based on their Name, Narration, Voucher number or Bill number, use the General option.
3. Amount– To search any data based on their amount.
- Amount type filter– To search data, based on conditions, select any of the options from the dropdown.
- Amount– Enter the exact amount that needs to be searched.
4. Bank Details– To search any data based on the bank details.
- Instrument Type– To search the data by the type of instrument.
- Instrument Number– To search the data by the specific instrument number.
- Instrument Date– To search the data by the specific instrument date.
Options– To look into more details for the entire listing together, click on the option, then mark the appropriate option from the dropdown list.
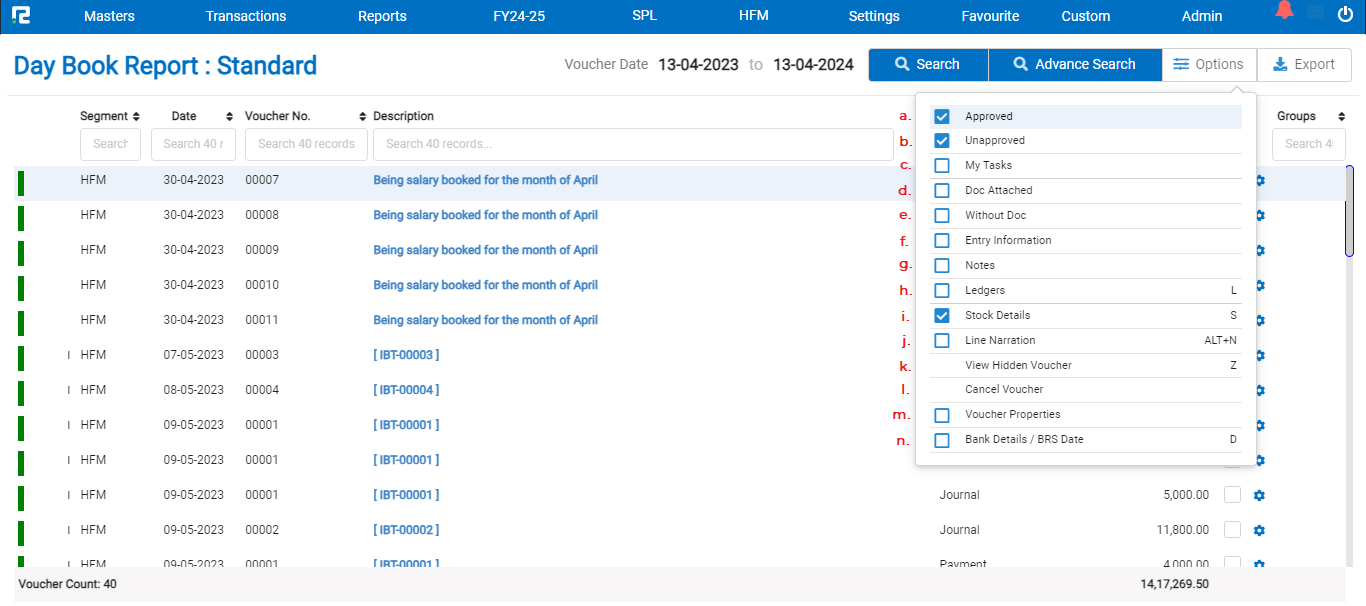
a. Approved– Where Approval workflow is in use, this option can be used to filter approved data from the entire list.
b. Unapproved– This option can be used to filter the unapproved data from the list.
c. My Tasks– Where the Approval workflow is in use, this option shows the transactions that are pending approval from the current user ID.
d. Doc Attached– To filter data on the basis of entries in which documents have been attached.
e. Without Doc– To filter data on the basis of entries in which no documents have not been attached.
f. Entry Information– To identify the user ID from which the entry has been created or modified along with the date and time.
Note– The modification details shown are the latest ones.
g. Notes– To view the narration on every entry enable this option.
h. Ledger– To view all the ledgers used in the entries with both the debit and credit sides, enable this option or press L.
i. Stock Details– To view the stock details in all the entries select this option or press S.
J. Line narration- To view the line narration select this option or press ALT+N.
k. View Hidden Voucher– To view all the vouchers that have been hidden select this option or press Z.
l. Cancel Voucher– To cancel any voucher select the vouchers and then click on the cancel voucher option.
m. Voucher Properties– To view any additional details captured in a transaction click on this option.
n. Bank Details / BRS Date– To view the bank details captured in a transaction click on this option or press D.
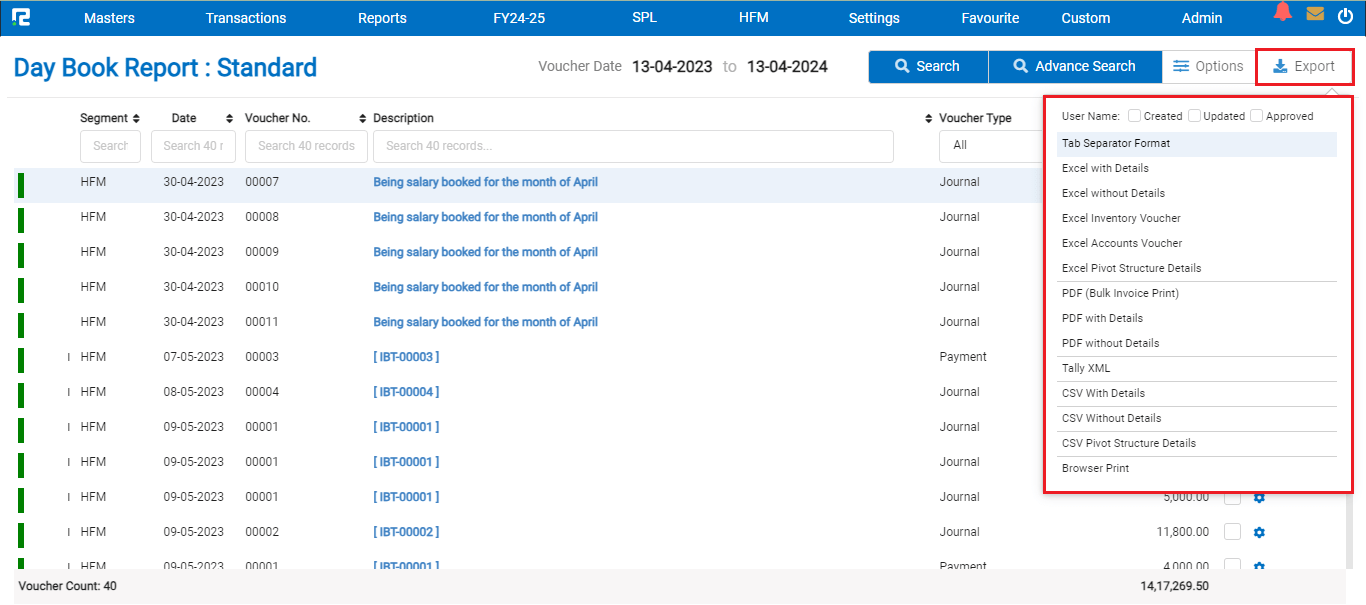
3. Export– To export the data select the appropriate template from the EXPORT dropdown list.
How To Edit, Cancel, and Delete an Entry
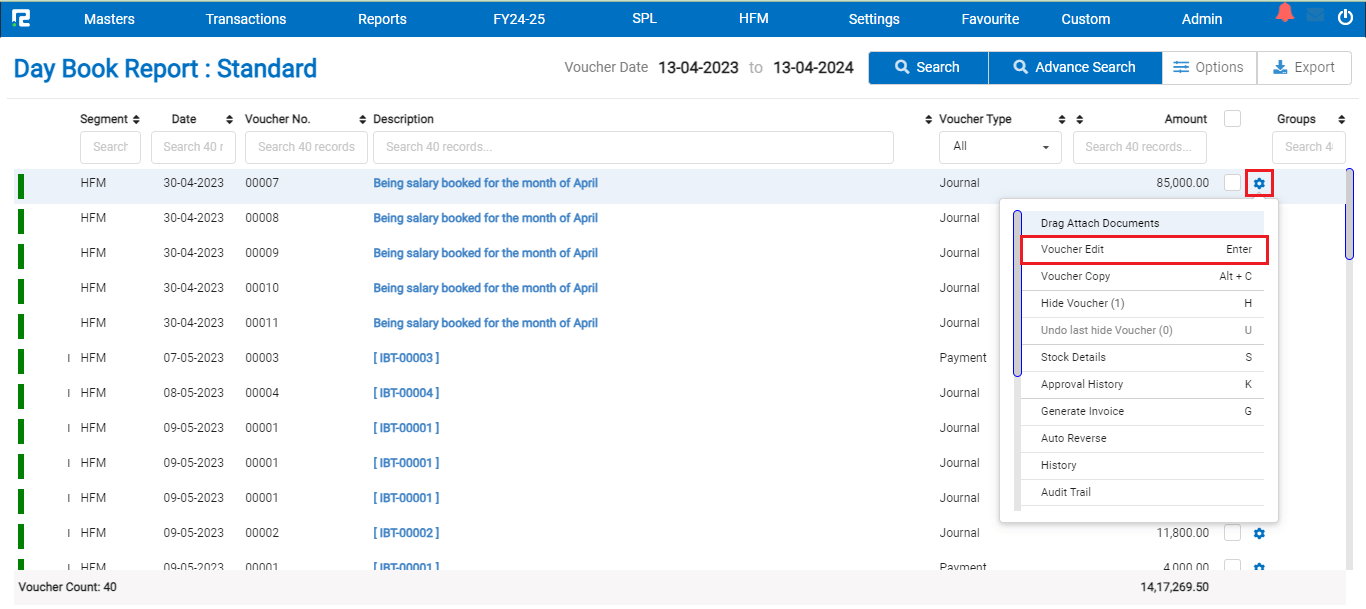
1. EDIT- To edit an entry, click on the settings icon on the right-hand side of the entry & click on the Voucher Edit option, or alternatively, press Enter on the keyboard.
Do the necessary changes as required and click on the submit button.
2. CANCEL/DELETE– To cancel/delete an entry, open the entry in edit mode, then go to the Settings icon on the right-hand side of the page. From the dropdown menu select the cancel/delete voucher as required, enter the reason for cancellation/deletion, and then click on cancel/delete.

Know More About the Transaction Menu
Click on the Settings/Gear icon available on the right-hand side of the transaction
A dropdown list appears–
![]()
a. Voucher Edit– To edit an entry click on the voucher edit or press ENTER.
b. Voucher Copy– To copy an entry click on the voucher copy or press Alt+C.
c. Hide Voucher– To hide any transaction from the listing screen click on the hide voucher option or press H.
d. Stock Details– To view the details of inventory involved in a particular entry click on the stock details option or press S.
e. Approval History– To check the workflow of approval or the approval status of an entry click on the approval history option or press K.
f. Generate Invoice– To print out the invoice details of a transaction click on this particular option or press G.
g. Send Email– To share an invoice via mail, click on the send email option.
Note: The attachment must be available in the transaction to use this feature.
h. Temporary Remove– To remove any transaction temporarily from the Daybook click on the temporary remove button or press R.
Note: In this case, the transaction gets removed from the books to the extent that its impact is not considered anywhere, but it remains available on a separate menu.
i. PDF for Voucher Print– To print the details of an entry in a Voucher PDF format click the particular option or press P.
j. Voucher View– To view the details of an entry without opening it in Edit Mode, select the voucher view option or press V.
k. Colour Mark– To colour mark, the transactions for future reference use the numbers mentioned against each colour. The transactions can be filtered using the colour names.
To access different types of Reports under Day Book (namely report variation) click on the Standard option on the left-hand side of the page.
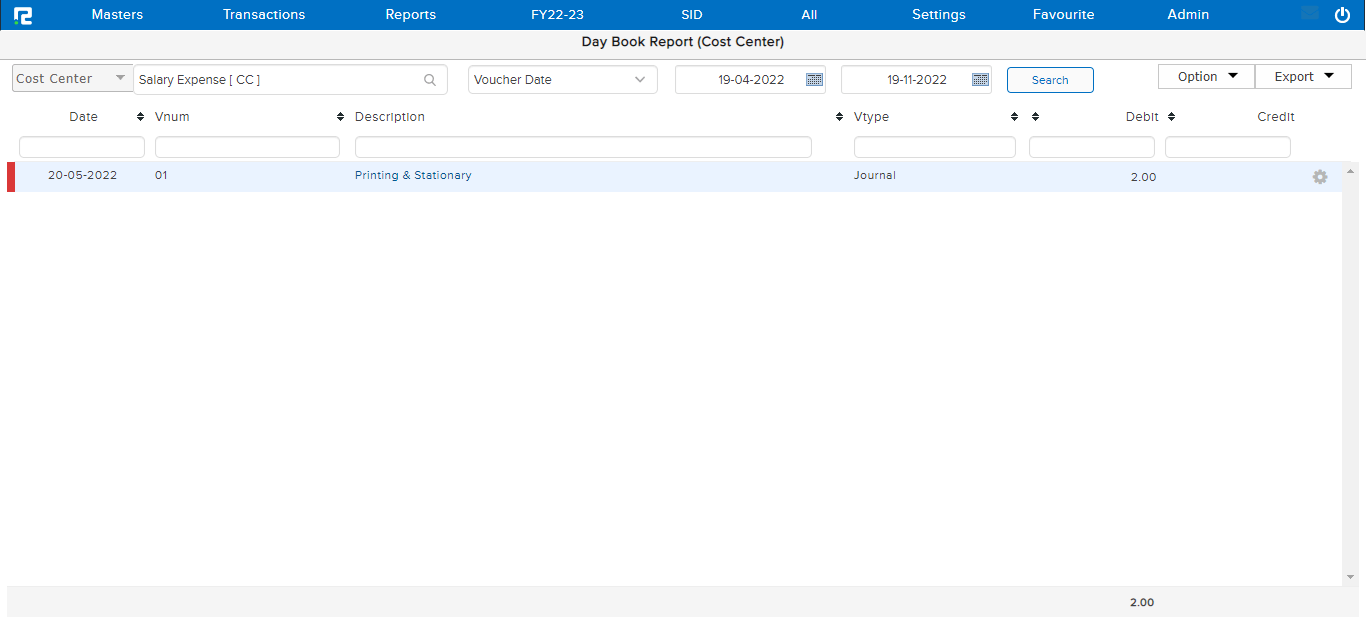
1. DAYBOOK REPORT (COST CENTRE)
This variation of the Day book helps the user to view the list of transactions for a specific date range based on the selected Cost Centre for a specified date range.
2. DAY BOOK REPORT (REMOVED VOUCHER)
This variation of Daybook helps the user to view the list of transactions that have been removed from the Daybook, for a specific date range.
A. To Restore the voucher

STEP 1: Click on the Options button on the right-hand side of the page.
STEP 2: Select a particular transaction or multiple transactions, click on the Restore voucher or press R.
B. To Delete the voucher
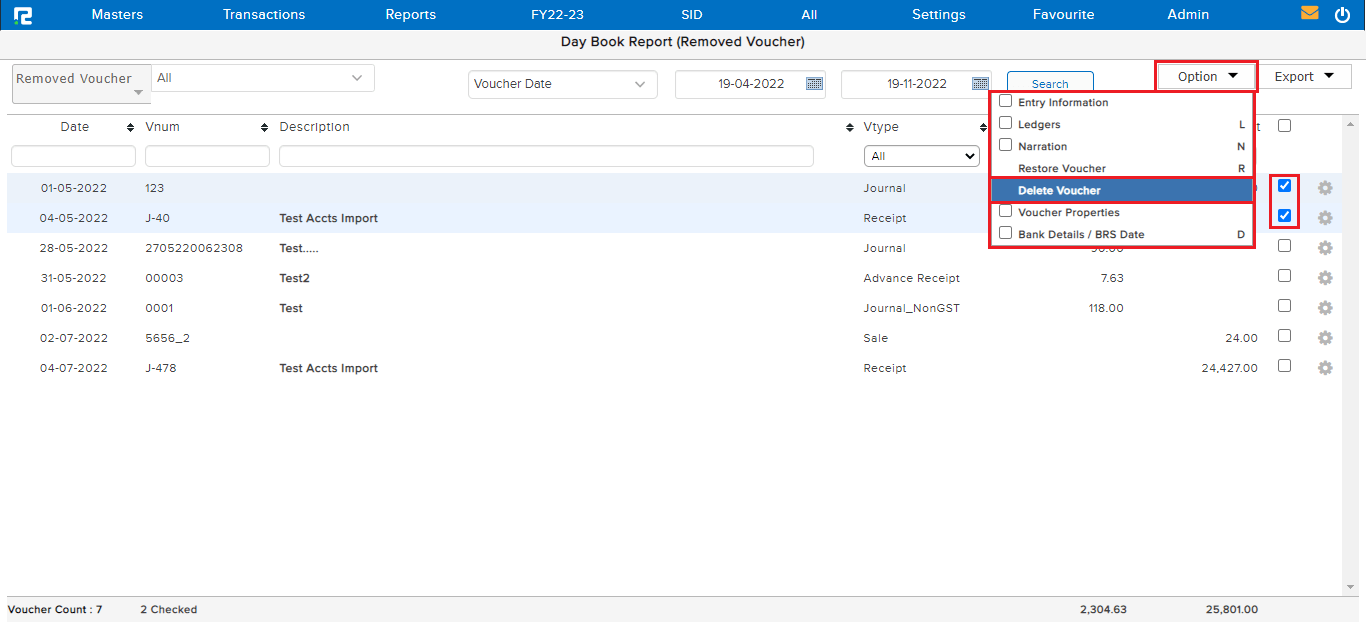
STEP 1: Click on the options button on the right-hand side of the page.
STEP 2: Select multiple transactions and click on the Delete Voucher.
To delete a single transaction, click on the setting icon beside the transaction, or alternatively, select a transaction and press delete on the keyboard.
Note: The system allows bulk deletion of 100 entries at a time.
3. DAY BOOK REPORT (CANCELLED VOUCHER)
This variation of Daybook helps the user to view the list of transactions that have been cancelled from the Daybook, for a specific date range.
A. To Delete the cancelled voucher
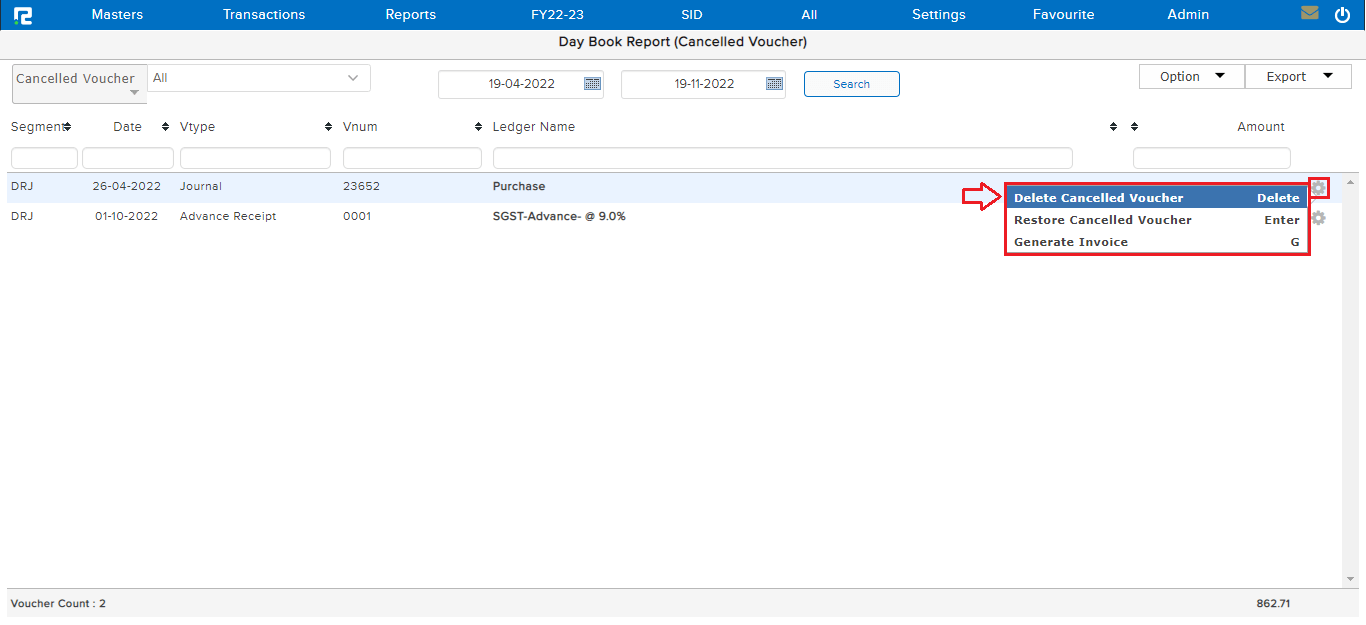
STEP 1: Click on the settings option on the right-hand side to the transaction.
STEP 2: Press enter on the delete cancelled voucher.
Alternatively, select a transaction and press delete on the keyboard.
B. To Restore cancelled voucher
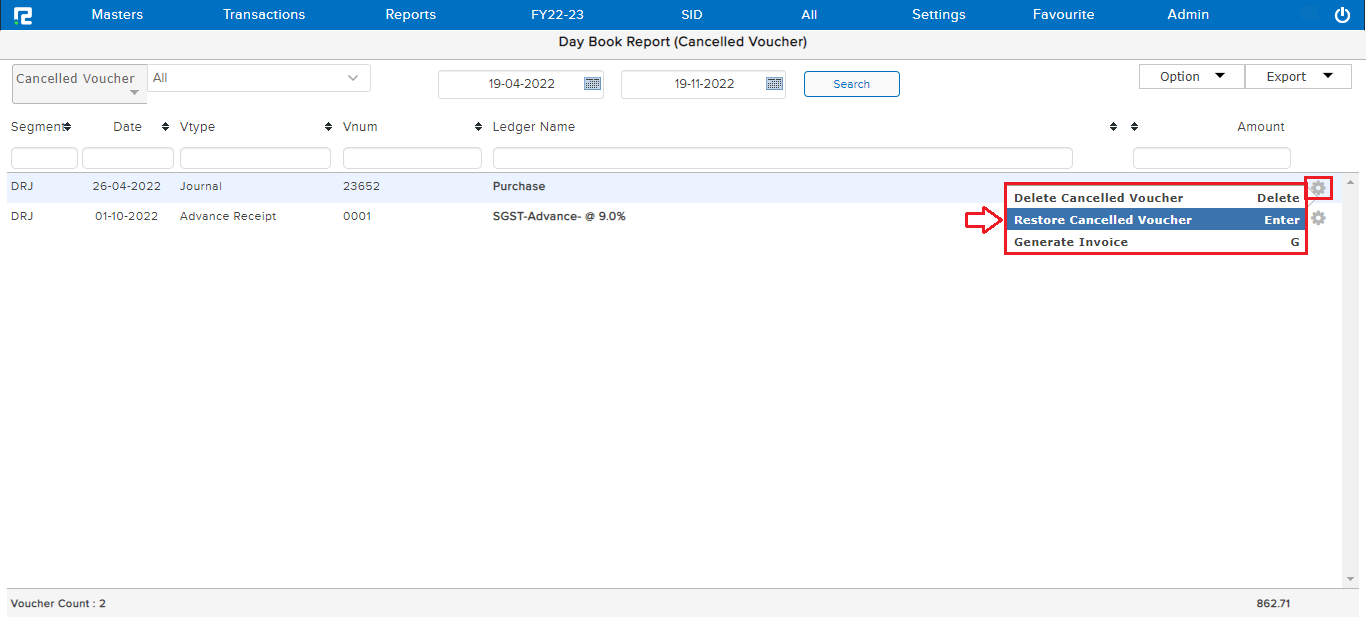
STEP 1: Click on the settings button on the right-hand side of the transaction.
STEP 2: Press enter on the restore cancelled voucher.
C. To Generate Invoice
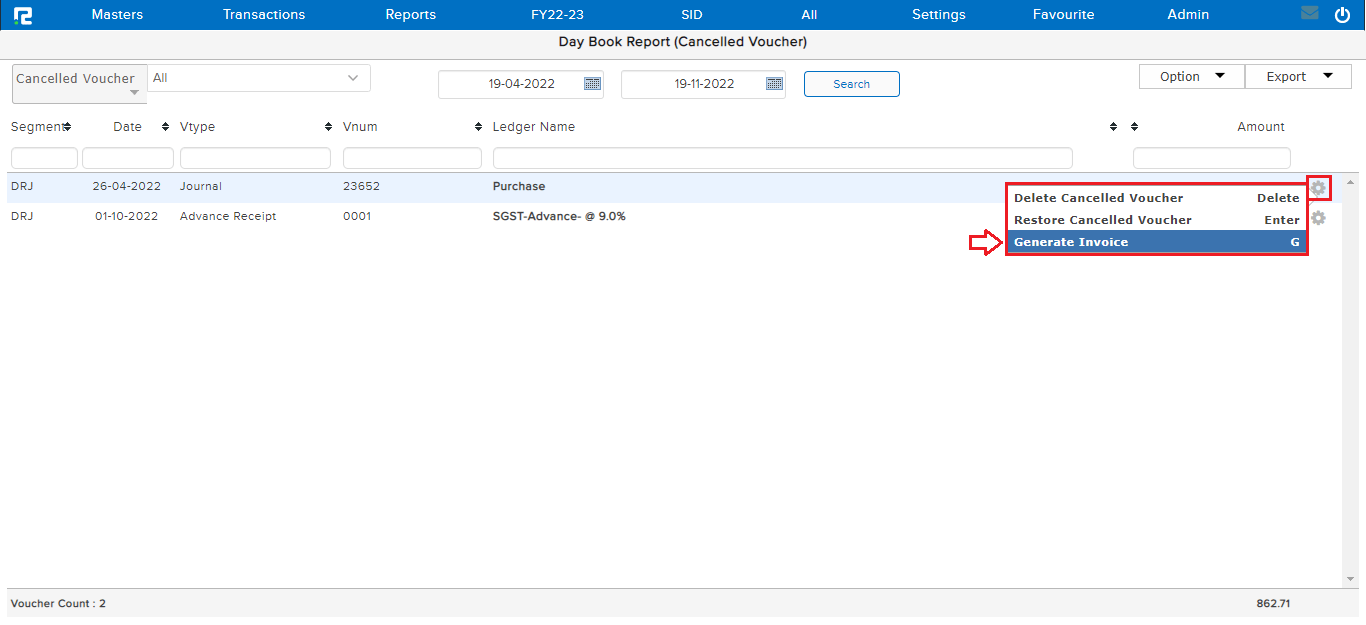
STEP 1: Click on the settings option on the right-hand side of the transaction.
STEP 2: Click on the Generate Invoice or press G.
4. DAY BOOK REPORT (INTER BRANCH TRANSFER)
This variation of the Day book helps the user to view the lists of Inter Branch Transactions that have been entered into the books of accounts, for a specific date range.
Note: These are the parent entries which if edited will have an impact on the child entry automatically.
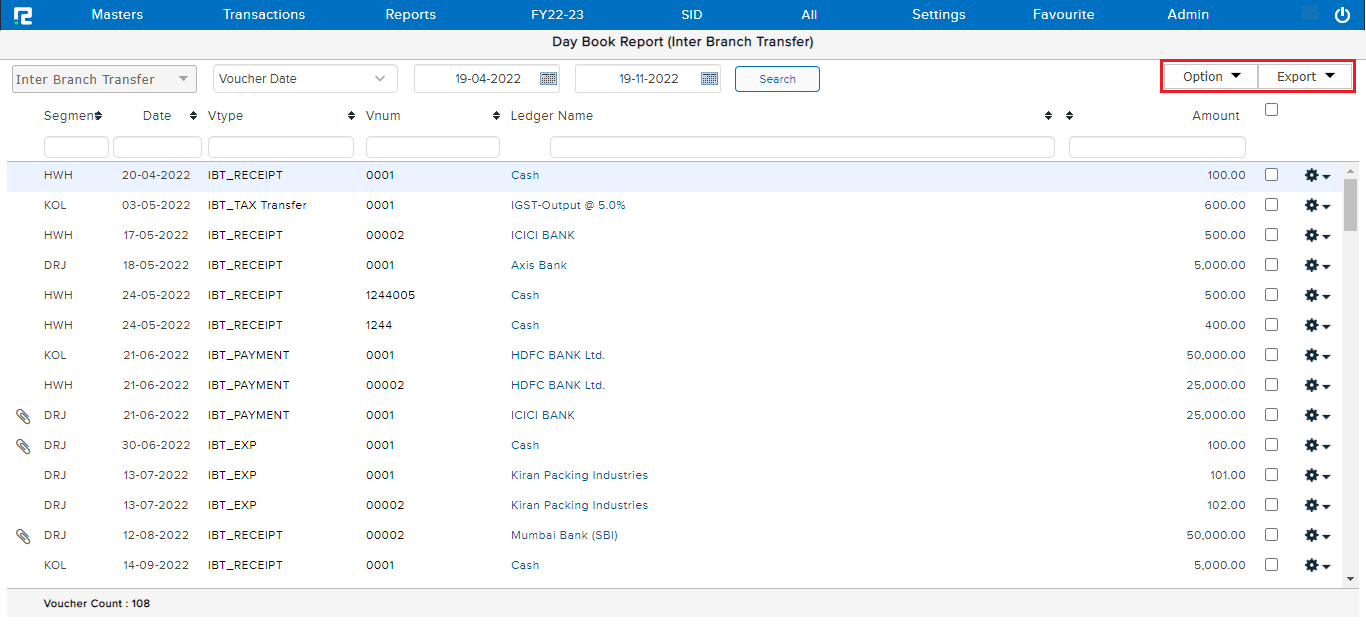
a. Click on the Options button on the right-hand side of the screen to explore more options.
b. To export any entry, click on the Export option on the right-hand side of the screen.
c. To Edit any voucher press ENTER.
d. To print a PDF form of a voucher press P.
5. DAY BOOK REPORT (MULTI BRANCH TRANSACTION)
This variation helps the user to view all the lists of Multi Branch Transactions that have been entered in the books of accounts, for a specific date range.
Note: These are the parent entries which if edited will have an impact on the child entry automatically.

a. Click on the Options button on the right-hand side of the screen to explore more options.
b. To export any entry click on the Export option on the right-hand side of the screen.
c. To Edit any entry press Enter.
d. To Print any voucher select the entry and press P.