STEP 1: Go to Masters ⇒ Accounts⇒ Company⇒ Create.
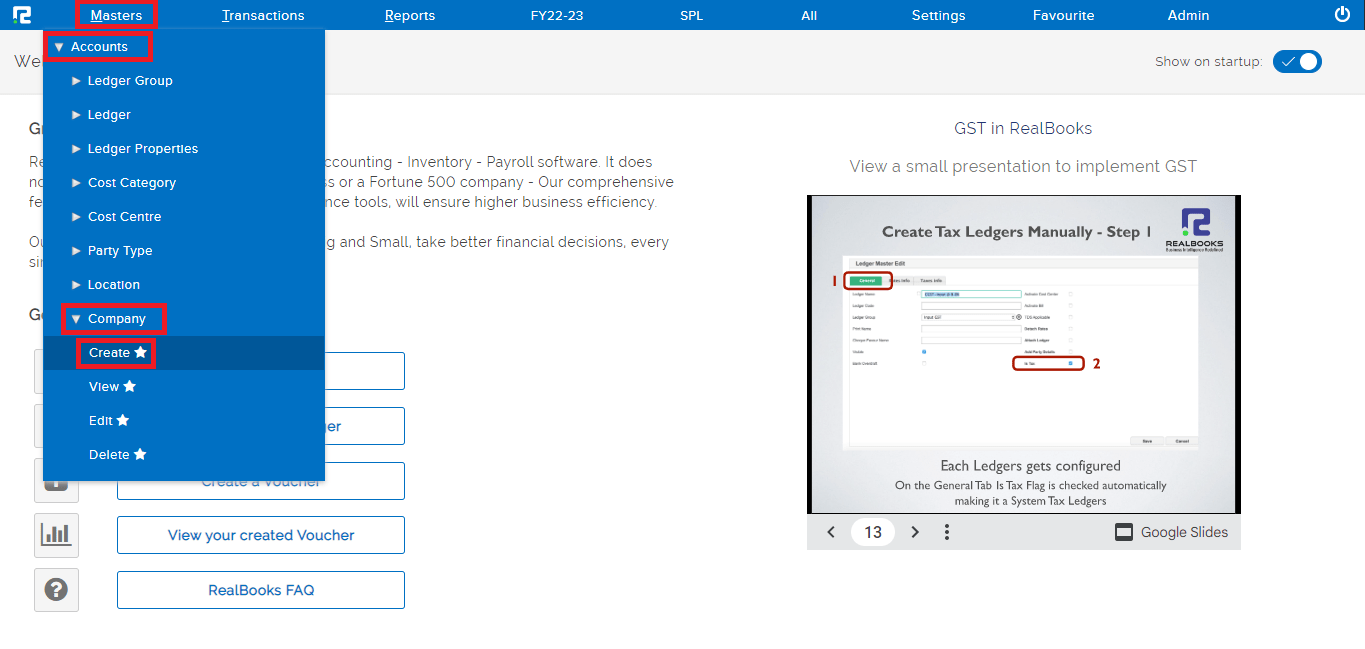
STEP 2: Fill in the following information under general tab after selecting the “CREATE” option.
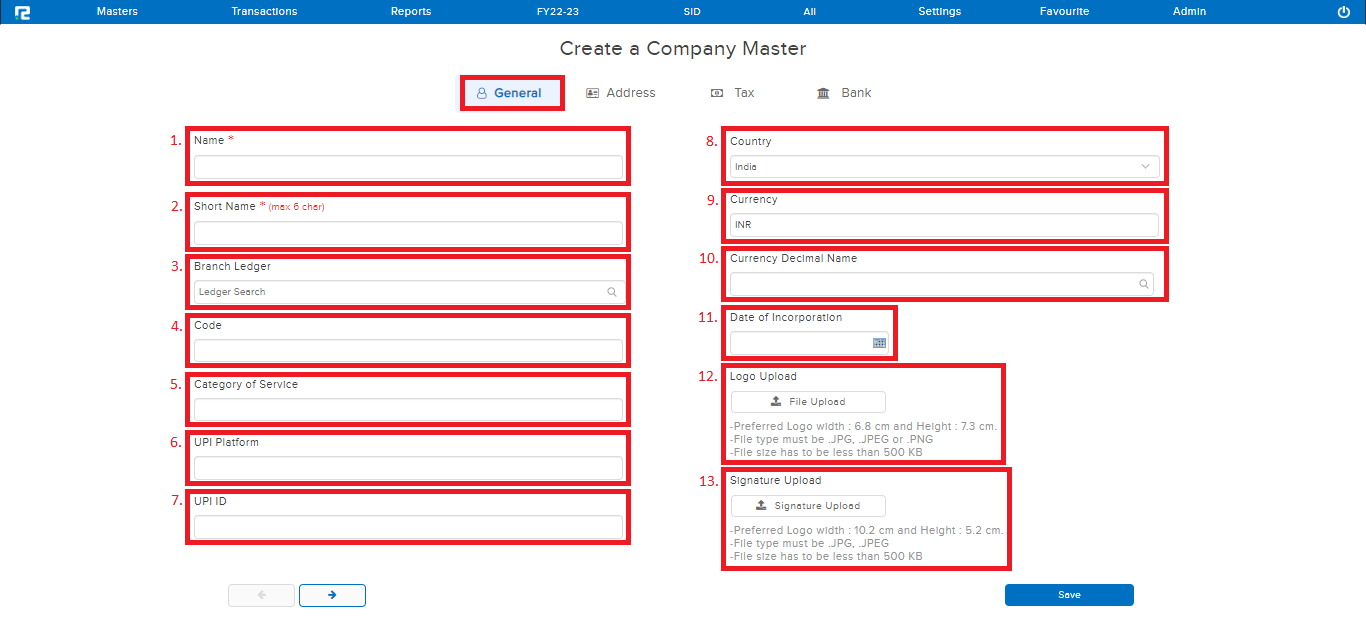
- Name- Enter the Company name.
- Short name- Enter the company short name.
Note: Maximum 6 character allowed.
- Branch ledger- Search and select the branch ledger. (The branch ledger mapped here, is used while auto posting inter-branch transactions)
- Code- Enter the branch code, if any.
- Category of service- Enter what type of service the Company provides.
- UPI platform- Add the UPI Platform detail, if any.
- UPI ID- Enter the UPI ID, if any.
- Country- Select the name of the country where the company is located.
- Currency- This is auto-populated based on the Country selection.
- Currency decimal name- Select the decimal place name for the currency.
- Date of incorporation- Add the date on which the company was incorporated.
- Logo upload- Upload the Company Logo, if any. This is displayed on the Invoices printed.
- Signature upload- Upload the signature, if any. This is displayed on the Invoices printed.
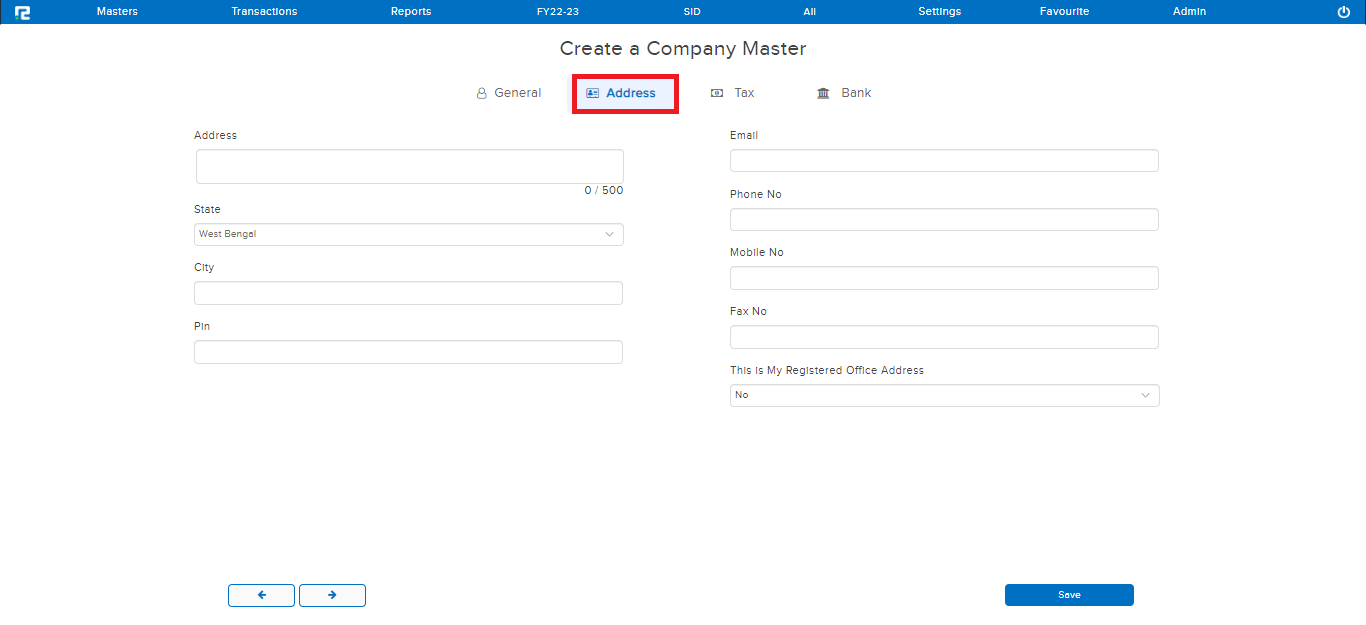
Address:
Fill the address, as per the available details.
Tax Info:
Add the license/identification numbers for each, if available. 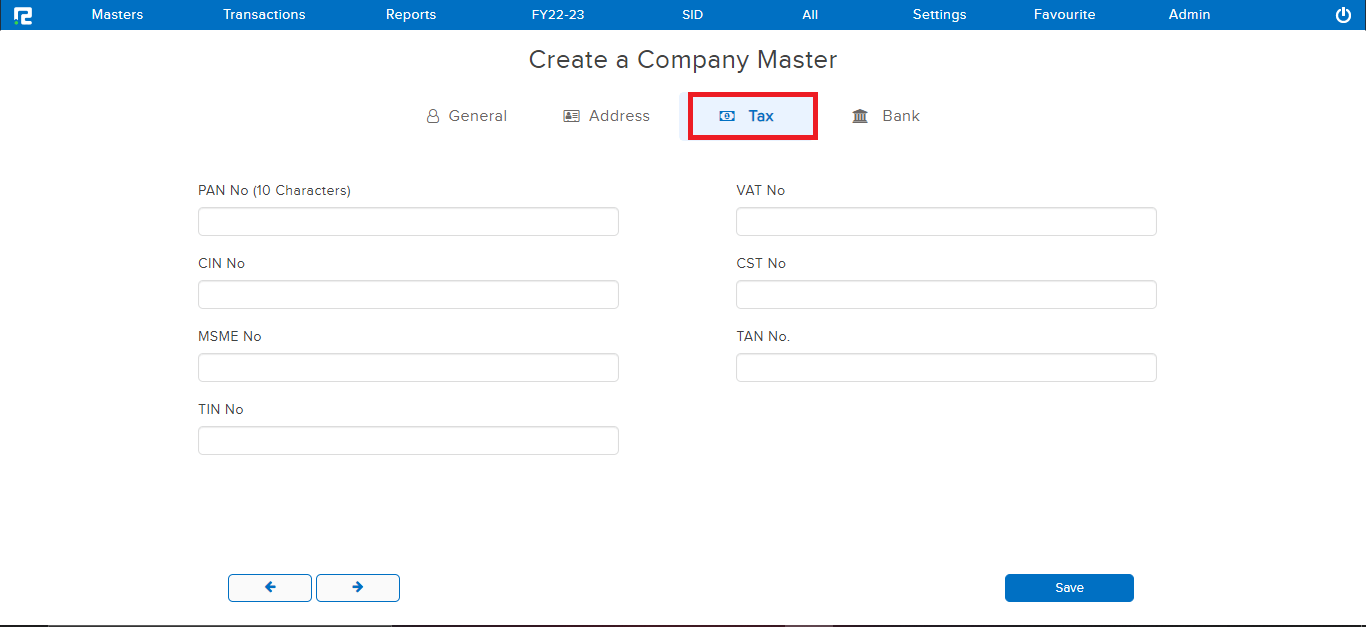
Bank:
Enter the details of the bank account associated with the company.
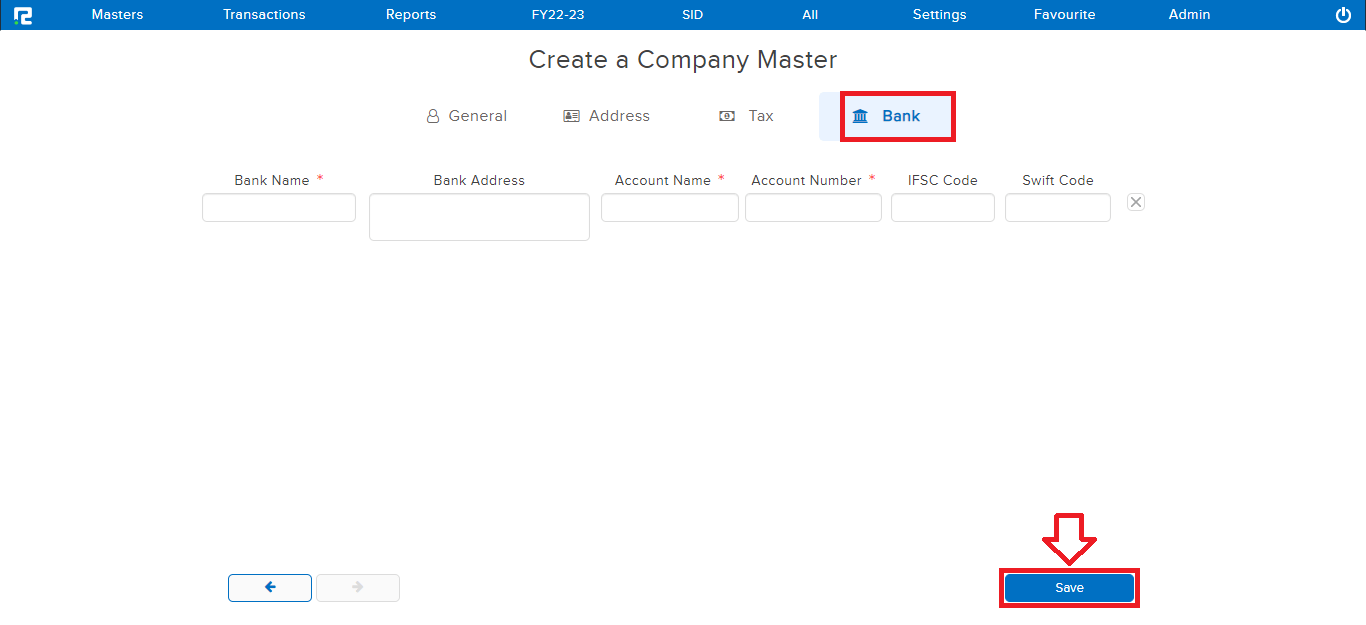
Note: The fields marked with (*) are mandatory.
STEP 3: Once the above details have been filled in, CLICK on “SAVE” to create the company.
How to View a Company
STEP 1: Go to Masters ⇒ Accounts ⇒ Company ⇒ View
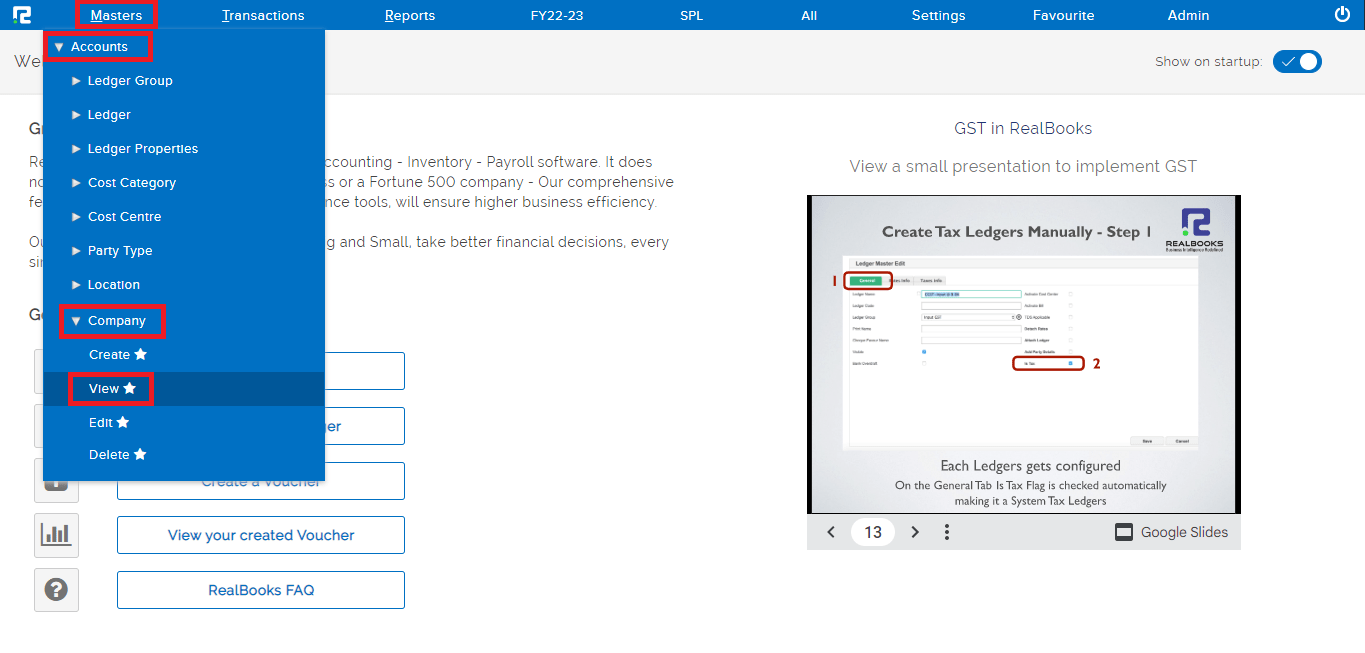
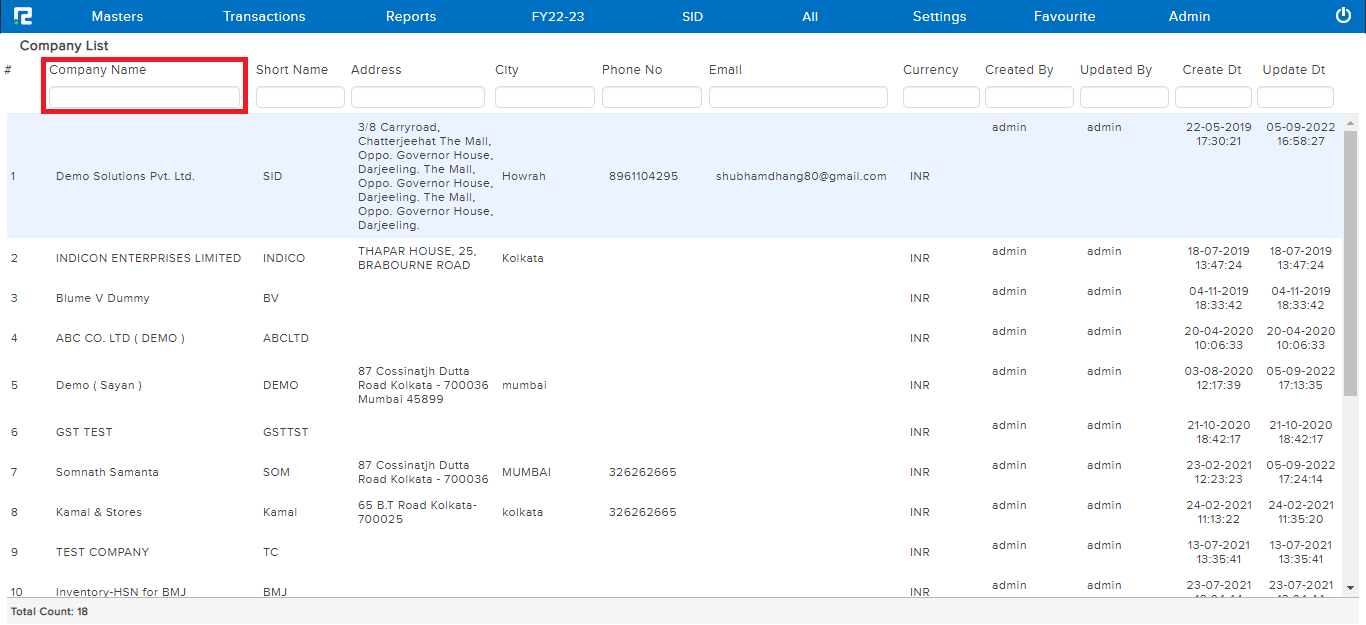
STEP 2: Once you click on view option, The entire list of existing companies will be displayed here. In the case of long lists, it is easy to filter the data by searching for the name under the Company Name.
How to Edit a Company
STEP 1: Go to Masters ⇒ Accounts ⇒ Company ⇒ Edit
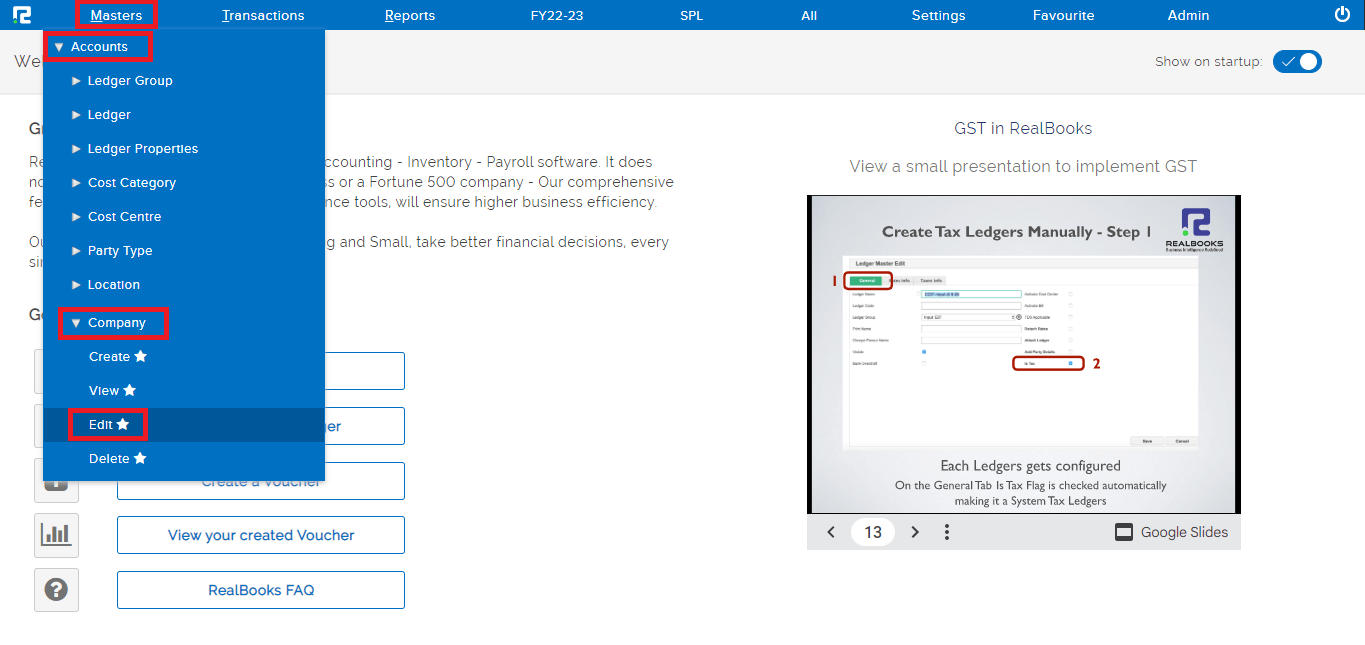
STEP 2: Once you click on edit option, Company List will appear.
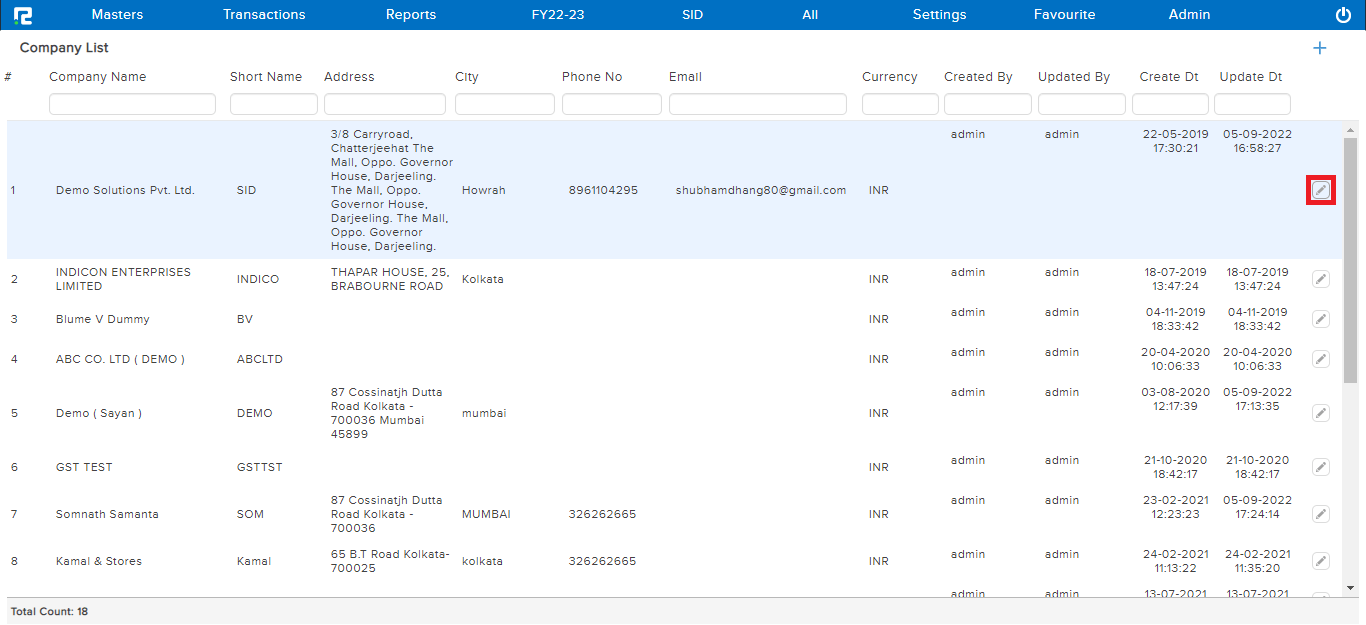
STEP 3: To edit any company CLICK on the “PENCIL” icon or select the company and press ENTER, Company Master Update page appears, wherein the details can be edited.
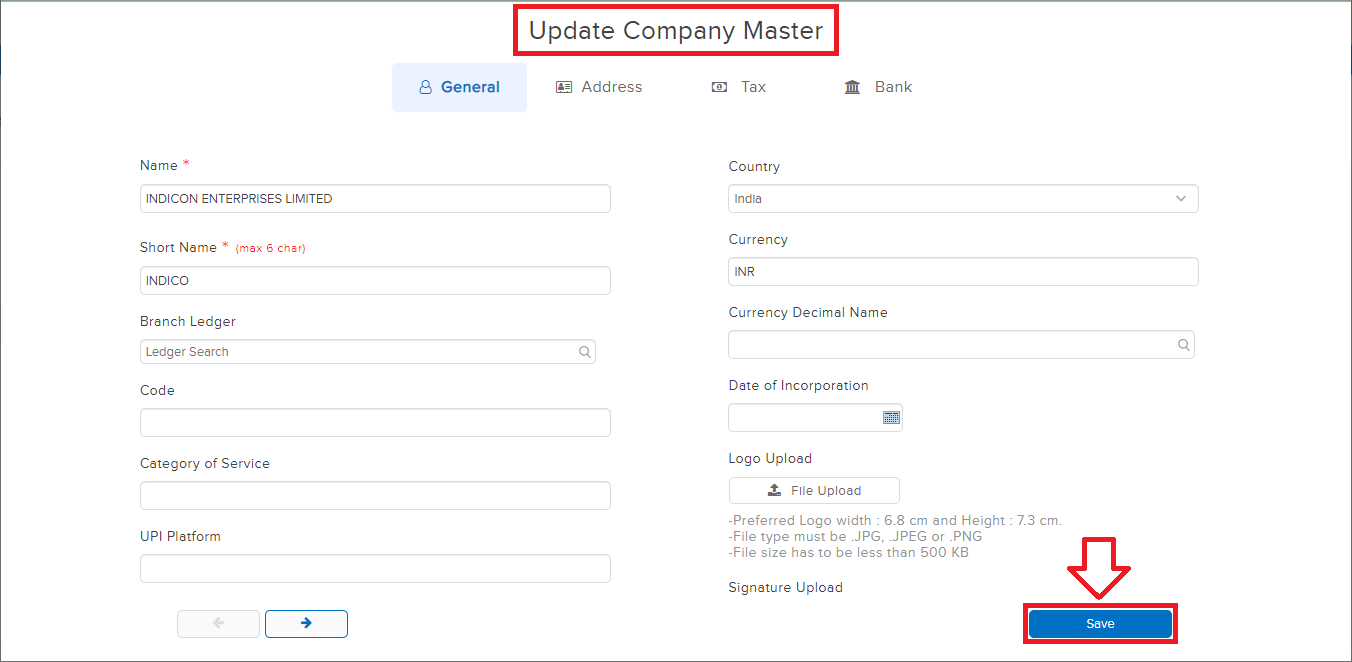
STEP 4: CLICK on SAVE to update the details.