A group of standard ledgers is called a ledger group, and it is used to apply general ledger accounting operations and procedures to the group as a whole.
How To Create a Ledger Group
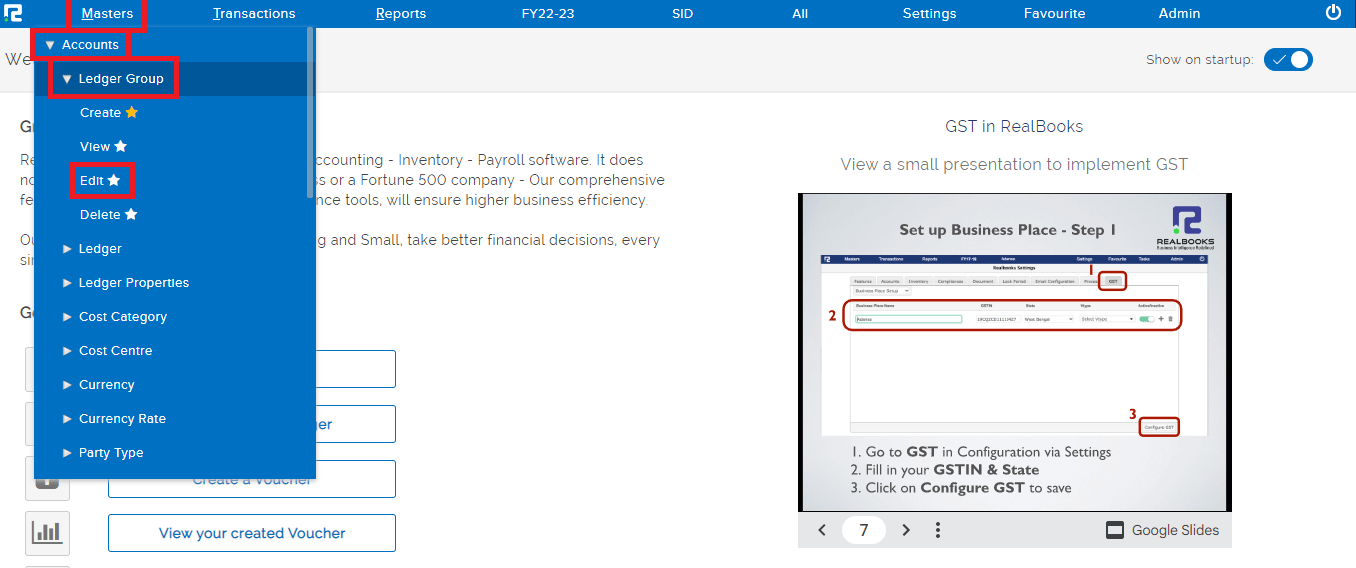
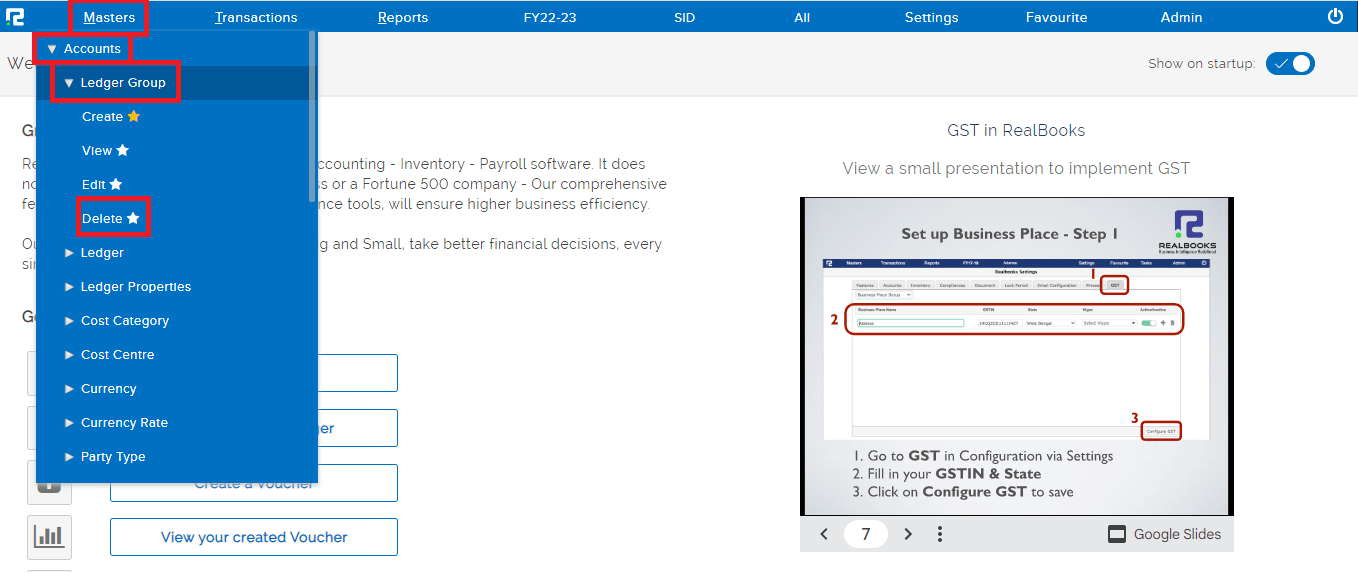
STEP 1: Go to Masters ⇒ Accounts ⇒ Ledger Group ⇒ Create

STEP 2: Fill in the following information after selecting the create option under general.
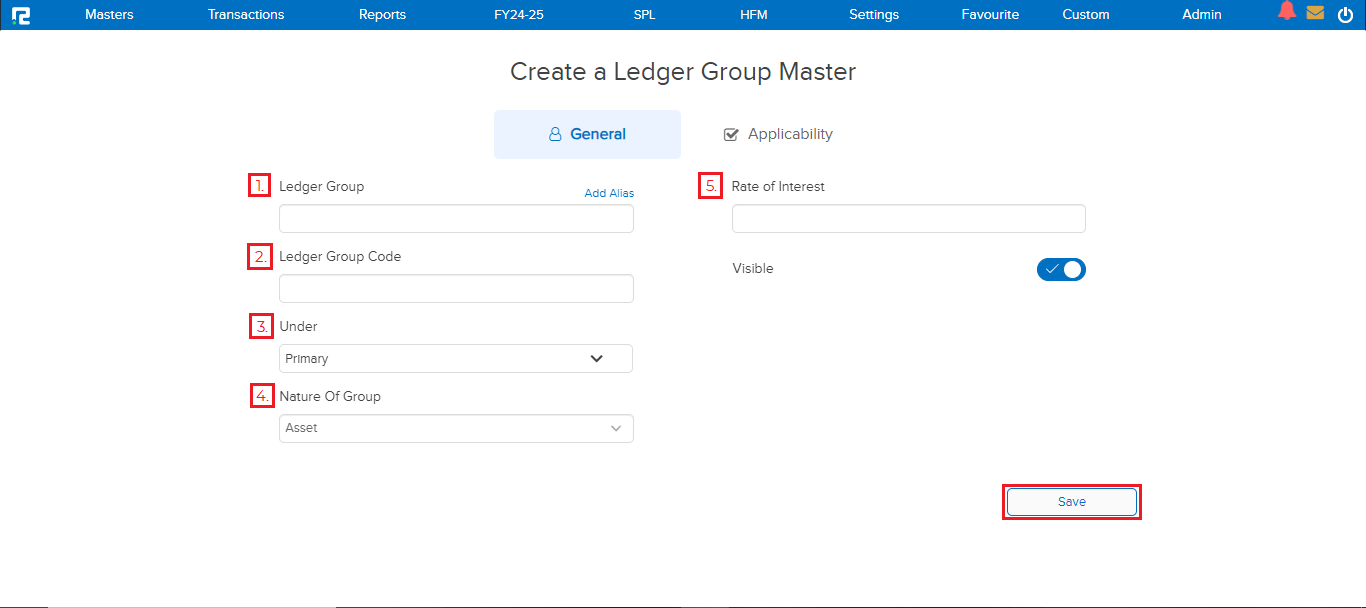
1. Ledger group– The ledger group’s name.
2. Ledger Code– If applicable, the ledger group code (Now the ledger code can be auto-generated as well)
3. Under– From the dropdown list displayed select the group hierarchy.
4. Nature of the group– Select the nature of the ledger group.
5. Rate of interest– If applicable set an appropriate rate of interest.
Go to the “Applicability” tab (This configuration is Optional)
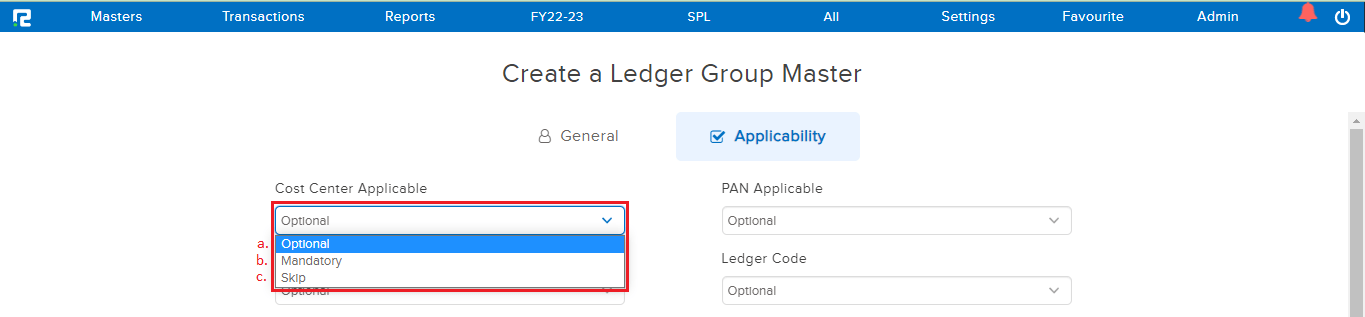
Note: Against every field, a dropdown is available, with 3 options, the impact of which is as follows:
a. Optional – If this option is selected, it means while creating a ledger under this ledger group, it is at the user’s discretion, whether they want to enable the feature or not.
b. Mandatory – If this option is selected, it means while creating a ledger under this ledger group, the feature will have to be enabled mandatorily, else the system will not allow saving the ledger.
c. Skip – If this option is selected, it means while creating a ledger under this ledger group, the feature will not be shown for activation.
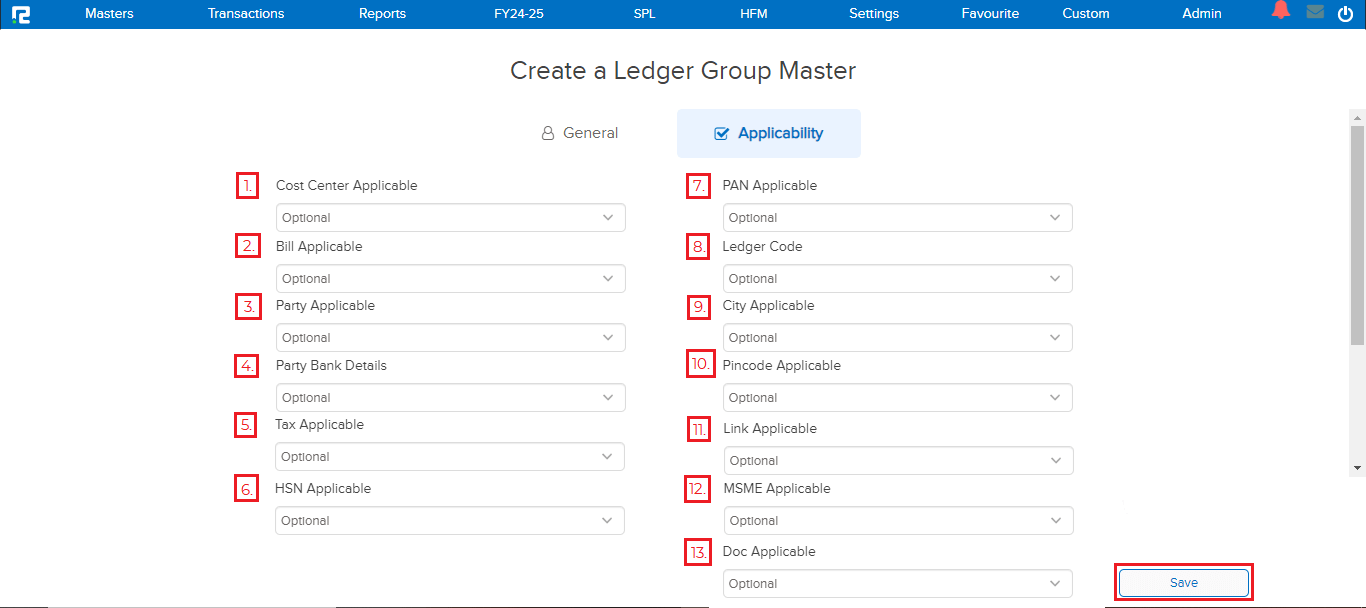
Select the option if applicable for all the given heads-
1. Cost centre applicable – Whether Cost Centre will be applicable for ledgers created under this group, or not.
2. Bill applicable – Whether Bill activation will be applicable for ledgers created under this group, or not.
3. Party applicable – Whether the “Add Party Details” option will be applicable for ledgers created under this group, or not.
4. Party Bank Details – Whether “Edit Bank A/C Details” will be applicable for ledgers created under this group, or not.
5. Tax applicable – Whether the “Taxes Info” option will be applicable for ledgers created under this group, or not.
6. HSN applicable – Whether the “HSN” option will be applicable for ledgers created under this group, or not.
7. Pan applicable – Whether the “PAN No” option will be applicable for ledgers created under this group, or not.
8. Ledger code – Whether the “Ledger Code” option will be applicable for ledgers created under this group, or not.
9. City Applicable – Whether the “City” option will be applicable for ledgers created under this group, or not.
10. Pin code applicable – Whether the “Pin code” option will be applicable for ledgers created under this group, or not.
11. Link applicable – Whether the “Link feature” option will be applicable for ledgers created under this group, or not.
12. MSME applicable – Whether the “MSME reporting” option will be applicable for ledgers created under this group, or not.
13. Doc applicable – Whether the “Document” option will be applicable for ledgers created under this group, or not.
STEP 3: Click on the SAVE button and your ledger group will be saved successfully.
How To Edit a Ledger Group
STEP 1: Go to Masters ⇒ Accounts ⇒ Ledger Group ⇒ Edit
On clicking EDIT, a search page displays, as shown below.
STEP 2: Enter the name of the ledger group that you want to edit in the search box, and click on search.
STEP 3: At the right end of each ledger group a “pencil” option is present, click on it to make the relevant changes to a particular ledger group.

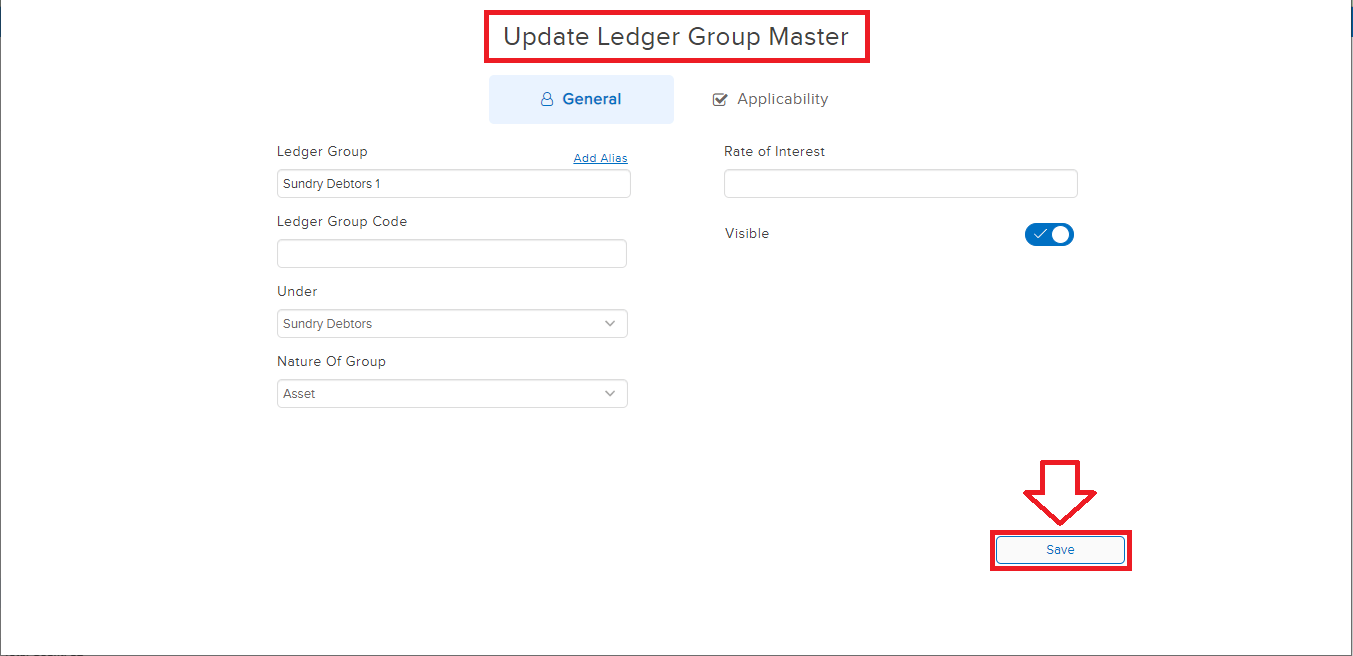
STEP 4: The Ledger Group update screen will appear, make the necessary changes. Click on Save.
How To View a Ledger Group
STEP 1: Go to Masters ⇒ Accounts ⇒ ledger Group ⇒ View

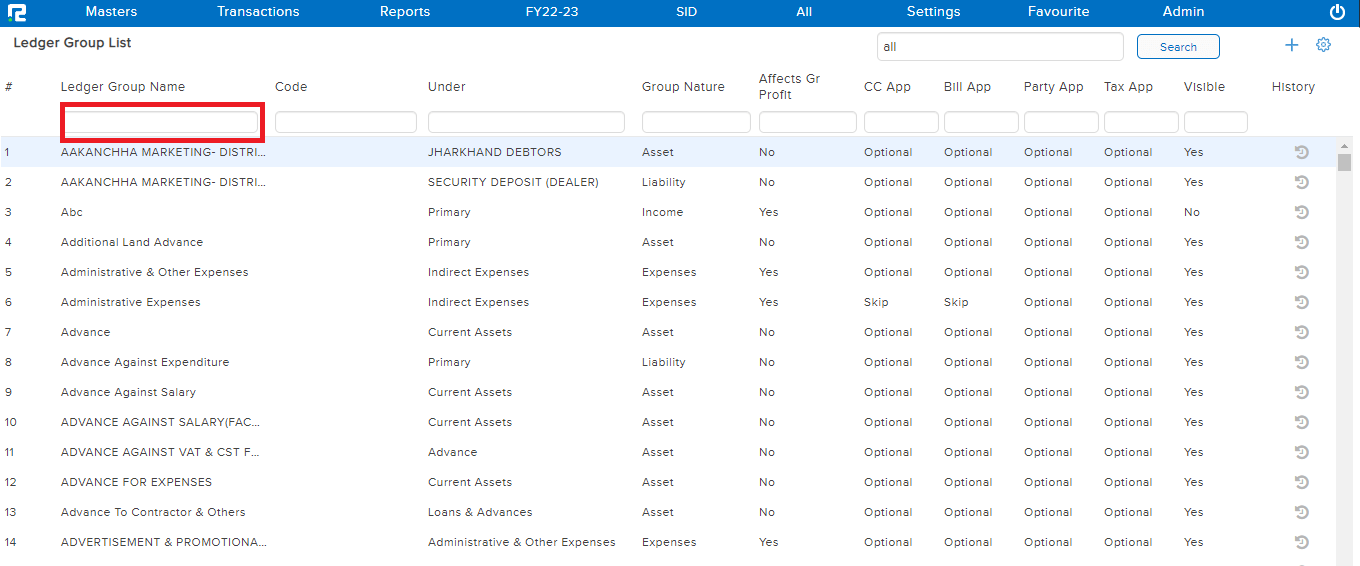
On clicking VIEW, a search page displays, as shown below.
STEP 2: Enter the name of the ledger group that you want to view in the search box, and click on search.
Alternatively, type “All” in the search box and click on Search, all the ledger groups that you have created will be displayed.
How To Delete a Ledger Group
STEP1: Go to Masters ⇒ Accounts ⇒ Ledger Group ⇒ Delete
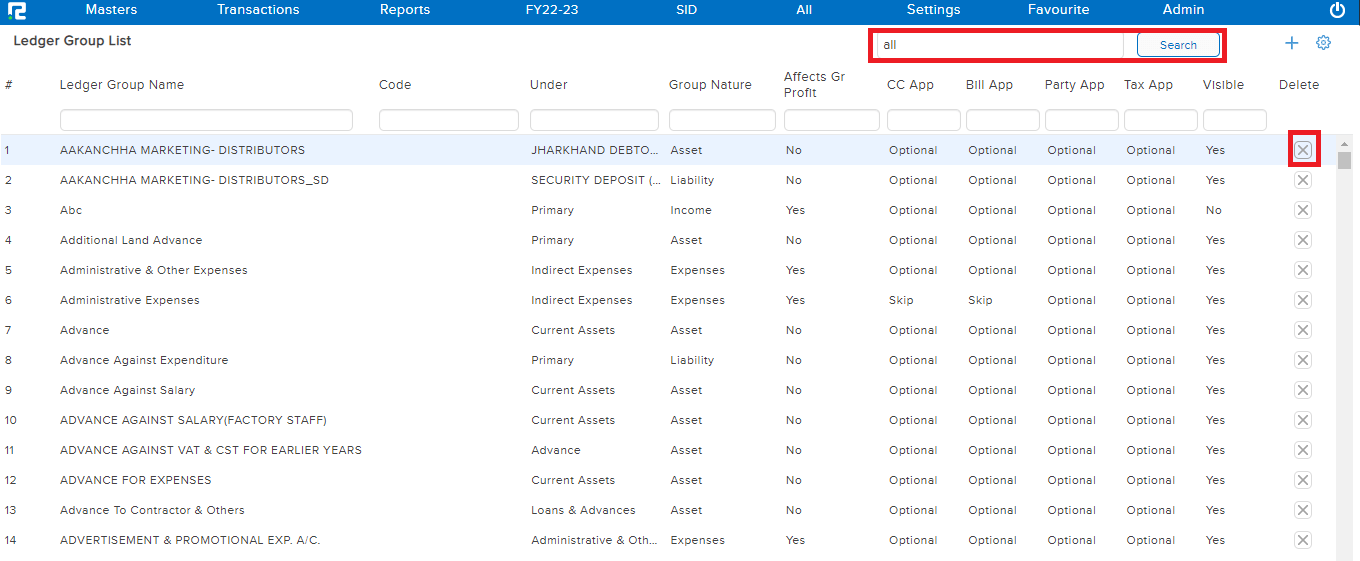
On clicking DELETE, a search page displays, as shown below.
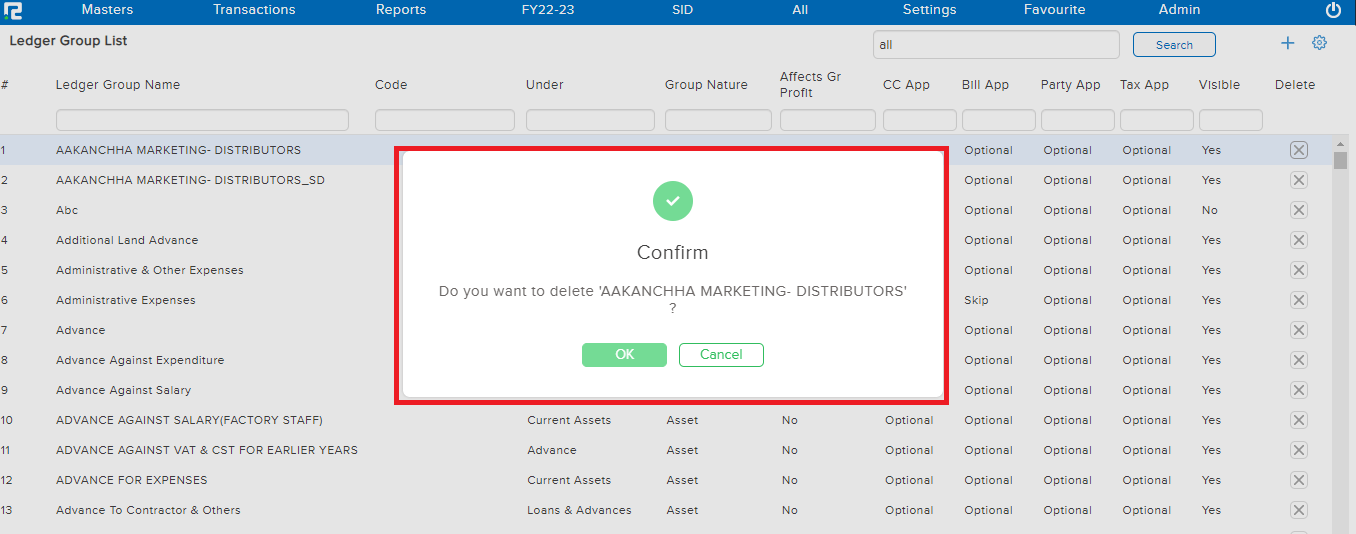
STEP 2: Enter the name of the ledger group that you want to delete in the search box, and click on search.
STEP 3: At the right end of each ledger group there is an “x” option click on it to delete the particular ledger group.
STEP 4: A confirmation box will appear, click on ok and the ledger group will be deleted successfully.
Frequently Asked Questions
Q) Can I track which user has created or modified the ledger group?
A) Yes, on the Ledger group edit listing screen, click on the gear icon(right top corner), click on User Information, and the data will be displayed.
Q) Can I export the ledger group master?
A) Yes, on the Ledger group edit screen, click on the export option(right top corner), click on any format, and the data will be downloaded.