In case, any buyer returns a purchased product for any reason to the seller, the same is recorded in the purchase return voucher.
How to Create a Purchase Return Entry
STEP 1: Go to Transactions⇒ Inventory ⇒Purchase Cycle⇒ Purchase Return
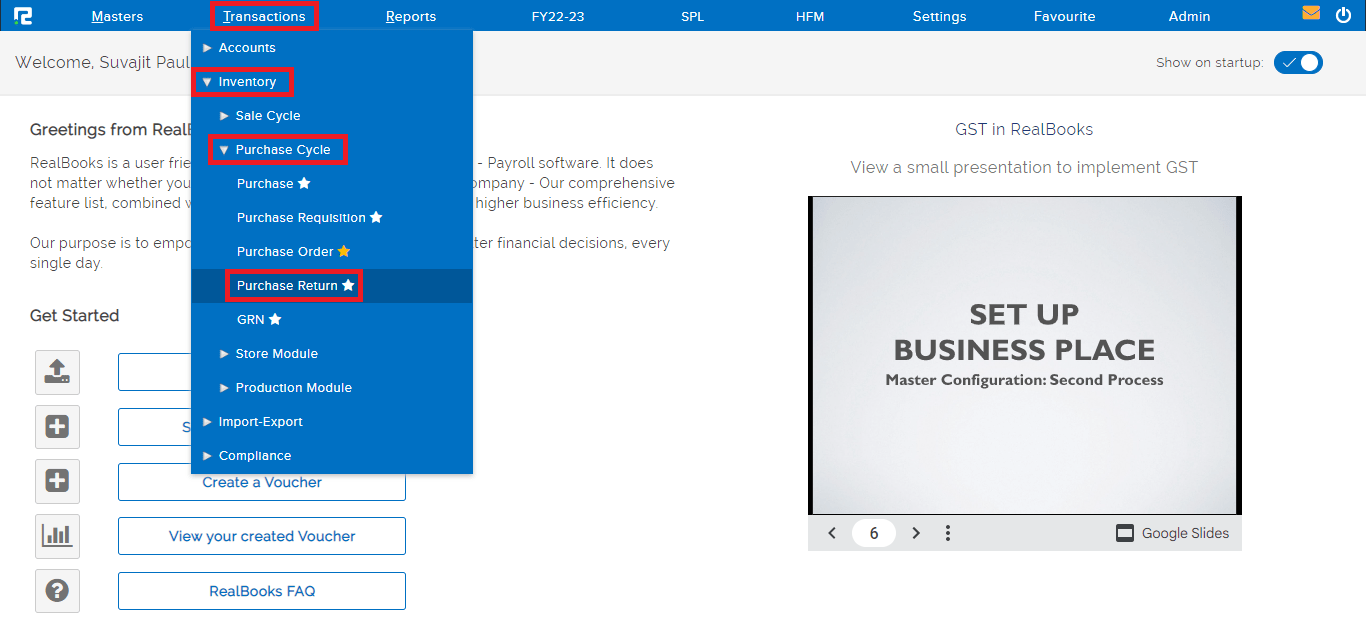
A purchase return transaction entry page will open-
STEP 2: Fill in the following details-
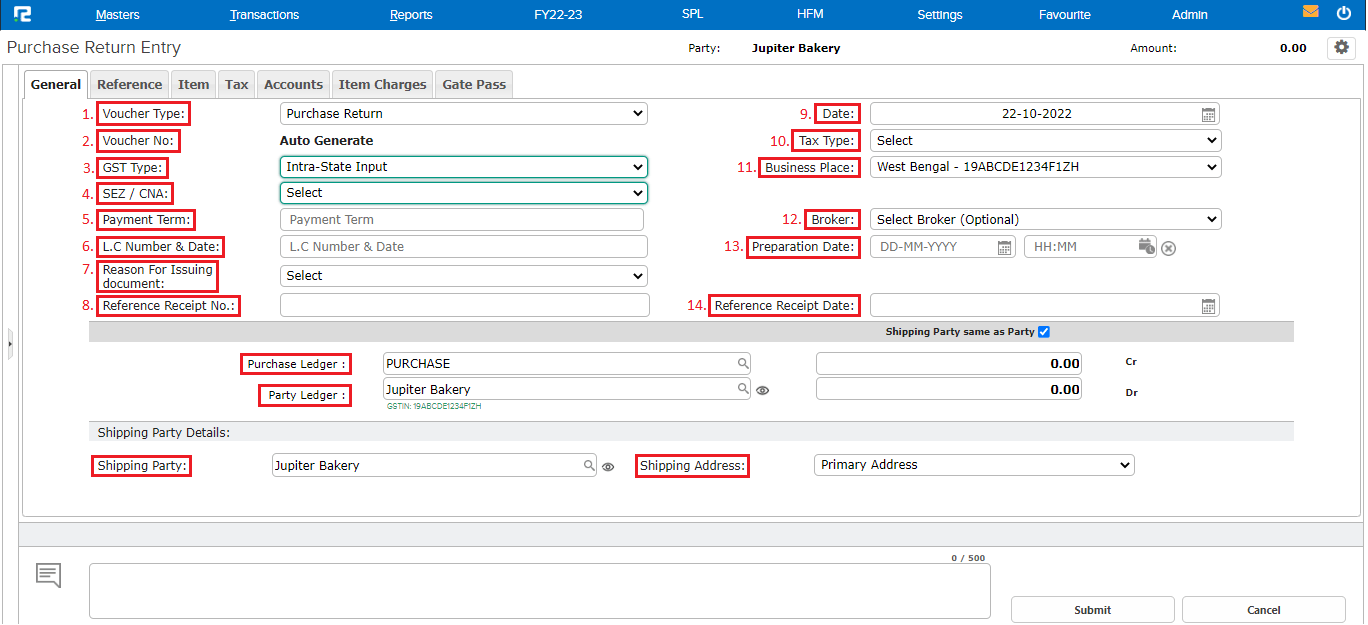
Under the general tab
1. Voucher type– Select the appropriate voucher type from the dropdown list displayed.
2. Voucher number– Based on the numbering pattern set in voucher master, this number will be displayed.
3. GST type– This is auto-fetched based on the company’s business place & party’s state.
4. SEZ/CNA– If the billing party belongs to a SEZ location then select SEZ or if GST input credit is not available then select CNA from the dropdown list.
5. Payment term– If there is a payment term agreed upon, it can be added here.
Note: It should not exceed 250 words.
6. LC number and date– Add the LC number and date, if any.
7. Reason for issuing document- Type in the purpose of yours for issuing the doc.
8. Reference receipt no- Type in the receipt that had to be referred to.
9. Date- Set the voucher date.
10. Tax type- This is auto-filled.
11. Business place- Usually, it is auto-selected, but in the case of multiple business places, this needs to be selected from the dropdown.
12. Broker- Search the broker ledger, if any.
13. Preparation date-
14. Reference receipt date- Type in the name of the receipt to be referred to.
Search and enter the Purchase & Vendor ledger in the respective fields, namely, Purchase & Party.
Also, you will see the shipping party and shipping address column below type in the necessary address and party name applicable.
STEP 3: Once the Party ledger is entered, a pop-up appears stating Select a date for Purchase reference.
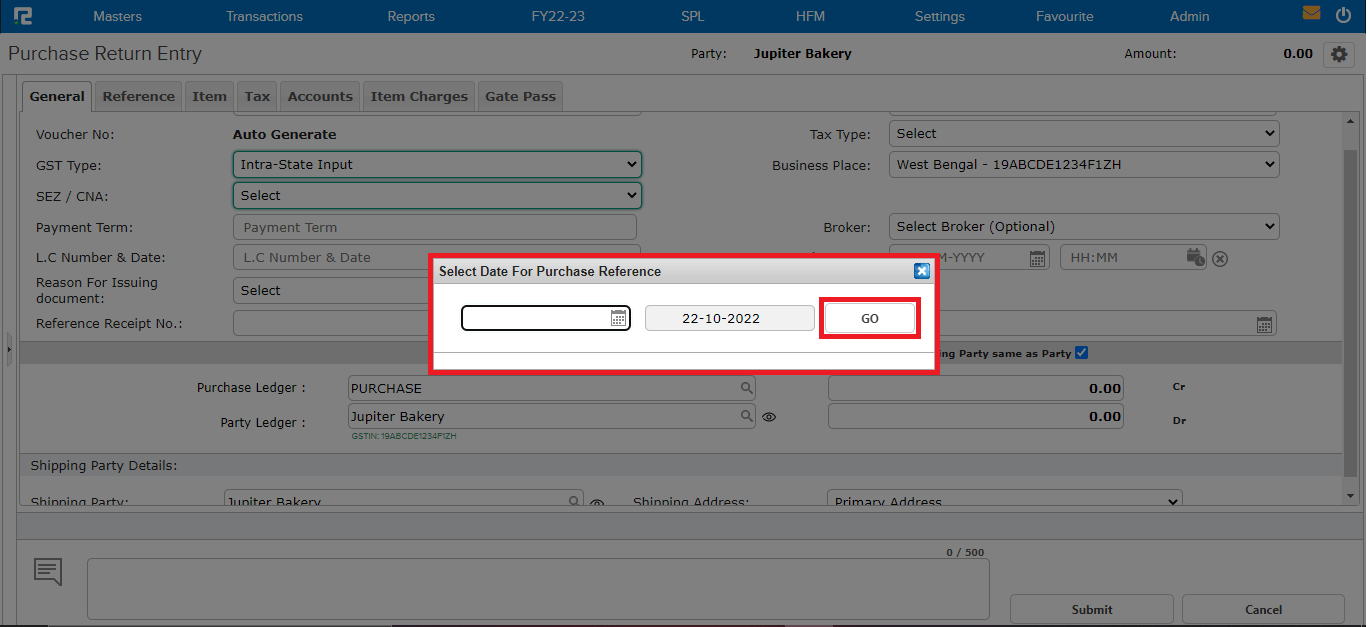 STEP 4: Set the date correctly and CLICK on “GO”. You will be redirected to the “REFERENCE” tab.
STEP 5: Select the Purchase Reference against which the Purchase Return is to take place.
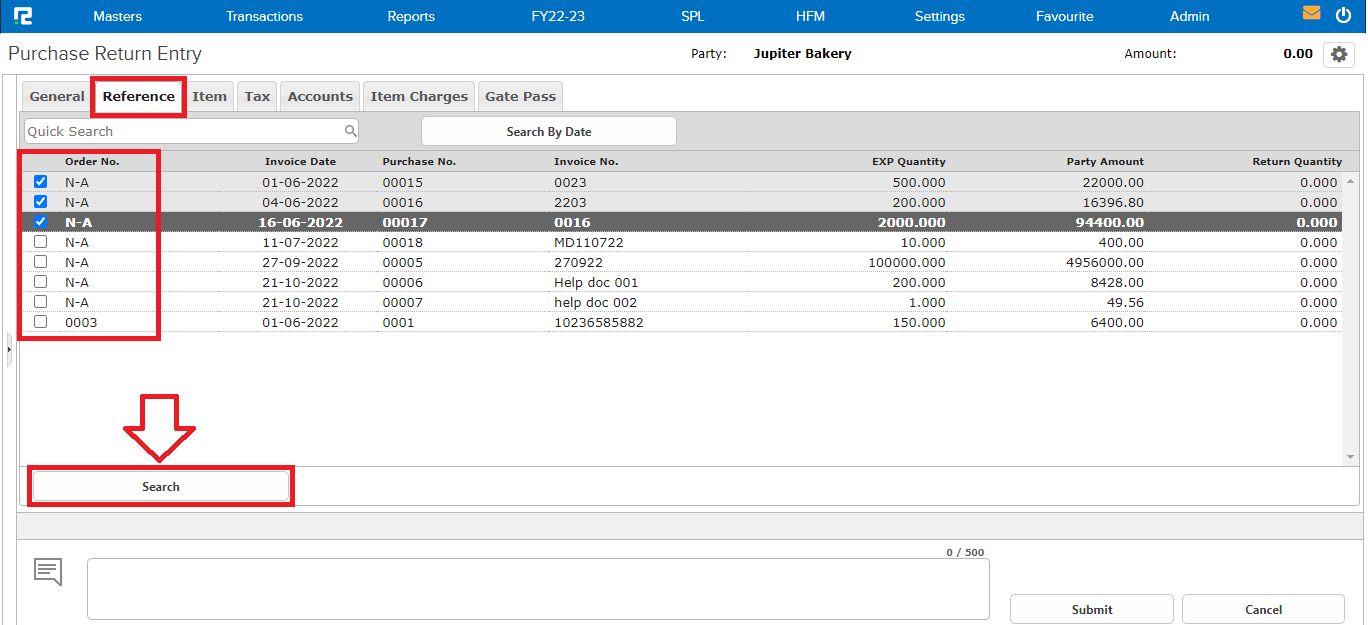
STEP 6: CLICK on the “SEARCH” button available at the bottom left corner, you will be redirected to the “ITEM” tab.
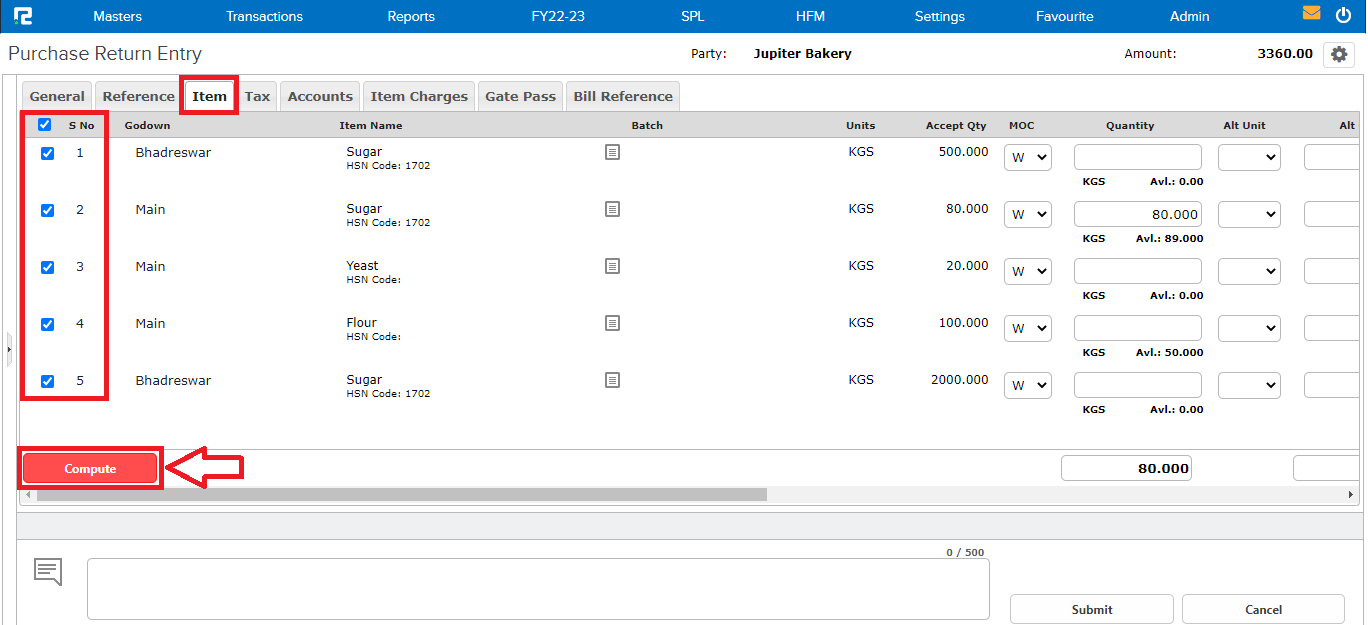
 STEP 7: Select the item row which has been returned, update the quantity (in case of partial return), and CLICK on “COMPUTE”. You will be redirected to the “ACCOUNTS” tab.
The Tax ledgers and amount come automatically, as per the Tax charged in Purchase. To add any additional charges, press Enter or click on the “+” icon, a new row will get added, and to remove additional rows, click on the “x” icon.
Note: The tax in Purchase Return flows from Purchase voucher, so whatever tax has been configured in Purchase Voucher, the same shall remain applicable for Purchase Return.
STEP 8: CLICK on the “BILLS REFERENCE” tab.
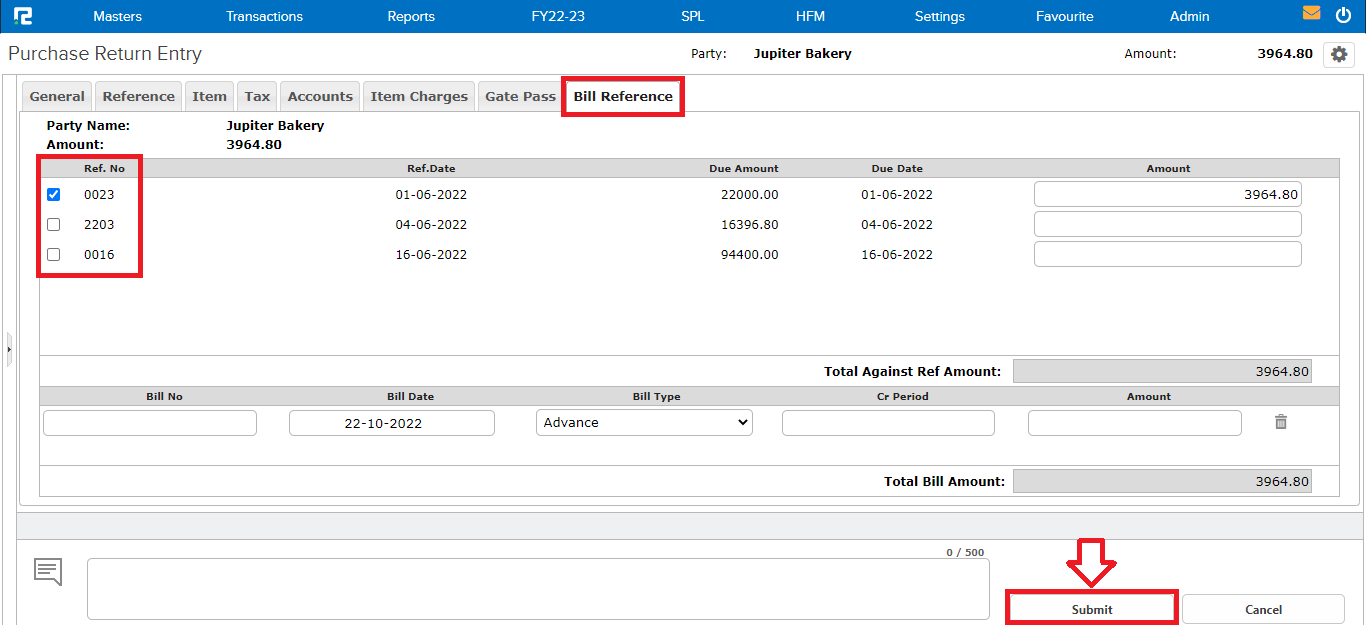 STEP 9: Select the bill reference number to knock off the dues against the invoice. CLICK on the “SUBMIT” button, the Purchase Return voucher will be saved successfully.
STEP 9: Select the bill reference number to knock off the dues against the invoice. CLICK on the “SUBMIT” button, the Purchase Return voucher will be saved successfully.
How to Edit a Purchase Return Entry
Users can view, edit, cancel, or delete a purchase return entry from almost every report available in the system. For ex: day book, purchase register, etc.
TRANSACTION EDIT VIA DAY BOOK
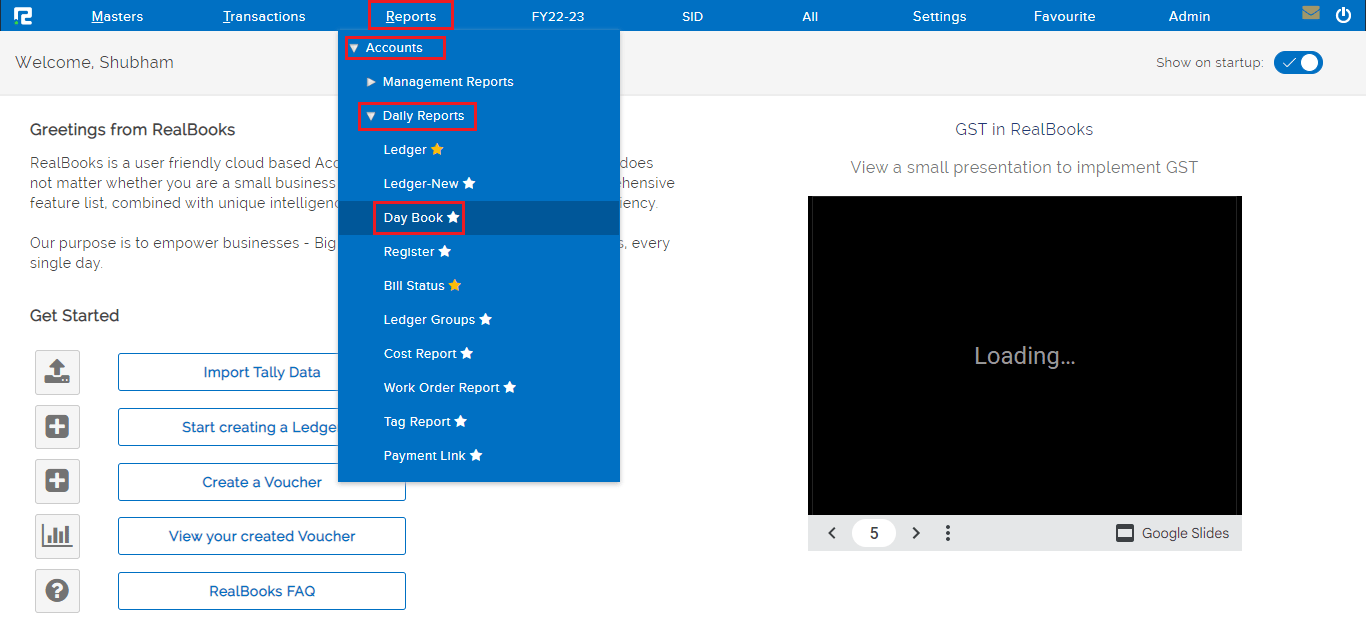
Go to Reports⇒ Accounts⇒ Daily reports⇒ Day Book
To edit an entry, click on the settings icon on the right-hand side of the entry & click on the Voucher Edit option, or alternatively, press Enter on the keyboard.
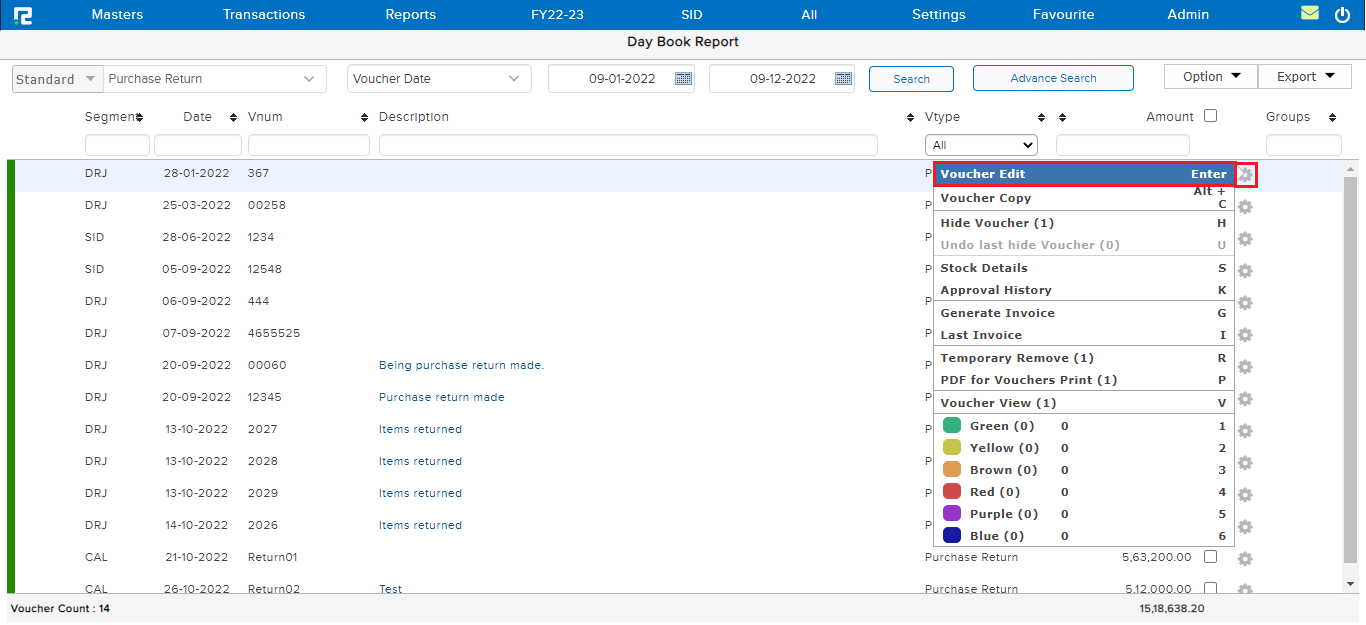
Do the necessary changes as required and click on the submit button.
TRANSACTION EDIT VIA PURCHASE REGISTER
Go to Reports⇒ Inventory⇒ Purchase Cycle⇒ Purchase Register

To edit an entry, click on the settings icon on the right-hand side of the entry & click on the Edit option, or alternatively, press Enter on the keyboard.
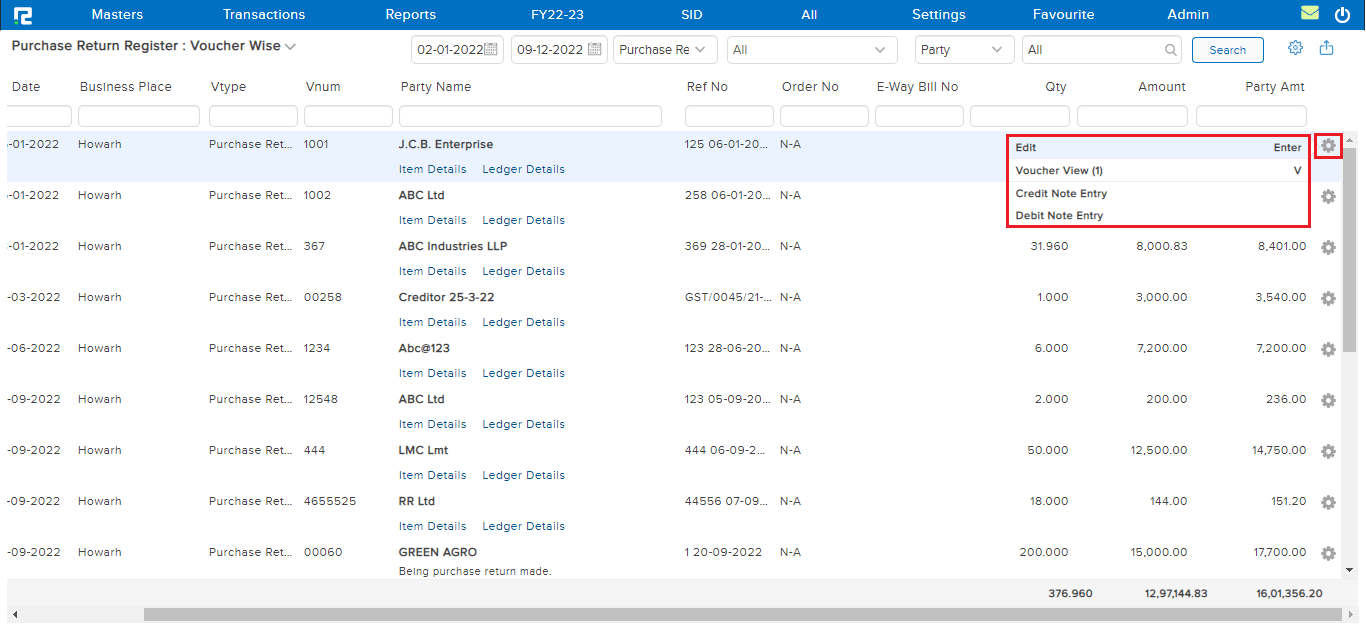
Do the necessary changes as required and click on the submit button.
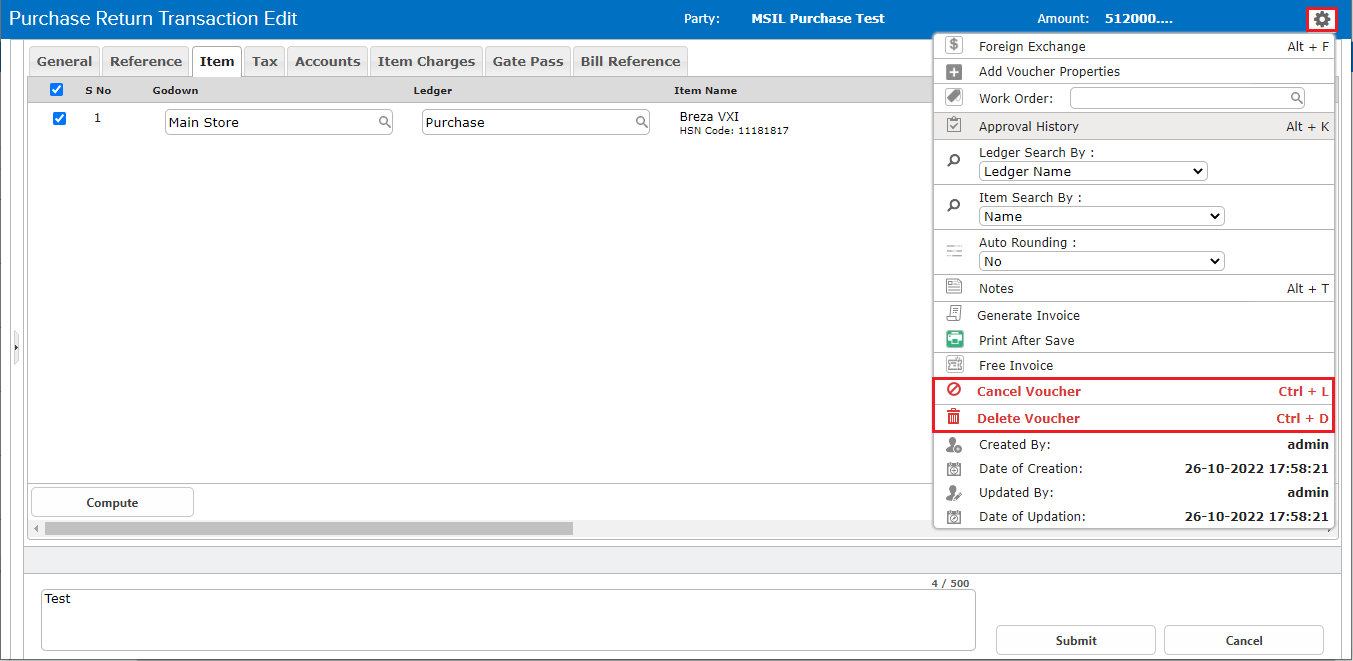
How to Delete or Cancel an Entry
DELETE/CANCEL– To delete/cancel an entry, open the entry in edit mode, then go to the Settings icon on the right-hand side of the page. From the dropdown menu select the cancel/delete voucher as required, enter the reason for cancellation/deletion, and then click on cancel/delete.