A receipt voucher is used to record all types of receipts. Some of them are payments received from customers against sales made, or on sale of some furniture, etc.
How to Record a Receipt Entry
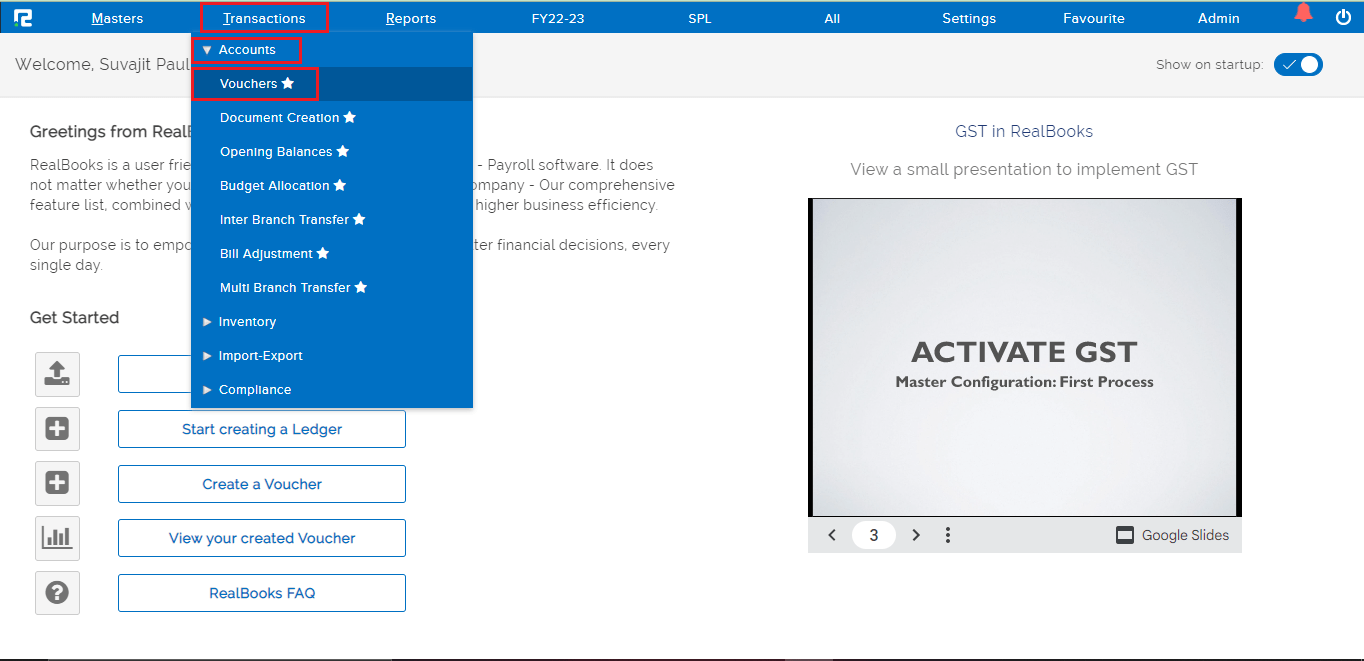
STEP 1: Go to Transactions ⇒Accounts⇒ vouchers
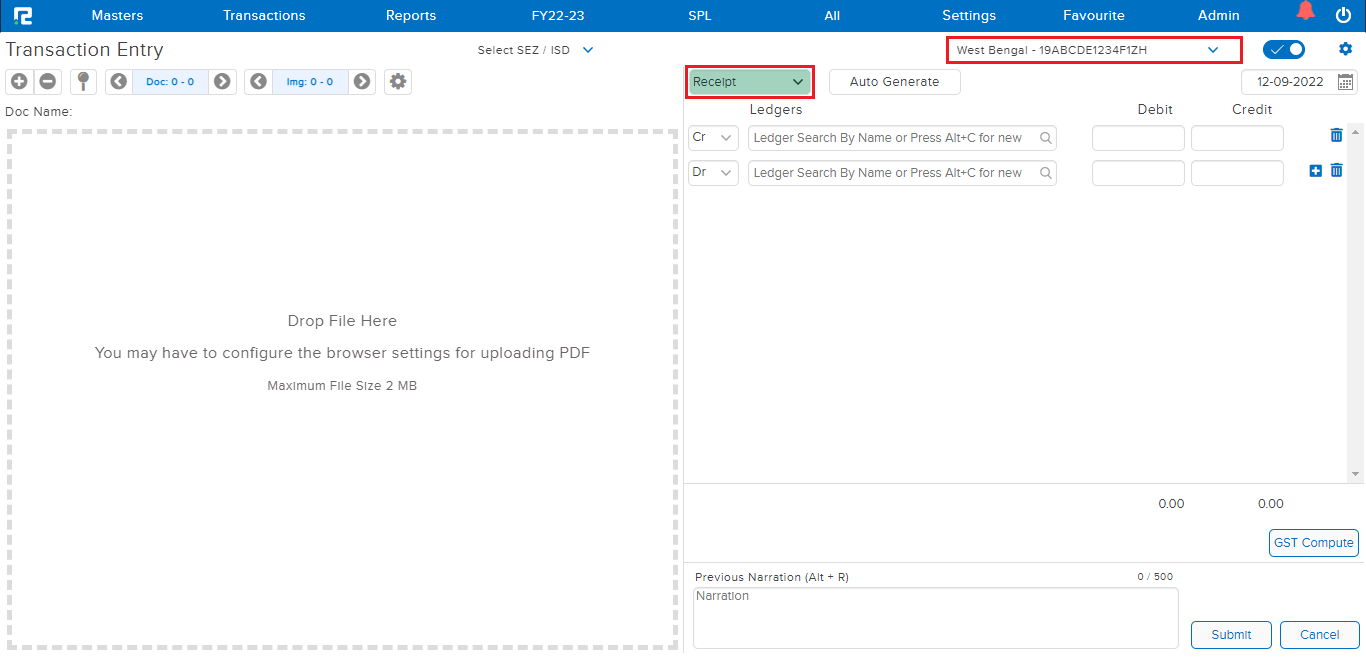
A Transaction Entry page will open. Select the Voucher type from the Dropdown list. The Business place as per GST is displayed by default, however in case of Multiple Business Places, the same can be selected from the Dropdown list.
STEP 2: On the Credit Side, search the Customer/Party ledger (type minimum 3 letters, then select the ledger) and put the party amount.
If the Bill Feature is enabled in the Customer ledger master, the Bill Table will open.
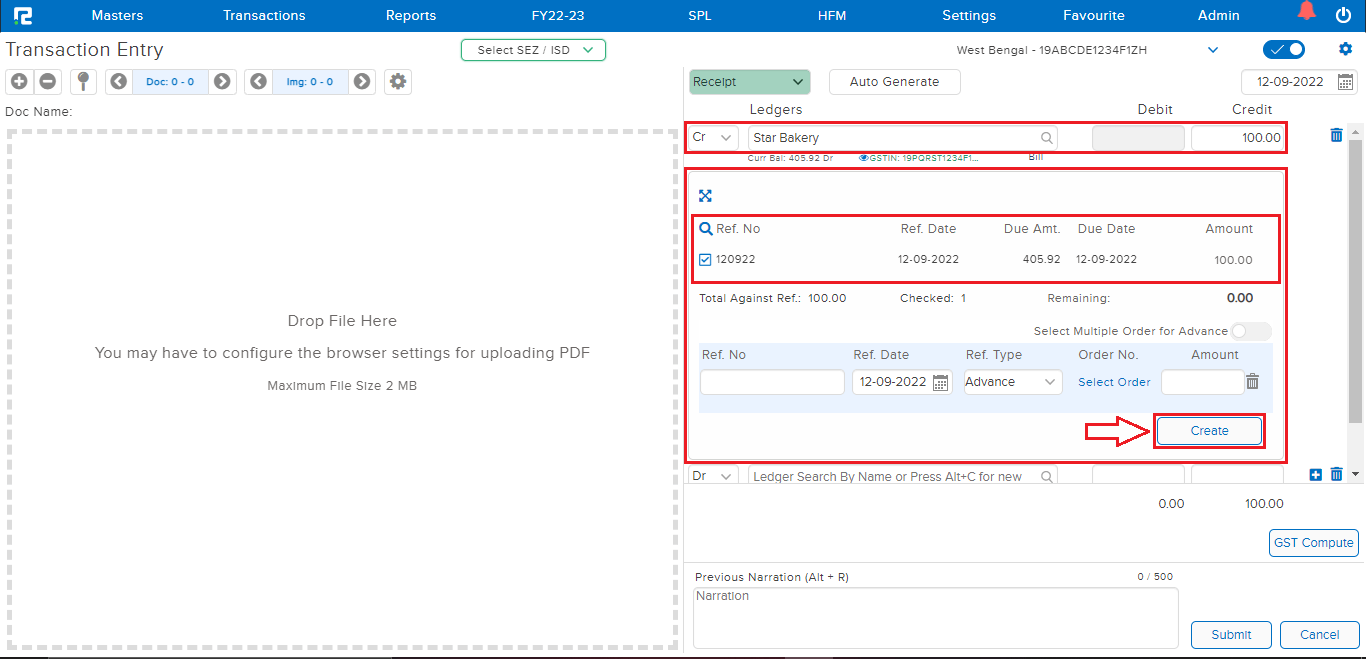
STEP 3: Tag the Bill reference, and CLICK on “CREATE”.
STEP 4: On the Debit side, search the Bank/Cash ledger and enter the bill amount.
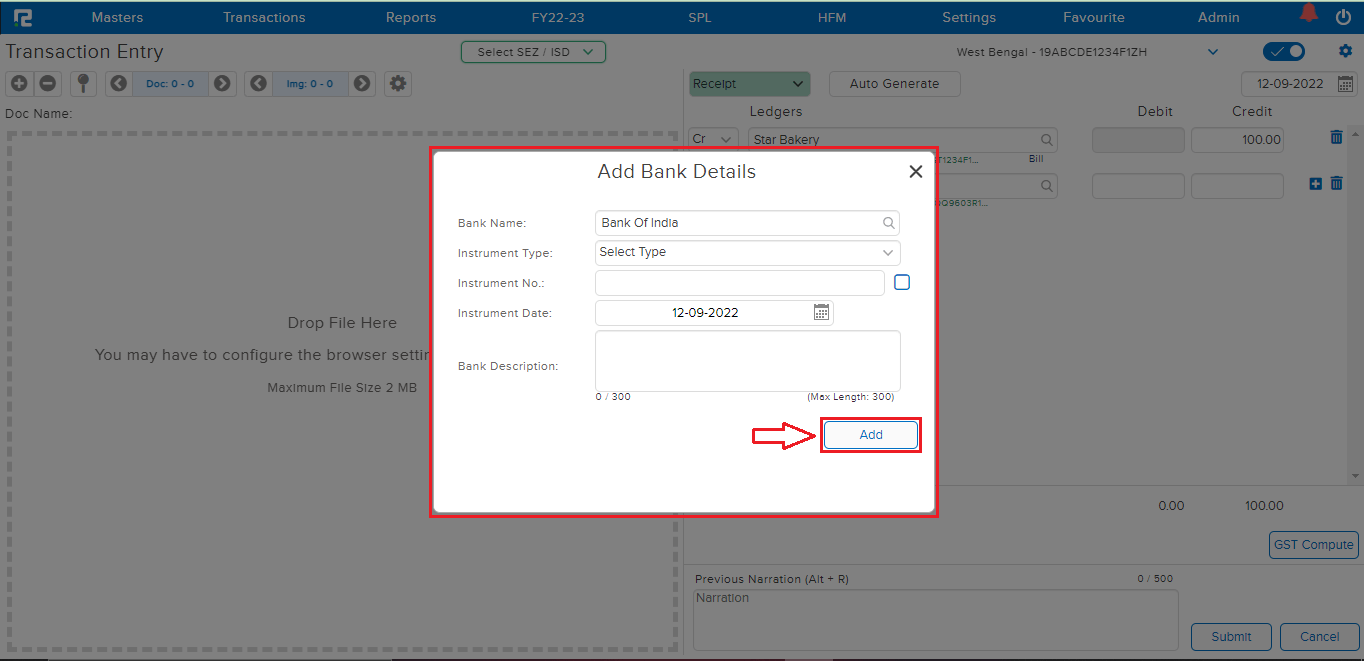
Note: In the case of a Bank Ledger, if capture Bank Details are enabled in configurations, then whenever a bank ledger is selected, the bank details pop-up will open.
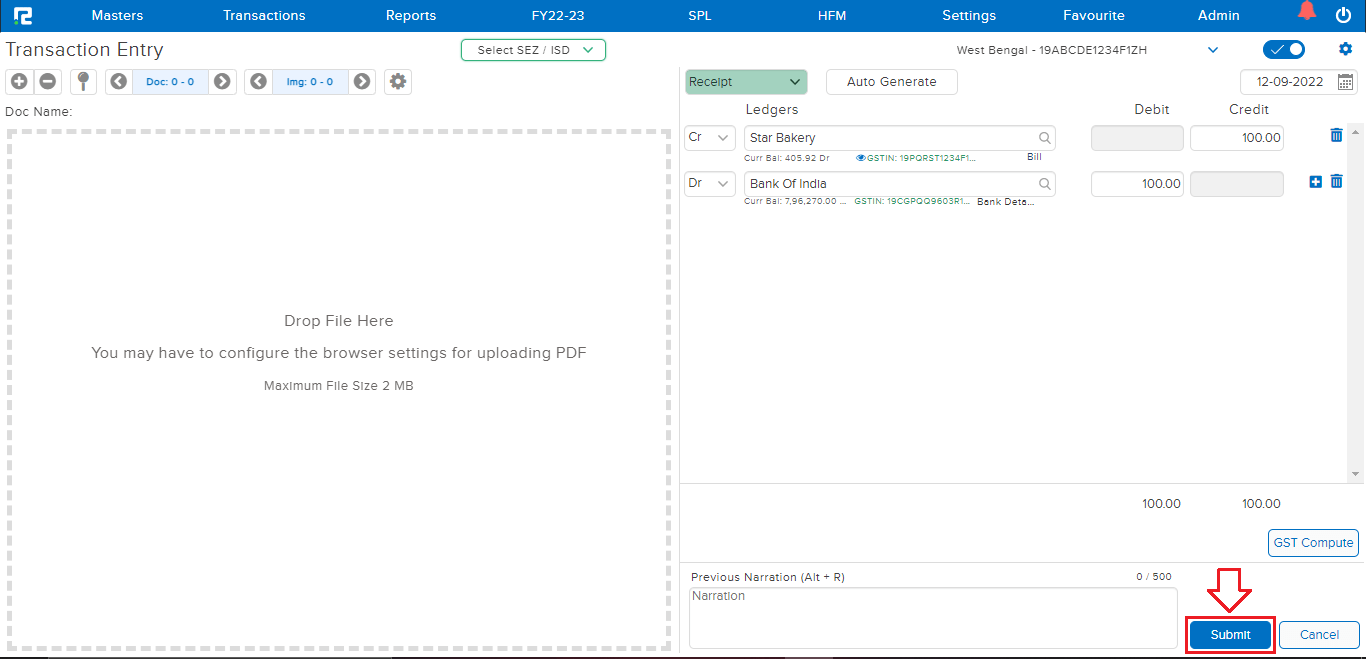
STEP 5: CLICK on the “SUBMIT” button to save the voucher.
How to Edit a Receipt Entry
Users can view, edit, cancel, or delete a receipt entry from almost every report available in the system. For ex: daybook, ledger report, etc.
TRANSACTION EDIT VIA DAY BOOK
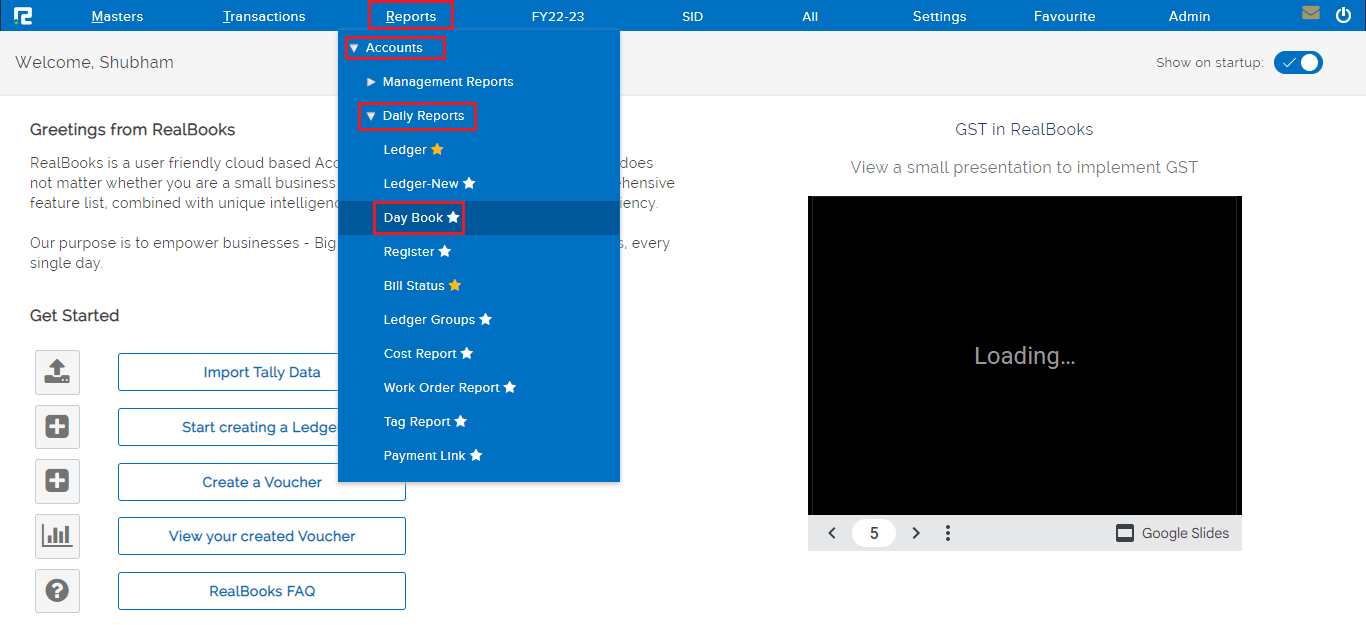
Go to Reports⇒ Accounts⇒ Daily reports⇒ Day Book
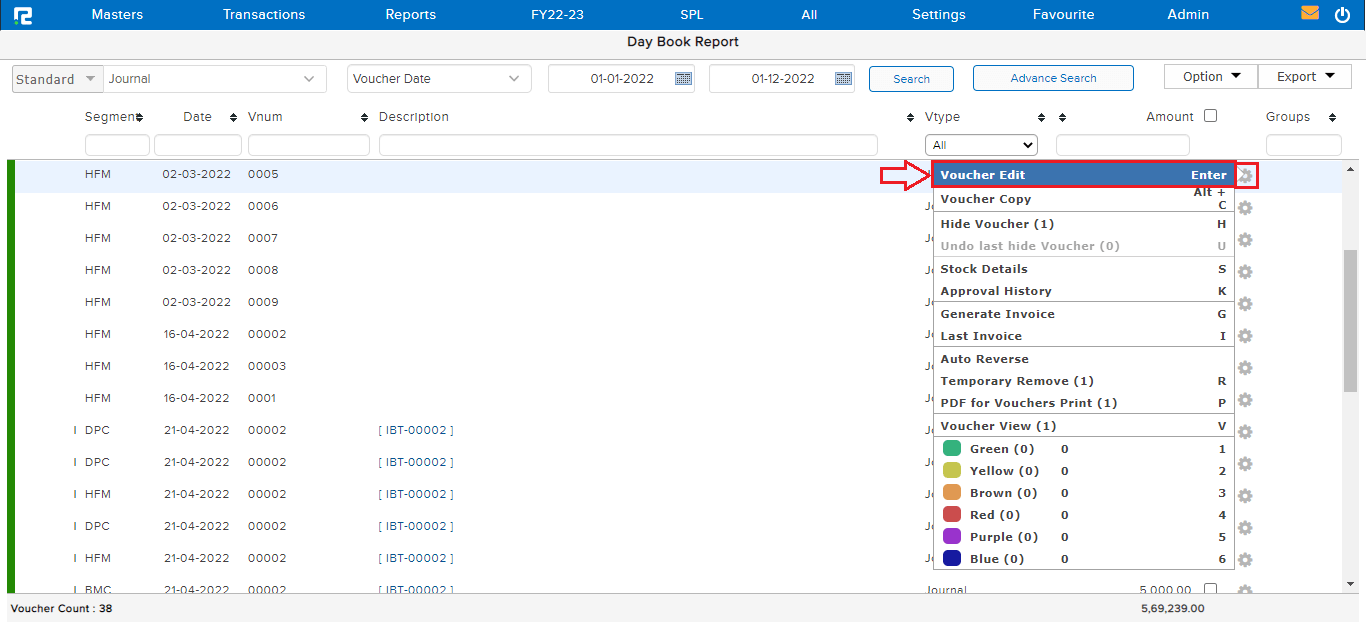
To edit an entry, click on the settings icon on the right-hand side of the entry & click on the Voucher Edit option, or alternatively, press Enter on the keyboard.
Do the necessary changes as required and click on the submit button.
TRANSACTION EDIT VIA LEDGER REPORT
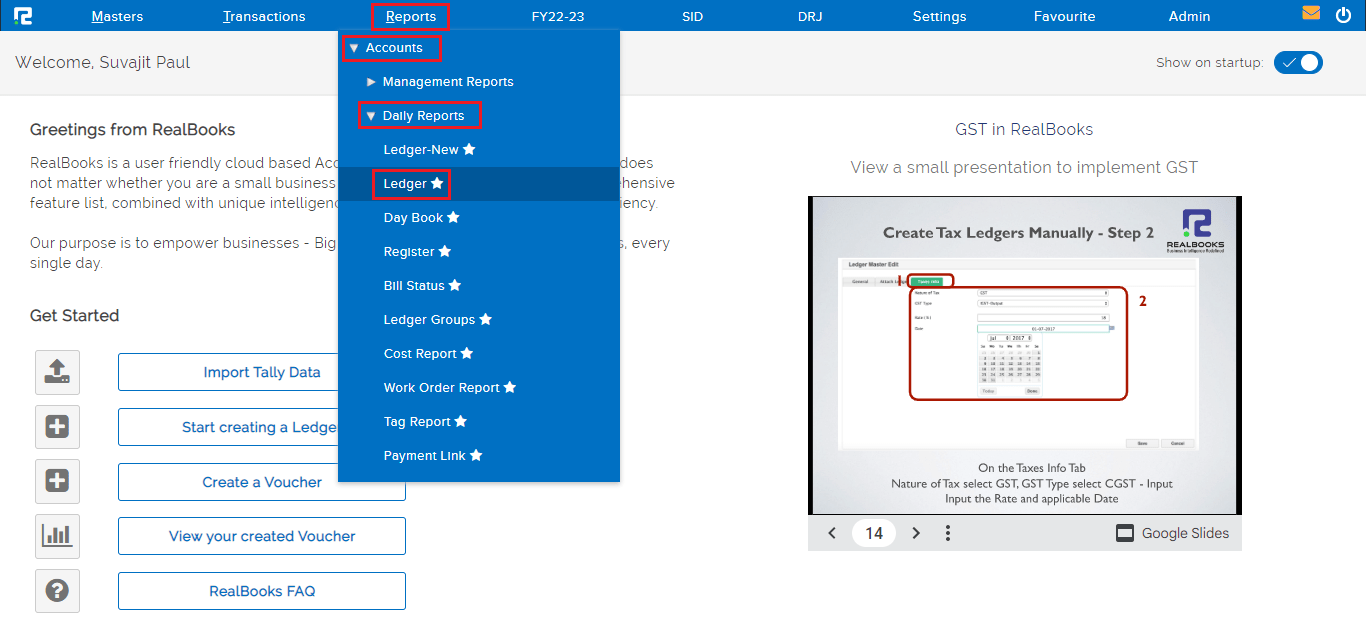
Go to Reports⇒ Accounts⇒ Daily reports⇒ Ledger
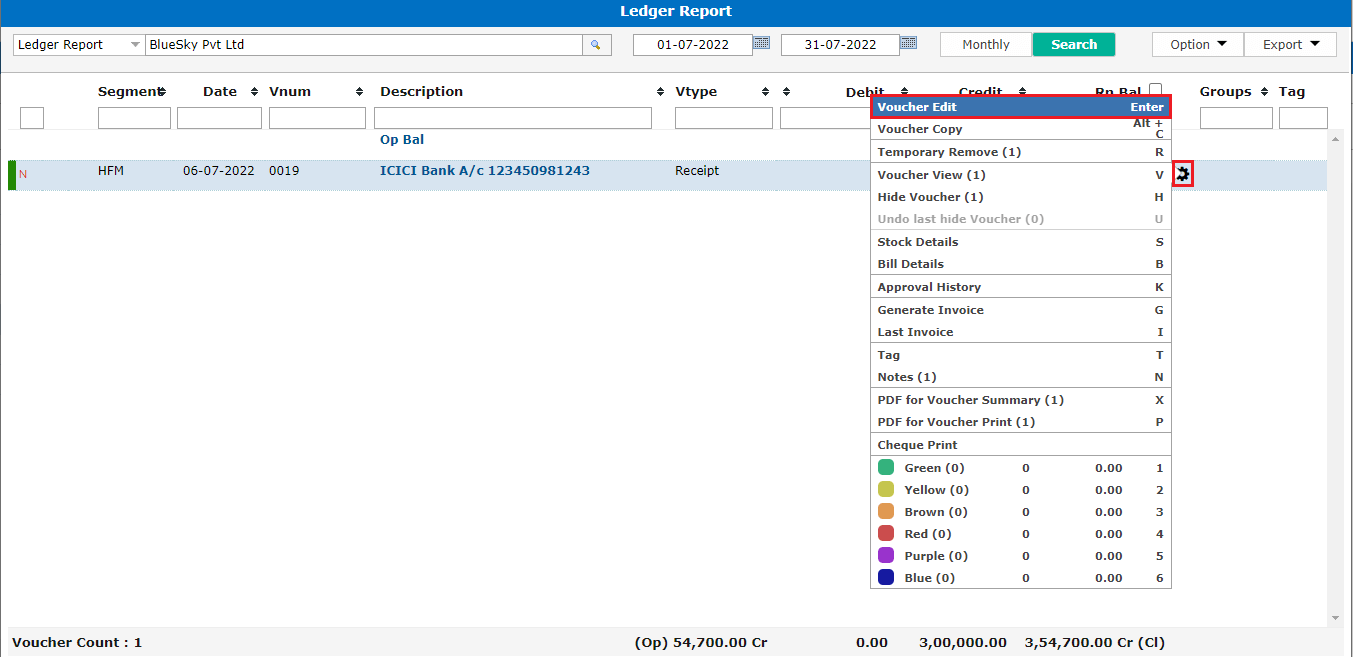
To edit an entry, click on the settings icon on the right-hand side of the entry & click on the Voucher Edit option, or alternatively, press Enter on the keyboard.
Do the necessary changes as required and click on the submit button.
How to Delete or Cancel an Entry
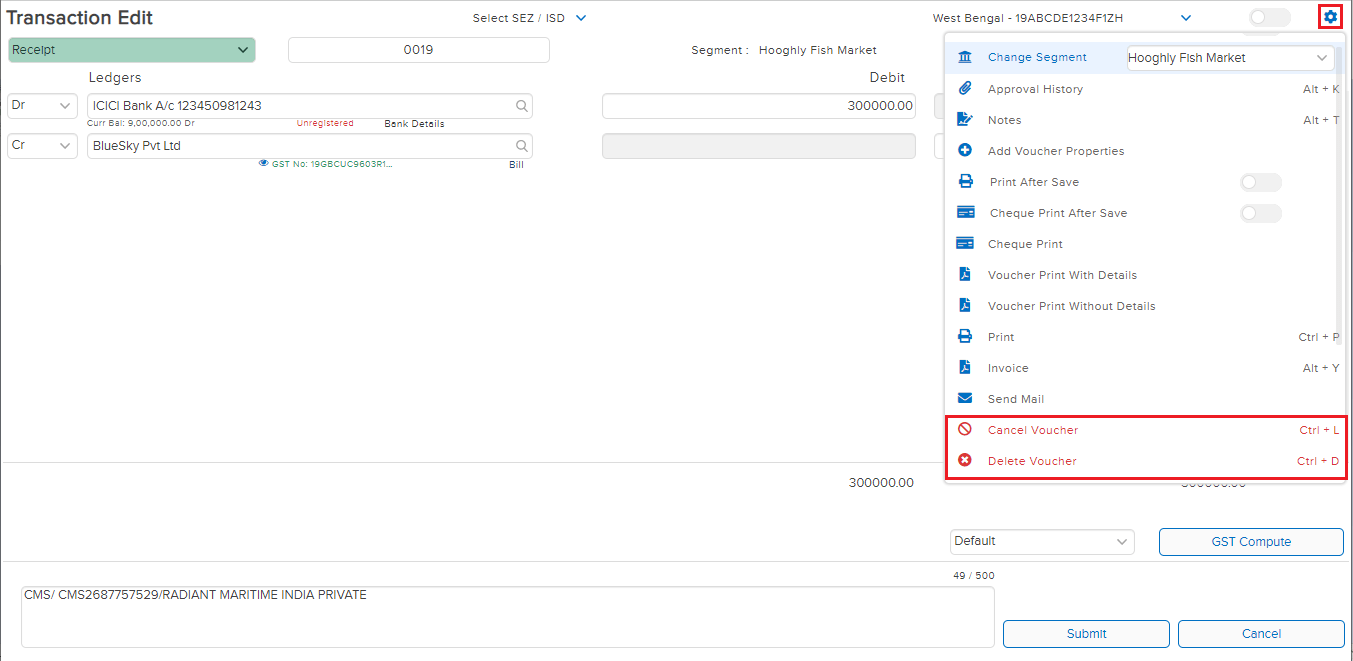
DELETE/CANCEL– To cancel/delete an entry, open the entry in edit mode, then go to the Settings icon on the right-hand side of the page. From the dropdown menu select the cancel/delete voucher as required, enter the reason for cancellation/deletion, and then click on cancel/delete.
