A segment is a branch of a company that runs its own operations and generates its own revenue. It is useful for multi-location accounting.
How to Enable Segment/Branch
STEP 1: Go to Settings⇒ Configuration
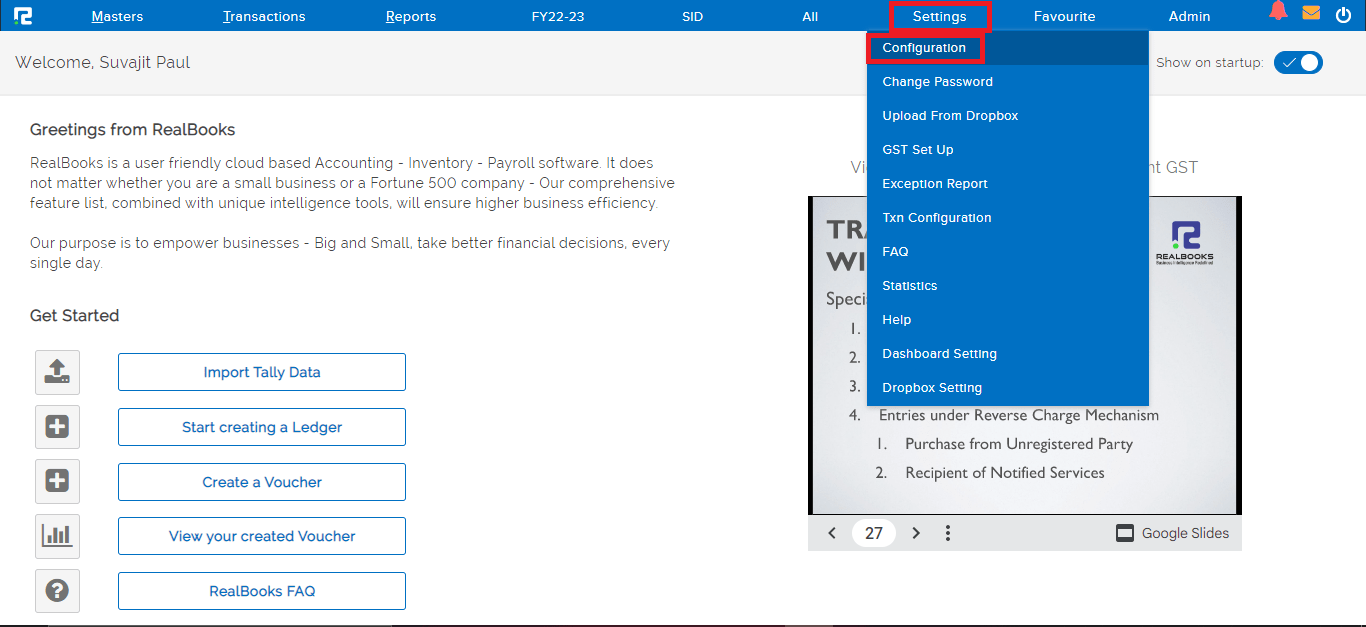
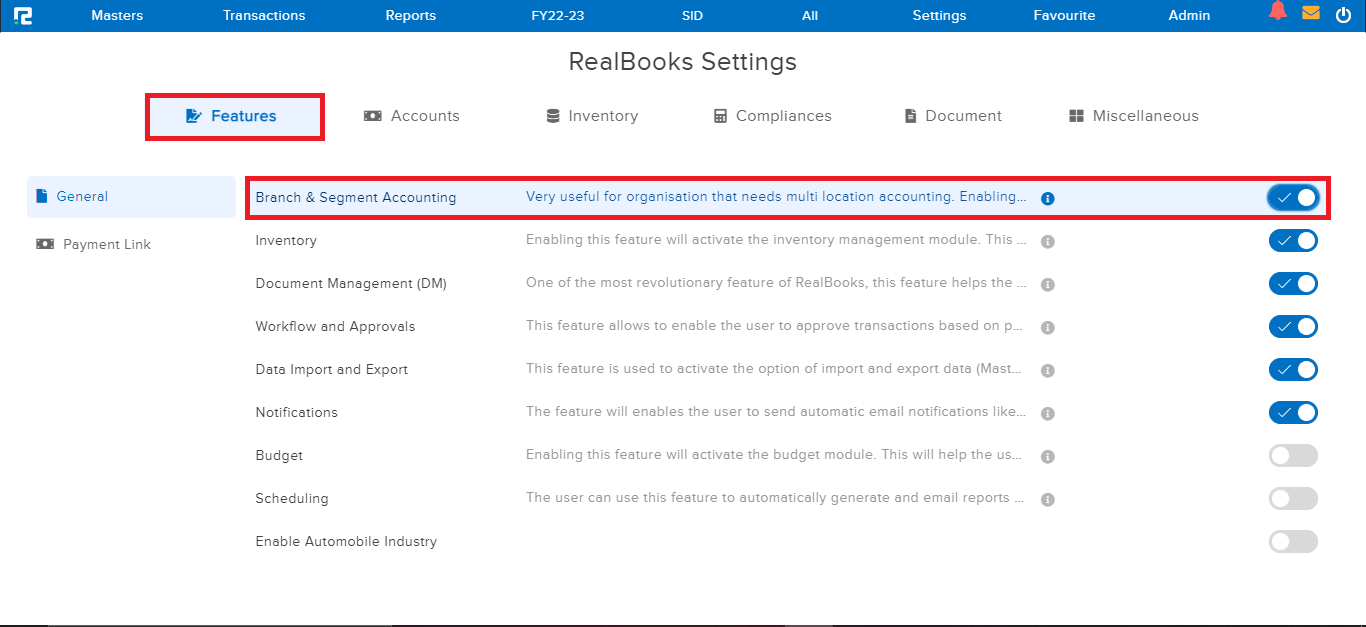
STEP 2: Go to features⇒ Branch and Segment accounting⇒ Enable
How to Create a Segment
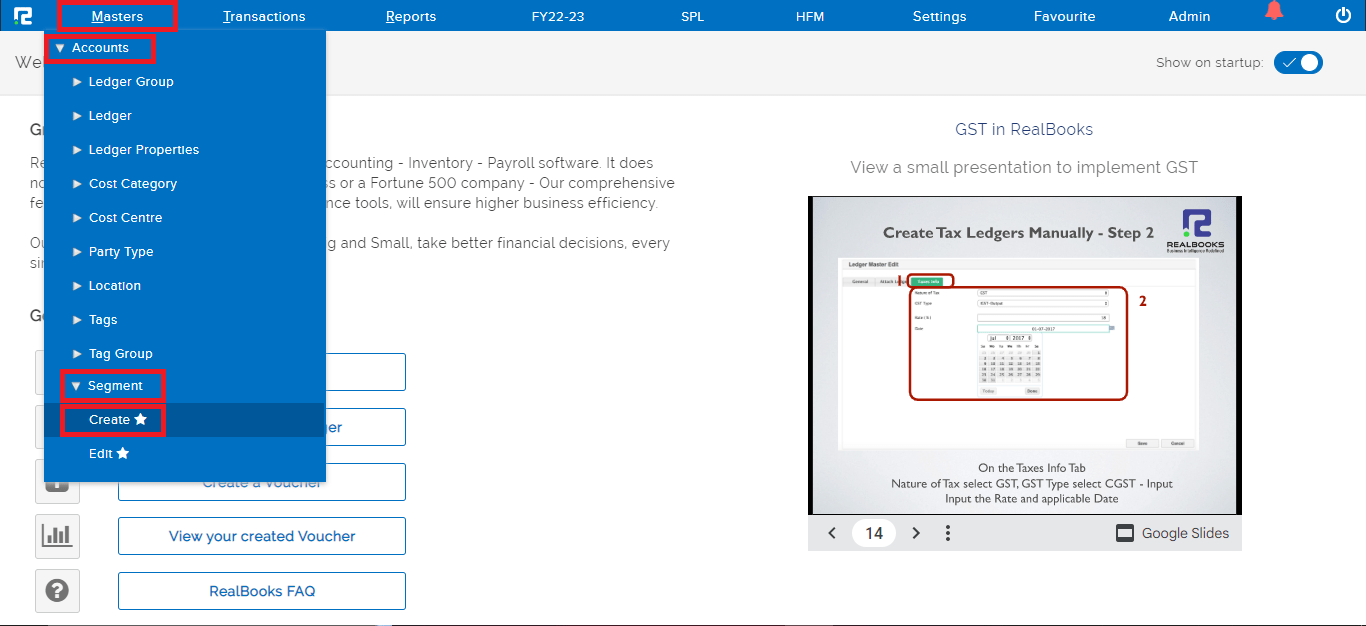
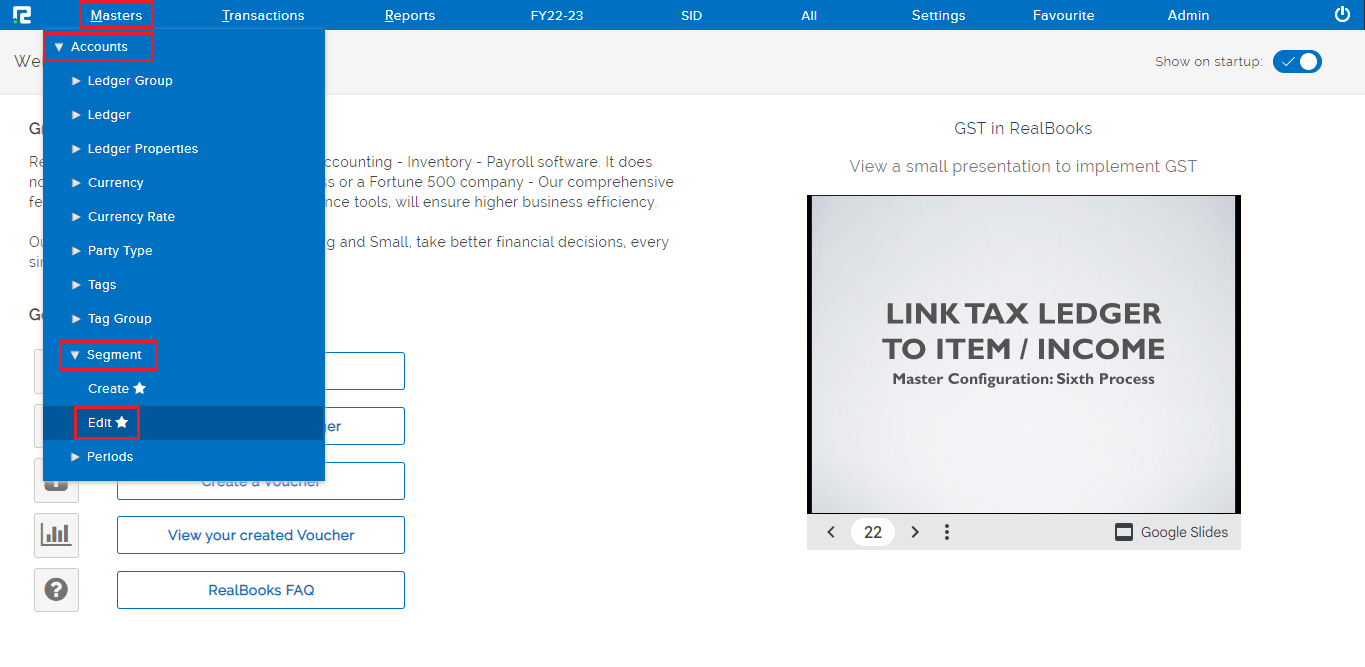
STEP 1: Go to Masters⇒ Accounts⇒ Segment⇒ Create
STEP 2: Fill in the following information.
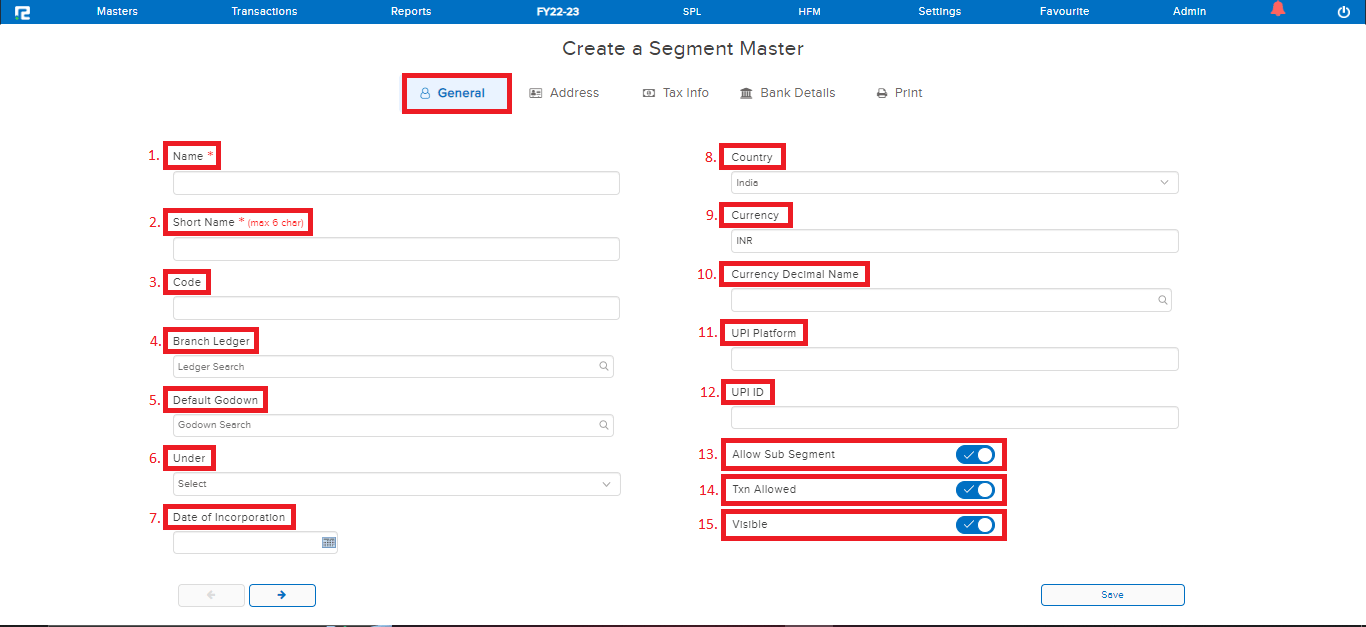
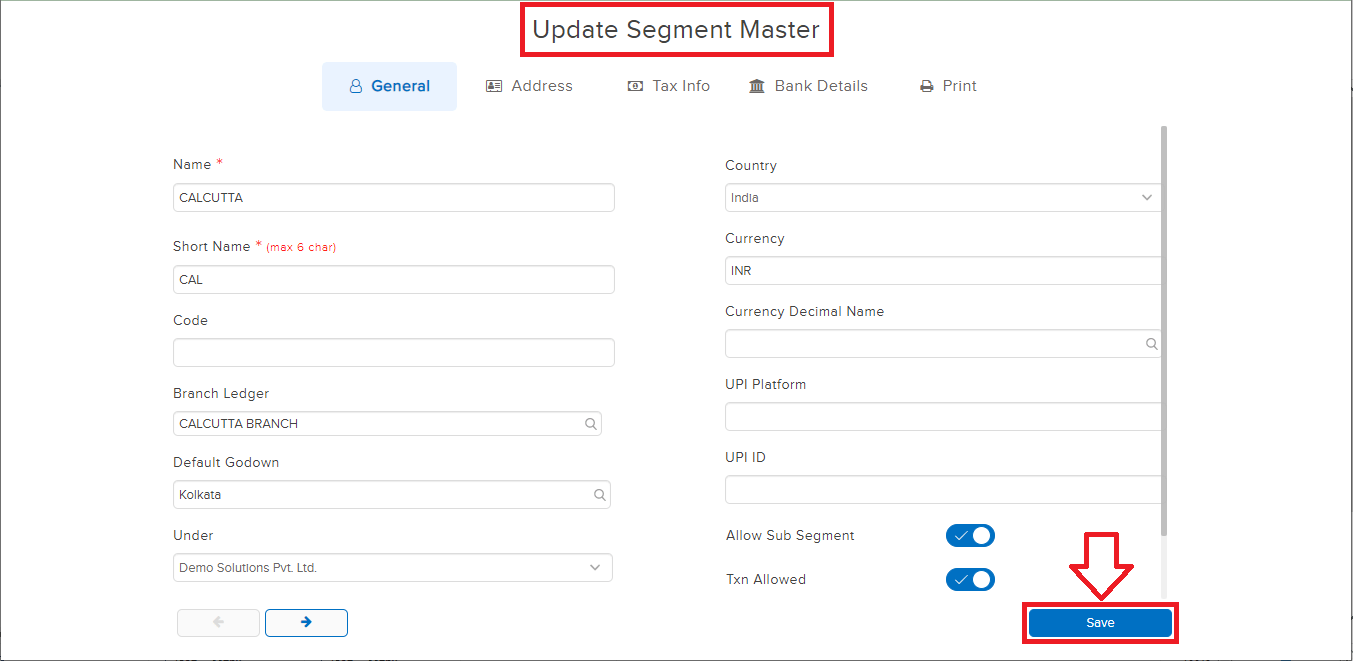
General:
1. Name- Enter the Company’s branch name.
2. Short Name- Enter the branch short name.
Note: Maximum 6 character allowed.
3. Code- Enter the branch code, if any.
4. Branch Ledger- Search and select the branch ledger. (The branch ledger mapped here, is used while auto-posting inter-branch transactions)
5. Default Godown- This helps to pre-define or map specific godown/warehouse locations for inventory movement.
6. Under- Select the company/group segment from the dropdown list under which you want to create the segment. This helps in setting a hierarchy for reporting purposes.
7. Date of Incorporation- Add the date on which the company was incorporated.
8. Country- Search/Select the name of the country where the segment/branch is located.
9. Currency- This is auto-populated based on the Country selection.
10. Currency Decimal Name- Select the decimal place name for the currency.
11. UPI Platform- Add the UPI Platform detail, if any.
12. UPI ID- Enter the UPI ID, if any.
13. Allow Sub Segment- Enable this feature to create a segment/branch under it, and treat this as a Group Segment. The reports will then be consolidated at group level.
14. Txn Allowed- Enable this feature to allow transaction posting in this segment. In case of Group Segments, it is advisable to keep it disabled.
15. Visible- Keeping it visible means, this segment will remain active.
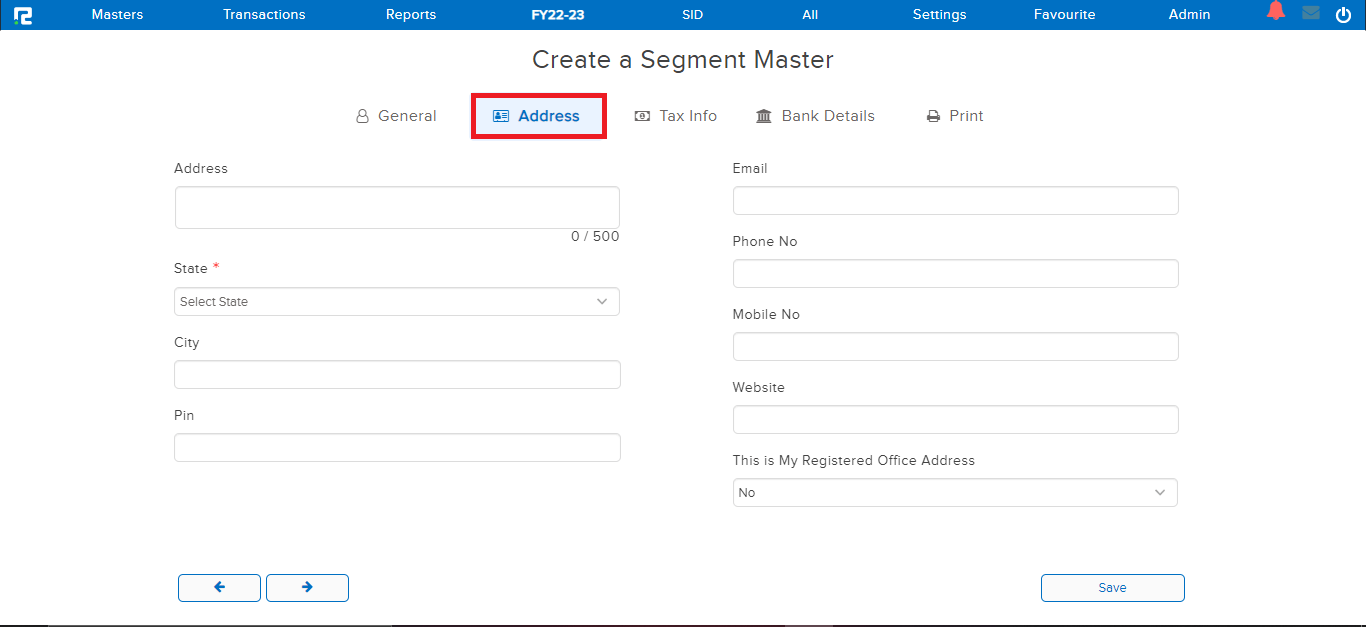
Address:
Fill in the address, as per the available details.
 Tax Info:
Add the license/identification numbers for each, if available. 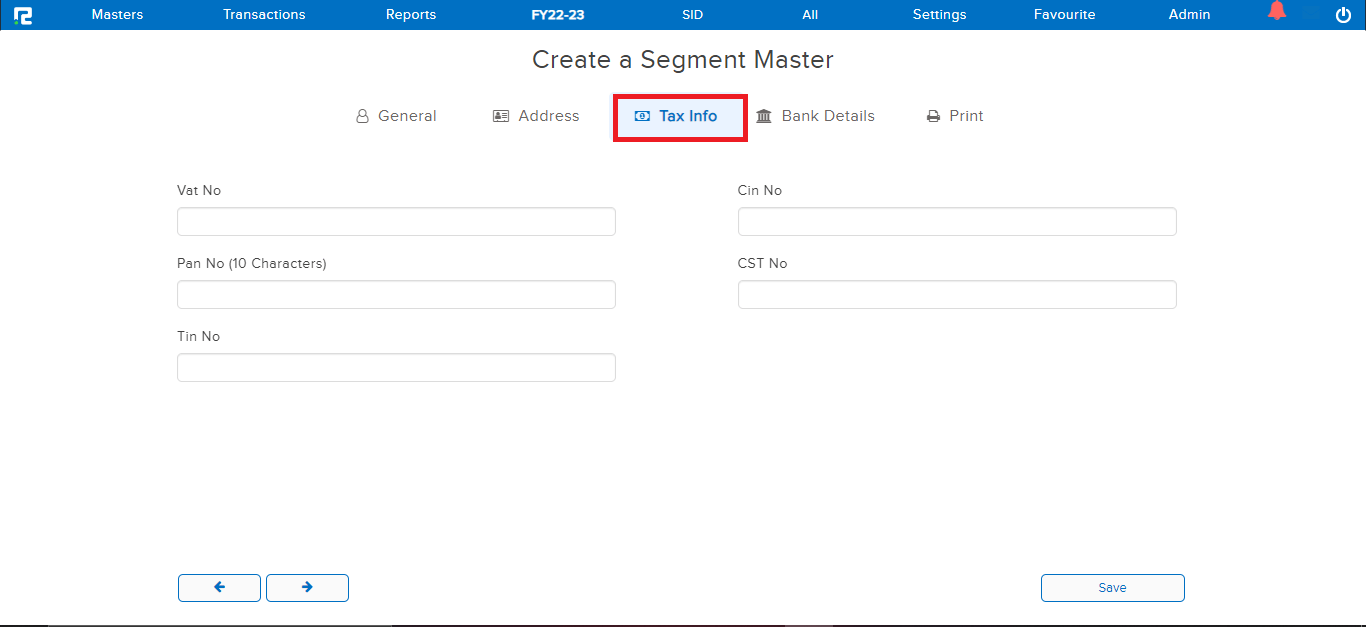
Bank Details:
Enter the details of the bank account associated with the segment/branch.
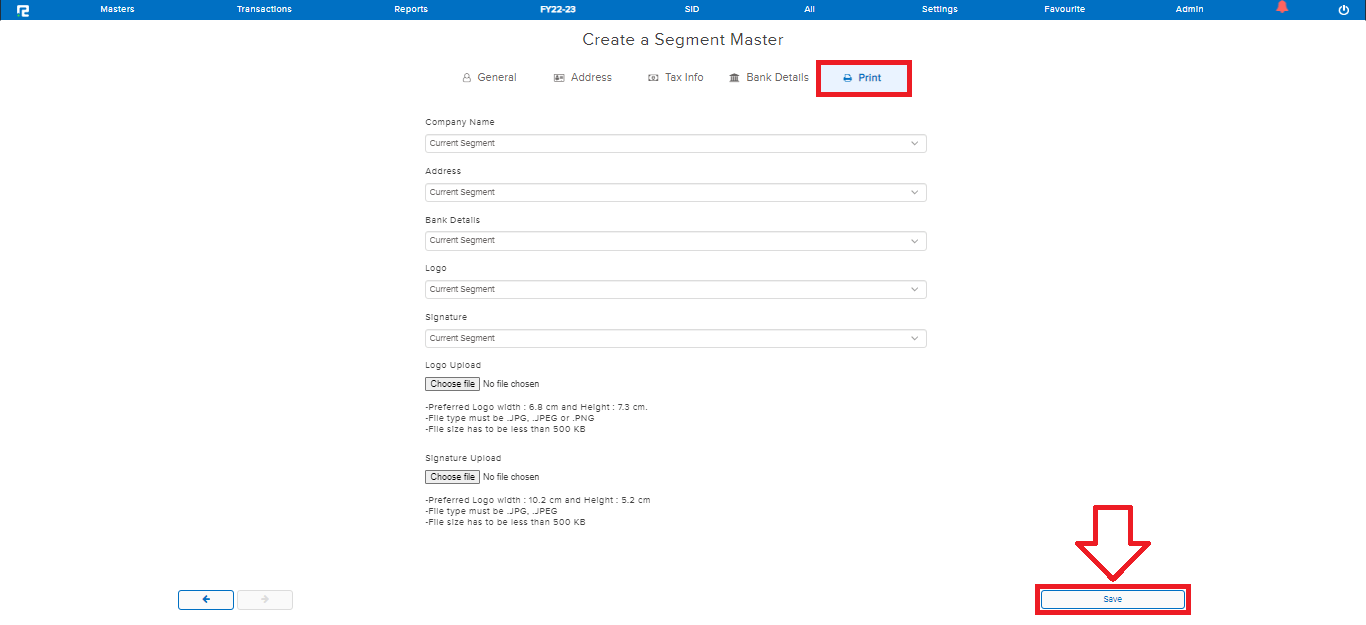
Print:

Customize print option as per requirement in this field.
 Note: The fields marked with (*) are mandatory.
STEP 3: Once the above details have been filled in, CLICK on “SAVE” to create the segment.
How to Edit a Segment
STEP 1: Go to Masters⇒ Accounts⇒ Segment⇒ Edit
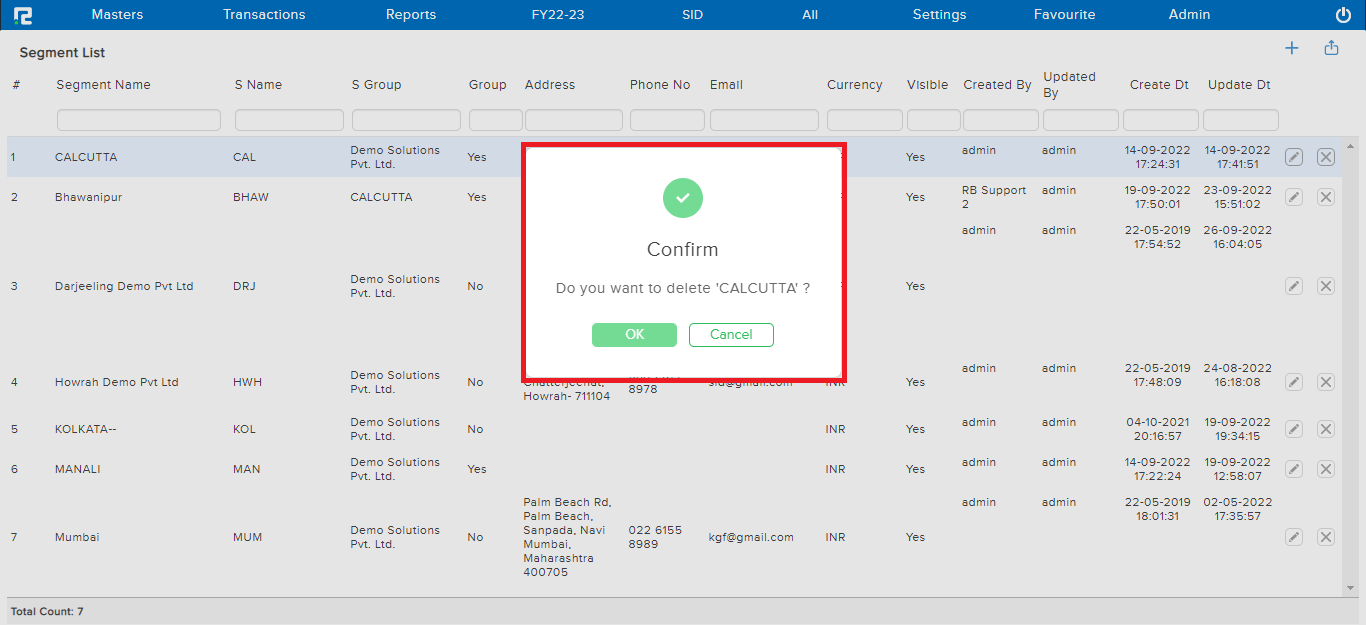
STEP 2: Once you click on the edit option, The entire list of existing segments will be displayed. In the case of long lists, it is easy to filter the data by searching for the name under the segment Name.

STEP 3: To edit any segment CLICK on the “PENCIL” icon or select the segment and press ENTER, segment Master Update page appears, wherein the details can be edited.
STEP 4: Once the data has been modified, CLICK on SAVE to update the details.
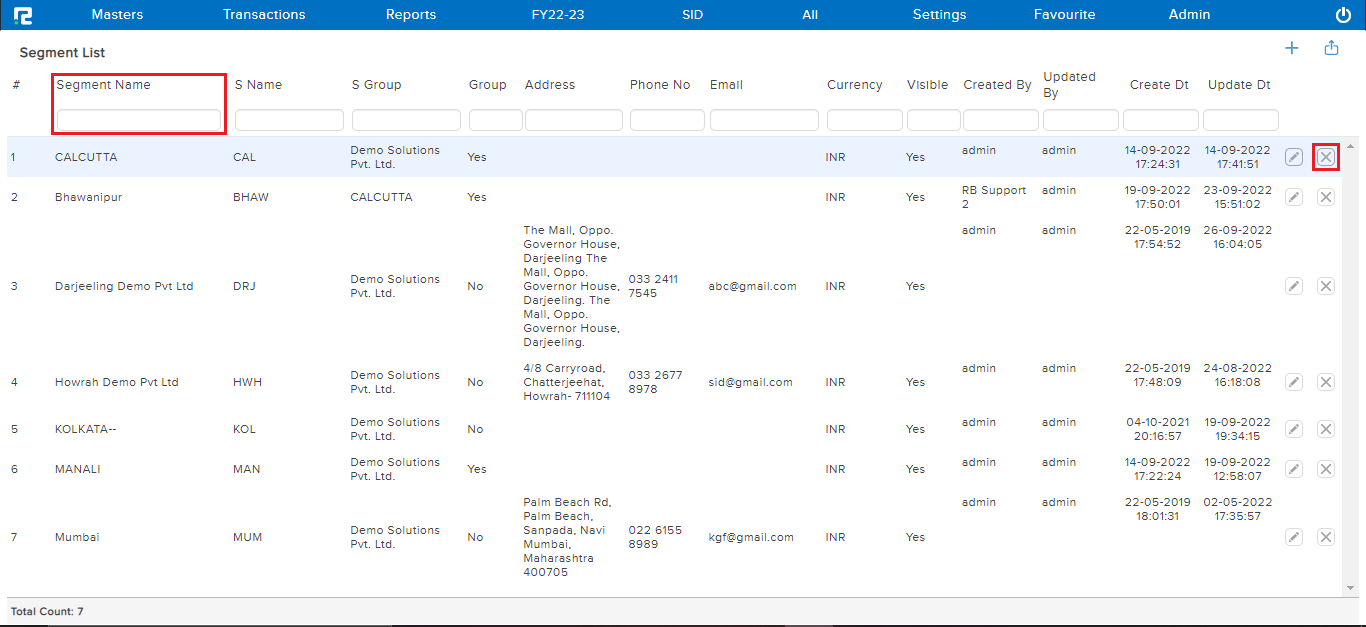
STEP 5: To delete any segment CLICK on the “x” icon or select the segment and press delete key. On clicking the same a warning message pop-up appears on screen, click Ok to confirm the deletion.