Goods Receipt Note (GRN) is a document that acknowledges the receipt of goods from a supplier. The GRN report lists the details of the goods received, as well as any discrepancies between the actual delivery and the purchase order.
To View the GRN Report Page
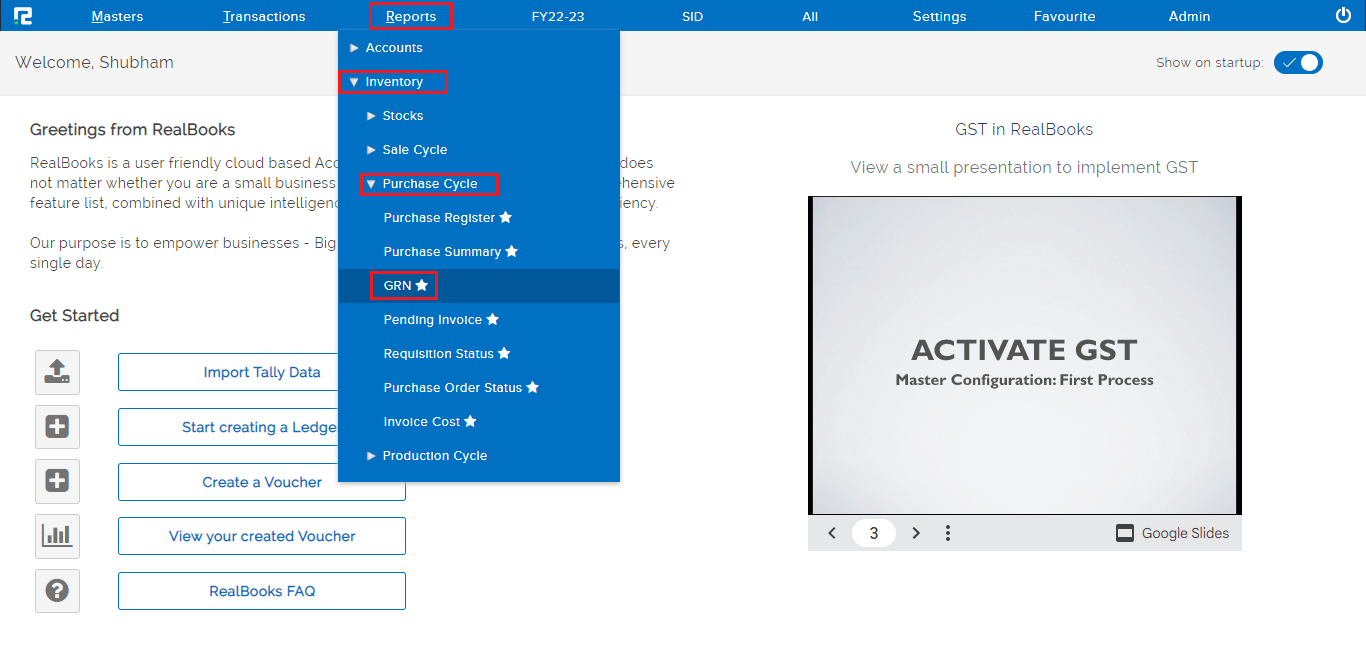
Go to Reports ⇒ Inventory ⇒ Purchase Cycle ⇒ GRN
A GRN Report page will open.
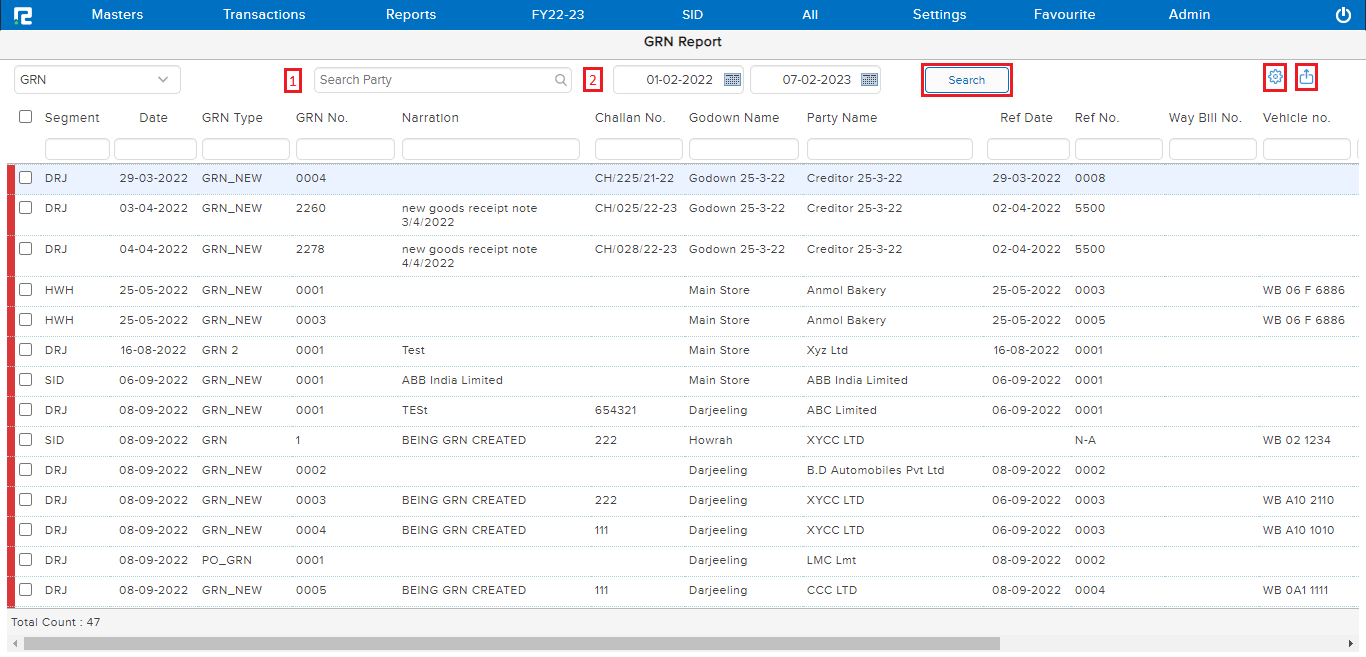
1. Party Search – This search box helps to search GRNs for “ALL” vendors at once or by a particular vendor name.
2. From date & To date – Set the date range for which the Report data needs to be searched.
Click on the search option. The data for the specified date range will be displayed.
Once the data is displayed on the screen, click on the settings icon to explore more features. Any option enabled or disabled here affects the entire listing together.
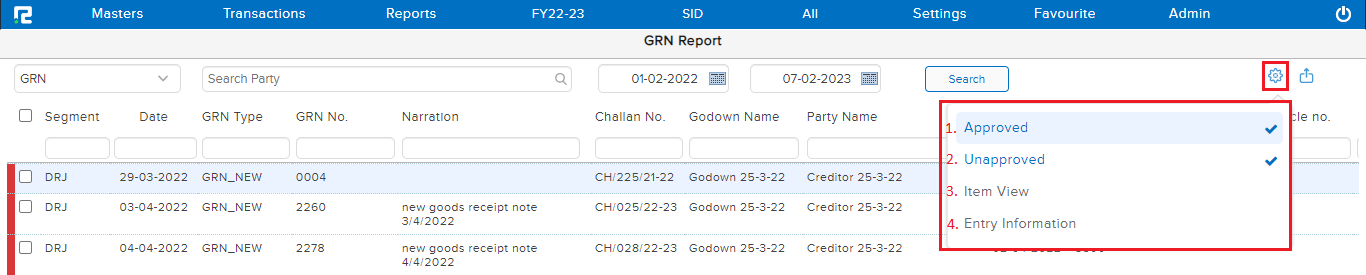
1. Approved – Click to filter out the data that have been approved.
2. Unapproved – Click to filter out those data that have not been approved.
3. Item View – Click to expand item details for each GRN row.
4. Entry Information – To identify the user ID from which the entry has been created or modified along with the date and time.
Note– The modification details shown are the latest ones.
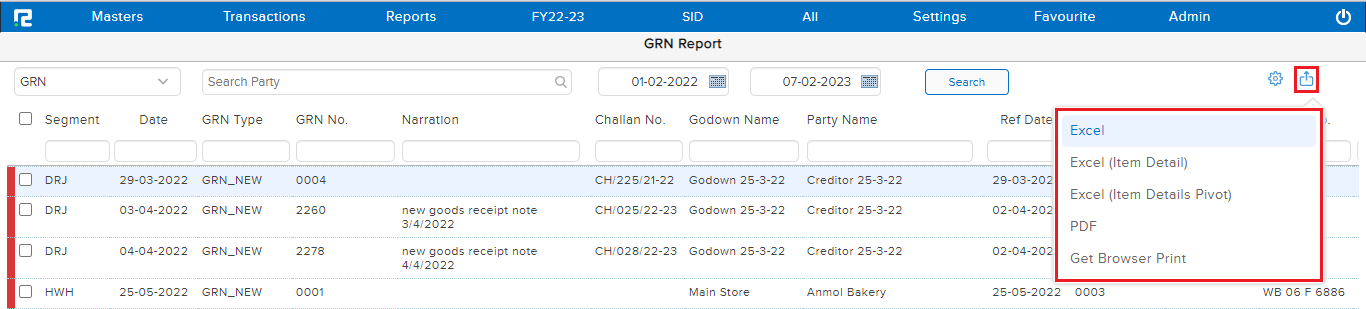
Export icon – To export the data select the appropriate template from the EXPORT dropdown list.
To Edit an entry
Select the particular entry that needs to be edited.
Press Enter and a Transaction Edit page will open.
Make the necessary changes and click on Save.
Know More About the Transaction Menu
Click on the Settings/Gear icon available at the right-hand side of the transaction row

A dropdown list appears–
a. GRN Edit – To open the GRN in edit mode select this option or press Enter.
b. GRN View – To open a GRN in view mode select this option or press V.
c. Purchase Details – To view the purchase entries recorded against the selected GRN select this option or press P.
d. Status Set Close – To close a GRN select this option or press C. Closing a GRN makes it ineligible for tagging in the purchase.
e. Status Set Open – To open a particular GRN select this option or press S.